
 School is in session, and it appears your teacher has a new pet…that could potentially eat him. Wouldn’t you rather have a sweet little hamster? We were delighted to have author Anica Mrose Rissi visit our story time to read her book, The Teacher’s Pet. There’s an interview with Nica at the end of today’s post, AND! We’re giving away 6 signed copies of the book to YOU, our blog readers!
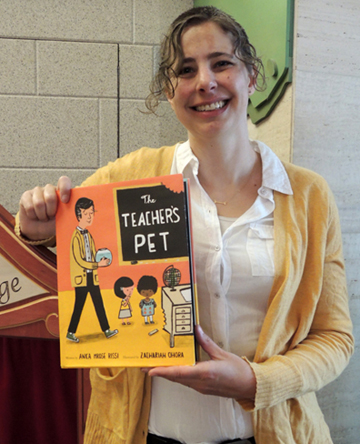
We read The Teacher’s Pet, written by Anica Mrose Rissi, and illustrated by Zachariah OHora (Disney Hyperion, 2017). Everyone is excited when the class tadpoles hatch. Mr. Stricter, the teacher, allows the class one tadpole to keep as a pet. Except “Bruno” isn’t a tadpole. He’s a hippo who proceeds to grow at an alarming rate and run amok. Bruno eats schools supplies, breaks desks, and snores during silent reading. But Mr. Stricter won’t hear a word against his beloved pet. Until Bruno swallows him whole. The clever class rescues Mr. Stricter, but Bruno needs to retire to a place with more room. Perhaps Mr. Stricter would like a hamster?
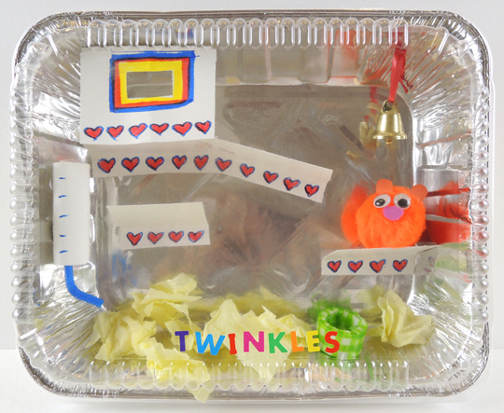
We made hamster cages, complete with a jumbo pom-pom hamster. Thanks to the wonder of magnets, your hamster can scurry around the cage, motor up ramps, and ring a little bell!
You’ll need:
- 1 aluminum food container with plastic lid (more on this below)
- Poster board
- Yellow crepe paper streamer
- Construction paper
- 1 wine cork
- 2 button magnets
- 2 wiggle eyes
- 1 jumbo pom-pom
- 1 bell
- Scissors and tape for construction
- Markers for decorating
- Hot glue
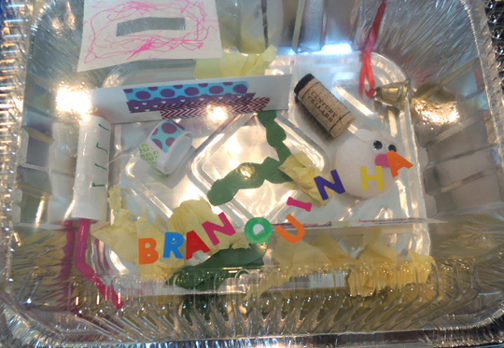
The key to this project is the container you use for the hamster’s cage. We found 10.5″ x 12.5″ aluminum food containers with plastic lids at our local dollar store that totally did the trick. Definitely opt for a larger container so you have room to attach the cage elements. Also, make sure the bottom of the aluminum container is somewhat smooth. Some are heavily ribbed, which makes it hard to keep the hamster/magnet connection going. The cage elements are simple:
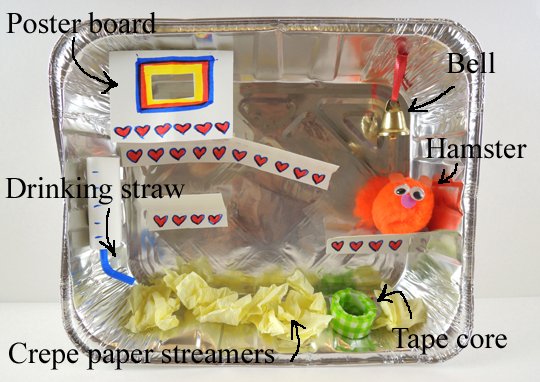 We made a water bottle out of a roll of construction paper and a snippet of drinking straw. The ramps and the little hamster house are poster board. The sawdust shavings are crumpled pieces of yellow crepe paper streamers (the clear winner out of testing a bunch of different types of paper). The food bowl is a tape core wrapped with patterned tape. And the bell is hanging from a little piece of curling ribbon.
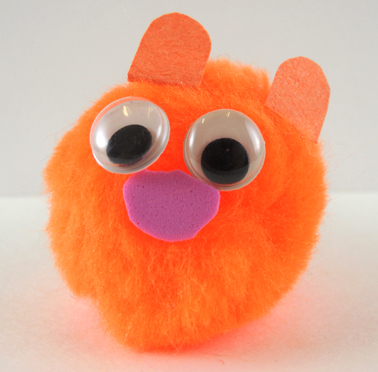
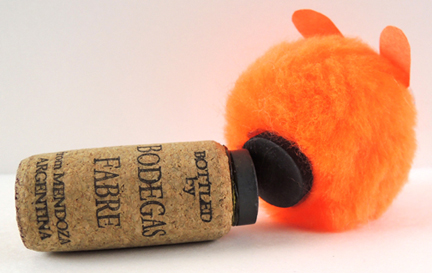
The hamster is a jumbo pom-pom with wiggle eyes, construction paper ears, and a little self-adhesive foam nose (even though construction paper works for the nose too). Hot glue button magnets to the back of the pom-pom and one end of a wine cork and you have your hamster magnet wand, ready to go!
 We also found some alphabet letter stickers in the art cabinet. So we encouraged kids to spell their hamster’s name on the clear plastic lid of the aluminum container. Our hamster was named Twinkles, but there was also a Sparky, Bob, Ricky, and…I can’t quite pronounce this one…
 To operate your hamster, place the cork wand behind the cage, connect it with the magnet glued to the pom-pom hamster, then drag the wand to lead the hamster through all of his/her activities!
The Teacher’s Pet is fantastic and fun, and the fun multiplied exponentially when the Anica Mrose Rissi arrived to read it to us herself (whilst also sporting an awesome Mr. Stricter sweater). Many readers know Anica from her charming Anna, Banana series, but she recently released her first YA novel, Always Forever Maybe.
 Please tell us a little about yourself!
I grew up on an island off the coast of Maine, where I read a lot of books and loved a lot of pets. After college, I moved to New York City, where I worked as a book editor for more than thirteen years. Now I tell and collect stories, make up songs on my violin, and take long walks with my dog, Arugula, here in Princeton, where I’ve lived for the past three years.
Besides my picture books, chapter books, young adult novels, and essays, I also write lyrics for (and play fiddle in!) the electro-country band Owen Lake and the Tragic Loves. Princeton-area friends can see us play at two free, family-friendly shows this fall: We’ll be part of the Unruly Sounds Festival at Hinds Plaza on September 29, and we’ll be playing a record release show at Princeton Public Library on November 10, to celebrate our new album, The Best of Your Lies.
Thanks for coming to our library! What do you enjoy most about reading to kids?
Thanks for having me! Talking with kids about writing and reading is one of my favorite parts of being an author. I’m lucky to do a lot of school visits, at which the kids always ask fun and interesting questions. The best thing about reading stories to kids and talking with them about my creative process is that young kids are all creators too. I don’t know a single child who isn’t also an artist or storyteller (or both!), so the conversation is really one amongst peers. I can inspire and encourage them, but they inspire me with their creativity and imaginations too.
You’re best known for your Anna, Banana series, but The Teacher’s Pet was your first picture book. What inspired it?
The Teacher’s Pet is the story of a teacher who is so enamored of the new class pet, he can’t see all the trouble it’s causing. I wrote it because I wanted to play with the pun suggested by the title and tell a story about a teacher whose obvious favorite is an actual pet. And I was drawn to the challenge of writing it as a picture book—a medium with so much room for humor, yet space for so few words.
As for character inspiration…Mr. Stricter is perhaps the most autobiographical character I’ve written. I am not an elementary-school teacher, and I’ve never (yet) been swallowed whole (or sneezed back out!) by a creature like Bruno, but I am wildly in love with my own adorable but not always entirely well-behaved pet (the aforementioned pup, Arugula).
A fun fact about picture-book creation: Picture book authors and illustrators almost always work separately, and even though I wrote this book, I didn’t know that Bruno, the class pet, would turn out to be a [species redacted] until I saw the first round of Zachariah OHora’s hilarious artwork. When the early sketches for the story arrived in my inbox, I laughed with surprise. I never would have guessed that a tadpole would grow into a [!!!!!]. (Though I knew, of course, that Bruno would not be a regular frog.) It’s so much fun to write a story like this and get to see the extra layers—and humor—that the visual story created by the illustrator adds to the text.
This summer, you released your first YA book, Always Forever Maybe. I know you’re continuing the Anna, Banana series, releasing another picture book, and working on another YA novel. Sometimes, do you feel like you’re writing on different planets?
I feel lucky to get to write many kinds of stories for different audiences, and my brain likes to keep busy. I’m happiest when I’m working on several projects at once (though it’s best when each project is in a different stage of creation—I can’t, for example, write two first drafts simultaneously). But no, they don’t feel like different planets to me. Each story has a way it wants to be told, and when I’m writing a draft, I’m focused on figuring out the best way to tell it. That process feels both similar from book to book and wildly different. But I’m exploring similar themes across categories, genres, and age levels—almost everything I write, from picture books for kids to essays for adults, touches on ideas about friendship, animals, and love.
Describe writing in 6 words.
Fun terrible surprising exciting wonderful drudgery :)
If you’d like to meet Anica, she’s going to be at the Princeton Public Library’s Children’s Book Festival this Saturday, September 22nd from 11am to 4pm. Go say hi!
We also have 6 copies of The Teacher’s Pet to give away, signed by Anica AND the illustrator, Zachariah OHora (who will be at the book festival too)! Just e-mail cotsenevents@princeton.edu with your name, and the name of your favorite pet growing up. We’ll put all the names in a hat and draw 6 winners at random on Tuesday, September 25th. Good luck!
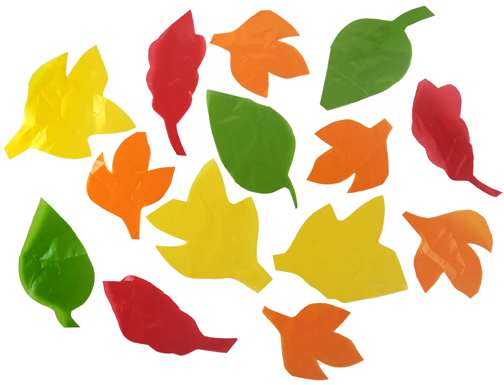 School has started, fall is around the corner, and the leaves are starting to change. So it’s the perfect time to post a simple sound and color story time featuring fall leaves!
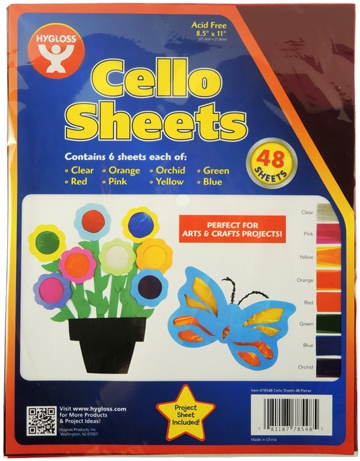 I bought these 8.5″ x 11″ cello sheets at Discount School Supply ($7 for a pack of 48). The sheets are flat, so no problem cutting out shapes and having them curl up on you. The trade off, of course, is volume. In the above pack of 48 sheets, there are only 6 of each color. However! I did spot a 104 pack on Amazon with 13 of each color for $9. If you ultimately decide go with rolls of cellophane instead of sheets, try flattening the shapes under a stack of books overnight to see if that helps uncurl them.
 For the story time project, cut various leaf shapes out of cellophane. Then have the kids crumble and crunch them, crinkle them madly, stomp on them, toss them in air, slide with them under their shoes, put them over their eyes to see the world in red, yellow, orange, and green…in short, PLAY. When you’re done, tape the leaves to a window to brighten things up!
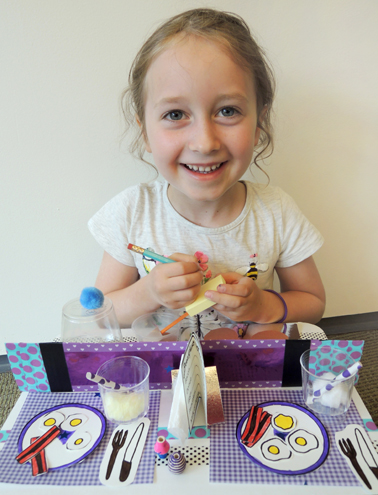
 If you like, you can use
 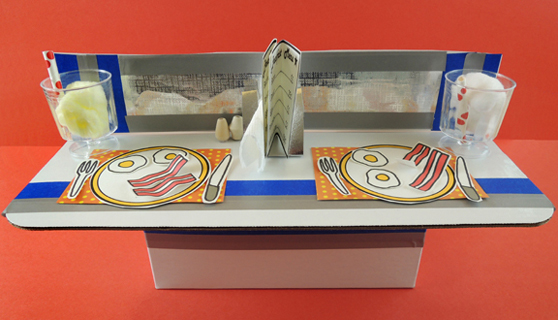 The plates, utensils, food, and menus are on the template. We used
 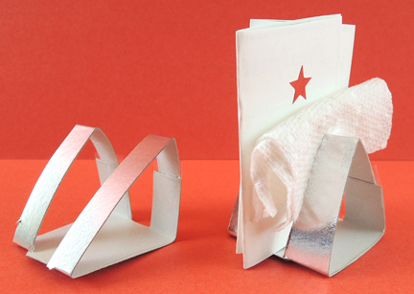 Basically, these are triangles of silver
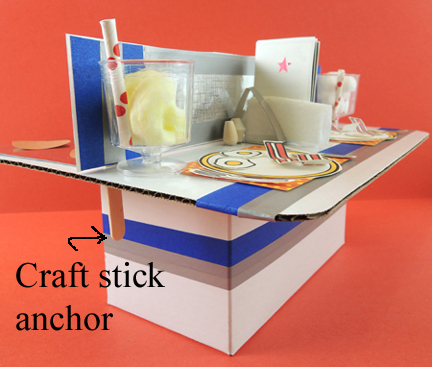
 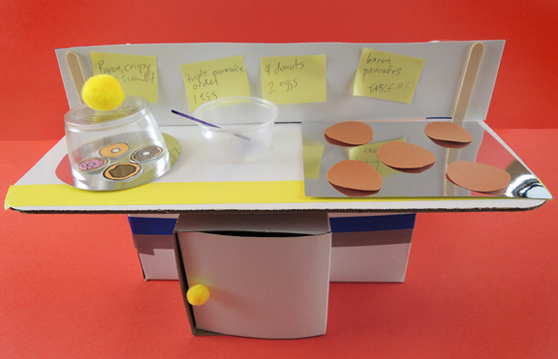 The donut dome is a plastic cocktail cup that has been cut down to 1.5″ and has a small pom-pom hot glued on top. There’s mirror board plate underneath it, and a mirror board griddle as well. There’s also a plastic sample cup mixing bowl with spatula (that’s a bit of silver mirror board taped to a mini craft stick). The pancakes are construction paper. Oh, and we included a fridge made out of a little box, but that’s totally optional.
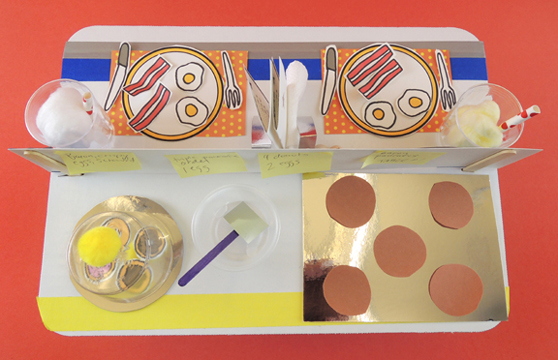 Miniature food sets are REALLY popular at story time. Sometimes, I hear about kids who are still playing with their sets months – sometimes years! – after story time (specifically our
 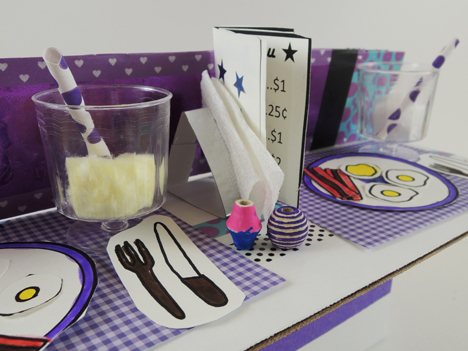 Look at the gorgeous purple decor! The carefully detailed salt and pepper shakers! The purple stripes on the bacon!
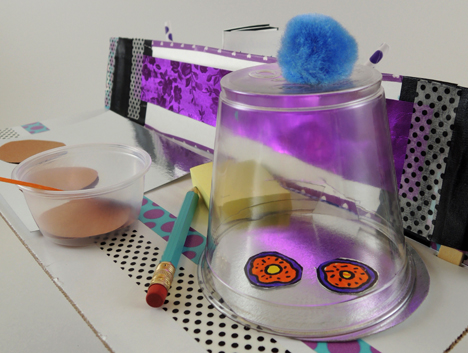 Which are only surpassed by the purple donuts. And then the black polka dots! LOVE.