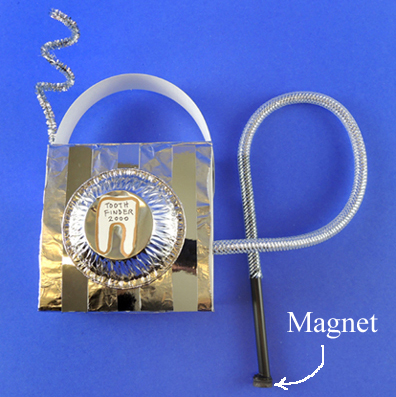
 Lose a tooth? No problem! Our magnetic Tooth Finder 2000 will locate your missing teeth in a jiffy! We also added a little alphabetical deduction game to the mix, as well as a magnetic tooth fairy wand variation.
We recommend reading Cousin Ruth’s Tooth, written by Amy MacDonald, and illustrated by Marjorie Priceman (Houghton Mifflin, 1996). Cousin Ruth’s tooth has gone missing, and the entire Fister clan is on high alert. Uncles, aunts, cousins, grandparent, siblings, and various pets embark on a energetic search through the house, yard, and eventually, the town. In the meantime, cousin Ruth solves her own problem – a new tooth has appeared where the old one used to be!
You’ll need:
- 1 small box (ours was 2″ x 4″ x 4″)
- 1 mini button magnet (ours was .5″ in diameter)
- Tin foil
- String or mesh tubing
- 1 drinking straw
- White card stock
- Paper clips
- Pen
- Tape
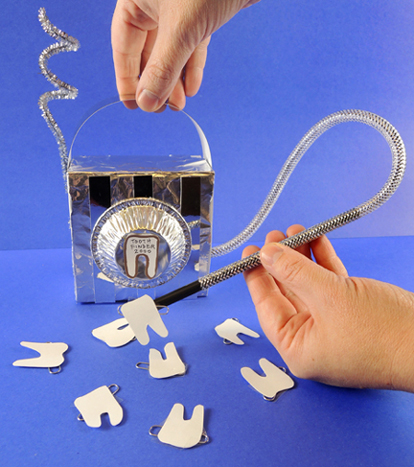
To make a “Tooth-Finder 2000,” cover a small box with tin foil, then add any other shiny stuff you have on hand (we used silver mirror board and a mini aluminum pie tin). Make a card stock handle for the machine, and a sparkle stem antennae if desired. The machine’s “hose” is a piece of mesh tubing, but a simple piece of string works too! The “wand” for picking up teeth is a half a drinking straw with a mini button magnet taped or hot glued to one end. The other end of the straw is inserted into the mesh tubing.
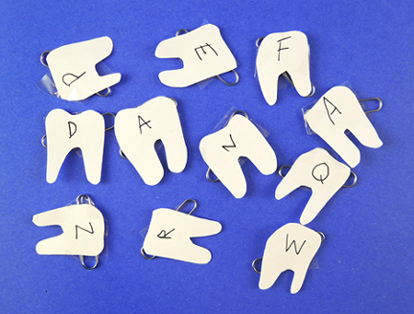
 Cut several teeth from card stock, then tape paperclips to the back. Wave the machine’s wand over the tooth, and it will magnetically connect! We came up with a spelling game as well. To play, write different letters on the teeth, then see if kids can can pick out a particular word or their name from the pile.
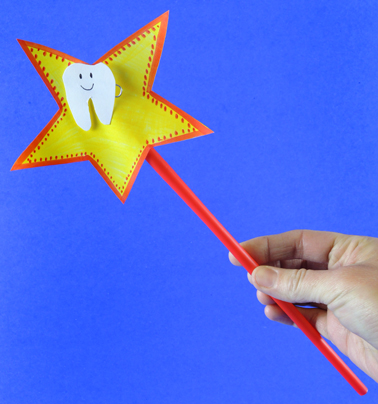
 If you’d like to skip the tooth finding machine and go even simpler, cut a star out of card stock, decorate it with markers, then tape it to a drinking straw. Tape or hot glue a mini button magnet to the back of the star and you have your very own magnetic tooth fairy wand!
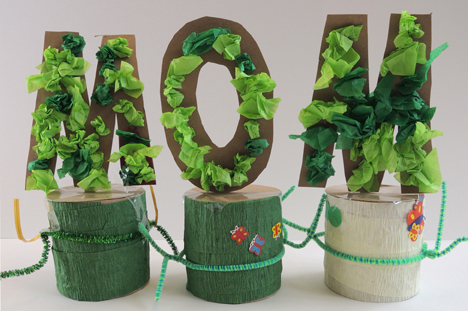
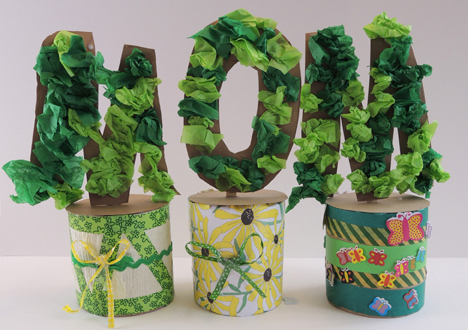
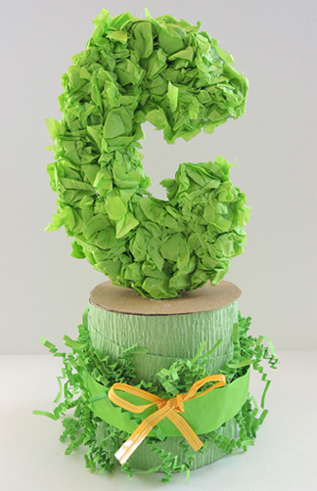 Spell something special with tissue paper topiary letters! Bedeck your initials, festoon your name, or spruce up your favorite word. Your personal topiary is guaranteed to stay green all year round, and no watering is required!
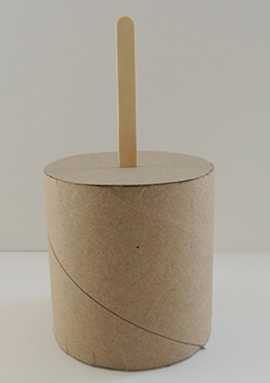 If you don’t have packing tape cores, use paper cups or paper soup containers. Simply flip them over, cut a slit in the bottom, and inset a craft stick into the slit.
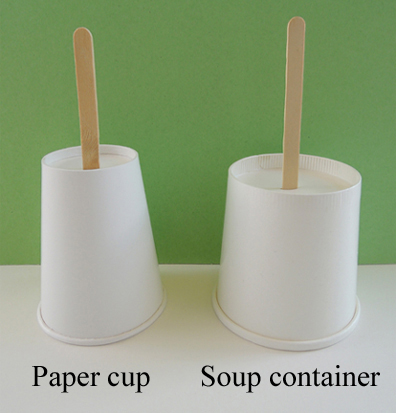 Since these bases are lighter than the tape cores, they run the risk of tipping over after you attach your topiary letters. If this happens, simply hot glue some pennies or
 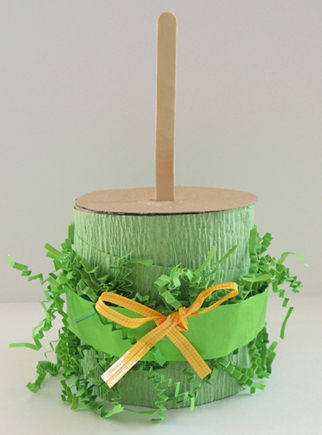 When the bases are finished, it’s time for your topiary letters! We asked the kids to limit themselves to 4 letters or less (and we announced this at the very beginning of the project, so they would know how many bases to decorate). After some experimentation, we determined that 6″ letters looked best. We whipped up some
 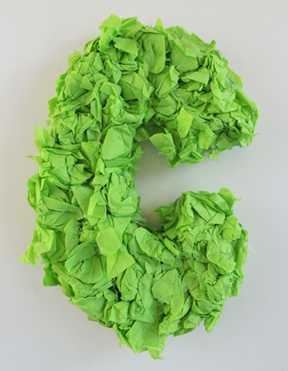 When the letter is done, hot glue it to the craft stick. Repeat until you have all your letters mounted on their bases:
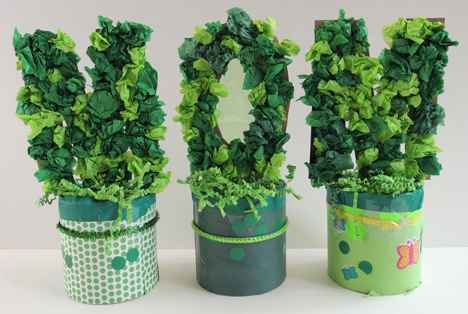
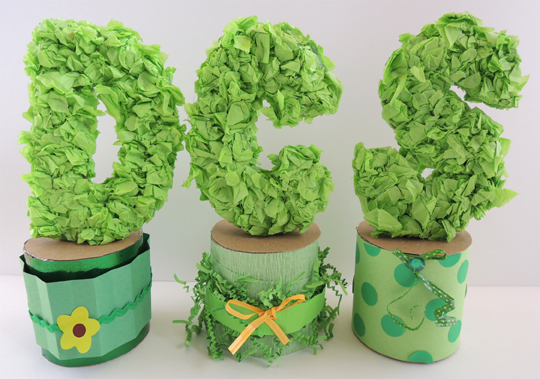 You might wonder why we went with topiary letters instead of animals or objects. We did try a few animals and objects, but they became quite unrecognizable after the tissue paper was glued on. The letters held their shapes extremely well, and it never hurts to get an early start on letter recognition! Some topiary letters did go floppy from the glue, however. If this happens to you, simply use extra craft sticks to reinforce the back of the letter.
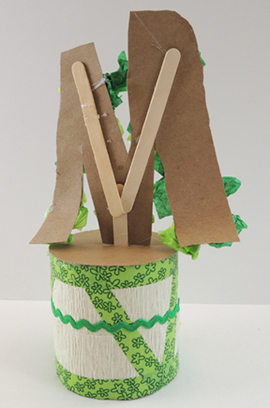 Another thing you can do to reduce floppiness? Use masking tape to secure the craft stick to the base. Here’s a shot of some tape stuck inside the base:
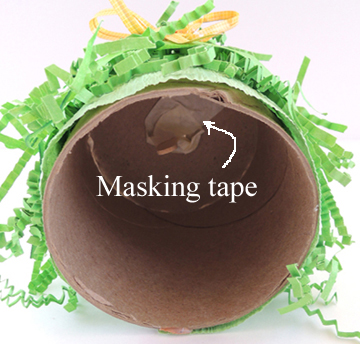 Usually, our craft area is loud and boisterous during the projects. But for this particular project, the room was filled with quiet concentration as kids put their gardens together. Perhaps it was the soothing botanical colors?