
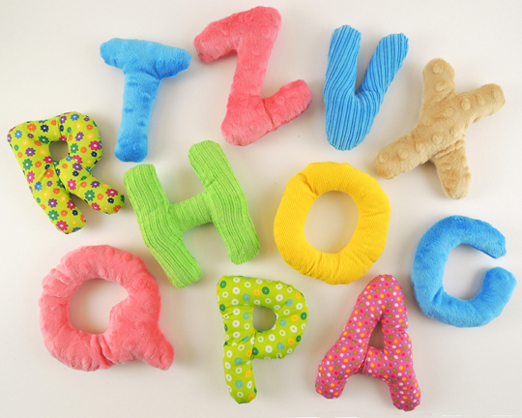
I’m always on the lookout for literacy, and this has to be the cutest alphabet set I have EVER seen. Sweet little stuffed alphabet letters in various patterns, colors, and fabrics. Best of all, some of the letters crinkle, some squeak, some rattle, and some jingle. Just…so…adorable!
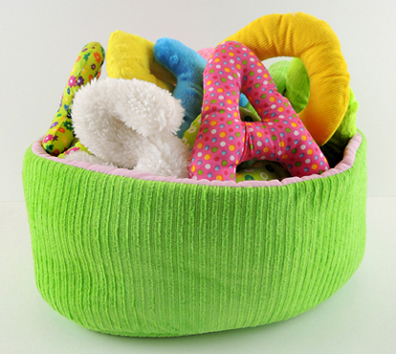
We discovered this set while putting together our new library baby program which involves unstructured social time and soft playscapes. But we also wanted a way to work in our best buddy, the alphabet. Enter the Soft Sensory Alphabet by Environments. The set comes with a fabric basket, and each machine washable letter is 5″ tall.
 The set retails for $62 online at Discount School Supply. The price is a little steep, but we couldn’t find it less expensively through any other vendors. Etsy, of course, has some fabulous fabric letters, but I don’t imagine they’re machine washable like this set.
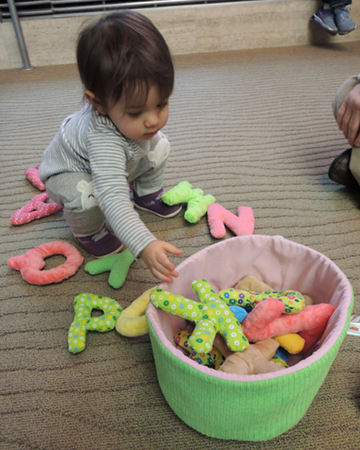
How did the set go over? The babies and toddlers loved it. They pounced, sorted, stacked, and rattled the letters. Some traversed the gallery, grasping a favorite. Others spent a good amount of time removing letters from the fabric basket and putting them back in again…
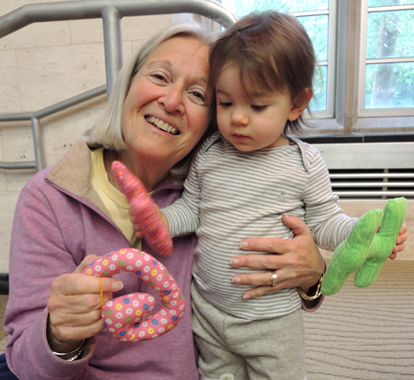
 This little girl and her grandparents were naming all the letters as she picked them up. It was incredible to see her grab one and proudly say “W!” all on her own. The Soft Sensory Alphabet by Environments is definitely recommended!
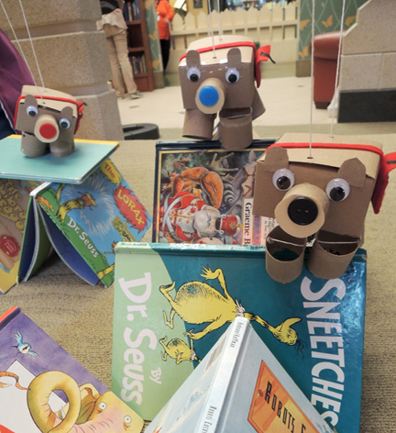 This intrepid bear marionette marches over all obstacles in our library landscape… searching for new friends and a cozy place to call home!
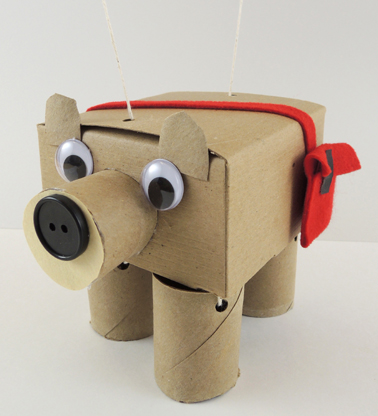 This marionette is designed with simplicity in mind! First, cut the bottom off a small box.Then cut the box down to about 2.25″ tall. Punch two holes in the top of the box, and thread a 29″ piece of string up and out of both holes like so:
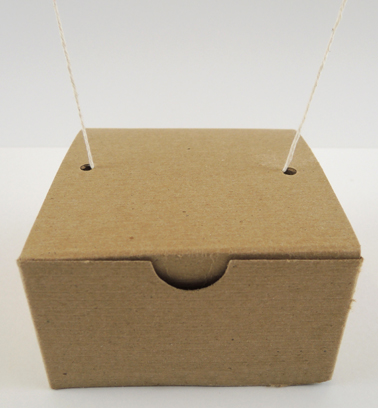 Tie the free ends of the string to a wooden dowel rod. If the top of your box has a lid like ours did, make sure to tape it down tightly.
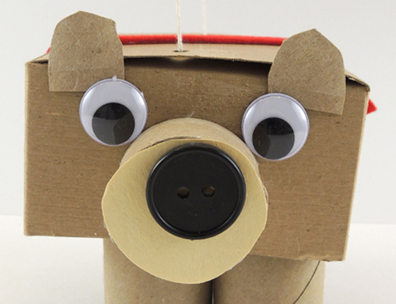 To make the bear’s legs, cut 2 toilet paper tubes in half. Punch 2 holes in the top of a half, then thread a 10″ piece of string through the holes like this:
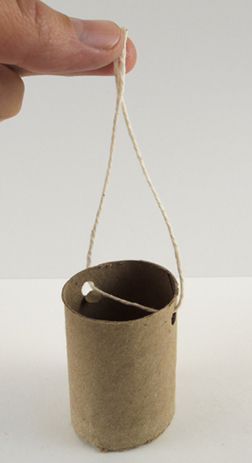 Repeat the above steps with the remaining three legs, then tape all 4 legs to the inside “ceiling” of the box. Here’s a shot of the underside of the box with the leg strings taped in place.
 Did you notice the black button in the image above? We hot glued that to the inside rear of the bear to counterbalance the button on the bear’s snout. It helps keep the marionette from leaning forward too much.
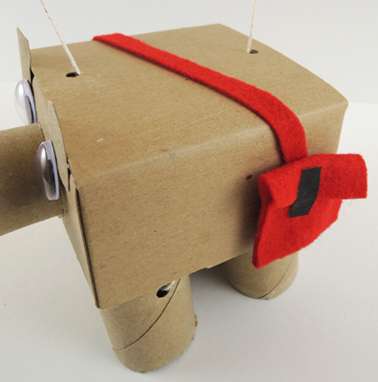 When the bear marionettes were finished, we encouraged kids to pull books off the shelves and use them to create mountains, walls, ramps, bridges, and paths for their bears to travel across. A few kids also made cozy little places for the bear to nap. Awwwww!
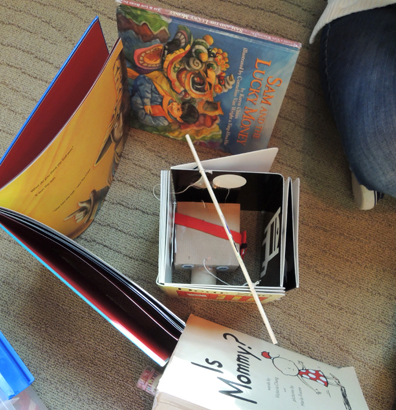
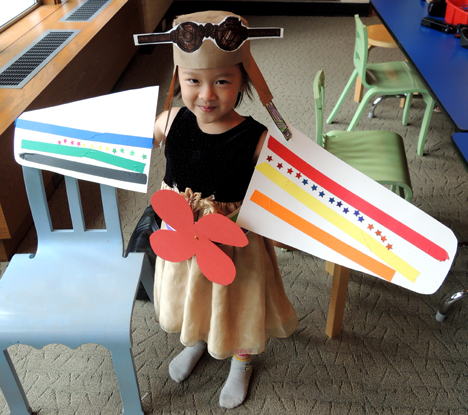 We read Pilot Pups, written by Michelle Meadows, and illustrated by Dan Andreasen (Simon & Schuster, 2008). Join a pair of enthusiastic stuffed dogs as they fly through the house in a toy plane. Dodging mountaintops (Dad’s head), encountering fog (tea kettle), and careening past the creek (kitchen sink), and returning to the bed before anyone notices their daring adventures.
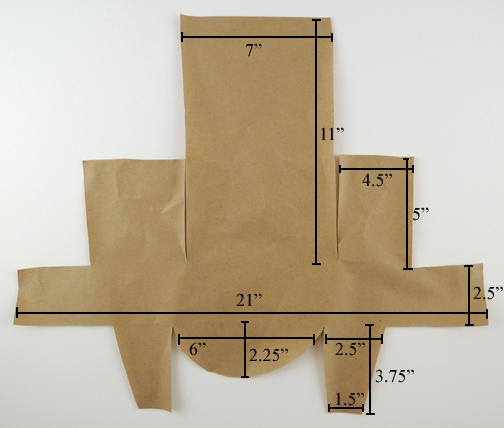
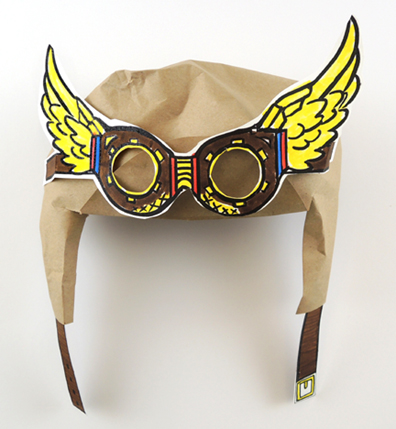
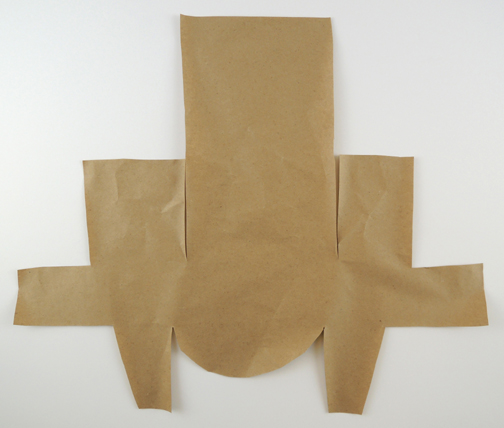 First, fold the rounded part of the template upwards and inwards, so it tucks under the back of the template. Later, this will be the bill of your aviator hat.
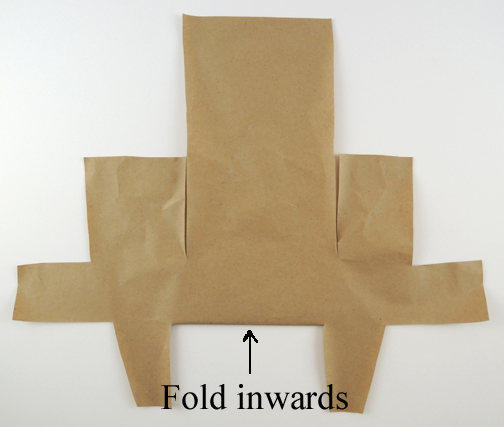 Hold the template to your forehead and curve the long ends around your head. Secure the ends together with staples. This is the headband of your hat (and, if the template band doesn’t go all the way around your head, just add a little extender piece in the back).
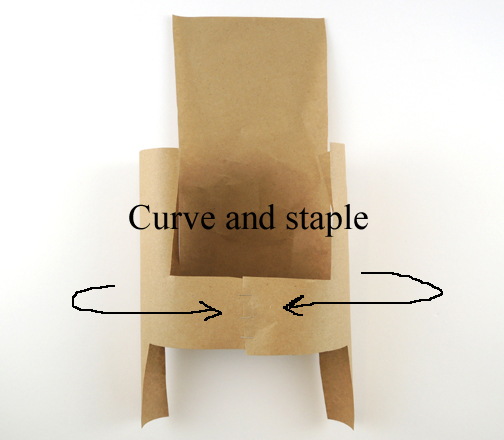 Next, fold the right and left flaps over the top of your head. Secure them together with staples. Note: you want the flaps to form a bit of a “dome” over your head, not fit super tight on top of your skull.
 Fold the the center flap down over the top of your head, gently tucking it into the back of the hat brim. Trim off any excess flap sticking out from under the brim.
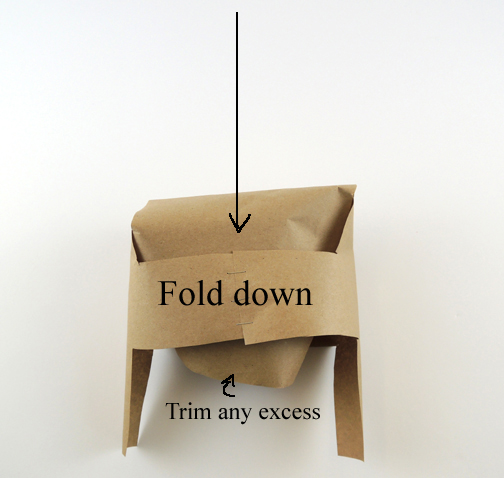
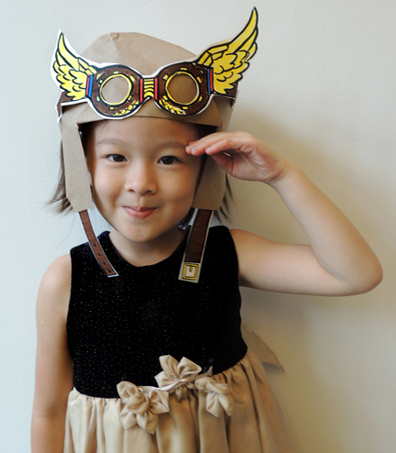
 That’s your hat, now for the rest of the costume! The wings are super simple. We cut pairs of 9.5″ x 16″ wings from white poster board, which the kids decorated with markers,
 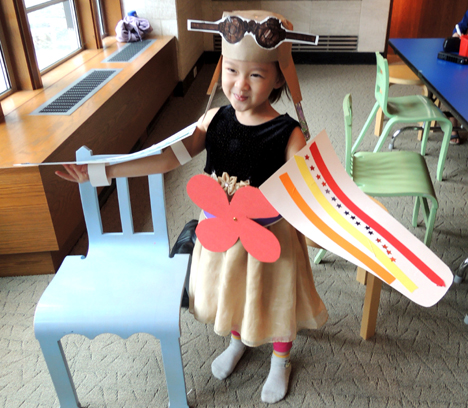 The propeller belt is a strip of poster board with holes punched in each end. Wrap the belt around your waist and secure it in place with a snippet of ribbon (decorate with markers and color masking tape of you like to) threaded through the belt holes. You can simply attach a poster board propeller to the front, or you can make it spin by using a