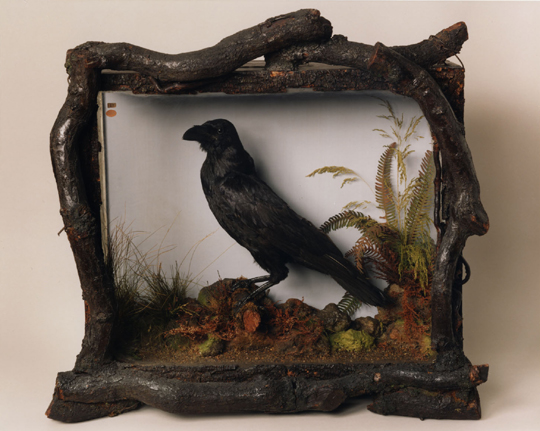
 This a not just a raven. It’s THE raven. The raven believed to have inspired Edgar Allan Poe to write his famous poem. If that isn’t enough of a distinction, this same raven (his name is Grip) was once the the beloved pet of Charles Dickens. After Grip died, Dickens had him stuffed and it’s reported that he arranged the foliage in the display box himself. Grip was a minor character in Dickens’ book, Barnaby Ridge. Poe, who was working as a reviewer in Philadelphia, read the book and remarked that the raven’s “…croakings might have been prophetically heard in the course of the drama.” Four years later, he published “The Raven.”
Grip the raven is just one of the treasures in the Rare Book Department at the Free Library of Philadelphia. I spent a happy afternoon there, learning about the history of the book and enjoying a massive cheese steak, both provided compliments of Joe Shemtov, Rare Books Librarian. Ready for a little history lesson?
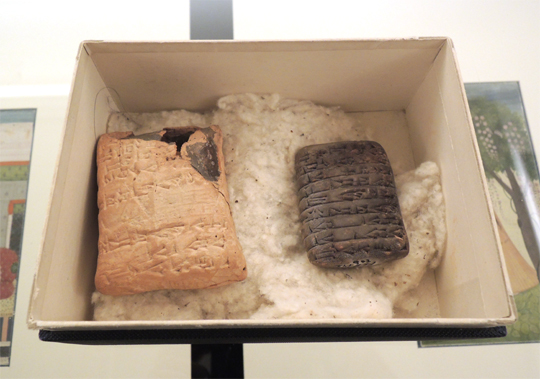 First, Joe brought out this Sumerian clay tablet and envelope (ca 2000 B.C.E). That’s the envelope on the left, and the tablet on the right. The envelope is, of course, clay, and was cracked open in order to gain access to the tablet. Interestingly, the tablet is a contract for a delivery of lard with a penalty clause. All business, those Sumerians.
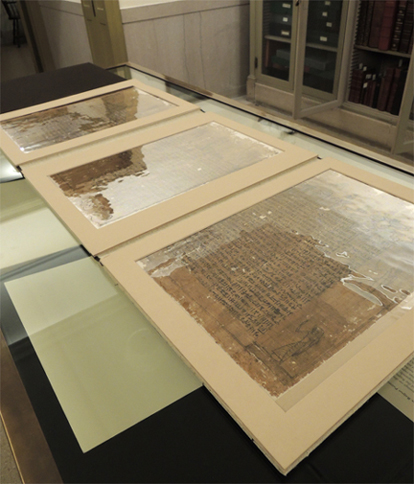 Next, we move to a papyrus manuscript from Ancient Egypt (ca. 700 B.C.E.). The image above is a section from a Book of the Dead, which the wealthier Egyptians were privy to. Interesting fact – while the scribes were producing these, they would leave blank spaces for the names of the book’s future owners. The manuscript is written in Hieratic, a cursive writing system that allowed scribes to write more quickly than with hieroglyphs.
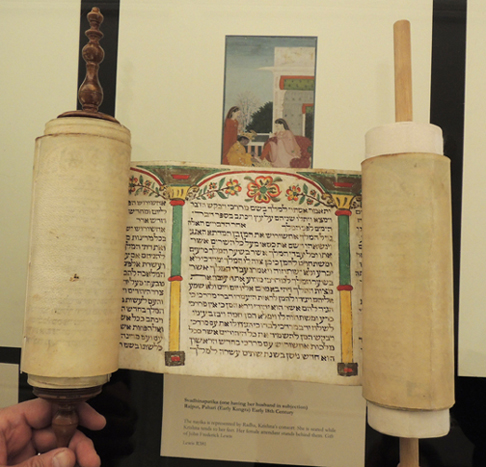 This Meghillat Esther scroll is a beautiful reminder of how the reading experience has changed over time. We flip pages to read, but before that, we scrolled. I suppose with computers, we’re back to scrolling. Huh.
 Moving forward, we start to see manuscripts and books written on vellum (i.e. the skin of sheep, calves, and goats). Vellum was sturdy, but rather tedious and time consuming to produce. The size of the animals limited the size of the vellum, which inadvertently resulted in more standardized sizes of books.
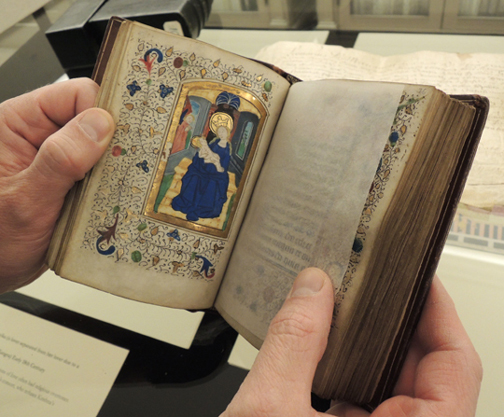 This is a Book of Hours (ca. 1475), a religious book that was the “bestseller” of the Middle Ages and the Renaissance. From the mid-13th century to the mid-16th century, more of these books were bought, sold, bequethed, inherited, printed, and reprinted more than any other book, including the bible. A Book of Hours was a book of prayers, but also contained a calendar of feast days (which commemorated the days on which particular saints were believed to have been martyred, as well as the important days of Christ and the Virgin).
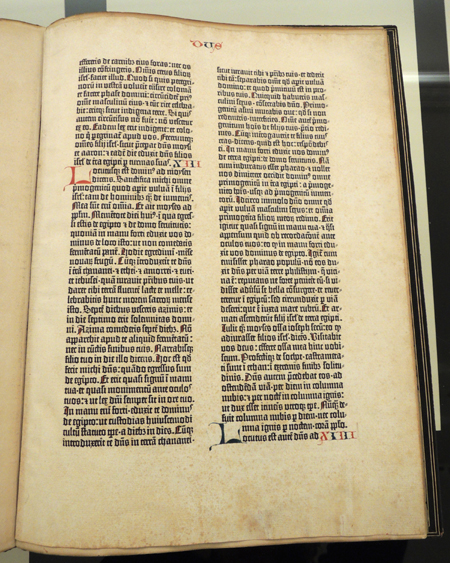 At this point in history, books were still written entirely by hand. Until this came along. Above is a page from a Gutenberg Bible, the first book printed on a printing press. Johann Gutenberg invented his press in the 1450s and thus ushered in a new age of literacy. Gutenberg also popularized the use of plant-based paper rather than vellum. While opinions and records vary, it’s generally believed that approximately 180 copies of the Gutenberg Bible were printed, and only 21 complete copies exist today.
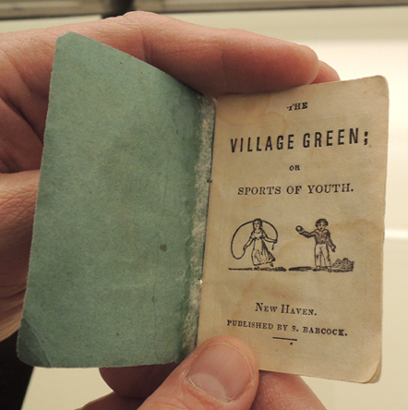 Sprinting forward to the 19th century, books were looking very much like the ones we know and love today. And because of the plethora of printing presses, books were selling cheap. An 1840 chapbook like the one above would have cost mere pennies. This made the books more affordable to the lower classes, which that meant more people could afford to start learning to read and write.
Of course, there were still some fancy books out there. Are you ready to see something really, really, cool?
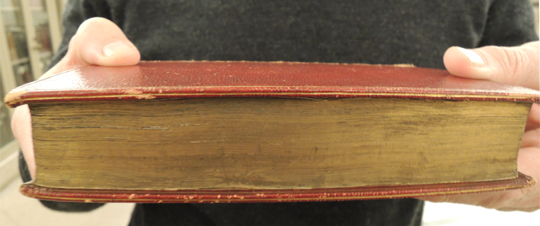 This is a book with a fore-edge illustration. While it’s a little hard to see in the image above, the edges of the pages are gilded (i.e. burnished with gold). But, when you fan the pages just so…
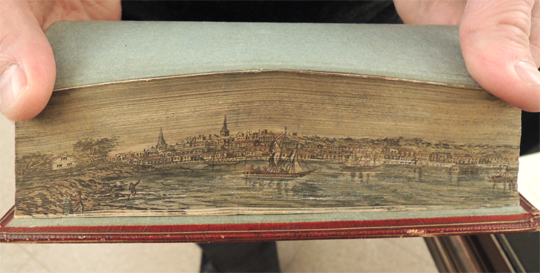 …the pages reveal an illustration! How completely and totally amazing is that?!? Man, I love rare books! Even better, this book has a double fore-edge. If you flip it over and hold the pages just so…
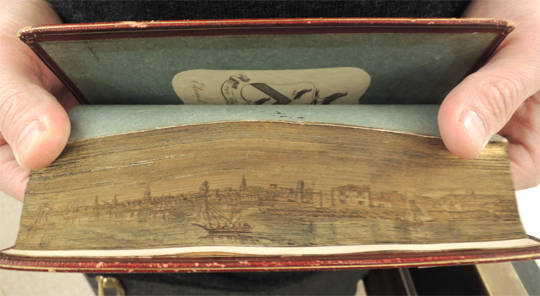 There’s a different illustration on the other side. Unbelievable. While the Rare Book Department has been giving history of the book tours for some time now, they were recently awarded a Hatching Innovation Grant to create a traveling educational program to local schools and library branches. Congrats Joe!
The Rare Book Department at the Philadelphia Free Library is open to the public and free of charge (they’re on Facebook as well). The library is open Monday-Saturday with daily tours starting at 11:00am. You are also free to visit their exhibit galleries, which are absolutely lovely.
 Their new exhibit space, the William B. Dietrich Gallery, is currently showing Sacred Stories: The World’s Religious Traditions. The exhibit draws from “one thousand years of human history, illustrating the ways we have written, printed, decorated, and illuminated our Buddhist, Christian, Hindu, Jewish, and Muslim faiths.”
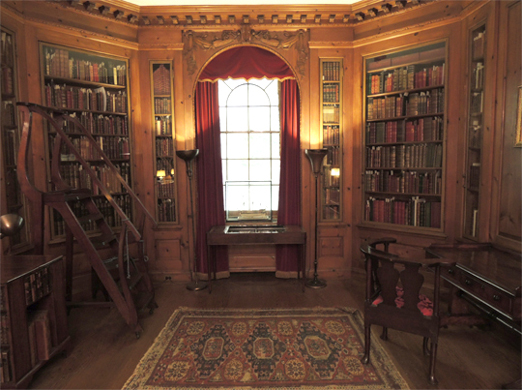
 Well, we began this post with Dickens, it seems only appropriate we end with him. This is the Elkins Room in the Rare Book Department, a gorgeous wood-paneled paradise filled with books, artifacts, sculptures, and artwork.
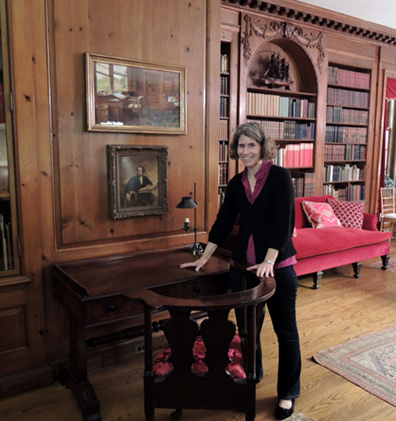
 See the desk to the right? That, my friends, is Charles Dickens’ writing desk. Originally, it resided in Gad’s Hill Place, Dickens’ country home. The great man himself sat right there, wrote amazing things, and even carved his initials in it! And there’s me, hopefully absorbing some of that writing power into my own fingertips.
Many thanks to Joe Shemtov and the Rare Book Department staff for an amazing afternoon! Sacred Stories: The World’s Religious Traditions is showing through January 30th, 2016.