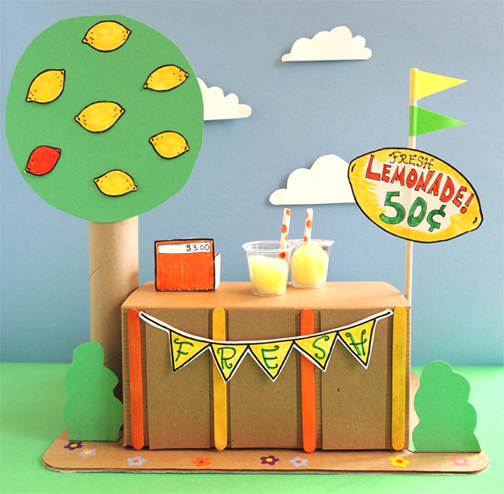
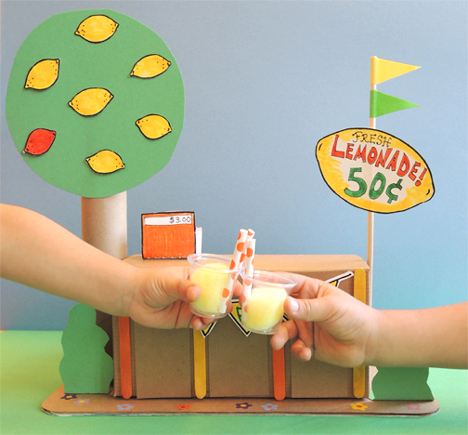
 Is there anything better than a refreshing glass of lemonade on a hot day? Served from your very own lemonade stand? Besides being a retail operation, this lemonade stand also involves counting, sorting, and sequential thinking exercises for the young shopkeeper. Yes, it’s a perfect blend of math and…wait a minute! Is that a RED lemon I see on the tree?!?
We read The Red Lemon by Bob Staake (Random House, 2006). Farmer McPhee is enthusiastic about his beautiful lemons and the delightful things they can produce (sherbet! pie! cookies! cakes!). However, while gallivanting through his grove, he discovers a RED lemon. Needless to say, he is outraged and huffily hurls the offending lemon far away, where it lands on a little island. Two hundred years pass, and the McPhee lemon grove is gone. But on that faraway island, a bustling metropolis has risen. Their world famous product? Red lemons, of course.
You’ll need:
- 1 box (mine was 4 ½” X 4 ½” x 9”) – a tissue box works too!
- 4 craft sticks (mine were 4.5″ long)
- 3 rectangles of tagboard (mine were approximately 2″ x 4.5″)
- 1 circle of green poster board (approximately 7″ in diameter)
- 1 paper towel tube
- 1-2 rectangles of green poster board (approximately 2.25″ x 4″) for bushes
- 1 corrugated cardboard base (approximately 9.75″ x 13.75″)
- 3 paper cups
- 1 wooden dowel
- A selection of color masking tape
- 3 small plastic cups (mine were 1.25 ounce clear cups, purchased at Party City)
- 3 yellow cotton balls
- 1 drinking straw
- 1 lemonade stand template, printed on 8.5″ x 11″ white card stock
- Flower stickers (optional)
- Scissors, tape, and white glue for construction
- Markers for decorating
- Hot glue
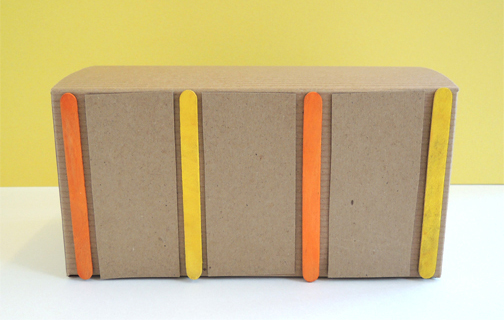
First, use white glue (or hot glue or tape) to attach 4 craft sticks and 3 rectangles of tagboard to the front of the box. I used this part of the activity to introduce (or revisit) the concept of a pattern.
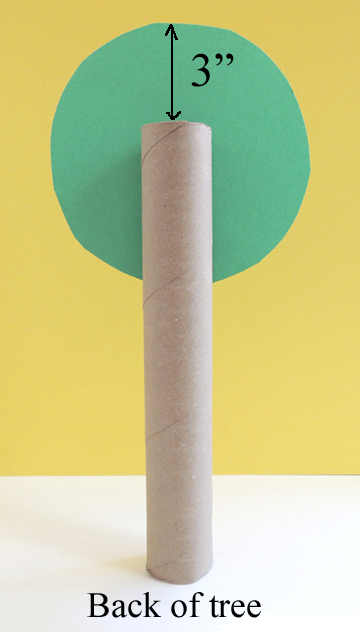
 Color the small lemons on the template (be sure to make a red one!) and glue them onto a 7″ circle of green poster board. Then hot glue the circle to a paper towel tube. As you can see in the image below, I left about 3″ of space between the top of the circle and the top of the tube.
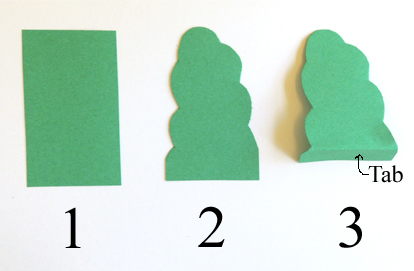
 To make a bush for your stand, cut a bush shape out of a rectangle of green poster board, and then tab it at the bottom.
 Now to put the set together! First, hot glue the box to a corrugated cardboard base (I used a cake pad, but you can also make one out of a copy paper box lid). Then glue 3 paper cups behind the box (i.e. the side that isn’t decorated with craft sticks & tagboard). Glue the bush to the right of the stand, and the tree to the left. Here’s a bird’s-eye view of the stand with everything glued in place.
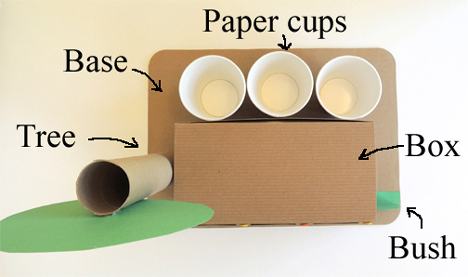 A word about the tree. As you can see, it’s hot glued to the base AND to the side of the box. The double attachment makes the tree extra sturdy (which is especially important if the project has to survive a car trip home).
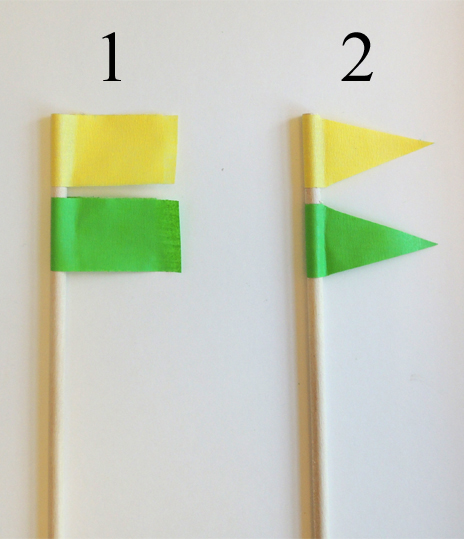
 Now for your lemonade stand’s sign! Wrap 2 pieces of color masking tape around the top of a wooden dowel, then trim the ends into triangles to create 2 flags. Tape the dowel on the right side of the box.
 Decorate the rest of the items on the template and add them to the stand. The large lemon sign gets taped to the wooden dowel and the “Fresh” garland gets taped on the front of the stand. We added some flower stickers too (you could also opt to draw flowers on using markers). We had some extra bushes., so I offered kids a second bush to double the landscaping fun.
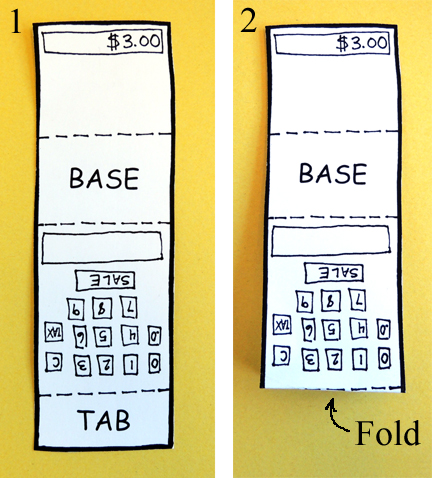
 All that remains is the cash register and your merchandise! You can see the register in the above photo. It does require a little assembly. I’ll demonstrate the steps below with an undecorated register, straight from the template.
First, fold the bottom tab of your register inwards like so:
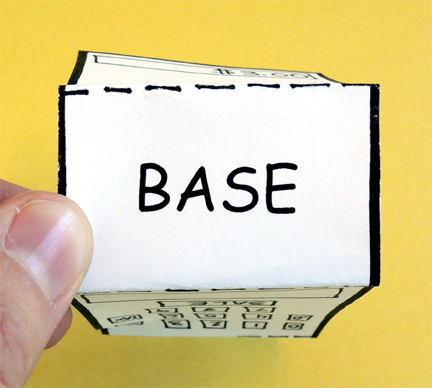
 Then, fold both sides downwards from the base like this
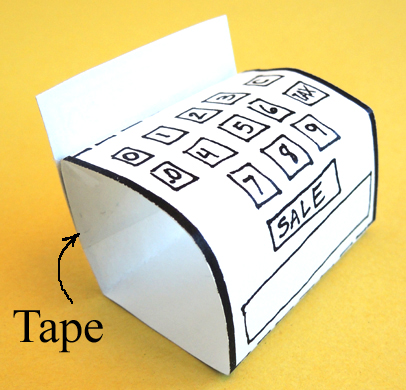
 Curl the tab around to meet the opposite side of the register
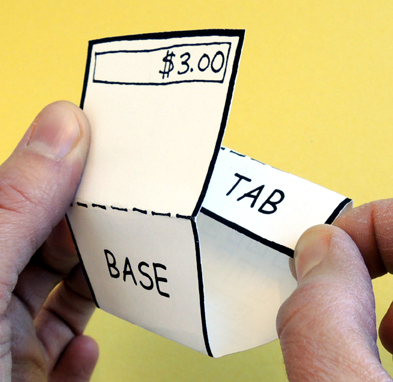 Then secure the tab with tape. Hot glue (or tape) the register to the top of the stand!
 Finally, the lemonade. You might recall that the lemonade stand has 3 paper cups glued behind it. These paper cups are to help kids practice sorting their small plastic lemonade glasses, yellow cotton balls, and mini straws.
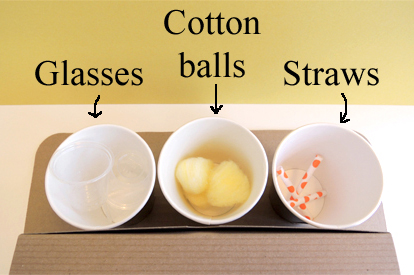 First, I showed the kids the sequence in which you need to make a glass of lemonade. Cup first, lemonade second, and straw third (to make the mini straws, simple cut a drinking straw into thirds – my mini straws ended up being about 2.5″ long).
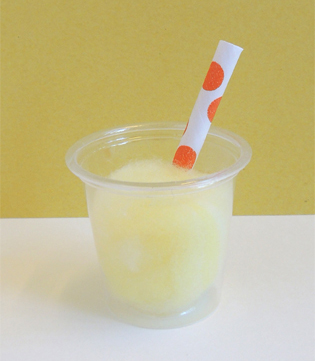 When your customer is finished, you take apart your lemonade in reverse order, making sure to sort everything back into its proper paper cup. I used yellow cotton balls for lemonade (purchased from Discount School Supply), but you could also use crumpled yellow construction paper. Or red paper – I hear those red lemons are all the rage!
As we stocked the lemonade stand with supplies, we had the kids count out loud with us: 1-2-3 cups, 1-2-3 cotton balls, and 1-2-3 straws. I suggested to parents that they use the stand and some fake (or real) money to give kids a taste of monetary math at home. But for now, let’s simply raise a glass to our lemonade-loving friends!
 Interested in other retail opportunities? Check out our ice cream truck and produce stand. Or get historical with our covered wagon & trading post story time! If you’re looking for ways to add a little math to your literacy programs, there are some hints on our Sneaky Math post.
