 Is your story time tractor running a little rough? Maybe it’s missing a few foam bead plugs or yarn wires? Not to worry! With your handy-dandy toolbox and “can do” spirit, you’ll have everything working in no time!
We read Tough Chicks written by Cece Meng, and illustrated by Melissa Suber (Clarion Books, 2009). Penny, Polly and Molly are NOT like the other chicks on the farm. Instead of preening feathers, peacefully pecking grain, or cheeping, they are swinging on cow tails, playing in mud, and getting under the hood of Farmer Fred’s tractor to see how it works. The other animals on the farm are annoyed by their antics, but when the tractor breaks down and gets stuck, it’s up to the tough chicks to use their unconventional skills to solve the problem!
You’ll need:
- 1 small box (we used a 4″ x 4″ x 4″ craft box, but a small tissue box works too!)
- Poster board or tagboard
- 2 foam beads
- 2 small rubber bands
- 1 sock
- Cotton balls or polyester fill
- 1 pair of wiggle eyes
- 1 chick beak (paper or self-adhesive foam)
- 1 tractor & tractor engine (more on this below!)
- Scissors and tape for construction
- Markers for decorating
- Hot glue
This story time was essentially two small projects: a chick hand puppet, and a tractor toolbox. Our puppet was a yellow soccer sock (we bought a 10 pair pack on Amazon for about $30) stuffed with poly fill and gathered around the neck with a rubber band. We added wiggle eyes, a self-adhesive foam beak, and a jaunty feather crest.
 Notice when you place the sock on your hand, you can still use your thumb and fingers to grasp things? It’s an important detail that we’ll return to later! Next up is the tool box:
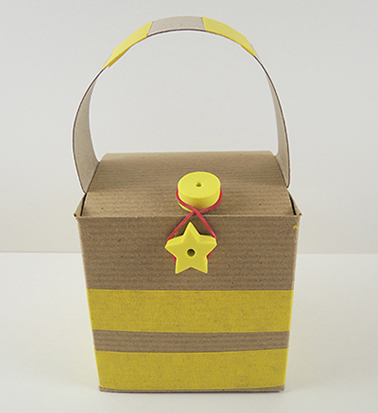 To make the box handle, tab both ends of 1.5″ x 11″ strip of poster board or tagboard, then attach the tabs to the underside of the box lid. Glue 1 foam bead on the top of the lid, and another on the front of the box. Wind a small rubber band around the beads to keep the lid closed while carrying. Decorate the tool box with markers (or use color masking tape like we did).
Now for the contents of the tool box! These can vary, but here’s what was in our boxes:
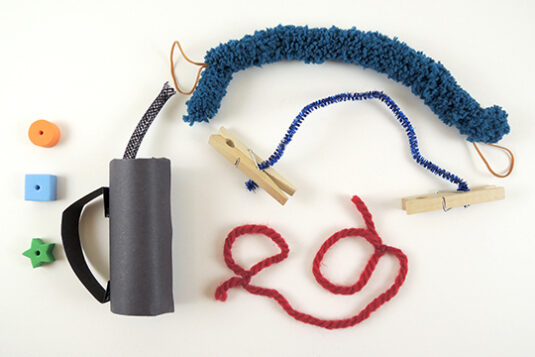 There are 3 foam bead bolts, 1 toilet paper tube oil can, and 3 different tubes and wires. The wires are made of yarn or sparkle stems and have rubber band or clothespin fasteners. All of these items are used to “fix” the engine of this AMAZING book cart tractor Katie constructed out of boxes, tubes, and poster board!
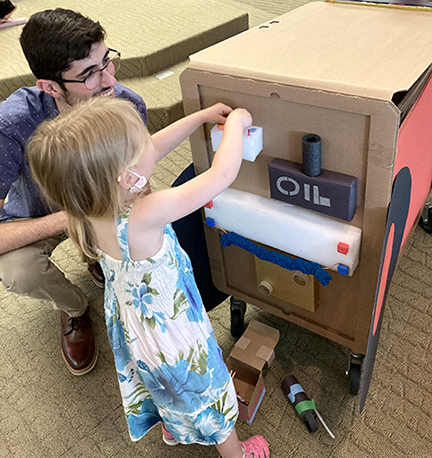
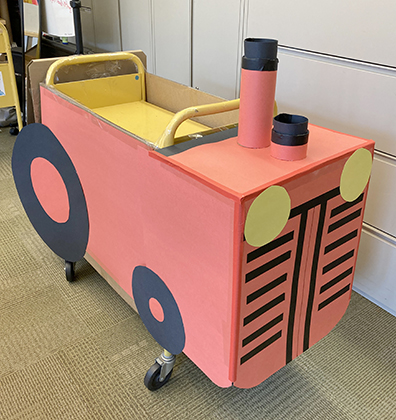 The back of the tractor flipped up to reveal the engine, which had parts missing. Kids then used the various items from their tool kits to repair it…all while wearing their chick hand puppet!
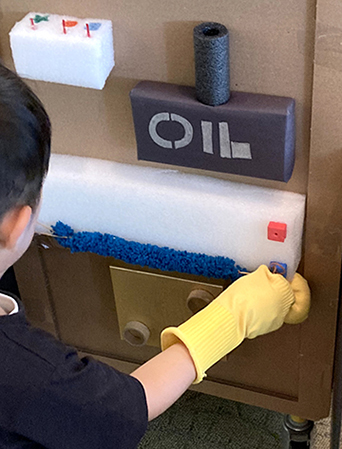 We constructed the tractor’s engine out of various upcycled boxes and materials (I especially love the mac & cheese box oil tank). You can also see how our tool box items fit on the engine below:
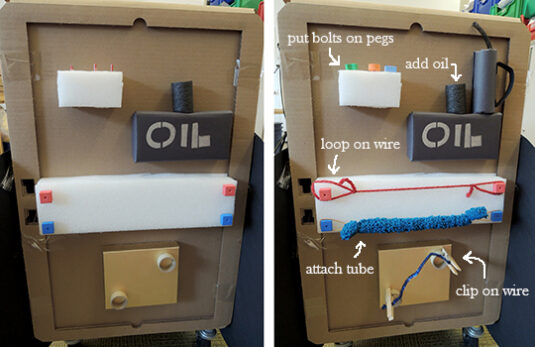
When it was each kid’s turn, they would bring their tool kits to the “broken” tractor, then use their items (with assistance from their hand puppet) to put everything in the proper place. When the engine was “fixed,” I played an audio clip of a tractor engine roaring to life!

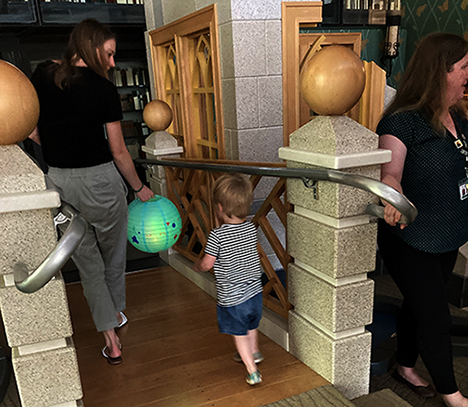
 We read Gustavo the Shy Ghost, by Flavia Z. Drago (Candlewick, 2020 and read here by The Teacher’s Library). Gustavo is a very shy ghost, but he wants friends more then anything! The problem is, no one ever seemed to see him. So Gustavo sends an invitation to a violin concert in the cemetery. No one shows. Gustavo decides to play anyway and gets so caught up glowing and creating his beautiful music he doesn’t notice his friends have arrived (they were just a little late)! Now Gustavo has plenty of friends, and even though he still might be a bit quiet, they always know he’s there!

 Is your story time tractor running a little rough? Maybe it’s missing a few foam bead plugs or yarn wires? Not to worry! With your handy-dandy toolbox and “can do” spirit, you’ll have everything working in no time!
 Notice when you place the sock on your hand, you can still use your thumb and fingers to grasp things? It’s an important detail that we’ll return to later! Next up is the tool box:
 To make the box handle, tab both ends of 1.5″ x 11″ strip of poster board or tagboard, then attach the tabs to the underside of the box lid. Glue 1 foam bead on the top of the lid, and another on the front of the box. Wind a small rubber band around the beads to keep the lid closed while carrying. Decorate the tool box with markers (or use color masking tape like we did).
 There are 3 foam bead bolts, 1 toilet paper tube oil can, and 3 different tubes and wires. The wires are made of yarn or sparkle stems and have rubber band or clothespin fasteners. All of these items are used to “fix” the engine of this AMAZING book cart tractor Katie constructed out of boxes, tubes, and poster board!
 The back of the tractor flipped up to reveal the engine, which had parts missing. Kids then used the various items from their tool kits to repair it…all while wearing their chick hand puppet!
 We constructed the tractor’s engine out of various
 This is not the first
  You’ll need: