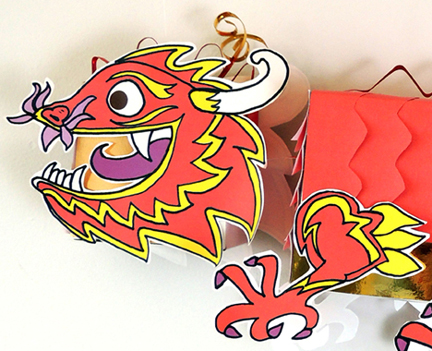
 This colorful dragon marionette twists, turns, dives, and flies with you! It was a project at To Be Continued, our chapter book story time for kids ages 6-8.
We read Where the Mountain Meets the Moon, written and illustrated by Grace Lin (Little, Brown, 2009). Minli lives in a poor village overshadowed by Fruitless Mountain. When she impulsively spends her money on a goldfish, her outraged mother demands that she release the fish into the river. Minli obeys, but is shocked when the fish speaks to her of Never-Ending Mountain, where the Old Man of the Moon can answer any question Minli asks – including how she can improve her family’s fortunes. This sends Minli on an epic quest to reach Never-Ending Mountain. Along the way, she is joined by a flightless dragon, who wants to ask the Old Man of the Moon how he can fly again. The two travelers encounter many obstacles, but eventually reach the top of Never-Ending Mountain, where Minli must choose between her own wish, and the wish of her faithful dragon friend.
Minli, of course, makes the right choice and the dragon flies again. We had some HUGE dragon fans at the program, so I thought it would be fantastic for them to make their own dragons to fly.
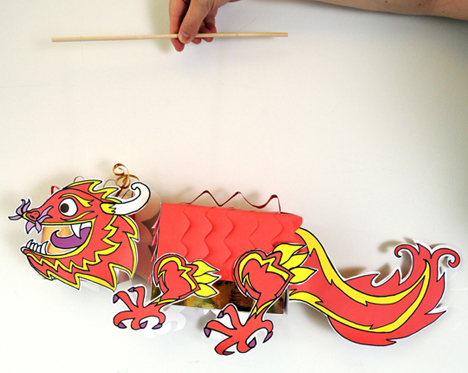 You’ll need:
- 1 small box (mine was 4″ x 4″ x 4″ – a small tissue box works)
- 1 large box (mine was 4.5″ X 4.5” x 6” – a large tissue box works)
- A box cutter
- 2 pieces of elastic beading cord or string (mine were 22″ long)
- 2 small craft sticks (mine were 3″ long)
- Construction paper
- A small rectangle of poster board (approximately 1.25″ x 2.75″)
- 1 flying dragon template, printed on four, 8.5″ x 11″ pieces of white card stock
- 1 wooden dowel
- Scissors, tape, and stapler for construction
- Markers for decorating
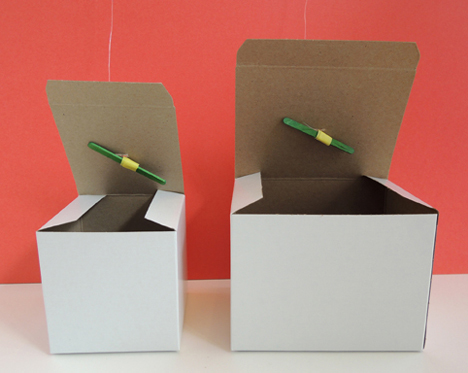
The important thing about marionettes is making sure that the strings stay securely attached! This marionette has two strings – one for each box. Begin by knotting each piece of elastic beading cord (or string) around a craft stick. Since elastic beading cord knots tend to come undone, it helps to wrap the knots with masking tape.
Use a box cutter to cut small slits in the tops of each box, then thread the free end of the cord through the slit. My boxes had lids, so here’s a shot of the open lids with the craft stick anchors in place. If you’re using tissue boxes, simply flip the tissue boxes over so the holes are facing downwards.
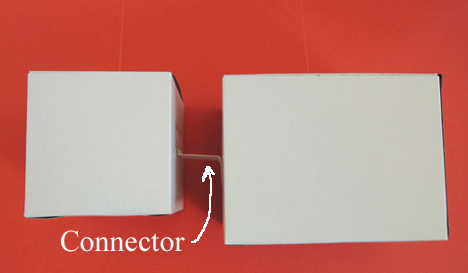
 Connect the two boxes together with a 1.25″ x 2.75″ rectangle of poster board that is tabbed at both ends (my tabs were approximately 0.75″ each). Tape the connector’s tabs to each box.
 Next, wrap the boxes with construction paper (we went with layered strips of construction paper, cut to resemble dragon scales). Cut and color the dragon pieces from the template and attach them to the boxes. If you don’t have time to color in all the template pieces, here is a full color version. We added some craft tie spines and curls along the top of the dragon as well!
You’ll notice that there are two tail pieces on the template. Match them up, staple them together, tab along the dotted lines, and then tape the tabs to the back of the large box.
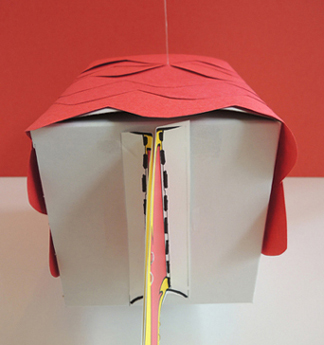 When your dragon is finished, tie the elastic cords to a wooden dowel (and secure the knots with tape if needed). Your dragon is ready to fly!


