 Dancing isn’t just for the petite-footed! Throw a MONSTER dance recital with giant feet and a rosy reward!
We read Giant Dance Party, written by Betsy Bird, illustrated by Brandon Dorman (Greenwillow Books, 2013). After freezing up at a number of recitals, dance-loving Lexy declares that she’s quitting dancing and is going to TEACH dancing instead. Her only customers, however, are five furry blue giants. With some coaching, coaxing, and channeling of their inner talents, Lexy whips the giants into shape. But when the big recital arrives, the giants are frozen with stage fright. It’s up to Lexy to overcome her own fears and show the giants how it’s done.
You’ll need:
- 2 boxes (mine were 4 ½” X 4 ½” x 9” but you can also use two large tissue boxes)
- 6 rectangles of tagboard (mine were 2.75″ x 5.5″)
- 6 pieces of self-adhesive foam (mine were 1.75″ x 2.25″)
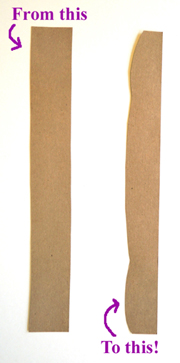
- Strips of construction paper (approximately 2.5″ x 12″)
- A selection of tissue paper squares (mine were 4″)
- 2 white paper lunch bags
- A selection of color masking tape
- Bubble wrap or sheets of tissue paper to stuff in giant feet
- 1 strip of red crepe paper streamer (approximately 13″)
- 1 green pipe cleaner
- A few inches of gold curling ribbon (optional)
- Dance music
- Markers for decorating
- White glue, scissors for construction
- Hot glue
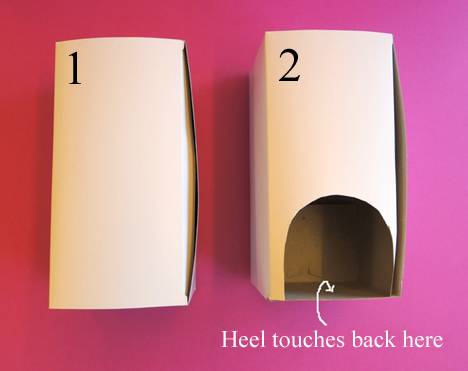
Feet first! Cut a rounded opening in the lids of both boxes. Make sure the back of your heel touches the back of the box.
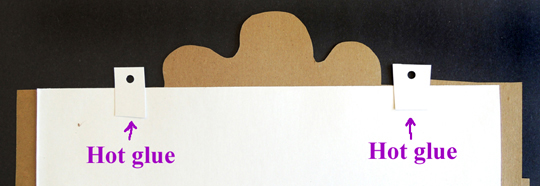
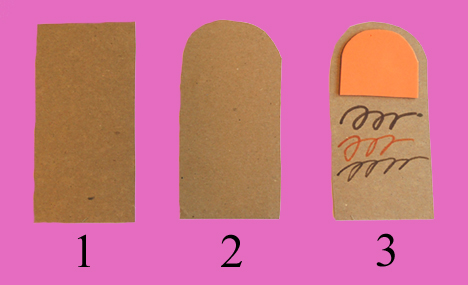
 Now for toes! Round the short edge of each tagboard rectangle. Then, shape the self-adhesive foam like toenails and stick them on each toe. You can use markers to draw some hair on the toes as well.
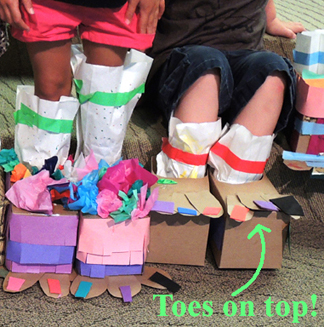
 Next, hot glue the toes to the underside of the box. One kid went with a “toe-on-top-of-the-box” option and I quite liked the results.
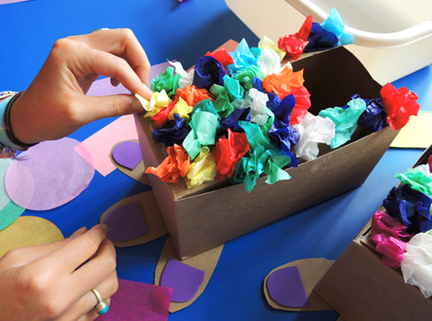
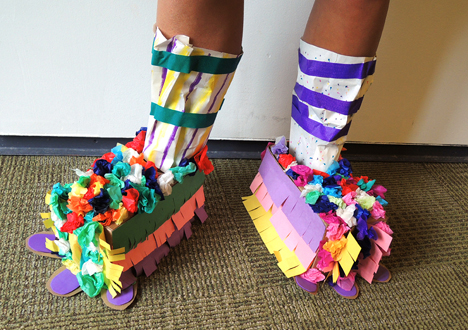
 Time to decorate! We offered strips of fringed construction paper (best secured with tape) and tissue paper squares (best secured with white glue). For maximum results with the tissue paper, crumble it up, dab some glue on the box, and then press the crumble onto the glue.
 I also unearthed some lizard-patterned paper from the art supply closet. Behold the creative coordination skills demonstrated below!
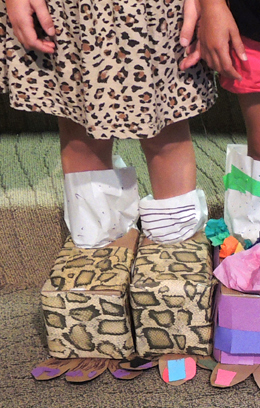 When the giant feet are finished, set them aside to dry a little and turn your attention to your giant socks. Cut the bottoms off the two white paper lunch bags, then decorate the bags with markers. Socks done!
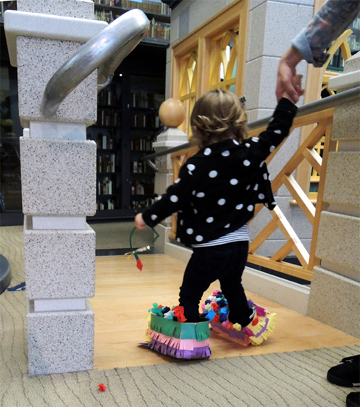
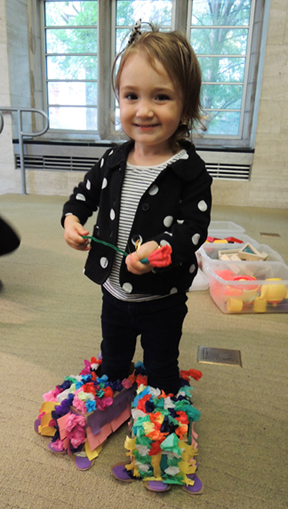
To get dressed, start by slipping your shoe through the paper bag sock and pushing the sock up your calf. Then slide your shoe into the giant foot and stuff bubble wrap (or sheets of tissue paper) around your shoe to make the giant foot more snug. Tuck the sock into the giant foot and wrap some color masking tape around the sock to secure it. You’re ready to dance!
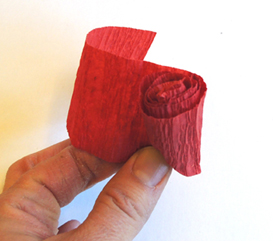
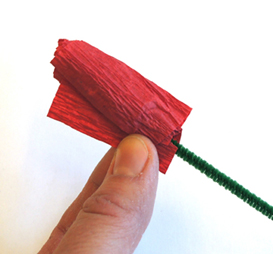
 Roses after a performance are traditional, so I prepped a bunch of paper roses to give to the dancers. This rose-making technique was developed by Victoria Hoss, one of my student assistants. Grab the crepe paper streamer on one end, then curl the outside edge inward. This forms the inner “core” of the rose.
 Keeping the bottom of the rose pinched, repeatedly wrap the paper around the inner core.When the paper is all wrapped, release the pinched bottom of the rose slightly and insert a green pipe cleaner in the center.
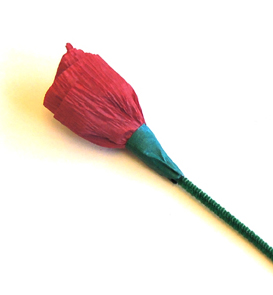
 Pinch the base around the pipe cleaner,
 Then wrap tightly with green masking tape.
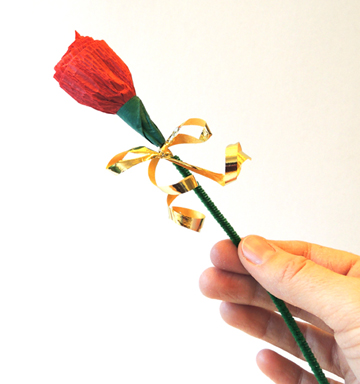
 I had some gold curling ribbon in the art cabinet, so I added a little flair to the finished rose (because a curly sparkly gold bow is ALWAYS a good thing in my book).
 Onto the recital! We danced to Polly Wolly Doodle (from the Dan Zanes album Rocket Ship Beach). As the kids danced, I handed out roses. But apparently, these feet were also made for walking…