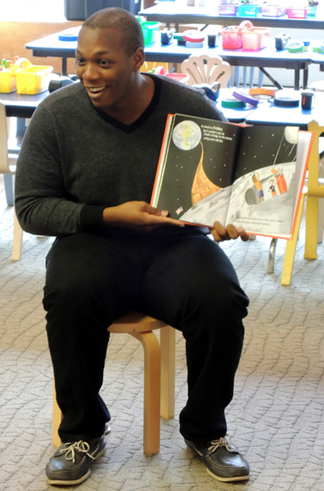
 A robot backpack? Yes indeed! Now you and your robot pal can embark on a series of terrific adventures. But the best thing about this story time? The author, Jared Aldwin Crooks, came to read the book to us!
 In addition to penning a children’s book, Jared studied astrophysics, has worked at NASA, and is currently obtaining Masters degrees in International Policy and Mechanical/ Aerospace Engineering here at Princeton University. There’s a short interview with him at the end of this post!We read The Several Strange Adventures of Max and Ding, written by Jared Aldwin Crooks and illustrated by Scott T. Baldwin (Crooks with Books, 2014). Maximilian Finch (Max for short) lives in a sleepy town where not much happens. During school breaks his classmates go to all sorts of exciting places, but not Max. But one Sunday, Max builds a robot named Ding. That week, Max and Ding hit the road – riding paper planes through jungles, climbing mountains, visiting the circus, digging to Atlantis, fishing for treasure, building a bridge to the moon, and discovering new planets. Thanks to his pal Ding, Max now has plenty to talk about!
You’ll need:
- 1 box for robot body (mine was 4 ½” X 4 ½” x 6” – a small tissue box works too)
- 1 smaller box for robot head (mine was 2.5″ x 3.25″ x 4″)
- 1 box cutter
- 1 small craft stick
- 2 strips of white poster board for backpack straps (approximately 1″ x 28″)
- A 20″ piece of mesh tubing (string, ribbon, or yarn works too)
- 2 rectangles of poster board for arms (approximately 1.5″ x 5.75″)
- 2 rectangles of poster board for legs (approximately 1.5″ x 11″)
- Robot decorating materials (we used metallic duct tape, prism tape, tin foil, beverage lids, washed Altoids tins, twisteez wire, sparkle stems, paper cups (in silver and gold), small plastic cups, embossed foil seals, craft ties, dot stickers, rectangular stickers, foil star stickers, color masking tape, balloon stick cups, grey construction paper, embossed foil paper, and mylar).
- Scissors, tape, and glue stick for construction
- Markers for decorating
- Hot glue
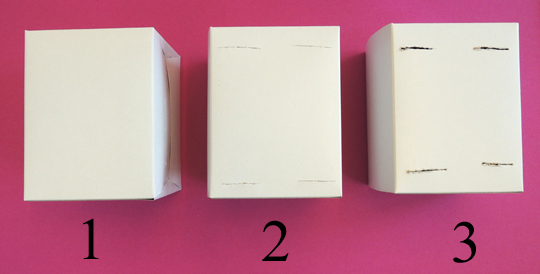
To make a robot backpack, cut four, 1.5″ slits in a box. Then, use a small craft stick to enlarge the slits a little (this will make it easier to slide the backpack straps through the slits later).
 Slide the white poster board straps through the slits like so:
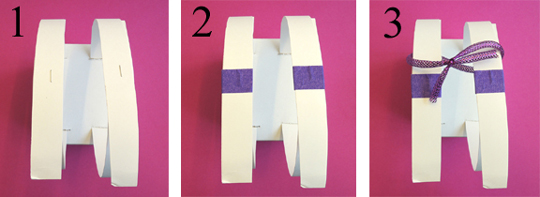
 Now, holding the box firmly to your back, curl the straps over your shoulders, adjust them, and staple them. Put pieces of masking tape over the staples (thus avoiding staple scratches or clothing snags). Later, when your robot is finished, you’ll want to tie a piece of mesh tubing (or string, ribbon, or yarn) around both straps to keep them from sliding off your shoulders.
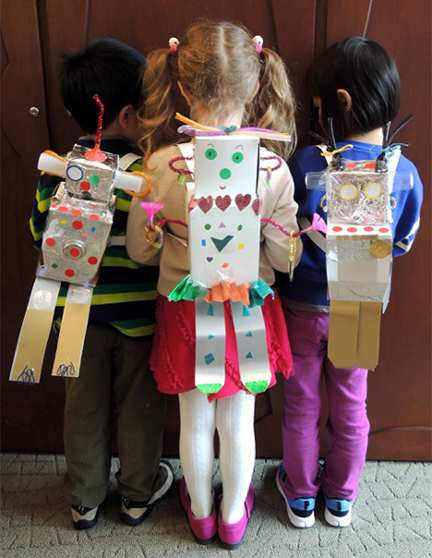
 When the backpack straps are finished, you’ll need to hot glue the head, arms, and legs on your robot’s body. You can do that now, or wait until you’ve decorated your robot a little. I offered OCuSoft lid scrub boxes as an option for the robot’s head. As you can see, when covered with tin foil, they look like fantastic smiling robot faces!
 Another great recyclable discovery? balloon stick cups make great robot antennae holders. I definitely use balloon sticks for projects (see here, here, and here) but I don’t use the cups as much. But a doubled-up sparkle stem fit perfectly in the narrow end of the cup.
 For decorating, we offered metallic duct tape, prism tape, tin foil, beverage lids, washed Altoids tins, twisteez wire, sparkle stems, mesh tubing, paper cups (in silver and gold), small plastic cups, embossed foil seals, craft ties, dot stickers, rectangular stickers, foil star stickers, color masking tape, balloon stick cups, grey construction paper, embossed foil paper, and mylar.
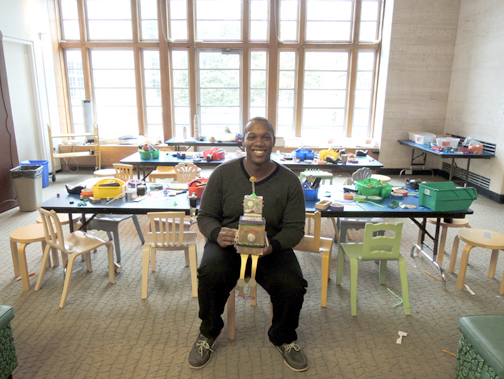
Here’s Jared, his robot, and our program area after our creative little endeavor concluded!
 Hi Jared! Tell us a little about yourself!
Hey there! My name is Jared Aldwin Crooks. I grew up in Fort Worth, Texas before coming to Princeton to get my undergraduate degree in Astrophysics and my Masters degrees in International Policy and Mechanical/ Aerospace Engineering. I have always loved creating things, whether it is some kind of contraption, food, or just writing down all of the things that are in my head. My creative partner, Scott T. Baldwin, and I are always working on a new project or book!
My passion is making the world around me a better place and I believe this can be done through little improvements over time (kaizen). My wife and I started NouriBar, a social venture that makes all-natural fruit and nut bars and for every bar purchased we work with the local communities to feed a child in need a hot meal in school. I also love doing radio and voice work. During my time at NASA, I was one of the narrators for the ScienceCasts! I love to cook and watch great films (Kurosawa, Bergman, Hitchcock).
What were some of your favorite books when you were a kid?
I was constantly reading as a kid. One of my all-time favorite books growing up was a picture book called Corduroy. The artwork seemed to jump out at you on each page and I loved the storyline! Other books that I really loved include any and all of the books from The Little Golden Books series, the Chronicles of Narnia series by C.S. Lewis, The Little Engine that Could by Watty Piper, and the Little House on the Prairie series by Laura Ingalls Wilder.
Why did you decide to write this book?
This book is loosely based on the daydreams that I had growing up. I had always wanted to share the things that had captured my imagination growing up; the stars, building things, wildlife, robotics etc. I also wanted write something to inspire kids to dream big and especially wanted to make sure that young kids of color could see another kid building and imagining things that are not typically represented in stories that are accessible to them. I linked up with my wonderful creative partner, Scott T. Baldwin right at the beginning and he shared the same vision that I had and he illustrated each page to show exactly what we had dreamed; so this is how the book came about!
What was an unexpected difficulty in writing this book?
One surprising difficulty I experienced while writing this book was trying to fit all of Max and Ding’s activities into 7 days! They have so many places to choose from and travel!
If Ding the robot appeared right now, where would you go?
Ding and I would most definitely travel to Cape Town, South Africa and have a swimming contest with a few great white sharks before hopping over to New Zealand and going to all of the Lord of the Rings filming locations!
Many thanks to Jared Aldwin Crooks for sharing his book and being our special guest!