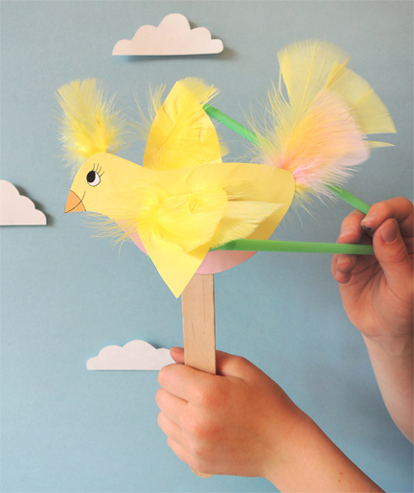
 No spring chicken? We got your spring chicken! The drinking straw “sticks” on this little bird puppet allow it to flap its wings and soar across the big blue sky! I designed the project for a weekend story time event for 50 kids. It needed to be inexpensive, appealing to ages 2 – 6, constructed without white glue or hot glue, and easy to put together with minimal adult assistance. For the full effect of the bird’s flight, check out the video clip at the end of the post!
You’ll need:
- 1 flying bird template, printed on 8.5″ x 11″ white card stock
- 1 jumbo craft stick
- 2 flexible drinking straws
- A selection of small feathers
- Markers for decorating
- Scissors and tape for construction
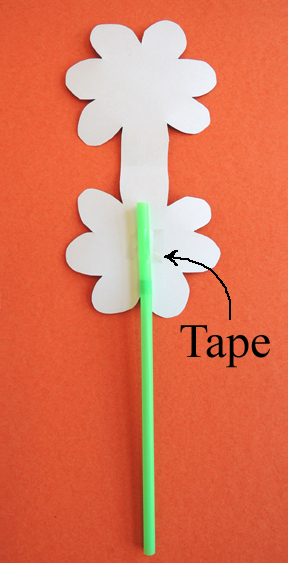
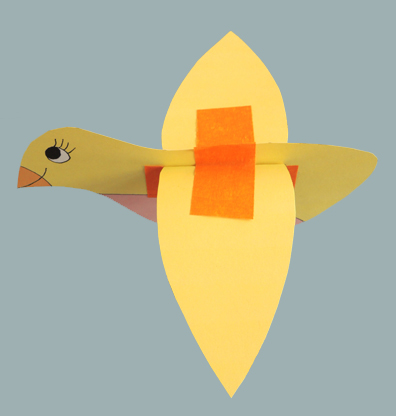
First, cut the bird’s body and wings from the template and color them with markers. Tape a jumbo craft stick to the back of the bird’s body (an 8″ craft stick work best). Make sure to leave approximately 1.5″ of space above the craft stick. Later, you’ll need that space to attach the bird’s wing.
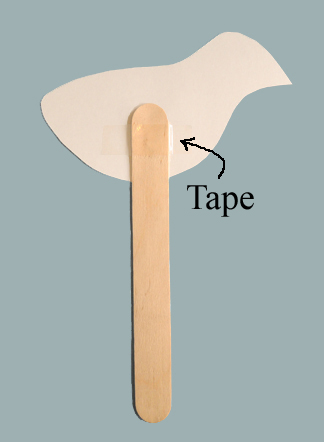 You could also wait until the end of the project to tape the craft stick in place, but I found that the early placement of the stick helped kids attach their wings in the right place (i.e. close to the top of the bird’s body instead of the middle).
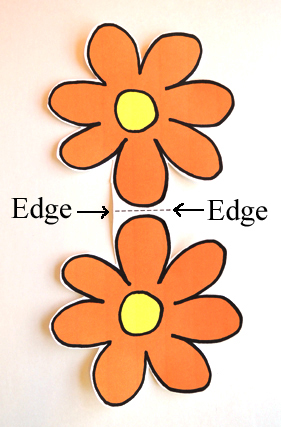
Next, fold each wing downwards along the dotted line, then attach the wings to the body with long pieces of tape. It’s important that the entire fold of the wing is covered with tape. I used orange masking tape to demonstrate this in the image below, but I used clear tape on the actual project.
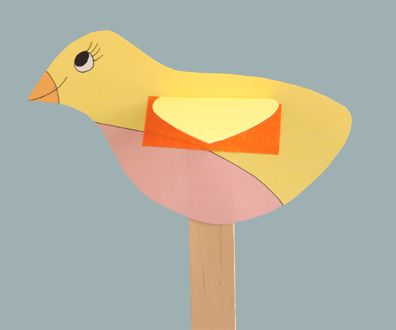 Now stick an additional piece of tape over the bird’s back and wings like a “tape saddle.” Again, I used orange masking tape to demonstrate it below…
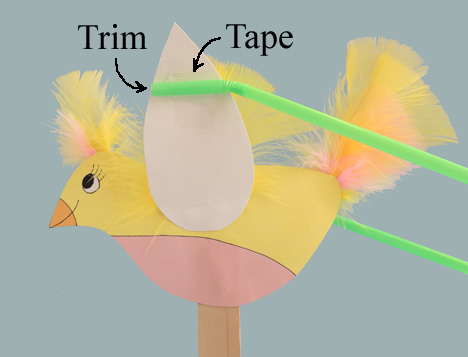
 Use tape to add feathers to the head, tops of the wings, and tail. Finally, tape the short end of a flexible straw to the underside of each wing, close to the wingtips (if the straws are too close to the body, the wings won’t flap properly). Use scissors to trim the ends of the straws so they don’t extend past the wings.
 To operate your bird, hold the craft stick in one hand, then gather the two drinking straws in your other hand. Holding the straws straight behind the bird, use them to flap the wings of the bird up and down!
Since my audience was primarily preschoolers, I read Birds, written by Kevin Henkes and illustrated by Laura Dronzek (Greenwillow Books, 2009). It’s a lovely book with simple text and plenty of opportunities for audience participation (such as naming the colors of birds, naming the types of birds, and yelling “Surprise!” on one of my favorite pages). The illustrations are colorful, pretty, and, in some places, extremely imaginative and delightful.