
 Hello from the Big Apple…we’re riding New York City’s subways today! We made tissue box subways, toilet paper tube passengers, and customized some special story time dollars. A quick stop at the MetroCard machine, and we were ready to zip through the tubes (and we mean that quite literally)!
We read Subway by Christoph Niemann (Greenwillow Book, 2010). It’s raining, and a Dad and his two kids decide to spend the entire day riding NYC’s subway trains. The clever, bouncy rhymes not only introduce the subway trains and their riders, but the various routes as well. There’s even a shout out to the “critters” who live on the tracks of the J! This vibrantly illustrated book is a fun read-aloud and a useful map for the twists and turns on NYC’s famous transit system.
You’ll need:
- 1 large tissue box
- 1 subway template, printed on two, 8.5″ x 11″ pieces of white card stock
- 2 jumbo paperclips
- String
- 1 toilet paper tube
- Decorating supplies for subway passenger (more on this below!)
- Magic bucks template, printed on 8.5″ x 11″ paper
- MetroCard template, printed on 8.5″ x 11″ white card stock
- 1 MetroCard machine (more on this below!)
- Scissors and tape for construction
- Markers for decorating
I did this project at my library’s story time, but I also brought it to my son’s kindergarten class! I’ll begin with the story time version first, then show you how I simplified the program for a classroom setting.
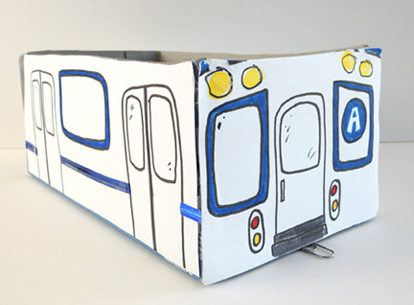
Begin by cutting the top off a large tissue box. Cut and color the pieces of the subway template, then tape (or hot glue) them to the sides of the box.
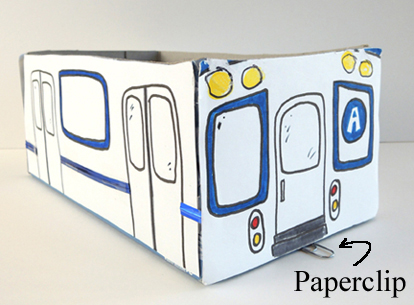
 Use tape to attach a jumbo paper clip underneath the front of the subway. The paperclip should extend approximately 0.75″ past the box. Later, we’ll use this paperclip to pull your subway through the tunnel.
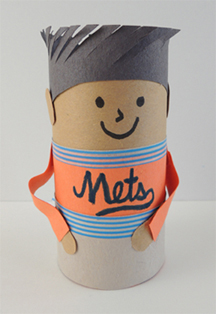
 Cut a toilet paper tube down until it fits inside your subway box, then decorate (we offered multicultural construction paper, regular construction paper, patterned paper, and patterned tape. Use markers to draw features on the face. Place the passenger in the subway.
 Cut and color some magic bucks from the template (you might recognize them from this itty bitty retail story time). Cut the MetroCards from their template as well. All you need now is a MetroCard machine!
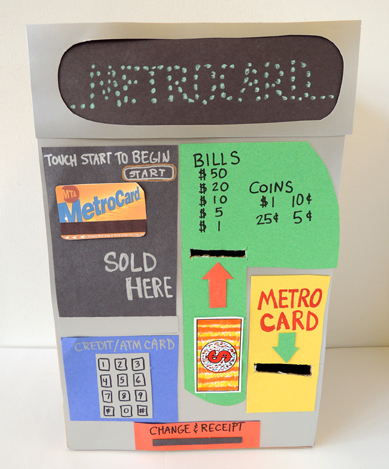 I made my machine out of a copy paper box. I cut slits for the money and the cards, then decorated it with poster board and construction paper. During story time, when the kids slid their cash into the slot, the machine would promptly dispense a MetroCard (this was done by a helper sitting behind the machine, catching the dollars and feeding cards through the slot).
The kids were super delighted by this marvel of technology! One little girl was peering closely at the machine, obviously working something out. Suddenly, she put her hands on her hips and shouted “Hey! I figured it out! There’s a person behind that machine!”
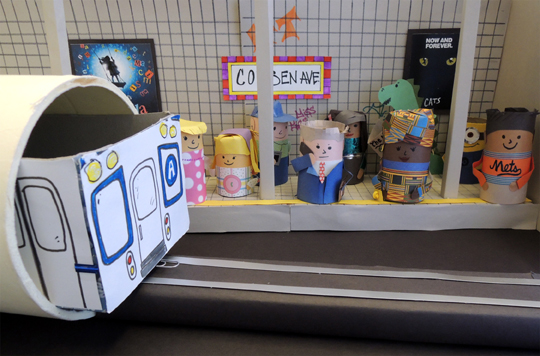
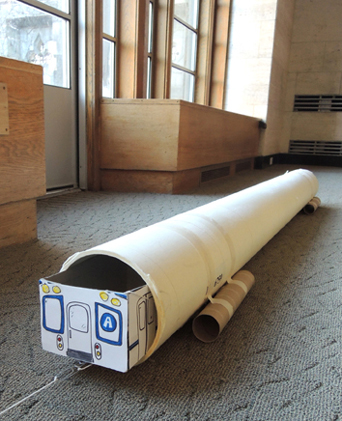
The subways are ready, the passengers are aboard, the MetroCard is in hand. Now for the ride! This entire story time was inspired by a 6′ tube gifted to me via library recycling. I taped some paper towel tubes to the sides to keep it steady. Voila! A subway tunnel!
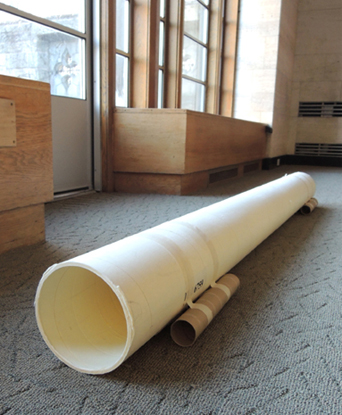 If you don’t have a tube, don’t worry! Throw a sheet over a table, or use a couple boxes to make a tunnel. So long as the subway travels through something, you’re good to go!
However, if you are using a tube, test to make sure your finished subway fits in it. We tested the boxes at the beginning of our prep work, but we didn’t test them after we attached the templates. “Pish,” we thought, “the templates don’t extend that far beyond the original box, yup no problem here.” Well, the morning of story time, we discovered that our subways were too tall to slide through the tube! We had to do some quick chopping to make it work.
Next, tie a long string to a jumbo paperclip, then bend one end of the paperclip out a bit.
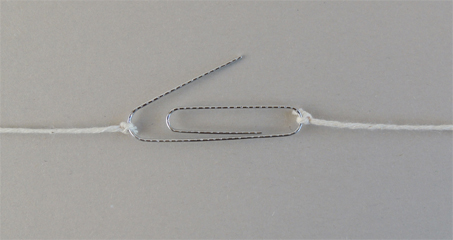 You’ll notice there are two strings attached to the paperclip in the above photo. The second string allowed my helper to pull the paperclip back through the tube after each subway had finished. Otherwise, we would have had to stop, stand the tube on its end, and let the paperclip slide back down to the mouth of the tube every time.
Ready to ride? The kids gathered at the mouth of the tube with their subways. One by one, a helper slid the subway’s paperclip onto the string’s paperclip…
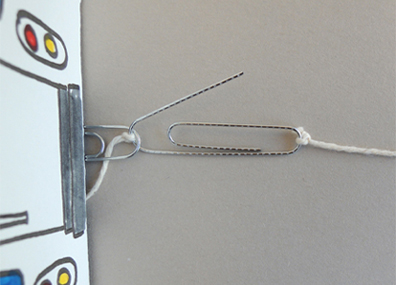 Then the kids dashed to the other end of the tube, crouched down, and watched as I pulled their subway down the tube towards them. Awesome.
As I mentioned at the beginning of the post, I brought this story time to my son’s kindergarten class. I definitely had to tweak it. For starters, we only had 15-20 minutes! So I prepped all the subways in advance. I hot glued the subway templates to 16 tissue boxes and attached the paperclips to the front. At the story time, all the class had to do was color in their subways.
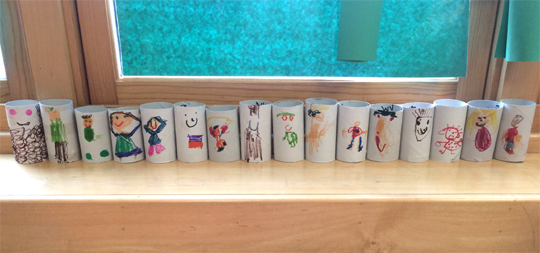
Also, instead of using lots of supplies to decorate the passengers, I brought white toilet paper tubes and asked the kids to draw directly on the tubes (if you don’t have white toilet paper tubes, wrap the brown ones with white paper). Here are the lovely passengers, waiting to board. I especially like the hairy one with the pink eyes all the way to the left.
 Follow exactly the same steps with the magic bucks and the MetroCard machine…and then haul the subways through the tube. The story time was a big hit! And the MetroCard machine actually stayed in the classroom, where it happily dispensed cards for the remainder of the school year.
 Every writer needs a pencil, and at the end of that pencil is…an eraser. By why settle for the cylindrical pink variety when you can opt for a colorful, unique creation of your own imagination? Enter the Creatibles D.I.Y. Eraser Kit, which retails for around $12. The kit includes a rainbow assortment of clay colors that you can sculpt and bake into custom erasers.
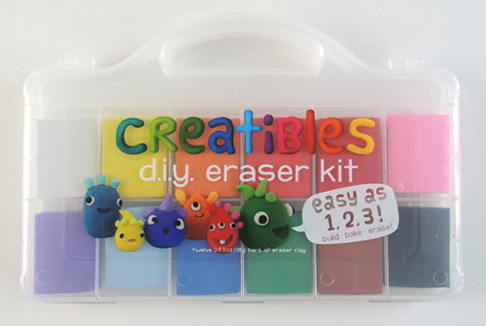 Our kid tester, Hope, is taking a break to tackle middle school madness (classes, school play, going to regionals for the National History Day competition…go Hope!), so Marissa took the Creatibles Kit for a test drive. Take it away, Marissa!
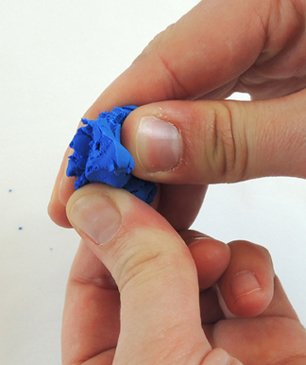 When working on my first eraser, I was conservative in my design and how much clay I used. I didn’t think there would be enough (each color is only 0.63 ounces). But I soon realized that I didn’t need that much (unless you’re making a gigantic multi-color dinosaur). The more comfortable I became with the clay, the more I experimented with detail and size.
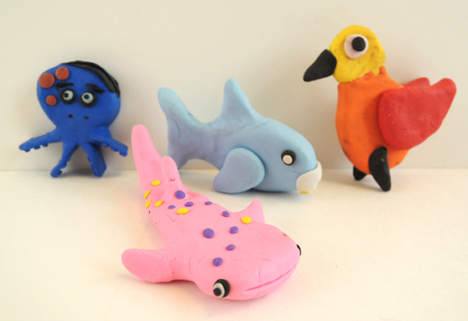 Some of the colors (like black, green, and blue) will rub off on your hands and table. So it’s a good idea to wash your hands in between colors. Also, use parchment paper. It really helps keep clay residue off your work table.
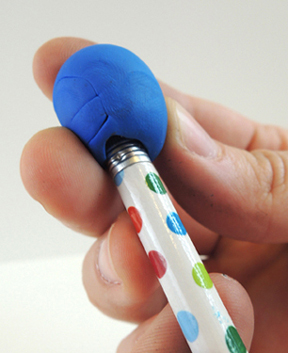 When adding little detailed pieces to your erasers, make sure you stick the pieces on well! I had a few eyes and limbs fall off because I didn’t press them down hard enough. Eventually, I used a plastic knife for pressing. Clay modeling tools would probably help and look cleaner, but you don’t have to get that fancy – a plastic knife works fine!
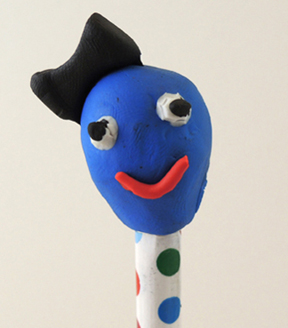 The erasers need to bake at 210-250 degrees for 30 minutes (I went with 250 degrees) then cool and set for 1 hour. I used parchment paper to protect my cookie sheet as well. The hardest part of this project? Waiting the full hour while the erasers cooled down and hardened! I kept checking them every 15 minutes (and if you poke them and they haven’t set, you run the risk of leaving a fingerprint or losing small pieces).
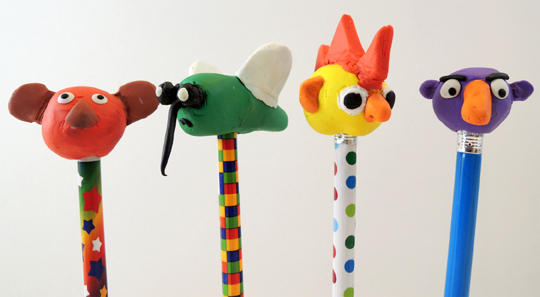
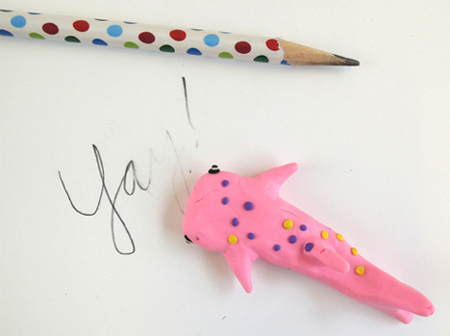 And they work! The pencil residue will stick to the erasers, so if you’re truly using them to erase, they won’t stay pretty for long (or rub the eraser on blank paper to clean it). The eraser doesn’t break or wear down quickly either. Even after some rigorous erasing, the pink shark’s chin was still intact!
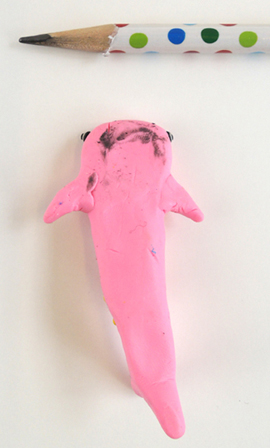 There’s no stated age range for this kit, but I think it would be good for ages 6 & up. However, because the clay starts out dry and crumbly, younger kids might have a difficult time handling it on their own. But once the clay gets to Play-Doh consistency, it’s fine. Also (and it says this on the kit) the clay could stain “certain finishes” and should be kept away from “carpet, clothing, and other porous surfaces.”
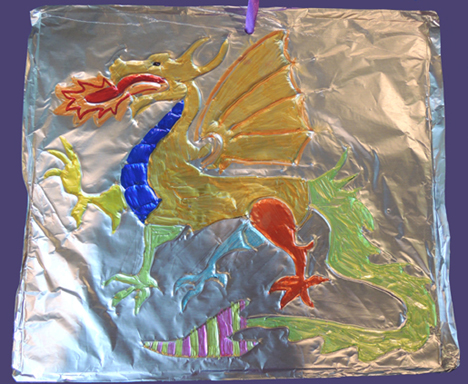 One of our regulars called this her “most favorite project, ever.” It’s amazingly simple to do, yet has fantastically beautiful results. Best of all, if you use the right markers, your metallic marvel of a dragon will illuminate under a black light! Get ready to test your metal at
 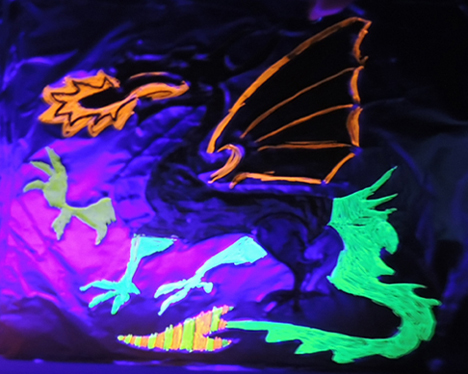 We read Lily Quench and the Dragon of Ashby, written by Natalie Jane Prior, and illustrated by Janine Dawson (Puffin Books, 1999). The town of Ashby Water used to be peacefully ruled by a King and Queen. But then the Black Count invaded, usurped the throne, tore up the botanical gardens, and built a grommet factory. Now the town is filthy, the river is polluted, and the people are suffering. To make matters worse, a dragon has landed on the grommet factory, and doesn’t appear to be leaving. Captain Zouche and Miss Moldavia (the baddies in charge), demand that young Lily Quench (a dragon slayer only by inheritance), defeat the dragon. But rather than slaying the dragon, Lily befriends it. With the help of Queen Dragon, Lily learns that there just might be a chance to defeat the Black Count, find a lost Prince, and rescue Ashby Water from ruin.
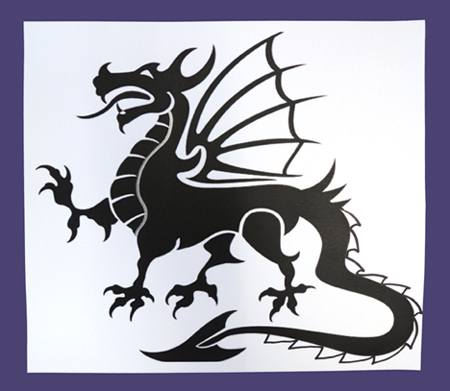 Next, outline the image with hot glue. The more outlines you make, the better the final drawing will look.
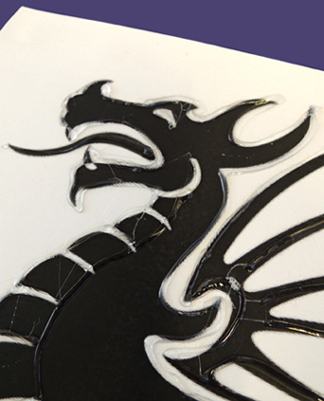 Once the hot glue is dry, cover the drawing with tin foil. Secure the tin foil to the back of drawing with tape – not hot glue! The hot glue will create unwanted ridges later. Below you can see exactly what we presented to the kids – a mysterious sheet of metal for them to explore with their fingers.
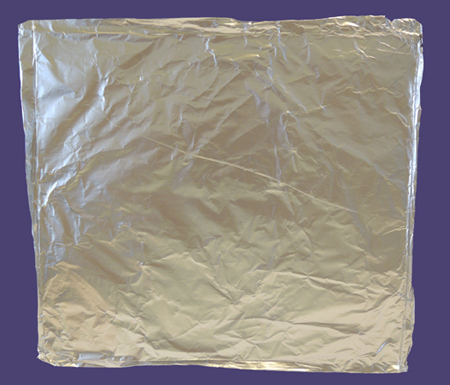 Use your fingertips to gently, but firmly, press down on the tin foil. As you press, the hot glue ridges will pop out, revealing a raised outline of the the image underneath!
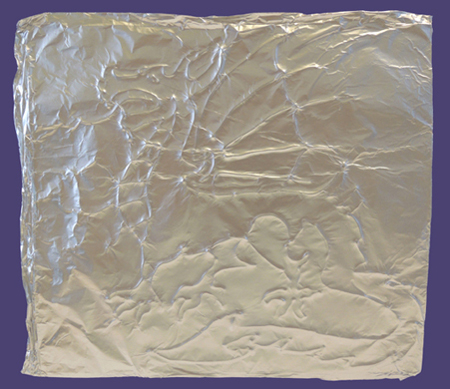 Here’s another shot that shows the ridges a little better…
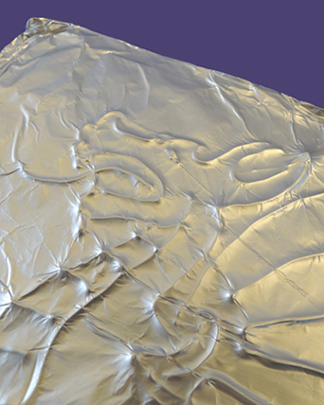 Some kids liked the idea of the image revealing itself from a “blank slate,” but other kids liked having an image to guide them. So have a few copies of the original image on your work tables, just in case.
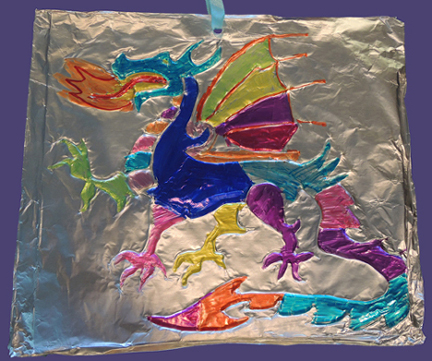 I was excited to learn that certain packs of neon color Sharpies fluoresce under black light (you’ll know because it says so right on the package). Awesome! I totally wish I had used them when we made
 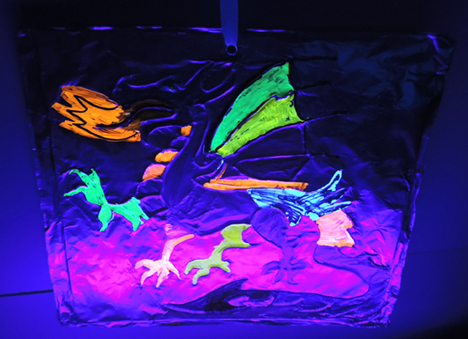 The final step is optional. I punched a hole in the top of each project and looped a ribbon through it so kids could hang their metallic creations up at home.