 Q: Hi Dr. Dana and Katie! I love the Top 10 posts, and I’m wondering what your Top 10 favorite blog posts are?
A blog post about this blog? Whoa, things are about to get super-duper metaphysical. But we’re game! In order to tackle this challenge, Katie and I each picked our top 5 favorite posts and commented on them. With 5 years and 463 posts to chose from, it was tough. But, as we soon discovered, sometimes it was a childhood memory, or a behind-the-scenes, that actually made the post one of our favorites.
#10 IT BEGINS

Dr. Dana: I have a lot of affection for this post because it is my VERY first one. August 13th, 2013. For years, people had been asking me to find a way to share my creative projects and programs (there was even person who suggested I get my own TV show…hmmmm). It was Katie who started whispering You should blooooog in my ear. I agreed to try it, not realizing that this blog basically adds a part-time job on to my already full-time job. I will get even with her. Someday.
Katie: I remember the first time I suggested a blog about all things Cotsen, Dr. Dana and I were crafting a Tiger Tales project and fielding questions about what we were building from an inquisitive parent. I think my comment went something like, “It’s easy! Just take a few pictures of the project, explain how to put it together, and BAM! You’re done!” So maybe it wasn’t going to be that easy, and maybe it has added a few grey hairs on Dr. Dana’s head, but the blog has certainly delivered creative literacy magic across the globe.
#9 ICE ICE FISHY
 Katie: This project was near and dear to my heart. It conjured up many memories of when I was a kid out ice fishing with my grandfather on a cold lake in Minnesota. Being outside in the cold is not my favorite activity, honestly I still hate being cold, but spending time with him doing one of his favorite things in the world was totally worth suffering through the frigid temperatures. I also believe the ice shanties were one of the first large-scale props that Dr. Dana had me design and build for Tiger Tales. If I only knew then what she was going to make me create in the future…
Dr. Dana: Notice how Katie put the shack on TOP of another big box? That was so kids could actually fish into the “ice” floor of the shack. Exactly like a real shack. Fantastic. Katie rules! Also, this project taught me the phrase “Ya Der Hey.”
#8 POETRY, LIKE WATER FLOWING
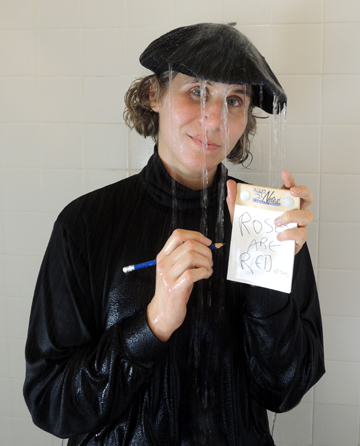 Katie: When Dr. Dana said we were going to head to her house to take pictures and/or video of her in the shower while she tested a product for the blog, I was totally up for it. What I did not realize was how I was going to have to restrain myself from laughing when she was in the shower and what ensued while she was there. You may hear me chuckle a bit and see the camera move, but the video did not show me nearly collapsing onto the tiled floor in laughter after I stopped recording. Hilarious.
Dr. Dana: Yup, writing poetry in the shower whilst wearing a soaking wet beret was one of those “Huh. First time in my life I’ve ever done this” moments. Which seems to happen ALL THE TIME on this job.
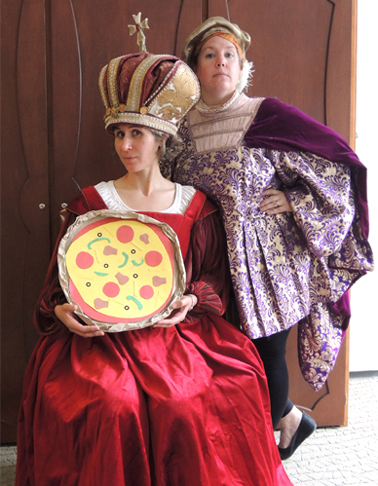
#7 ROYAL PIE
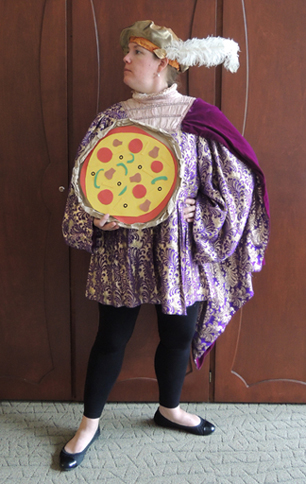
Katie: One of the reasons I applied to work at Cotsen was because the job description specifically stated that applicants would be asked to wear a costume. I’ve worn many a costume during my tenure at Cotsen and transformed myself into fun characters: a renaissance princess, a steampunk spelunker, Charmander, a car mechanic, a Potter-esqe witch. I think dressing as a medieval herald is one of my favorites. The tights were super comfy.
Dr. Dana: All in my orbit must enter the costuming vortex! Mwah hah hah! And hey…who wants to see Katie as Eloise?
#6 CAN YOU DIG IT?
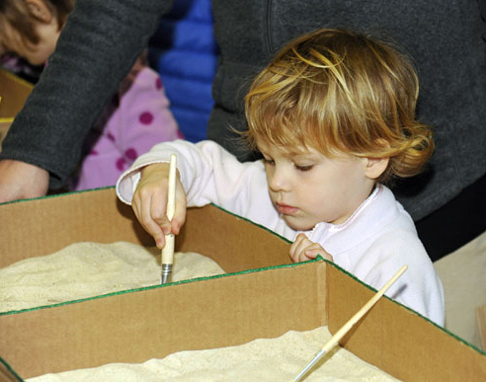 Dr. Dana: This was an archeological dig we designed for a Journey to the Centre of the Earth event in 2013. We really wanted to do this activity, but there were so many challenges. How do we replicate an actual dig? How do we tie the concepts together in a way that allows kids to self-discover? How do we make this thing portable? How do we keep it hygienic? How can we produce it fairly cheaply? The results were a total home run.
Katie: We estimate that 5,000 people attended this event. Along with being able to participate in an archaeological dig, learn about spelunking, climb a inflatable mountain, meet nocturnal animals and play music on rocks, those who were brave enough got to meet a baby Tyrannosaurus Rex!
#5 GIRAFFE’S GOTTA DANCE
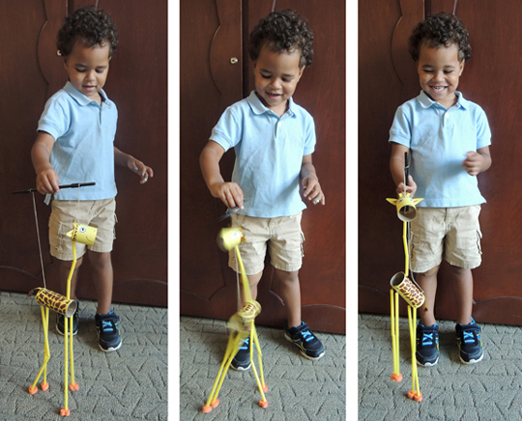
Katie: Figuring out how to make a giraffe puppet with dancing legs and a moveable neck was tough. Really tough. Dr. Dana and I went through at least a dozen ideas and templates before we struck gold using cut straws, string and toilet paper tubes. I still have the giraffe we created hanging in my conference room office. I’m pretty proud of that little dancing giraffe. He’s quite adorable, too.
Dr. Dana: At one point, Katie and I were madly designing separate giraffe prototypes, grinding our teeth in frustration. In the end, Katie had the winner. The giraffe really dances!
#4 THRIFT STORE COSTUME CHALLENGE
 Dr. Dana: My specialty is unusual takes on literacy, and I think this was one of my finest moments. I challenged a Princeton University student designer to costume as many literary characters as he could in 180 minutes, using ONLY what he found in our locally-owned thrift and consignment store. My only regret was that we ran out of time before I could be dressed as Mrs. Whatsit.
Katie: Mad props to the Princeton University students who were willing to stuff their feet into shoes that were several sizes too small. And salad forks as crystal daggers? Brilliant.
#3 SHOW JUMPING!
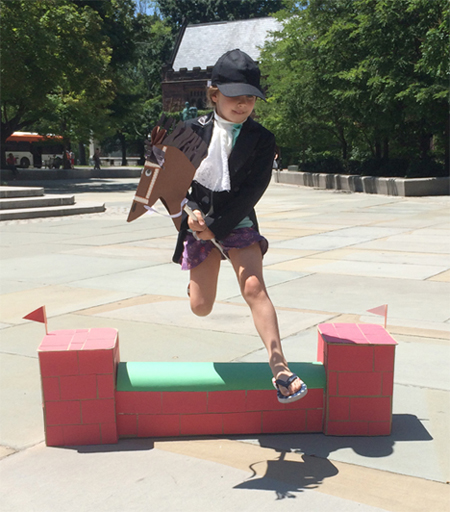 Dr. Dana: As a horse-obsessed little kid, I was constantly building show jumping courses, which I would then jump over, endlessly. This project allowed me to revisit those happy memories, and I was surprised at how deeply touching it was. Also, the video! The cheers when the little girl recovers from her misstep over the last combination? Awesome.
Katie: This is the perfect time for me to introduce an often used phrase in our office: LID. Leave It Dana. She wanted to create an elaborate jumping course and I had to constantly remind her about our young audience. LID.
#2 KATIE HITS THE ROADSHOW

Katie: This was a once in a lifetime opportunity to be a part of the PBS ANTIQUES ROADSHOW! I was lucky enough to spend a long weekend hanging out with my younger brother, I got to meet my favorite ROADSHOW appraiser, and I learned what some of my inherited treasures are worth. PBS is currently airing the episodes of the San Diego ROADSHOW, so tune in and see if you can spot me in the crowds!
Dr. Dana: Well, I was on Channel 20’s WOW when I was a little kid. Anyone? Anyone?
#1 THE DYSLEXIC LIBRARIAN
 Dr. Dana: Marissa is amazing on so many levels. How can she NOT be on this list?
Katie: Yup. What Dr. Dana said.
AND THE GRAND FINALE…RUN COOKIE RUN
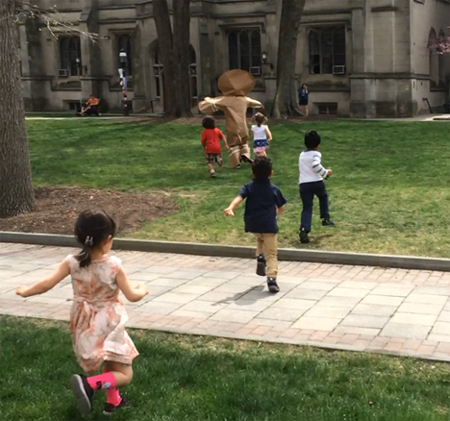 Katie: I was living in Belgium when Tiger Tales kids were creating gingerbread houses and chasing an enormous cookie that looked strangely like Dr. Dana across campus, but this project still tickles my funny bone. From our apartment across the Atlantic, my son and I watched the accompanying video and we both went into hysterics when Dr. “Gingerbread Girl” Dana did her little hop and started running away from the excited kids. It takes a confident cookie to dress up like one.
Dr. Dana: This story time definitely ranks as one my favorites of all time. I distinctly remember running away from the kids, giggling madly, thinking: “I have a Ph.D., I’m dressed like a giant cookie, I’m being chased by kids on an Ivy League campus.” Life is sweet!

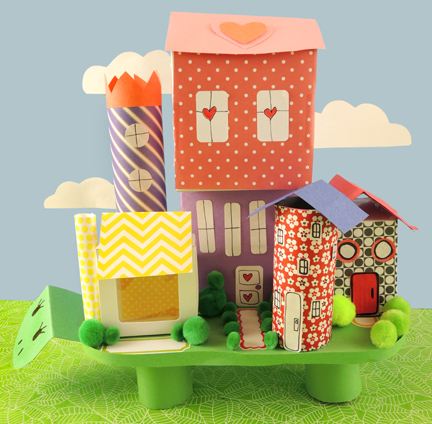
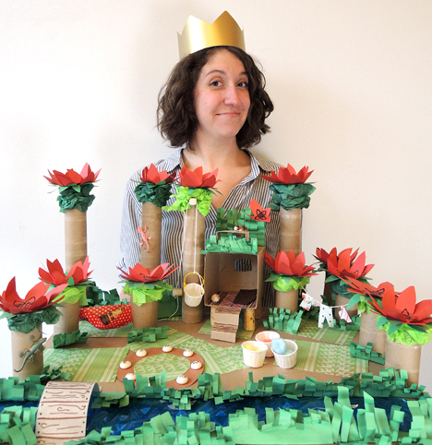
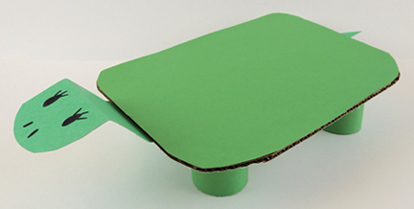 First, build your “turtle table.” This is a corrugated cardboard base with 4 toilet paper tubes halves attached to the bottom. We used heavier weight poster board for the head and tail, but construction paper works too. Then, gather assorted boxes and tubes to create a town!
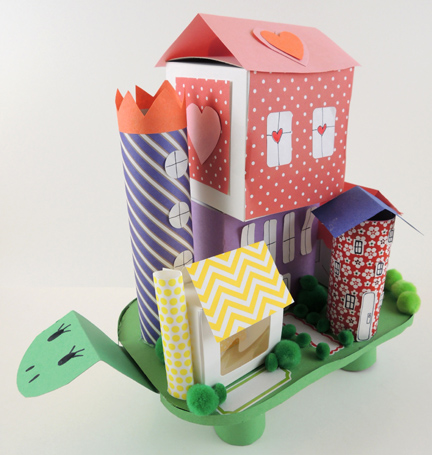 We offered patterned paper and construction paper to decorate the boxes. The windows and doors are old mailing/file labels and dot stickers. Some green pom-pom shrubs finished the look. But some kids opted to simply decorate their boxes with markers. Really, anything goes!
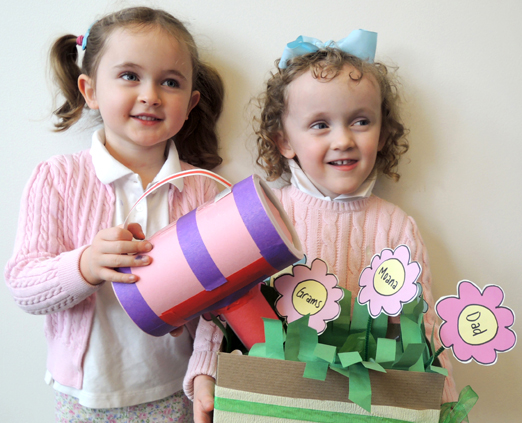

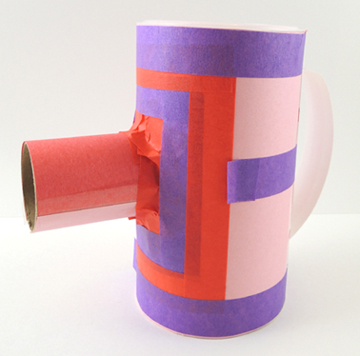 The watering can is a small oatmeal container wrapped in construction paper. Use a box cutter to cut a hole for the “spout,” which is a toilet paper tube that has been cut down to 2.5″. Attach a poster board handle, and then decorate everything with (optional)
  Our confetti was a blend of foam shapes, iridescent fabric hearts, and red poster board hearts (the construction paper versions were too light, and tended to jam in the spout). Drop your confetti in the watering can, and gently shake over your garden to share the love!