 Recently, it occurred to me that we’ve done story time projects with dogs, monkeys, chicks, ponies, mice, hamsters, butterflies, birds, crocodiles, bugs, rabbits, and chickens in hot air balloons…but no CATS! To correct this egregious oversight, I present you with the purrfect cat story time.
We read Hookwinked by Arthur Howard (Harcourt, 2001). Mitzi (who is a witch) adores creepy things. So when it’s time to find a pet, she heads to the creepiest store in town. She selects a toad. But all the toad wants to do is eat bugs. She returns the toad and gets a pair of bats. But all the bats want to do is hang out with each other. She returns the bats and leaves the store, completely discouraged. The next day, however, there’s a scratch at her door. It’s an adorable little kitten. Naturally, Mitzi is disgusted by the kitten’s cuteness, but she agrees to let it stay one night because it’s raining outside. That night, the kitten stays by Mitzi’s side as she hunts ghosts, purrs on Mitzi’s lap during a scary movie, and licks Mitzi’s chin when she reveals her deepest fears. Mitzi’s heart is won, and she realizes that looks aren’t everything!
You’ll need:
- 1 small oatmeal container
- Construction paper
- A rectangle of tagboard (approximately 4.25″ x 6″)
- 3 pieces of twisteez wire (or very thin card stock strips) approximately 4.5″ each
- A small rectangle of self-adhesive foam (approximately 1.25 ” x 1.5″)
- 2 wiggle eyes
- A 16″-18″ piece of ribbon
- A small circle of card stock (approximately 1.5″ in diameter)
- Scissors, tape, and glue stick for construction
- Markers for decorating
- Hole punch
- Hot glue
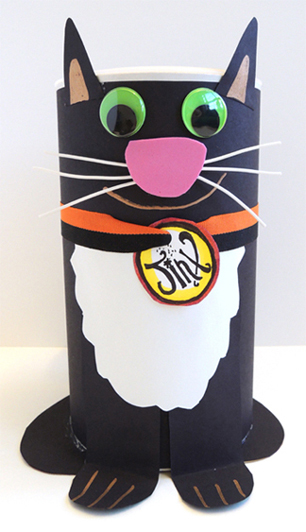
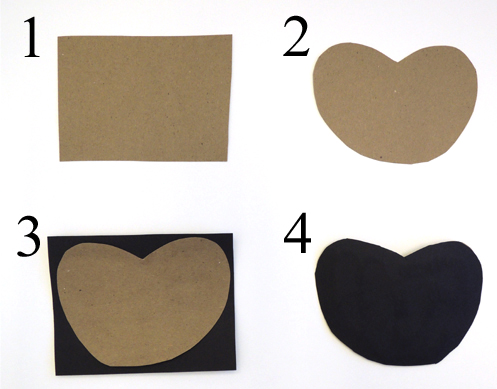
First, wrap your oatmeal container in construction paper (we offered black, white, orange, and gray). Cut the hind feet out of a tagboard rectangle, then glue the tagboard to your choice of colored construction paper. Trim the construction paper to fit the tagboard feet. Your tag board hind feet are now covered with construction paper on one side.
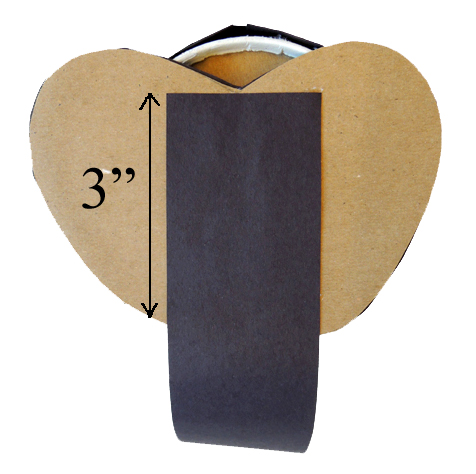
 Set the feet aside for a moment, and cut a tail out of your choice of colored construction paper. Our tails were 2.25″ x 12″ rectangles and they looked great. Round one end of the rectangle, then wrap the tail around a marker to give it an awesome curl.
Hot glue the hind feet to the bottom of the oatmeal container, then hot glue to tail on top of the feet. To keep the tail anchored and less likely to tear off, I suggest hot gluing at least 3″ of it to the feet.
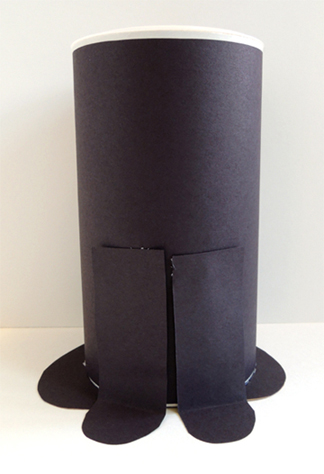
 To create your cat’s front feet, cut two, 1.5″ x 4.5″ rectangles of construction paper, round one end of each rectangle, and then fold the rounded ends up to create paws. Hot glue (or tape) the legs to the front of the oatmeal container.
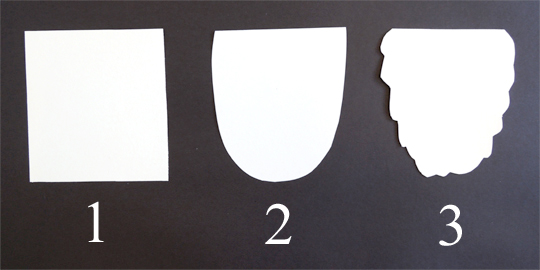
 To make the cat’s furry bib, cut a 4″ x 4.25″ rectangle of construction paper into an upside-down bell shape, then cut little ripples on the edges to create “fur.”
 Hot glue (or tape) the bib to the front of the cat. Make sure the bib covers the tops of the front legs, but also leaves room for your cat’s face.
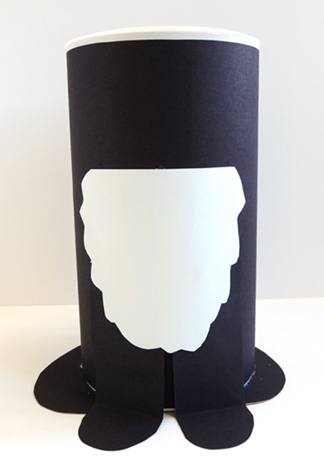 Use a marker to draw a smile on your cat and little “toe lines” on it’s feet (metallic Sharpie markers work great on black construction paper). Next, bunch together 3 pieces of twisteez wire (or 3 very thin card stock strips) and tape them over the mouth like so:
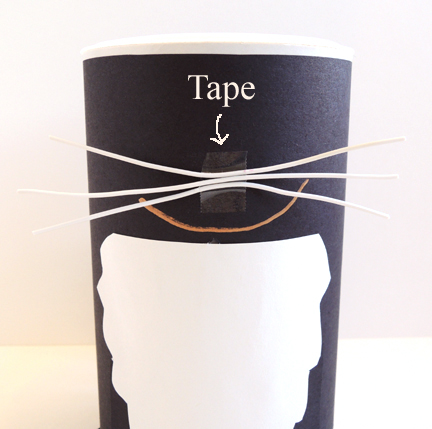 Cut a piece of self-adhesive foam into a cat nose and stick it over the whisker tape. Hot glue a pair of wiggle eyes above the nose, and hot glue (or tape) a pair of construction paper ears next to the eyes.
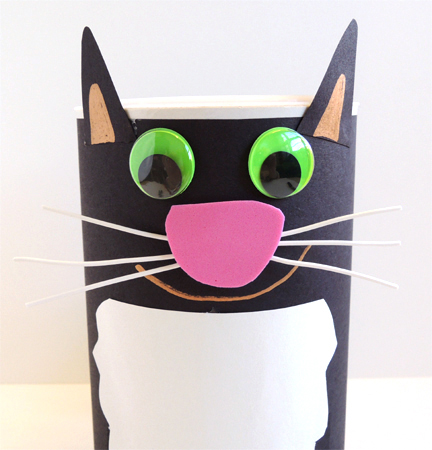 The final touch is your cat’s name tag. Punch a hole in a circle of white card stock, then decorate the circle with your cat’s name. Thread a piece of ribbon through the hole and tie the ribbon around your cat’s neck. Invite a few friends over for a grand night out.
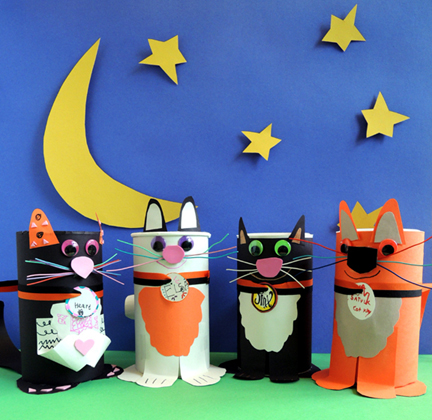 And there you have it…a splendid cat story time! I wonder what animal’s next? We’ve already covered flamingos, squirrels, long-haired rainbow yaks…

