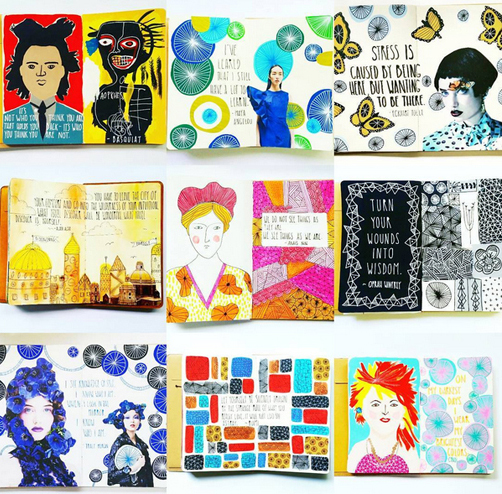
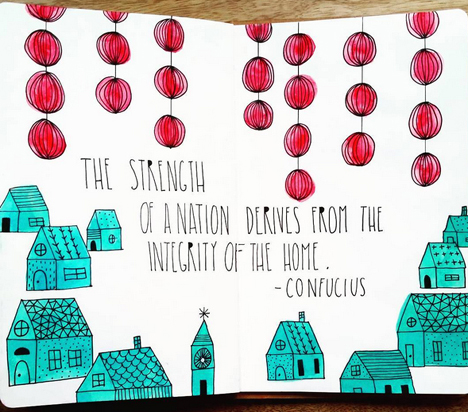
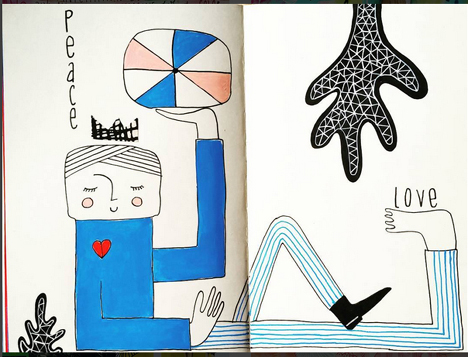
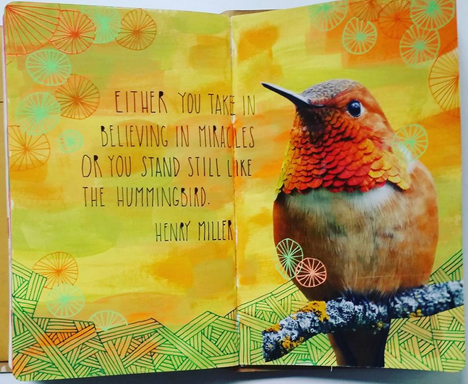
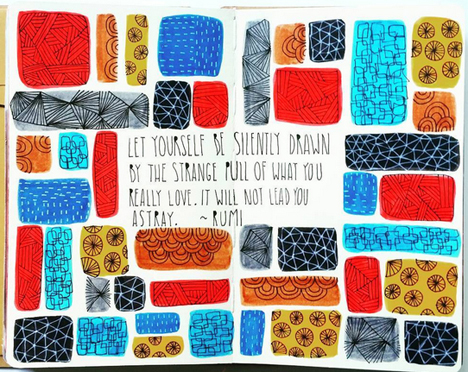
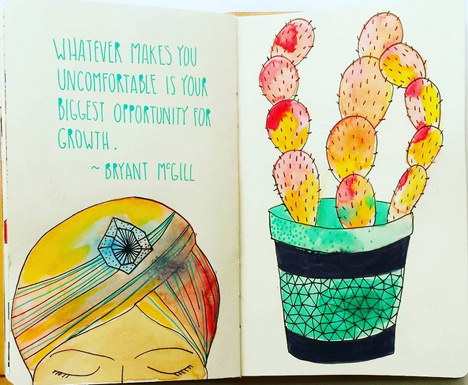
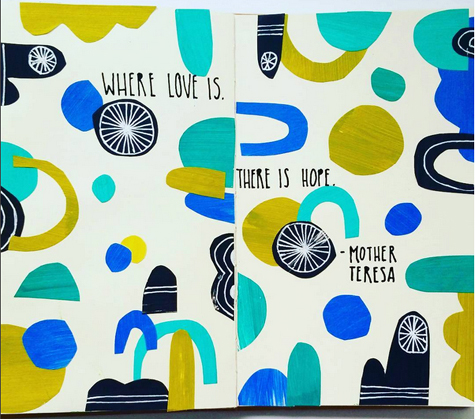
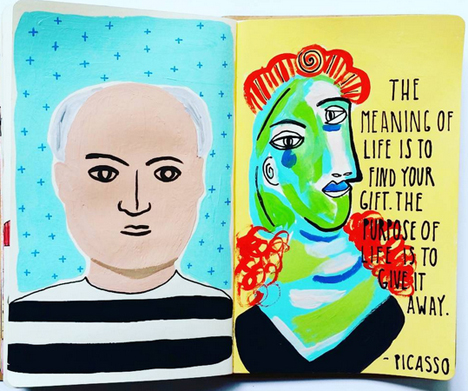
 Words of wisdom, explosions of color, gorgeous layers, and playful images. You will find all of these in the work of art journalist Megan Whisner-Quinlan. What is art journaling? Basically, it’s a more formalized version of a sketchbook. The goal is to express yourself with small, complete works of art within the bound pages of a journal.
A self-taught artist, Megan recently completed an Instagram-hosted project called #the100dayproject. I asked her to share her work, and answer a few questions about her process!
 When did you first learn about art journaling?
I learned of art journaling about 16 years ago, right around the same time I discovered book binding, as they often go hand in hand.
 How long have you been doing it?
I did art journaling for about 3 years until I had children and then stopped because I was so overwhelmed with the early years of motherhood. I came back to it about 3 years ago. Initially, I was just journaling during a difficult time, but then I added some nice designs on the pages and before I knew it the art took over.
 Do you lean more towards the art…or the journaling?
Right now I lean towards the art. It really depends on where I am in my life. Art journaling is considered an art, but a therapeutic form of art. Sometimes, I will add more writing if I want to focus on certain elements of my life. Many art journalers use a lot of positive affirmations when journaling.
 What are some of your favorite go-to supplies?
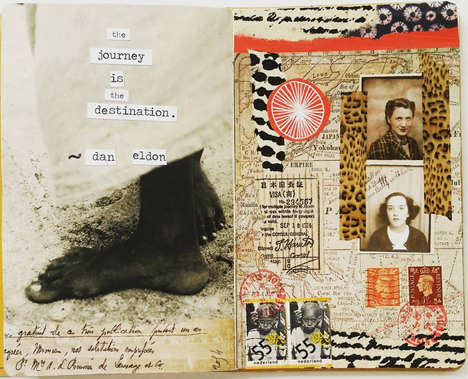
I use Ranger Ink’s Dylusions journals, paints and inks. They are specifically designed by art journalers for art journaling. I also love watercolors, watercolor pencils. and gel pens to add detail and background to my pages. I do a lot of collage as well, so used magazines are my favorite source for supplies as well.
 Are there any parameters to art journaling? Or is it whatever you can imagine – text, images, sketches, color washes…?
There really are no parameters to art journaling, which is why it is so great and accessible for anyone.
 Is it difficult coming up with a concept every day?
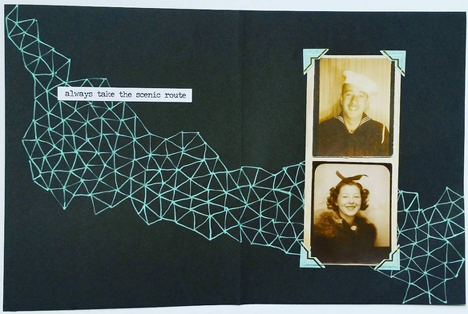
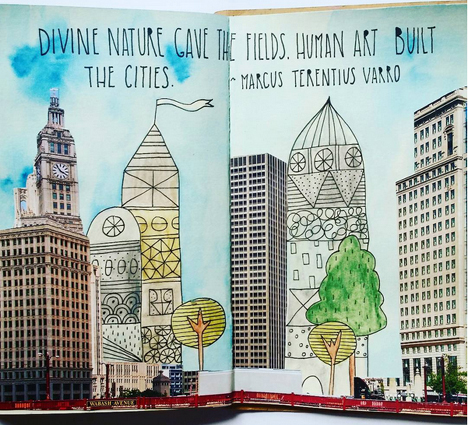
I almost never have any plan anytime I sit down to journal. Usually I will generate a direction from an image that is interesting and go from there. More recently I have been prepping many pages at once and just go back and forth between them each day.
 How has your journaling changed since you first started posting it on Instagram?
I have only been posting on Instagram since January so It hasn’t actually been too long. But as an artist, you tend to try different techniques and phases all the time. I still feel like I’m “learning” and maybe I always will, so I guess right now at least I don’t feel like I have found my niche yet.
 What are your top 3 favorite entries and why?
This is a tough one. I have some favorites, but more interesting to me is when you put it out into the world. You don’t know what will resonate with others. To this day I have always noticed, at least on Instagram, my favorites are often the posts that get the lowest “likes.” I love that. It is actually a comfort, because I know that I am still pleasing myself regardless of others opinions.
 You finished your 100 day project, what are you up to next?
Right now I am in an “absorption” phase and am doing a lot of workshops online. I looked up one of the more known art journalers, Teesha Moore, and have been watching her videos. I recently just learned she suffered a stroke in March and is still rehabilitating. It is remarkable to see her progress, and even though she is struggling to regain control of her right hand (and speech) the art she is doing just for her recovery, is beautiful. She is such an inspiration to me, so right now, I am trying to learn as much as I can from watching her and grow even more as an artist.
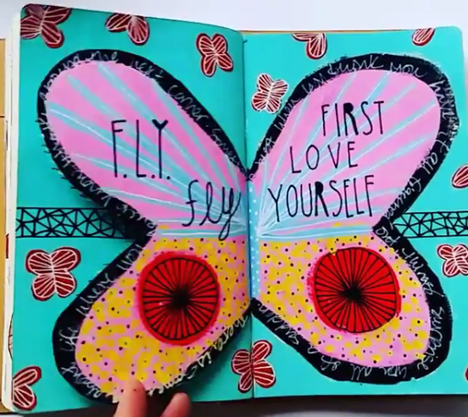
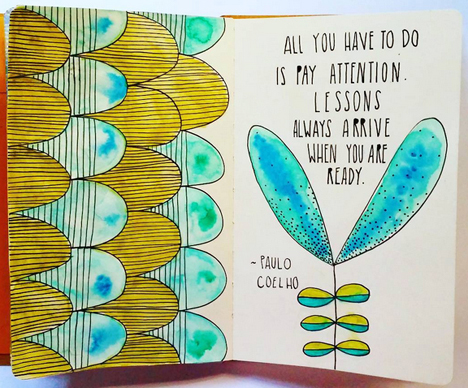
Click here to see this journal entry flutter!

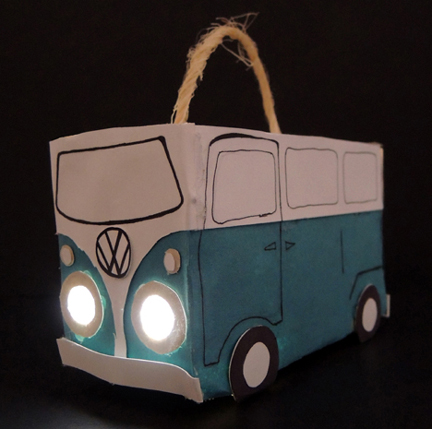
 We used a submersible LED to light Marissa’s van. You can find them in the floral section of Michaels craft store – 9 cost $21, but I always use a 40% off coupon.
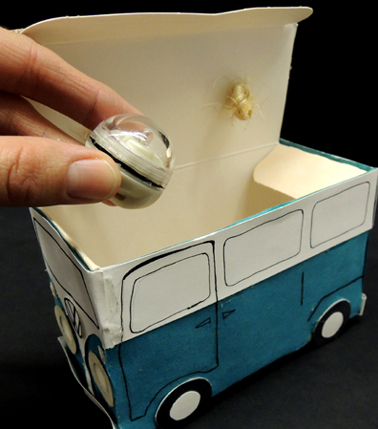 If the LEDs are too pricey, a glow stick will do the trick. Drop the illumination of your choice in the vehicle box, close the lid, and you’re done. Vroom vroom vroom!
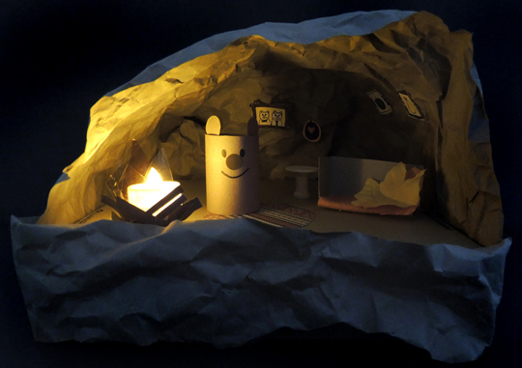
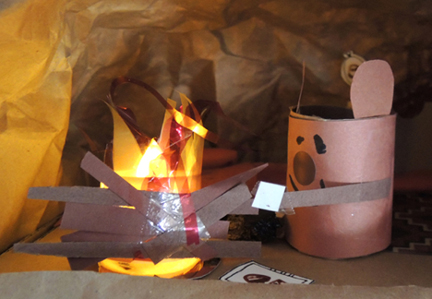
 First, crinkle up brown packing or wrapping paper. Then arch it over the top of the base and secure to the sides and back of with tape. We taped a strip of crinkled paper to the front of the base as well.
 Now, for the inside! We made a half a toilet paper tube bear (with a
 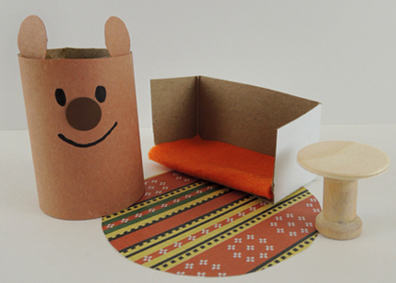 Ready for some artwork? Cut the frames from the template, draw some pictures, and attach your artwork to the walls of the cave with
 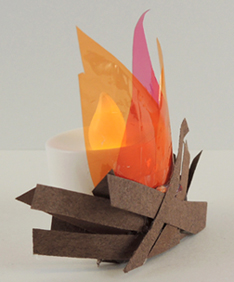 To make things extra fun, we turned off the lights during the fire construction portion of the program. It was so cute to see these little illuminated caves on all the tables. But here’s the cave that completely captured my heart…this bear is roasting a marshmallow!