
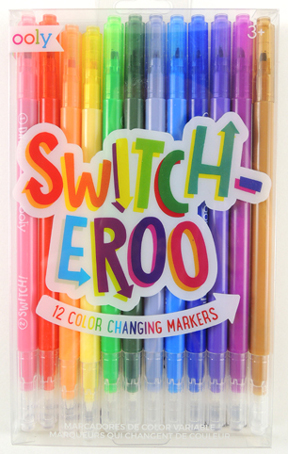
 The future is here, because some amazing genius has invented color changing markers. But do they really work? While Crayola, Alex, and an intriguingly named company called Wham-O all have versions of these markers, today, we’ll be testing the Switch-Eroo set of 12 color changing markers by Ooly ($9).
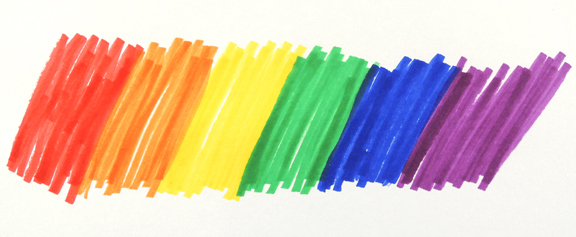
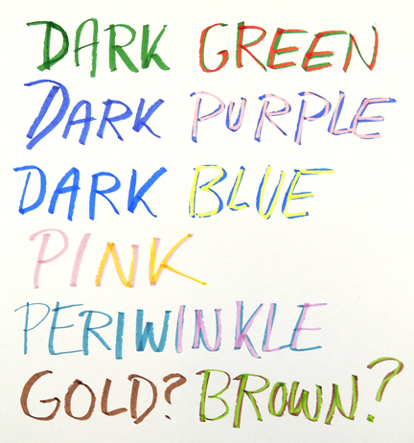
 Each marker has a color chisel tip at one end, and a slightly rounder white tip on the other end. The premise is simple. Use the color end first, then turn the marker around and use the white end on top of the color. Here’s a rainbow with the color end of the markers:
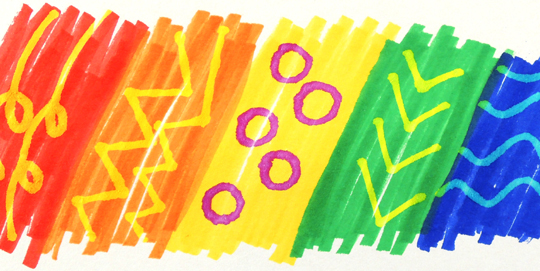
 And here’s the results of the white end on top of said colors. Pretty cool right? The color yellow was especially surprising. Look at those big, bold purple circles!
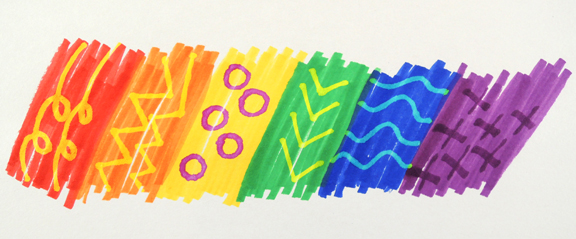 There was no smudging as you “reversed” the colors, though in my opinion, there seemed to be a lot of yellow resulting from the color reverse. Red, orange and light green? Those basically all reversed as yellow. As did blue and pink. But look at the dark green. It reversed as red! Very cool.
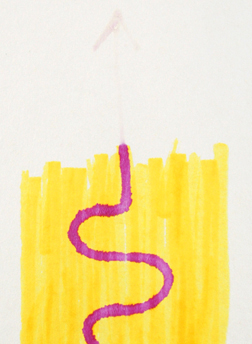
 One question you might be asking: Does the white end do anything if you just use it on paper? Nope. Below you can see my yellow scribble, and how I drew on top of it with the white end of the marker. But you can barely see where I departed from the yellow and drew an arrow pointing upwards. Once the white tip moves off the color, the ink basically becomes invisible.
However, this begs a further question: Can you use the white end to write invisibly on paper, then scribble over it with the color end to reveal a secret message?
 Wooo hooo hooo! The coolness factor just increased ten fold.
I expected the white ends of the markers to start staining as I progressed through testing, but they didn’t. They stayed clean except for maybe the faintest touch of color on the tip. Nice.
The Ooly Switch-Eroo color changing markers are terrific. You not only get 12 extra colors in a set of 12 markers (though there did seem to be a lot of yellow going on), you also have a mechanism for writing secret messages in technicolor. The markers have plenty of ink, and I like the company’s color choices. So for the little artist in your home, this is a terrific extra that will no doubt inspire more creativity. Recommended!
Bonus points to anyone who recognized the Winnie the Pooh reference in the blog title. 1989! Represent!
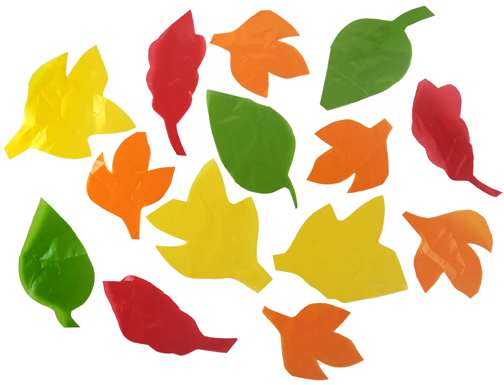 School has started, fall is around the corner, and the leaves are starting to change. So it’s the perfect time to post a simple sound and color story time featuring fall leaves!
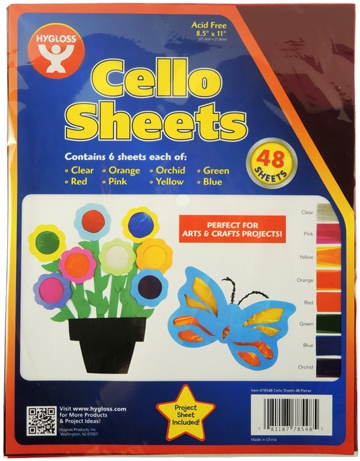 I bought these 8.5″ x 11″ cello sheets at Discount School Supply ($7 for a pack of 48). The sheets are flat, so no problem cutting out shapes and having them curl up on you. The trade off, of course, is volume. In the above pack of 48 sheets, there are only 6 of each color. However! I did spot a 104 pack on Amazon with 13 of each color for $9. If you ultimately decide go with rolls of cellophane instead of sheets, try flattening the shapes under a stack of books overnight to see if that helps uncurl them.
 For the story time project, cut various leaf shapes out of cellophane. Then have the kids crumble and crunch them, crinkle them madly, stomp on them, toss them in air, slide with them under their shoes, put them over their eyes to see the world in red, yellow, orange, and green…in short, PLAY. When you’re done, tape the leaves to a window to brighten things up!
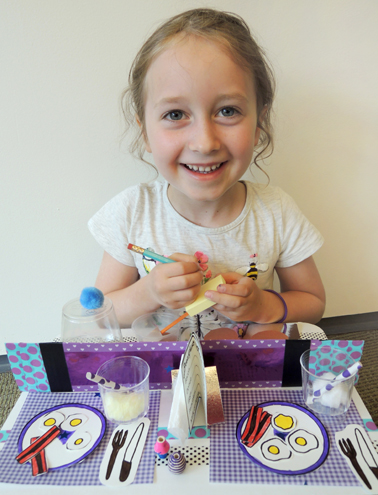
 If you like, you can use
 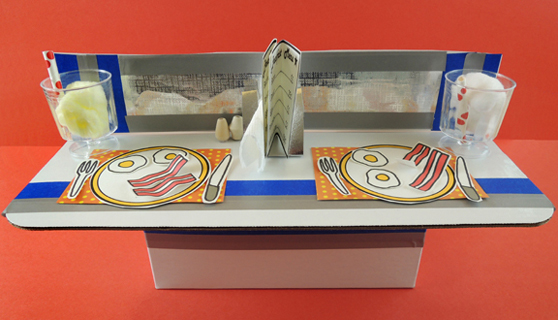 The plates, utensils, food, and menus are on the template. We used
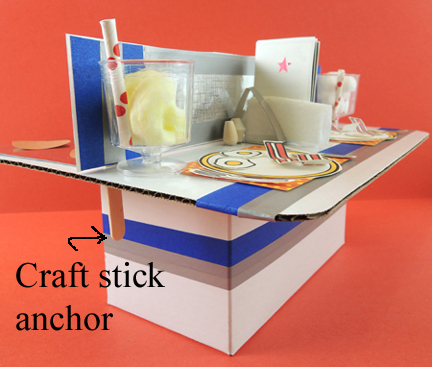
 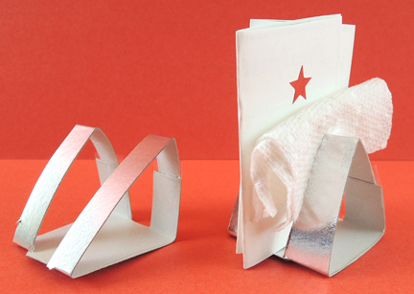 Basically, these are triangles of silver
 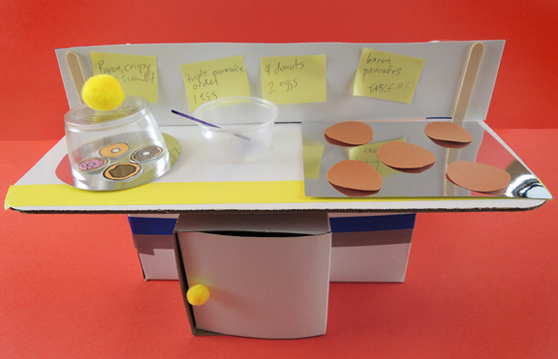 The donut dome is a plastic cocktail cup that has been cut down to 1.5″ and has a small pom-pom hot glued on top. There’s mirror board plate underneath it, and a mirror board griddle as well. There’s also a plastic sample cup mixing bowl with spatula (that’s a bit of silver mirror board taped to a mini craft stick). The pancakes are construction paper. Oh, and we included a fridge made out of a little box, but that’s totally optional.
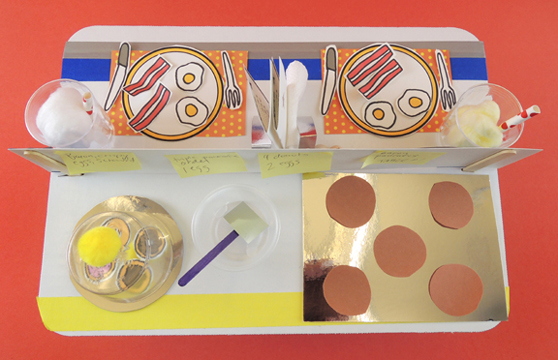 Miniature food sets are REALLY popular at story time. Sometimes, I hear about kids who are still playing with their sets months – sometimes years! – after story time (specifically our
 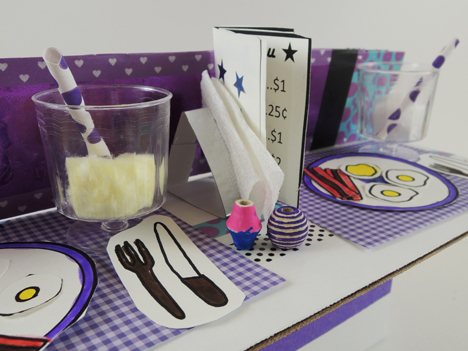 Look at the gorgeous purple decor! The carefully detailed salt and pepper shakers! The purple stripes on the bacon!
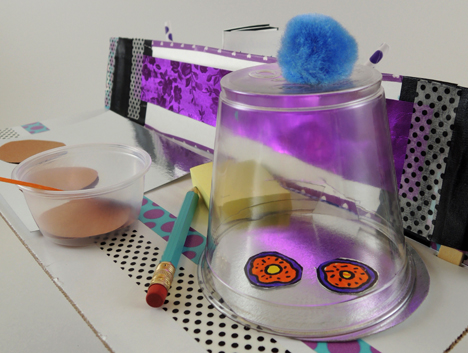 Which are only surpassed by the purple donuts. And then the black polka dots! LOVE.