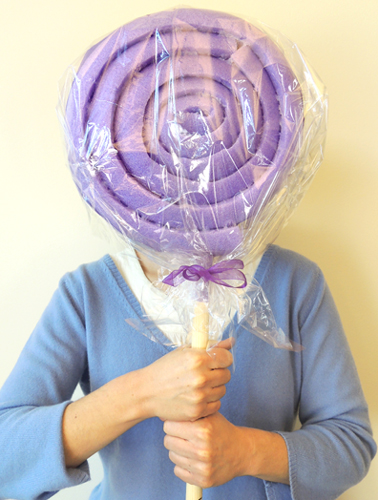
 Now that’s a large lollipop! Tomorrow, our library is hosting an original Willy Wonka escape room, designed by the same genius (i.e. Katie) who brought you our Sherlock Holmes escape room last year. And I must say, she’s outdone herself this time.
The premise is thus: there’s a job opening in Willy Wonka’s top secret Inventing Room, but in order to make the cut, teams of 6 kids will have to solve the puzzles he’s left behind. And this isn’t your ordinary lab, of course. For one thing, the candies are unusual sizes, including this humongous lollipop, which we hope will measure up to the escape room challenge (heh heh, that’s a hint!).
We’ll have a complete breakdown of the escape room puzzles and solutions for you next Friday (and here it is!). But today, here’s how we made this giant lolly!
You’ll need:
- 1 pool noodle
- 1 large wooden dowel
- Clear cellophane
- Ribbon
- Scissors and a box cutter for construction
- Hot glue
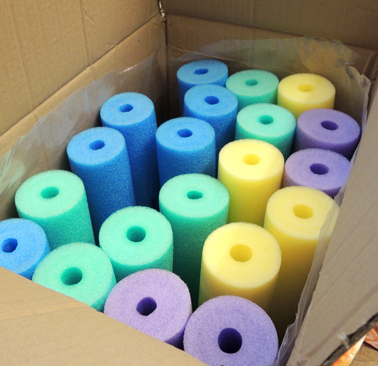
This project starts with a pool noodle, which are the long, Styrofoam tubes you can find for a couple bucks in pool toys section of Target, or even at the Dollar Store during the summer months. We bought ours bulk from Oriental Trading company, because we plan to use them for another event. Our noodles were 46″ long, with a 2.5″ diameter.
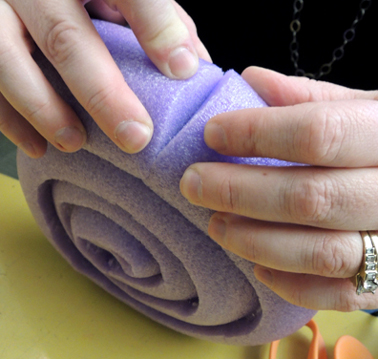
 Start by cutting a pool noodle in half. Katie used a box cutter and scissors. She found that neither tool was ideal, but the scissors worked a little better for her. Both methods, however, resulted in shredding, so definitely work over a trash can.
To create the spiral head of the lollipop, glob a bunch of hot glue on the end of a pool noodle half, then roll it inward. Keep globbing and rolling, and Katie advises LOTS of hand pressure to make sure the glue really adheres.
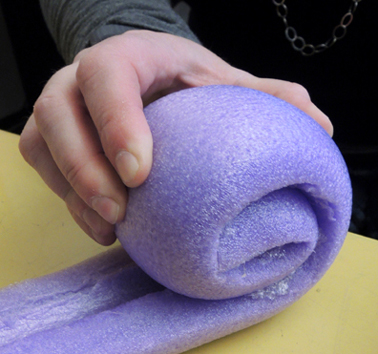 When you get to the end of the first noodle half, glue on the second half and keep rolling! Note: there will be a gap where the two halves meet, but it’s not too bad:
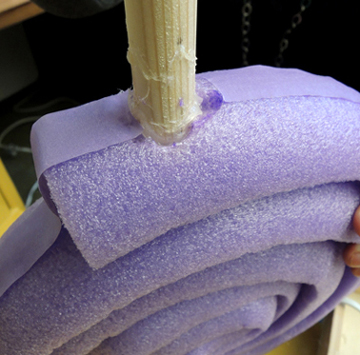
 When the lollipop head is finished, use a box cutter and scissors to create a small hole in the bottom of the spiral (about 1.5″ deep), for the lollipop’s stick. We used 36″ wooden dowel that was .75″ in diameter. I found them at Michael’s Craft store for $1.60 a piece. Insert the stick, and glob a ton of hot glue in and around the hole to secure the stick in place. Katie’s also used color masking tape to reinforce the perimeter of the lollipop spiral.
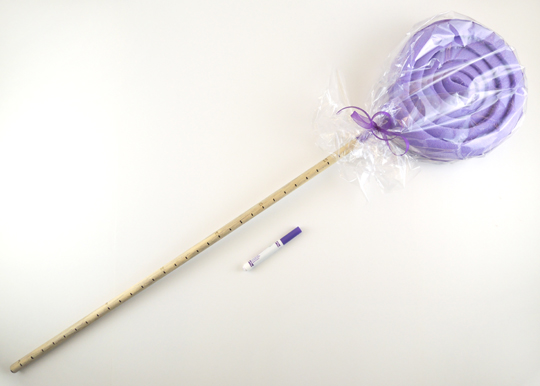
 Finally, use clear cellophane and a ribbon to wrap your lollipop head. Here’s our finished lollipop…the final length was a whopping 46″. I included a marker to show you the size ratio. Notice the measurement notches along the stick? Shhhh! It’s a clue!
 And just in case you’re wondering, yes, it is a lot of fun to run around the office wielding giant lollipops. Definitely recommend it.
 Flip the puppet back and forth to reveal a simple, dynamic story! This project was part of our library’s World Kamishibai Day
 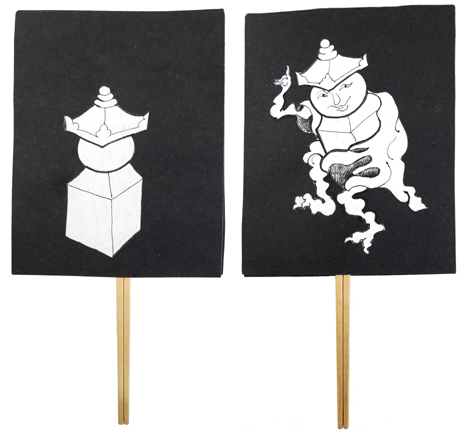 It’s way cooler to see the puppet in action though…
 A very sweet butterfly…
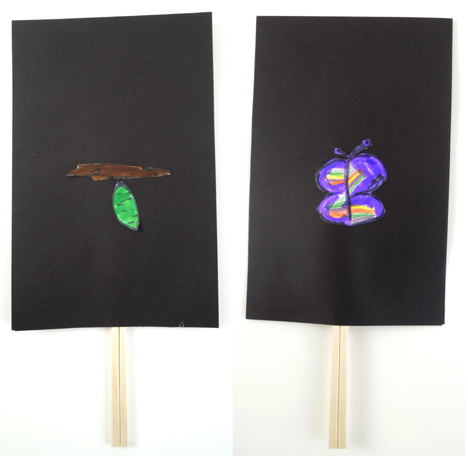 A single fish that goes “Pop!” and turns into a school of fish…
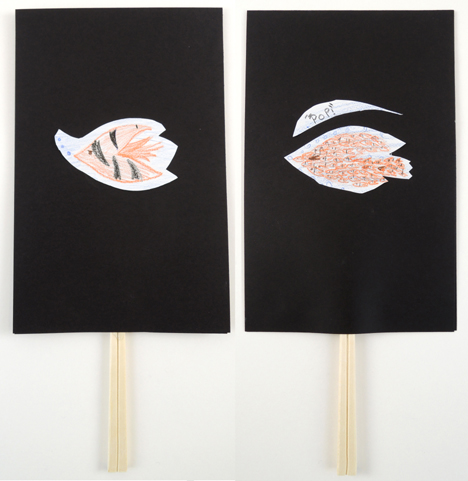 An exploding firework…
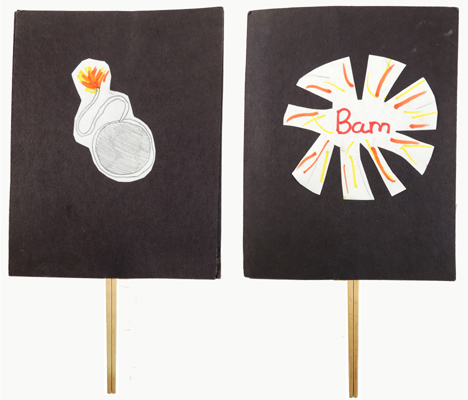 And a girl that duplicates into 5 girls!
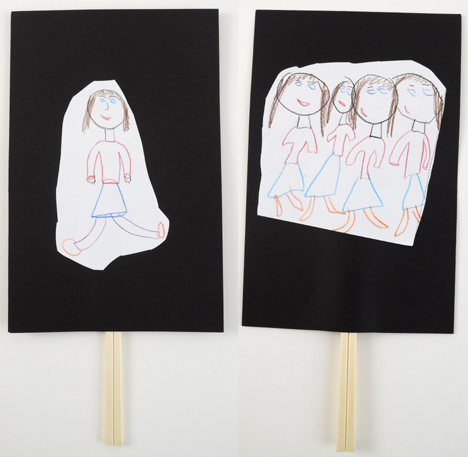 If that last one seems a little confusing, it was inspired by a kamishibai performance of Manmaru manma tantakatan (written by Fumiko Araki, and illustrated by Takuya Kusumi). It’s about a ninja boy who duplicates himself to foil a wicked serpent.
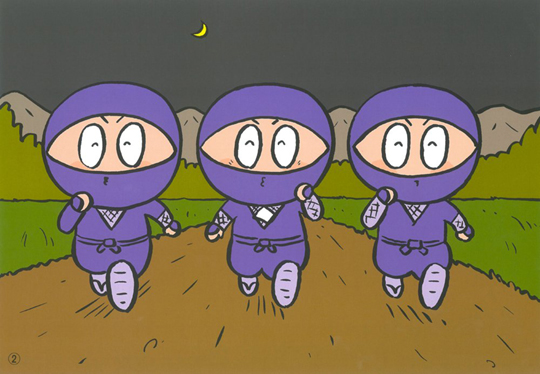
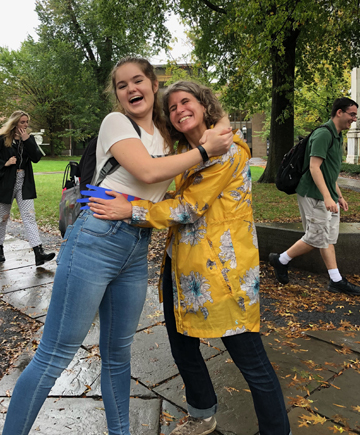
 It’s a big world out there. A world with lots of things in it. And those things need HUGS. The question is…are you up to the task? Are you a Hug Machine?
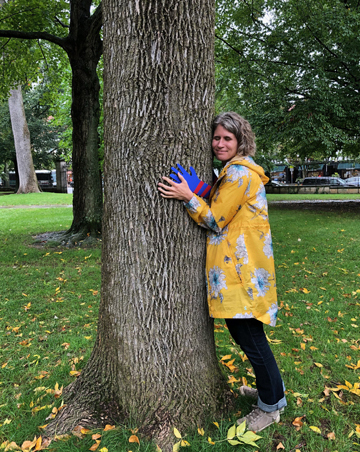
 OK, you’re ready to start hugging – and by hugging we mean go forth and find things to wrap your poster board hug around! You can just use the paper hug, or get right in there and use your arms too. Always dedicated to seeing a project through, Katie and I hit the streets on a rainy afternoon to share the love with Princeton.
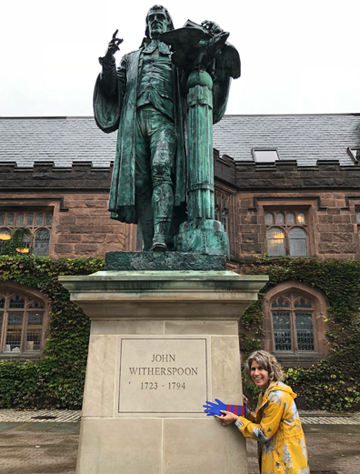
 A mailbox clearly in need of a hug.
 Hugging a roaster and barista pal at our awesome local coffee shop, Small World.
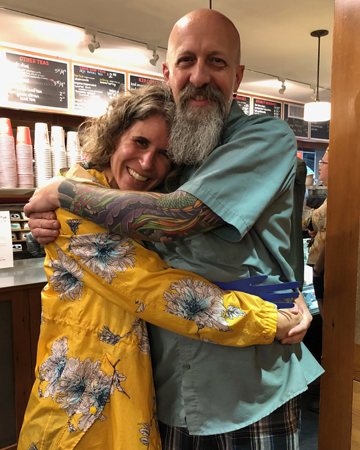 A hug for
 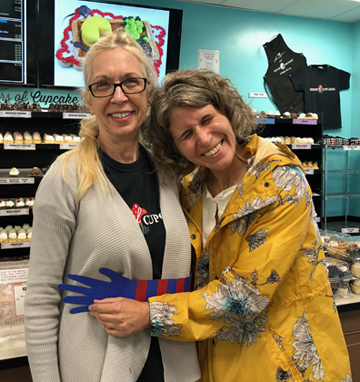 Hugging a rainbow narwhal at JaZams, our stupendous local toy store.
 No park bench escapes me…
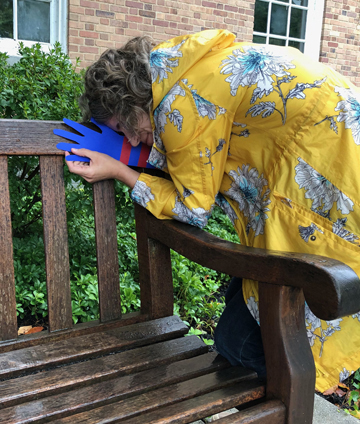 Nor jungle-like foliage…
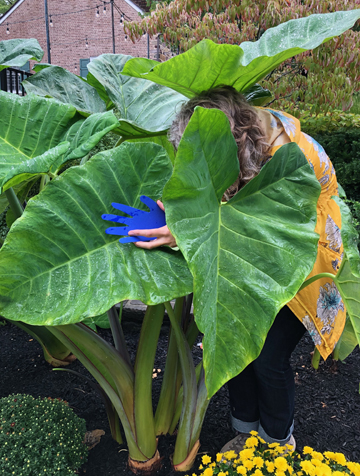
 An attempted hug of one of Princeton’s famous black squirrels…yeah, no go.
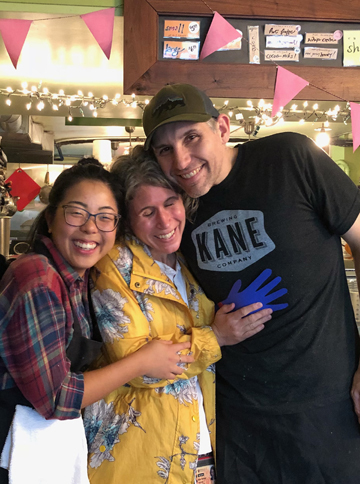
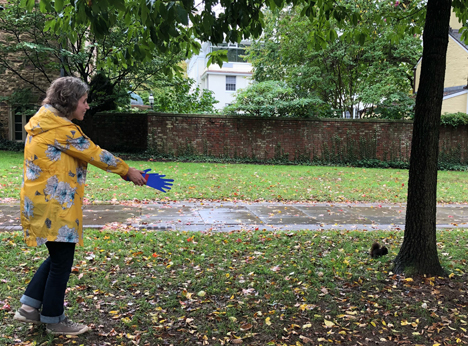 Finally, a hug from a random person who totally rocked the love. Awwwww!