 Mmmm…is there anything more enticing than a cupcake? How about four cupcakes artistically decorated with delightful toppings? Oh cupcakes, you complete me.
 We read Cupcake by Charise Maricale Harper (Disney-Hyperion, 2010). One day, a cupcake is born. Topped with a plain creamy frosting top, Vanilla Cupcake is eager to meet his brothers and sisters. There’s Happy-Face Cupcake, Chocolaty Chocolate Cupcake, Pink Princess Cupcake, Rainbow-Sprinkles Cupcake, Stripy Cupcake, Polka-Dot Cupcake, and Fancy Flower-Top Cupcake. At the end of the day, however, only Vanilla Cupcake is left on the platter, completely overlooked. A plain little candle hears Cupcake weeping and can definitely empathize – what with his large and colorful family (there’s Number Candle, Stripy Candle, Letter Candle, Super-Long Candle…). Candle decides that Cupcake just needs something special on top. It’s not pickles, pancakes, peas, or a squirrel. Hmmm…I wonder what it could be?
You’ll need:
- 1 white paper plate
- 1 6″ white paper doily (optional)
- 1 white paper cup
- A selection of patterned tape
- A 21″ piece of shimmer ribbon
- 2 toilet paper tubes
- 4 rectangles of construction paper (approximately 1.5″ x 6″)
- 4 coffee filters (the standard size, 7.5″)
- A small handful of polyester fill
- A selection of dot stickers
- A selection of iridescent fabric shapes
- A selection of mini pom-poms (mine were 0.5″)
- A selection of self-adhesive foam shapes
- A selection of fabric flowers
- A selection of eye stickers
- Scissors, tape, white glue for construction
- Markers for decorating
- Hot glue
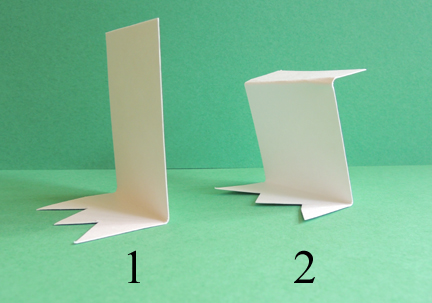
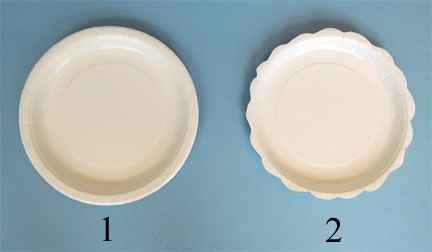
Begin with your cupcake stand! It’s very simple. Cut a scalloped edge into your paper plate like so:
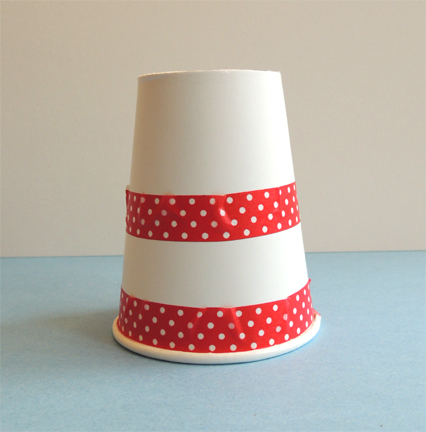
 Then, flip a white paper cup upside down and wrap pattered tape around it.
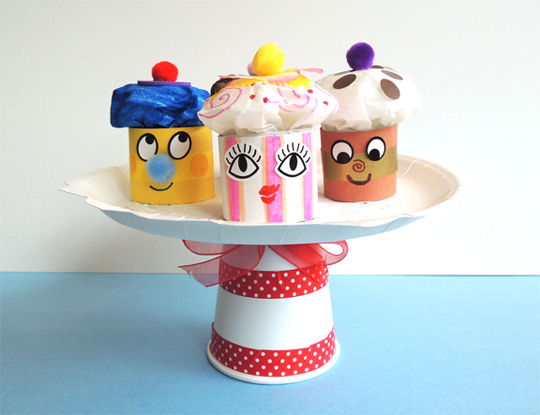
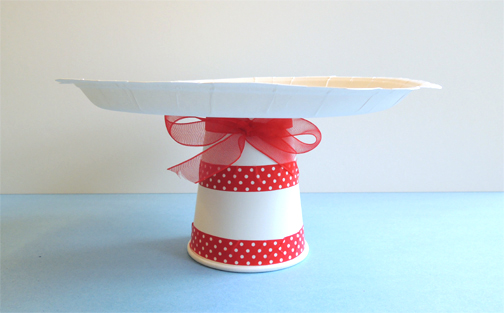
 Hot glue the paper plate to the top of the flipped cup, and tie a piece of shimmer ribbon around where the cup and plate meet. For extra fanciness, glue a white paper doily to the top of the paper plate.
 The stand is done, now for the cupcakes! Decorate 4 construction paper rectangles with markers and patterned tape. We gave kids 4 choices of “cupcake colors.” Namely, yellow, brown, white, and pink. Cut the toilet paper tubes into four, 1.5″ pieces. Wrap the decorated construction paper rectangles around the tubes.
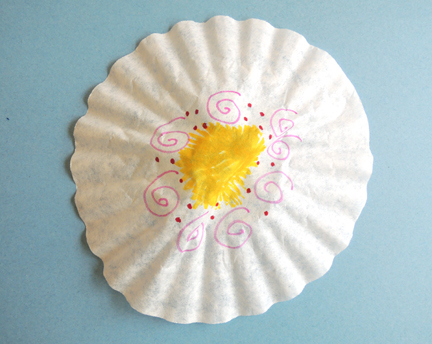
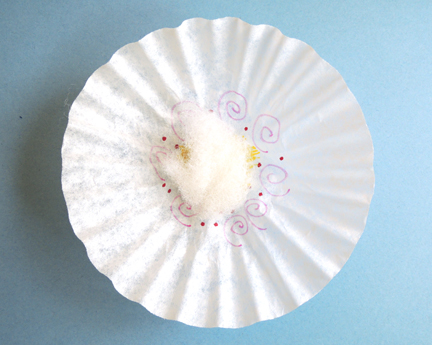
To make frosting, use the markers to decorate 4 coffee filters. You only need to decorate the center of the filter, not the entire thing.
 Flip the filter over and drop a bit of polyester fill in the center.
 Bunch the filter together around the polyester fill like a little bag. Then trim about 1″ of filter off the top.
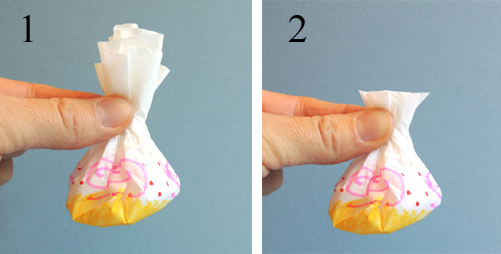 Push the gathered end of the bag into a tube and secure it to the interior of the tube with tape.
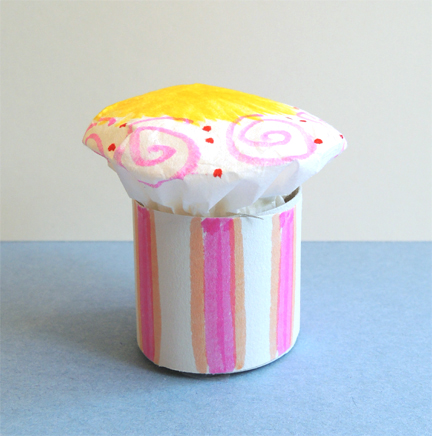
 You now have a cupcake with frosting…
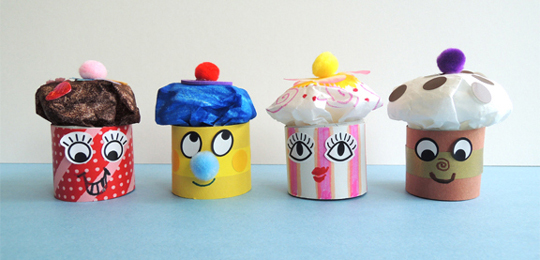
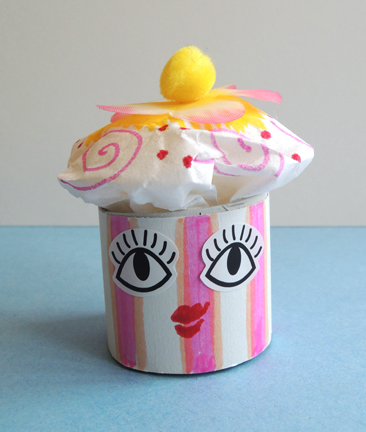
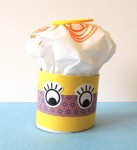
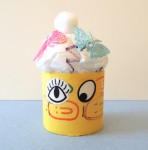
 Which you are free to decorate with markers, dot stickers, iridescent fabric shapes, mini pom-poms, self-adhesive foam shapes, and fabric flowers. The final step is to add some eye stickers.
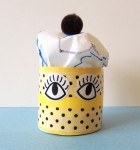
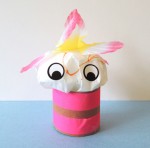
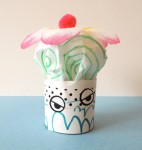
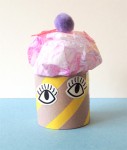
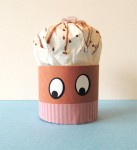
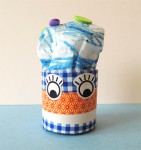
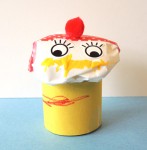
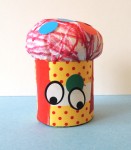
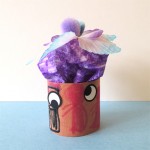
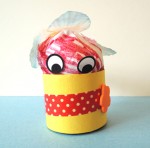
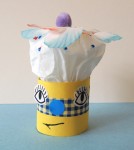
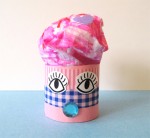
 The thing I loved best about this story time was how much personality the cupcake creations had. Here are a few I managed to capture with my camera!
-
- Dotty Cupcake
-
- Aloha Cupcake
-
- Nefarious Cupcake
-
- Side Stripes Cupcake
-
- Choclotastic Cupcake
-

- Fashionista Cupcake
-
- Country Cupcake
-
- Extrovert Cupcake
-
- Anxious Cupcake
-
- Confused Cupcake
-
- Peek-A-Boo Cupcake
-
- Curmudgeon Cupcake
-
- Surprised Cupcake
-
- Demure Cupcake
-
- Picasso Cupcake