 On your mark…get set…GO! The race is on with these fantastic pull string snails and tabletop race track. But it’s not speed that counts in this event. Sweet victory goes to the slowest snail in the race!
 We read Snail Boy by Leslie McGuirk (Candlewick, 2003). Meet Snail. He’s as big as a pony! Being big and extremely rare, Snail spends most of his days hiding from snail hunters. At night, he is plagued with nightmares about being captured. But one day he has an inspiration! If he can find just the right owner, he’ll be safe from snail hunters forever. Venturing to the park, Snail spots a boy and introduces himself. While the boy is reluctant to have a giant snail as a pet (snails are way too slow for his tastes), Snail finally convinces him by performing some excellent tricks. Plus, he has a private clubhouse on his back! The two friends ride off slowly, slowly, sloooowly together.
The boy in the story is reluctant to adopt Snail because of his lack of speed. I thought it would be fun to have super slow snail races to show that slow is just as fun as fast!
You’ll need:
- 1 large rectangle of tagboard for snail body (approximately 2″ x 11.5″)
- Hole punch
- A 68″ piece of yarn
- 2 small rectangles of tagboard for eye stalks (approximately 0.5″ x 2.25″)
- 2 squares of white poster board (approximately 5.5″ x 5.5″ each)
- 1 small box (mine was 4″ x 4″ x 4″)
- A Bling Bin
- 1 wooden dowel
- Construction paper (we offered orange, green, yellow, red, and purple)
- A selection of color masking tape
- A 28″ piece of ribbon
- A 2″ gold embossed foil seal (or use metallic paper)
- Scissors and tape for construction
- Markers for decorating
- Hot glue
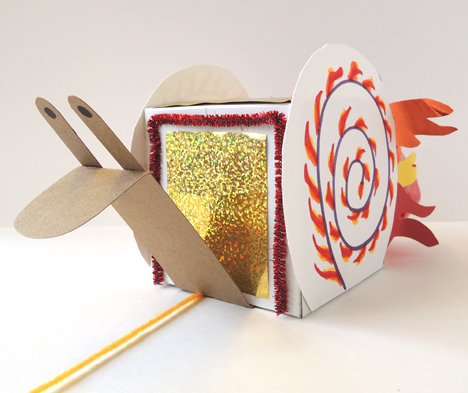
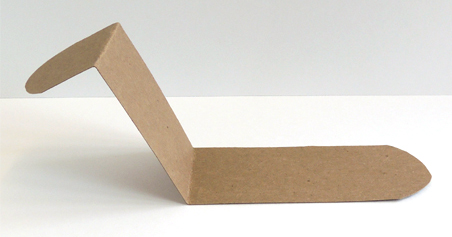
We’ll start with your snail! Round both ends of a large rectangle of tagboard. Fold the rounded rectangle twice – once to create your snail’s head, and twice to create your snail’s neck. Your snail’s body should now look like this:
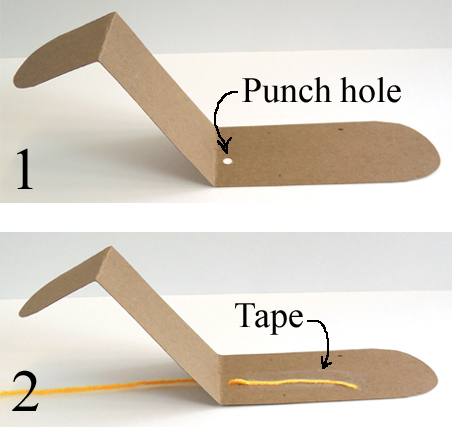
 Punch a hole in the snail’s body, right at the base of the neck. Thread one end of a 68″ piece of yarn through the hole, and tape it tightly to the snail’s body.
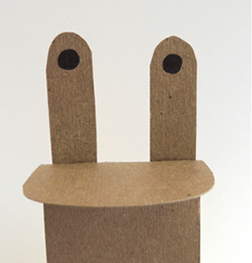
 Round the ends of 2 small rectangles of tagboard and tape (or glue, or hot glue) them to the back of your snails head. Use markers to draw a pair of eyes on the ends of the stalks.
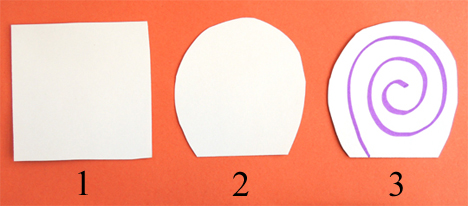
 Now for the shell! Round three sides of a white poster board square. Use a marker to draw a spiral on the shell. Repeat with the other white poster board square.
 Hot glue a box to the top of your snail’s body, and then hot glue both pieces of shell to the sides of the box. The flat part of the shell pieces should align with the bottom of the box. Don’t let it extend beyond the bottom of the box, or your snail will have trouble sliding later.
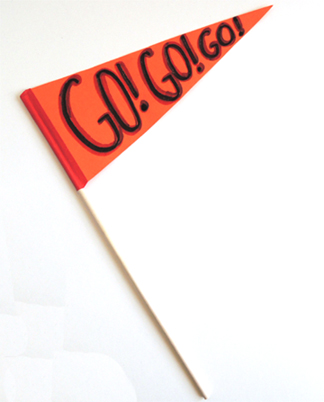
 Finally, use markers and the Bling Bin to decorate your snail’s shell! We also whipped up a flag for demonstrating your team spirit. It a 9″ triangle of construction paper taped to a wooden dowel with color masking tape. Decorate the flag with markers if you like.
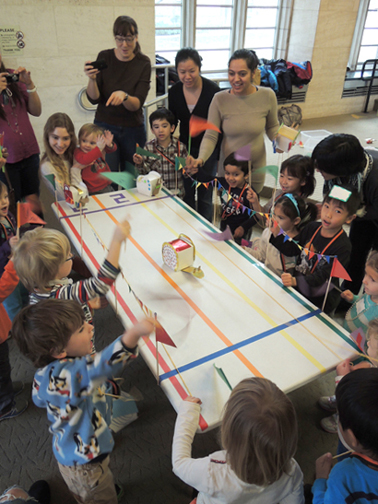
 Now for the race track! We created our track on a 6′ plastic-topped table (the same type of table we used to make these sled runs actually).
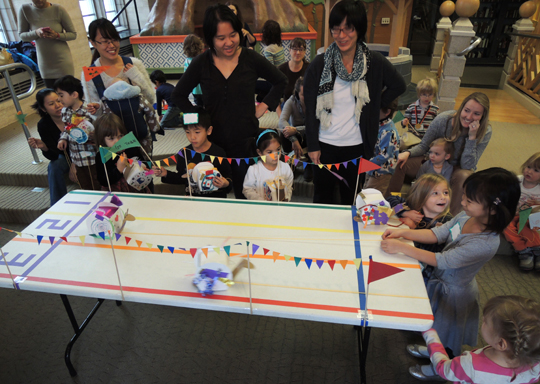 First, I used color masking tape to create 3 racing lanes, a starting line, and a finish line. I also used the tape to number the lanes (you can see the numbers in purple all the way to the left on the picture). I attached 8 wooden dowels to the sides of the table using packing tape, and then I strung the dowels with kite string. Katie and I used color masking tape to make flags along the kite string (just double a 2″ piece of tape over the string, then snip the tape with scissors to make it triangular). We finished by attaching construction paper flags to the dowels by the start and finish lines.
Ready to race? Have the kids place their snails behind the starting line in lane 1, 2, or 3. Then have them walk down the table to the finish line and stand in their snail’s lane. Leaving the snails at the starting line, deliver the long pull strings to the waiting hands of the snail jockeys. A quick tweet of a starting whistle, and they’re off! The slowest snail wins!
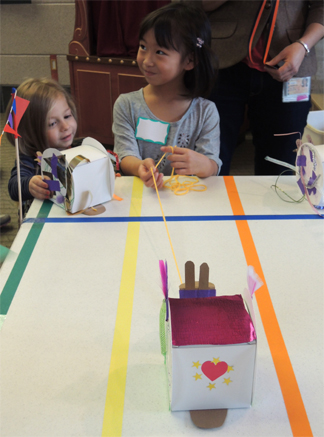 The hilarious thing about this activity is that it’s nearly impossible for kids to go slow in a race. Especially when people are waving flags and yelling in excitement. Most of the snails burned down the track in seconds. But some snails were Olympians of slowness. You can see one of the record breakers in the photo above, finally approaching the finish line.
The prize was a gold medal on a ribbon. We mounted a 2″ gold foil seal on a circle of poster board, then taped a 28″ piece of ribbon to the back. Everyone received a gold medal for finishing, regardless of how their snails placed in the race!

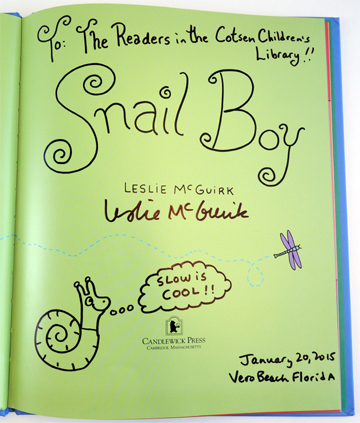
Postscript: Wow! Leslie McGuirk sent us a signed copy of her book! Thanks so much Leslie. I absolutely love the snail…