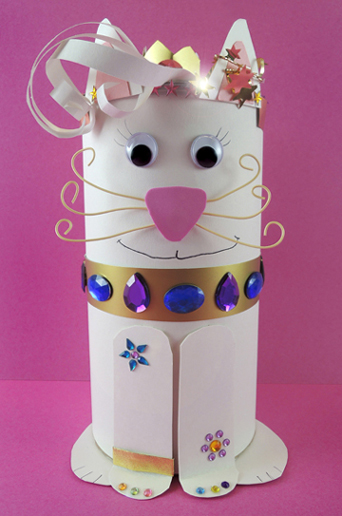
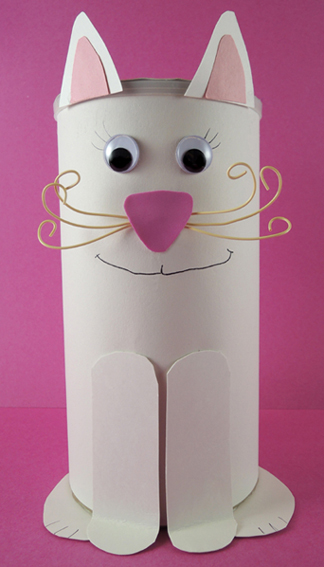
Bring on the bling! This glamorous feline is festooned with rhinestones, bangles, and brilliant bobbles. But that’s not all. She also has her own designer blanket, jewel-encrusted water dish, and solid gold mouse toy. Meow, indeed.
We read Glamourpuss, written by Sarah Weeks, and illustrated by David Small (Scholastic, 2015). Glamourpuss lives with Mr. and Mrs. Highhorsen. She has everything a cat could want – a diamond collar, attentive servants, a lavish private room, and total adulation from her owners. Then Mr. Highhorsen’s sister Eugenia visits with her pet chihuahua, Bluebelle. In addition to having a stunning array of outfits, Bluebelle can do tricks. Glamourpuss soon finds herself upstaged, and vows revenge. However, whilst stalking Bluebelle, Glamourpuss discovers that Bluebelle hates her outfits and tricks – she really dreams of simple elegance. Well. Glamourpuss can certainly help Bluebelle with that! They become close, and very glamorous, friends.
You’ll need:
- 1 large oatmeal container
- White construction paper
- White poster board
- A strip of gold poster board (approximately 1.5″ x 17″)
- 3 pieces of twisteez wire (approximately 7″ each)
- A small, rounded triangle of self-adhesive foam (approximately 1.25″ tall)
- A pair of wiggle eyes
- Cat jewelry & accessories (more on these later!)
- Scissors and tape for construction
- Markers for decorating
- Hot glue
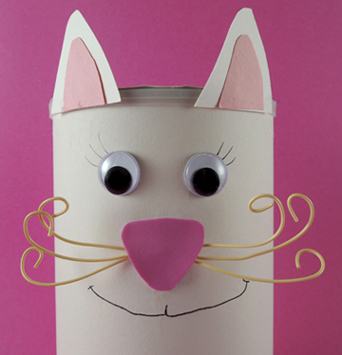
Wrap the oatmeal container with white construction paper. Use extra paper to make the ears. Attach wiggle eyes with hot glue, then use a marker to add a smile (and maybe some eyelashes!). To make the nose and whiskers, curl the ends of 3 pieces of Twisteez wire, then bunch them in the middle and tape them to the container.
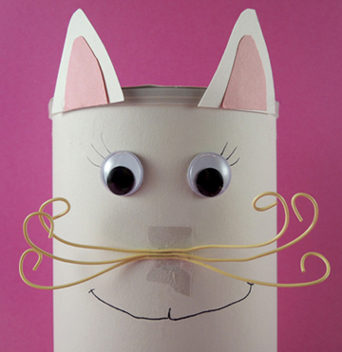 Peel and stick a triangle of self-adhesive foam over the tape.
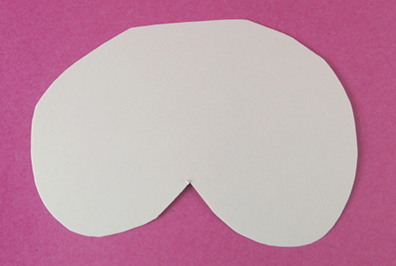
 To make the cat’s hind legs, cut a 4.25″ x 6.25″ rectangle of white poster board into the shape you see below. Hot glue it to the bottom of the oatmeal container.
 The front legs are two, 1.75″ x 4.5″ rectangles of white poster board. Round the rectangles at both ends, then fold one end to create cat paws. Hot glue or tape the legs to the front of the container. And don’t forget to add a tail!
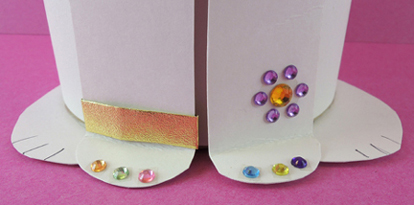
 Now to fancy things up! We crafted paper bangs, a little gold poster board crown, and a gold poster board collar embellished with large gemstones. We also offered small gemstones, gold embossed foil paper, and gold star stickers. The final touch were self-adhesive rhinestone stickers Katie found in a discount bin after Easter
In a stroke of crafting genius, Katie cut one of the rhinestone flowers into little bits and gave the cat a fancy feline pedicure.
 Your cat is finished, now for the accessories! The blanket is a 7″ x 11.5″ piece of fleece trimmed with gold tape. The water dish is a be-jeweled gold paper cup (cut down to 1.75″), with 2 blue cotton balls.
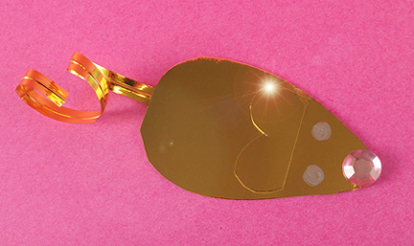
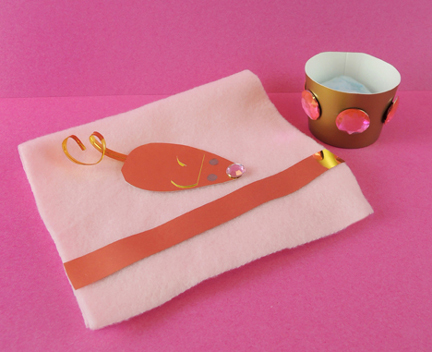 The gold mouse toy is a 2.25″ x 3.25″ rectangle of gold mirror board trimmed into a mouse shape. We added ears, a gold craft tie tail, a diamond nose, and finished with a pair of eyes drawn on with silver metallic Sharpie. Absolutely fah-bu-lous dahling!
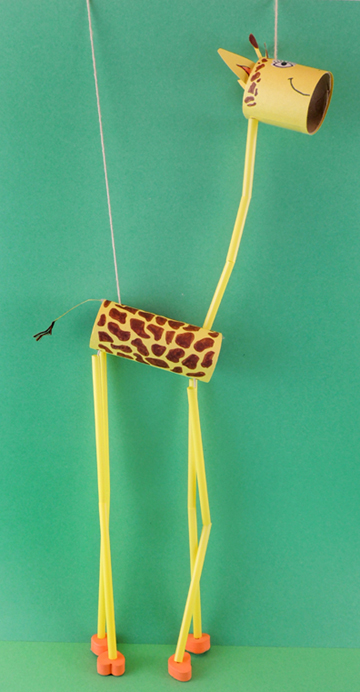 The giraffe has a toilet paper tube body, and a 2″ long toilet paper tube head. Both of the tubes are wrapped with yellow construction paper. We used extra yellow construction paper to create the ears, antlers, and tail. Then we used markers to add the giraffe’s spots, mouth, and nostrils. We used
  The second hole is positioned underneath the first, on the opposite side of the tube.
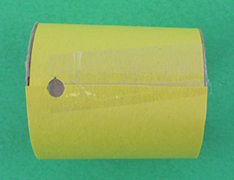 If my description seems a little confusing, this next image should clear things up. Here’s the finished marionette head with the string running through the 2 holes you punched in the head tube.
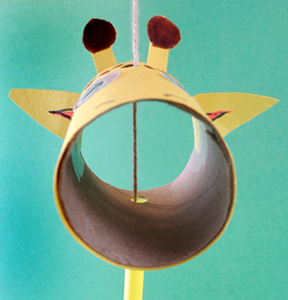 Next, punch a hole at each end of the top of the body tube:
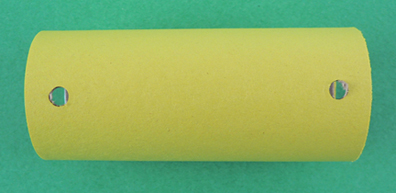 Then turn the tube over and punch 4 holes in the bottom. As you have probably guessed, these 4 holes are where the marionette’s legs attach in the next step.
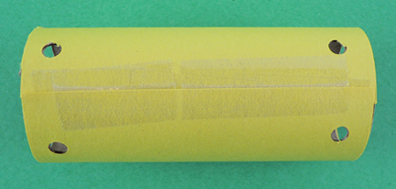 To make the giraffe’s legs, thread a piece of string through a foam bead. Secure the string to the bottom of the foam bead with tape. Cut a drinking straw in half, then slide the 2 pieces down the string towards the foam bead. Thread the loose end of the string into the leg hole you punched in the body tube. Secure the string inside the tube with tape. Repeat these steps with the 3 remaining legs.
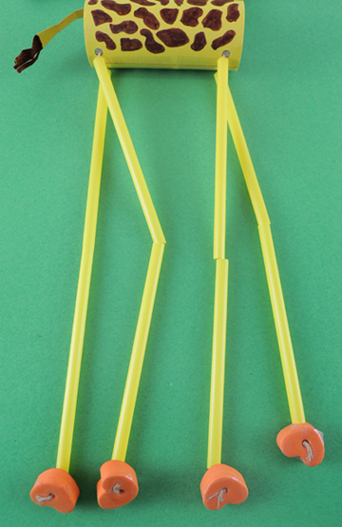 The lower part of the your puppet is done, now for the upper part! The puppet is attached to its drinking straw control stick by two strings. The first string runs from the control stick to the giraffe’s rear end, where it is secured inside the tube with tape. The second string runs through the head, the neck, and then attaches to the body tube with tape. The neck is a drinking straw cut into 3 pieces. We used black masking tape to secure the string to the control stick too.
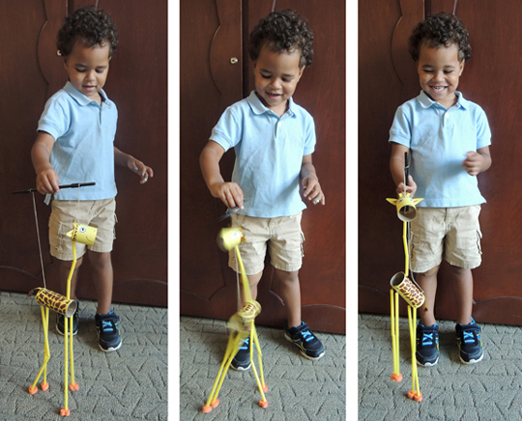
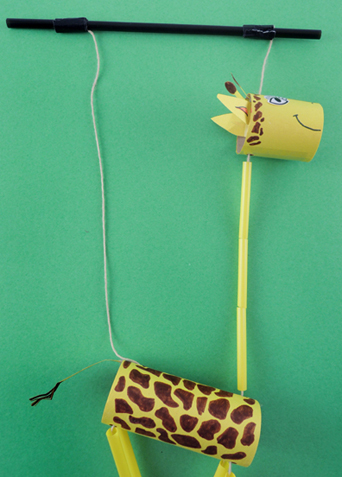 Your marionette is done! We put on some tunes and invited kids to dance their giraffe friends. This resulted in some bouncy, twisty, bendy, jumpy dance moves, as well as a few bars of an original song we’re calling “Dancing, Dancing, Dance-a-lee-Dance!”
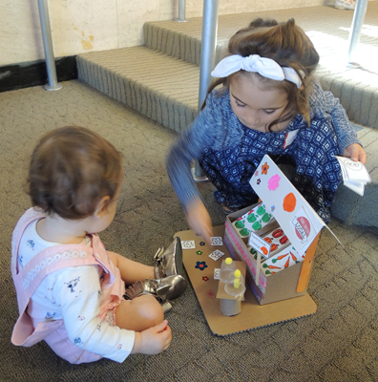
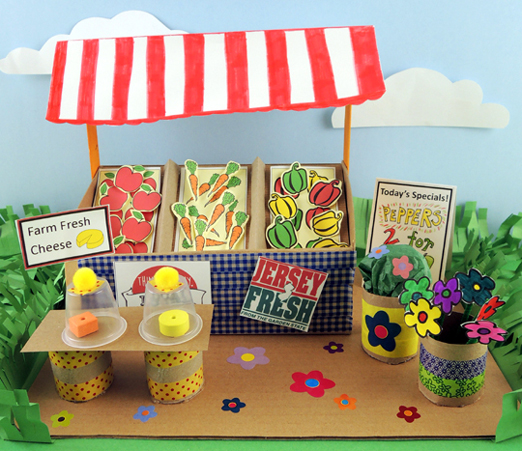 Stock up your stand and get ready for some customers! We let grown-ups and siblings browse at a farmer’s market full bursting with fresh veggies, flowers, and artisanal cheeses (which, coincidentally, look a lot like
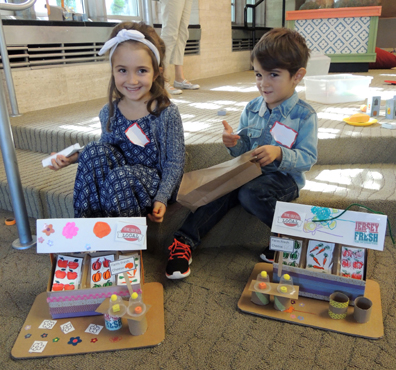
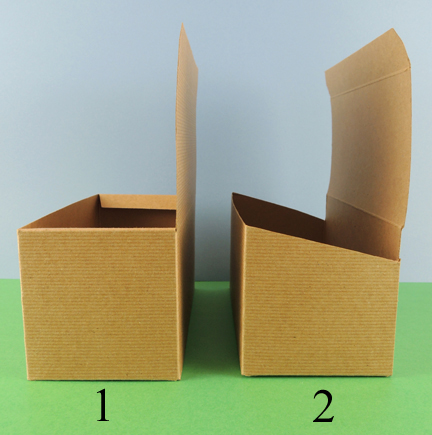 Now make 2 folds. Fold the lid over the lower edge of the counter. Then fold the lid upwards (a.k.a. a valley fold) so it rests on the higher end of the counter. Your counter will now look like this:
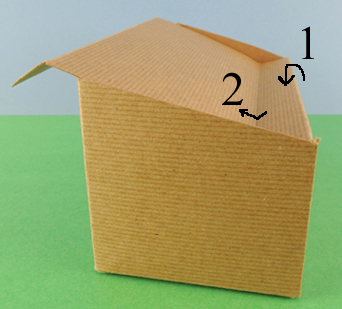 See the part of the lid that extends past the counter? Push that back down towards the lower end of the counter, then tuck it inside the higher end of the counter. You now have slanted bins that are sunken in the counter.
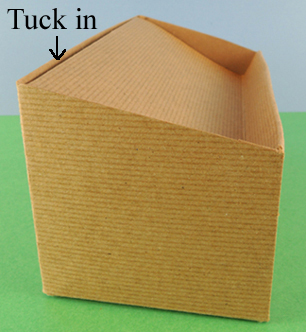 Make a pair of folded tagboard bin dividers, but don’t attach them just yet!
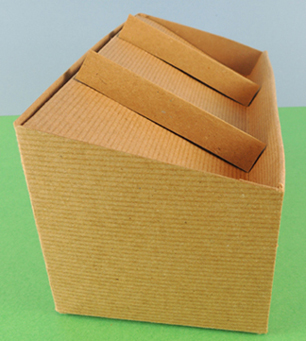
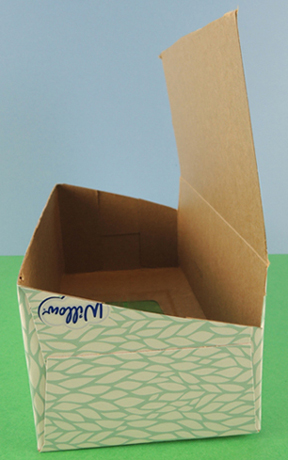 Fold the lid over the lower edge, then upwards to the higher edge. But instead of tucking the end of the lid into the box, just tape it to the higher edge.
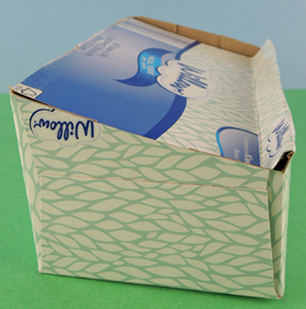 Finish with a pair of tagboard bin dividers.
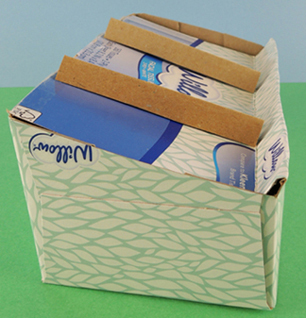 Use markers and patterned tape to decorate the counter, then hot glue it to the cardboard base. Now for the awning! Hot glue (or tape) 2 jumbo craft sticks to both ends of the counter. Fold a 4.5″ x 10.5″ piece of card stock in half and decorate it with markers. Put generous globs of hot glue on the ends of the jumbo sticks, then gently press the card stock awning in place.
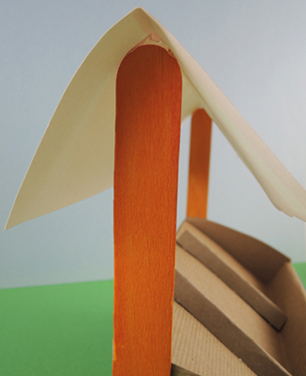 Color and cut the produce bin backdrops from the
 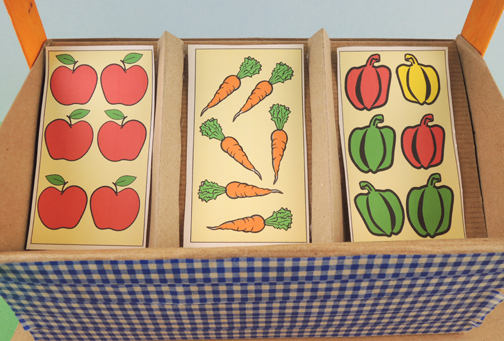 You’ll notice that there are 2 sets of produce bins on the template. One set is for the background. The other set is for you to individually cut, drop in the bins, and sell at market!
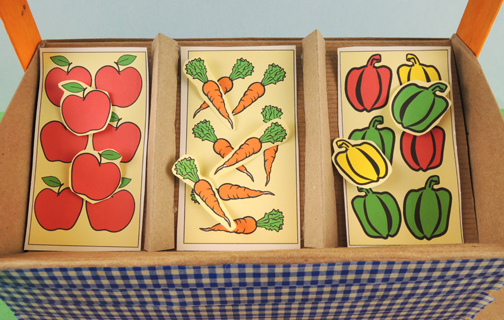 To create the cheese table, cut a toilet paper tube in half and hot glue the halves to a piece of poster board or tagboard. Place a pair of foam bead “cheeses” on the table, then cover them with a clear plastic cup. Hot glue a mini pom-pom handle to the top of each cup, and finish with a
 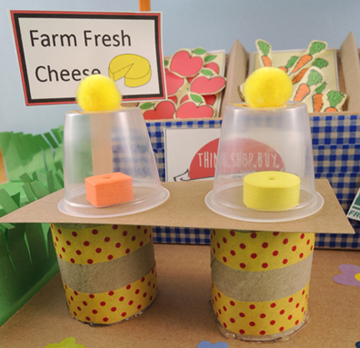 To make the flowers, cut 2 pipe cleaners into thirds, then color and cut 6 flowers from the
 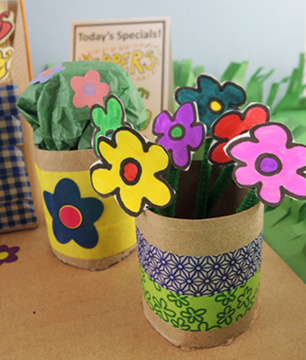 A few more touches. Behind the flowers you’ll see a “Today’s Specials” sandwich board (it’s on the farm stand template). On the front of the stand are “Shop Local” and “Jersey Fresh” signs, courtesy of Google images. Add some cute little flower stickers, and you’re done!
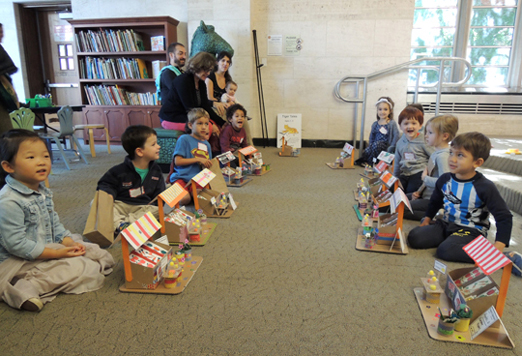 We gave grown-ups and little siblings
 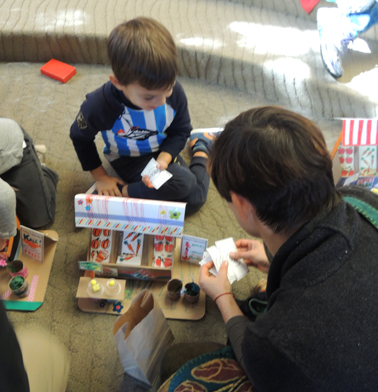 Customers seemed particularly enamored with the foam cheeses. And really, who wouldn’t be? Just keep an eye out to make sure the littlest shoppers don’t enthusiastically sample the wares!