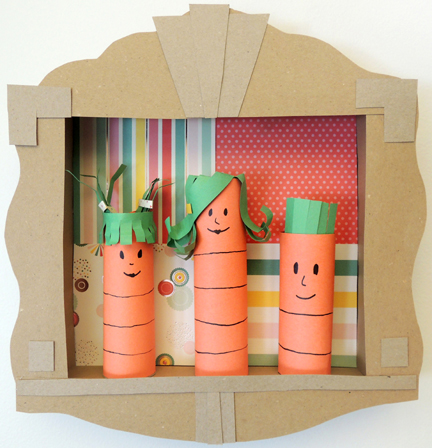
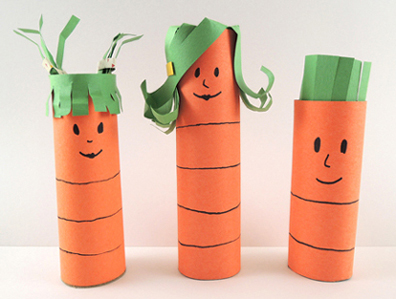
 This handsomely framed three-dimensional portrait is a must for any home. And if you want to portray your sweet little family as carrots, well why not?
We read All Kinds of Families! written by Mary Ann Hoberman, and illustrated by Marc Boutavant (Little, Brown, 2009). This beautifully illustrated picture book describes, through charming rhymes, the various kinds of families in the world. Not just mothers, fathers, brother and sisters either – forks, spoons, numbers, animals, plants, clouds…all kinds of families!
You’ll need:
- 1 cardboard box
- Paper towel tubes and/or toilet paper tubes
- Brown poster board
- A selection of construction paper
- 1 pipe cleaner
- Scissors, glue, and tape for construction
- Markers for decorating
- Hot glue (optional)
There are 2 parts to this project – the family, and the frame. The family is basically toilet paper tubes and/or paper towel tubes decorated with construction paper and markers. The important thing is to measure the tubes inside the frame box before you start decorating them. Otherwise, your family might not fit inside the final frame!
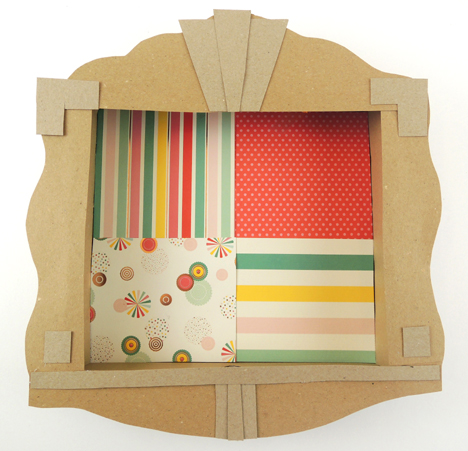
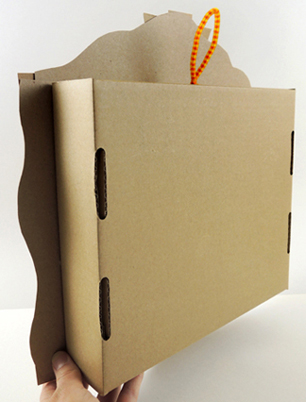
 The frame is a box cut down to 2″ deep. We decorated the back of our frame with patterned paper (but you can also have kids draw the background on with markers). Next, we offered different brown poster board shapes to glue around the edges of the box:
 To hang the frame, twist a pipe cleaner into a loop, then attach it to the top of the box with tape. Want to make it extra secure? Cut a slit in the top of the box, thread the pipe cleaner ends through the slit, then tape them to the interior top of the frame. Here’s a shot of our frame from the back, hanging loop in place:
 Hang your frame in your favorite room of the house, place your little family inside it, and feel the love!
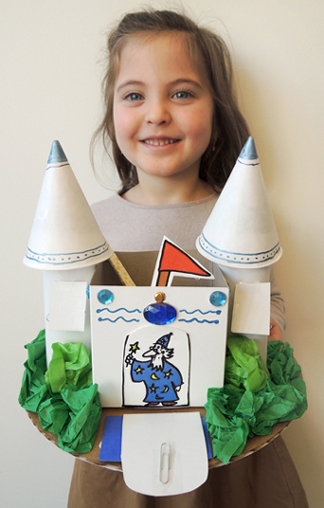
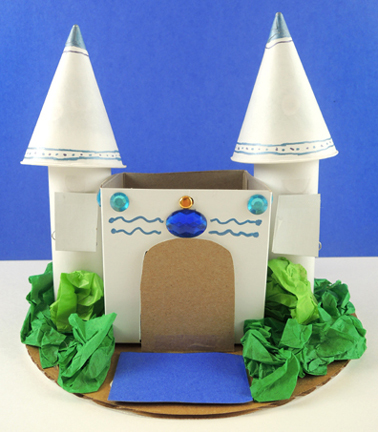
 Next, tape paperclips to various castle elements. Here’s what we did, using our castle
 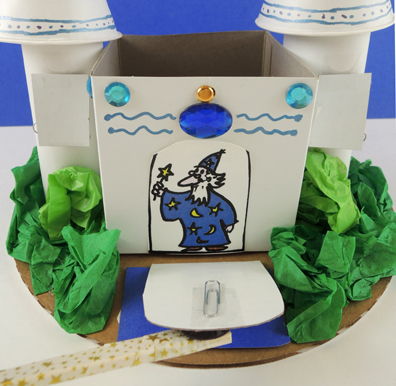 The moat rises to reveal a water dragon:
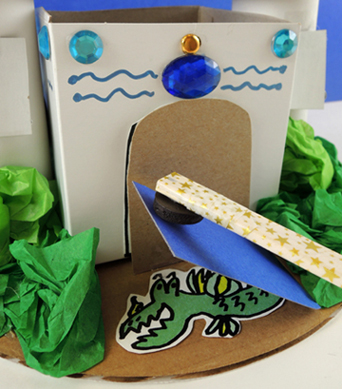 The castle towers each have a window that hinges upward to reveal something inside. Below you see a cat…the other window has a friendly flower in a pot:
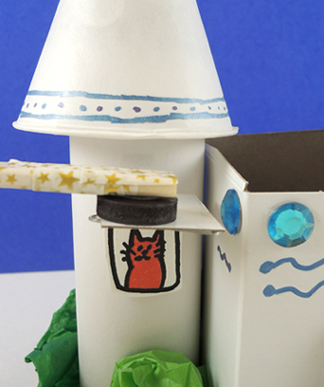 Above the drawbridge, you can also raise a flag! Use a hole punch to create a hole in the pole of the template flag, and in the wall of the castle. Thread a brass tack through the holes, tape a paperclip to the back of the flag, and fly it high!
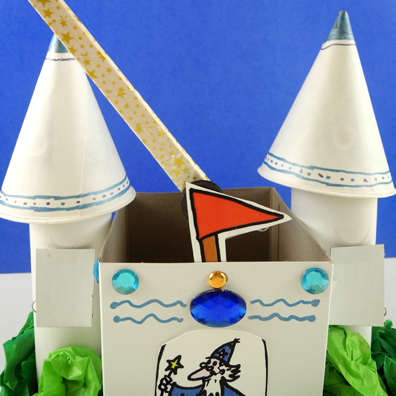 Around the back of the castle is an (optional) fountain. We wrapped a packing
 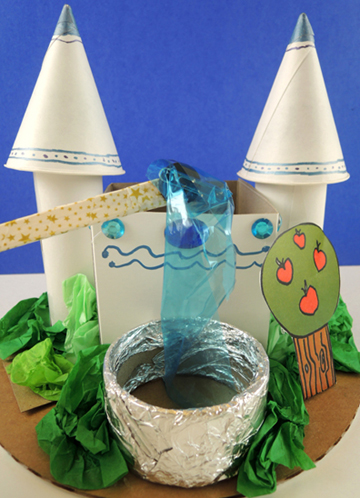 In the garden next to the fountain was a buried treasure trap door:
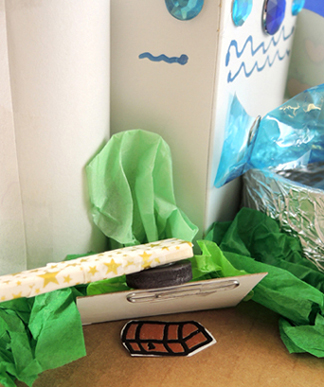 And on the other side of the fountain is an apple tree with flying bird. We tethered the bird to the tree with
 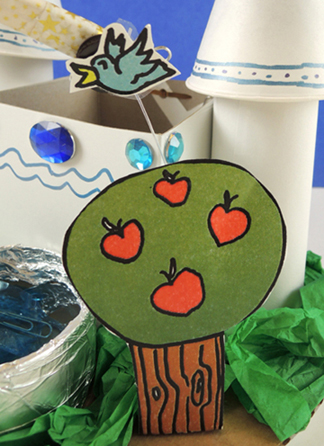 At this point, you might be wondering…where is the UNICORN? The book is all about an adventure with a unicorn! Well fear not. We scored these awesome unicorn Valentines by Peaceable Kingdom (a set of 28 cards cost $13-15). Each card comes with a little rainbow charm:
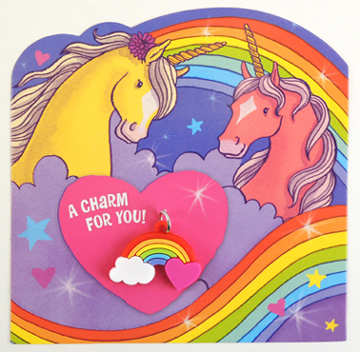 When kids were finished with their castles, DR. MAGICAL PURPLE UNICORN bestowed cards and rainbow charms!
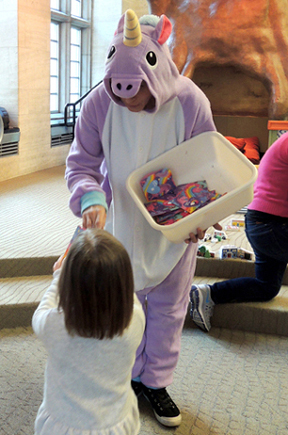 And yes, that unicorn onesie does feel just as comfortable as it looks.
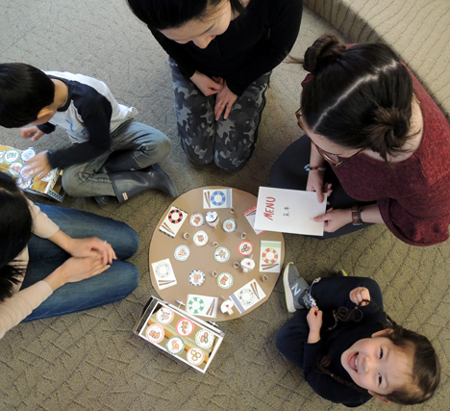 Hungry? We invite you to peruse the contents of this adorable dim sum cart. In addition to being stocked with deliciously delectable dishes, the cart is a bilingual matching game with an additional story time social twist!
 We read Dim Sum for Everyone! by Grace Lin (Alfred A. Knopf, 2001). Follow a family as they sample the many little dishes served at a dim sum restaurant. Pork buns, fried shrimp, egg tarts…the carts have something for everyone! The book concludes with an excellent essay about dim sum – it’s history, traditions, and social aspects. Fantastic book!
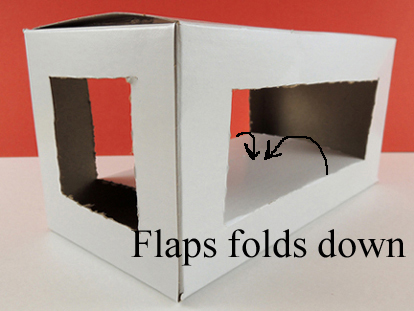 Add a wheel assembly to the bottom of the box (you’ll find instructions and alternative wheel suggestions
 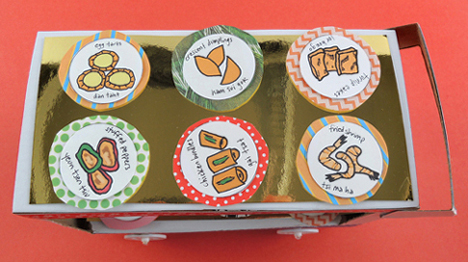 Would you also like to serve tea? The tea cups are leftover bits of card stock circled into miniature cylinders. To make the teapot, circle and tape the rectangular part of the
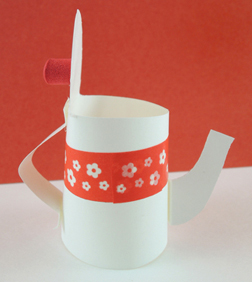
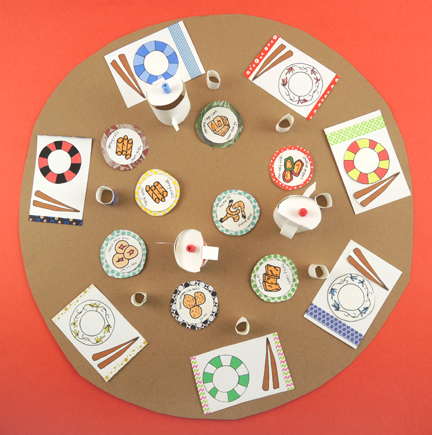 The book mentions how social dim sum dining is, so we made a couple tables (i.e. brown poster board circles) and asked the story time grown ups to sit around them. Kids traveled to ALL the tables, playing the matching game with everyone’s grown up! If you decided to add this social aspect to your story time, just make sure the kids write their names on the backs of each of their dishes so they can be returned to the proper cart.
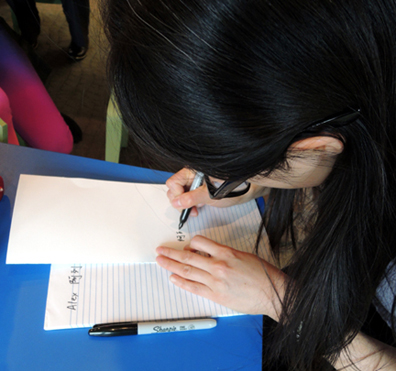
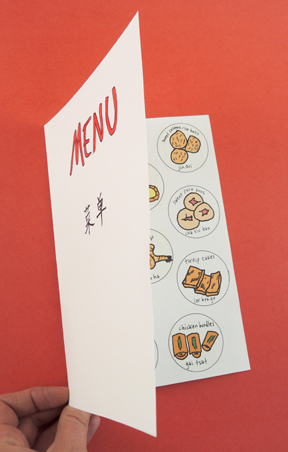
 The final touch on this awesome project? Our colleague, Dr. Minjie Chen, stopped by to write the kids’ names on their menus in Chinese characters. The absolutely loved it. Thanks Minjie!