
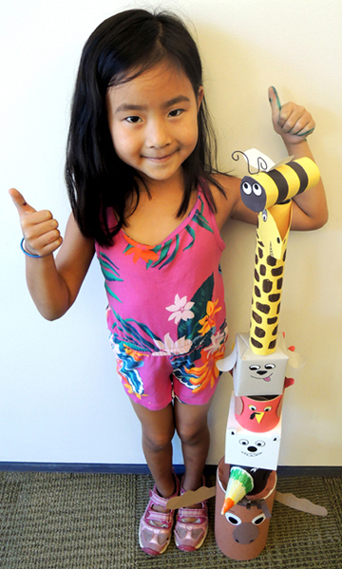
Balance the animals in a teetering, tottering tower…but will your stack stick the landing?
We read Chicken Cheeks, written by Michael Ian Black, and illustrated by Kevin Hawkes (Simon & Schuster, 2009). When a bear spots a honey-laden hive at the top of a very tall tree, he enlists a number of friends to attempt the reach it. The funny thing about this book, however, is that the narrative is driven by the…ah, alliterative body part each animal must balance on to stack upwards. Hence, “Chicken cheeks.” We’ll leave the rest to your imagination.
You’ll need:
- An assortment of oatmeal containers, small boxes, and tubes
- A selection of construction paper
- A selection of eye stickers (optional)
- Scissors and tape for construction
- Markers for decorating
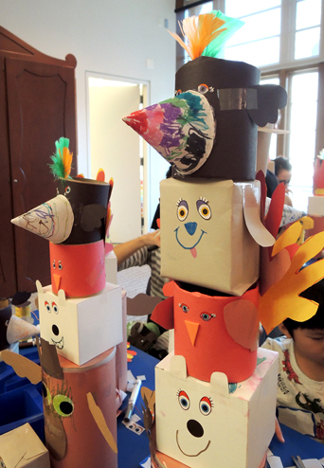
This project consists of a set of critters constructed out of tubes, boxes, and construction paper. We used eye stickers, but you can draw eyes on with markers as well. Any combination of animals will do, but here’s our story time stack:
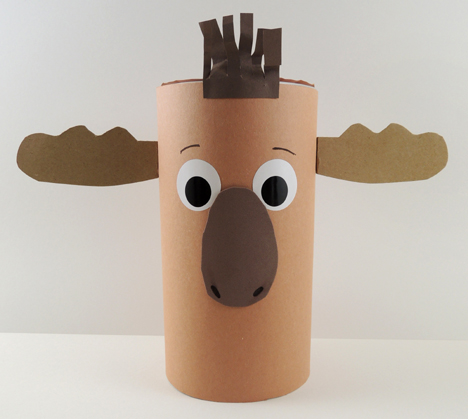
MOOSE
The moose was the biggest and heaviest, and thus at the bottom of the stacking tower. This was a large oatmeal container wrapped in construction paper.
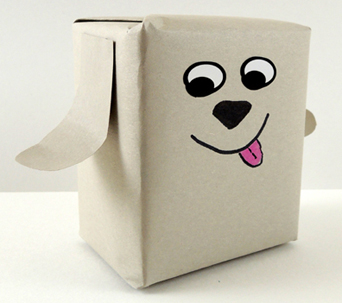
DOG
This was a small box wrapped with paper. We went with a grey dog since there was already a lot of red and brown in the stack.
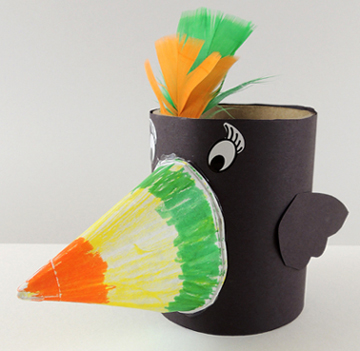
TOUCAN
Our toucan was a round packing tape core, though a small box can easily be substituted. We used a cone water cup for the beak, but a cylinder of construction paper works as well. Feather crest optional!
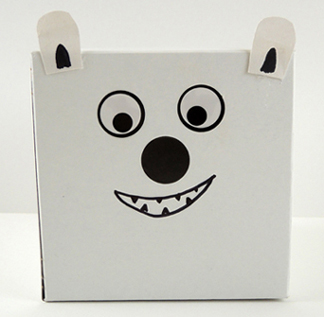
POLAR BEAR
We decided to go easy with this one…the polar bear is a white craft box with a face. Done!
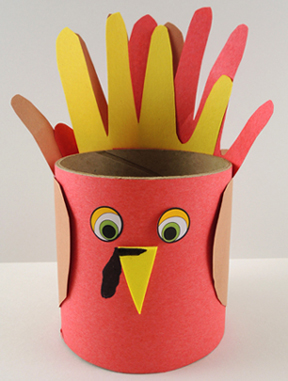
TURKEY
Everyone’s surprise favorite was the turkey! It has a tape core body, but the tail is kids’ hands repeatedly traced onto construction paper. In other words, the classic kiddie turkey drawing, rendered in 3-D!
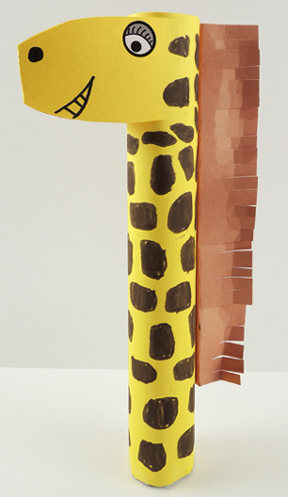
GIRAFFE
This is the same paper towel tube giraffe we created at our Don’t Rock the Boat story time. And if you want to add a tiger, turtle, parrot, ladybug, monkey, skunk, or elephant to your stack, you’ll find that post as well!
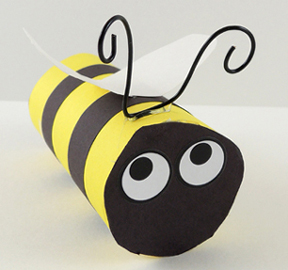
BEE
By the time we got to the bee we were almost out of time. So I handed these to the kids almost fully constructed. They just had to add the pre-cut construction paper stripes (or draw them on with marker), choose a twisteez wire antennae, and stick the eyes on.
Yes, this project was a lot of critter-building, but it was well worth the work. Especially when the artistic towers started growing taller and taller. Just look at this awesomeness!
 Our nunchucks are surplus foam book spine protectors
 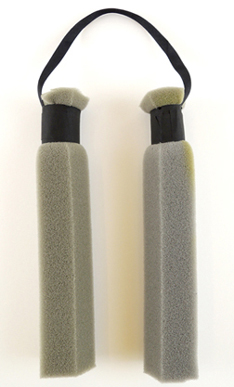 The throwing stars are of the classic origami variety (instructions
 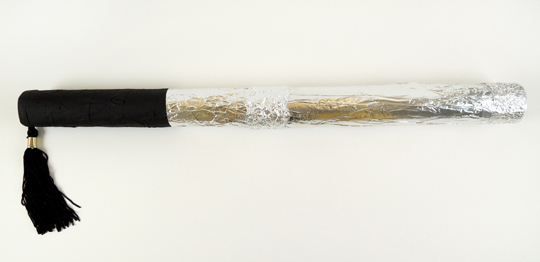 Once our ninja kids were ready, we gathered at the start of the obstacle course. First, ninjas walked the red masking tape tightrope to build balance skills:
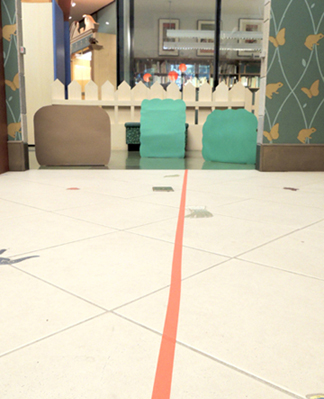 Next, they entered the forest to demonstrate their hiding abilities. Can you spot the ninja in this photo?
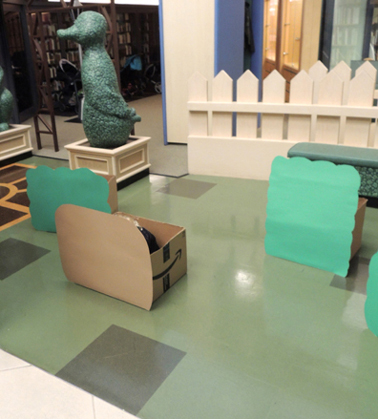 Then the ninja stealthily moved along a dark corridor and crawled through a tunnel…
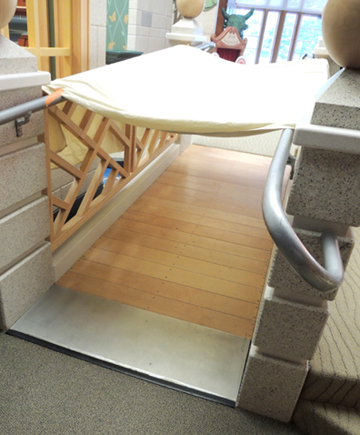 Finally emerging at our throwing star range, where they took aim at targets:
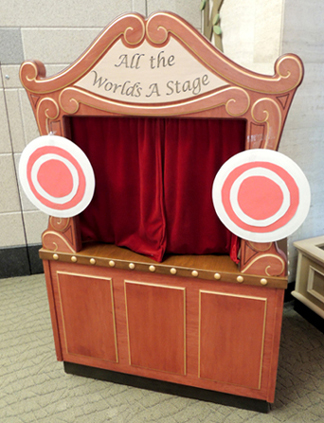 When the obstacle course was complete, the ninja headed over to the Shadow Blade stone, where they drew their swords under the proud eye of Sensei Katie!
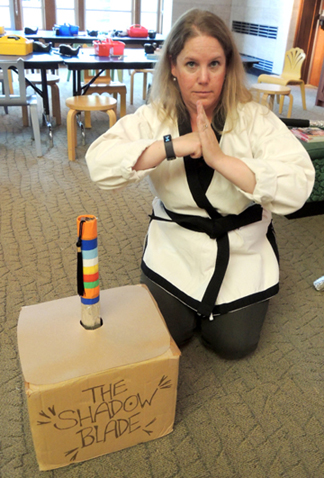 Fun fact: Katie has a black belt in Tae Kwon Do.
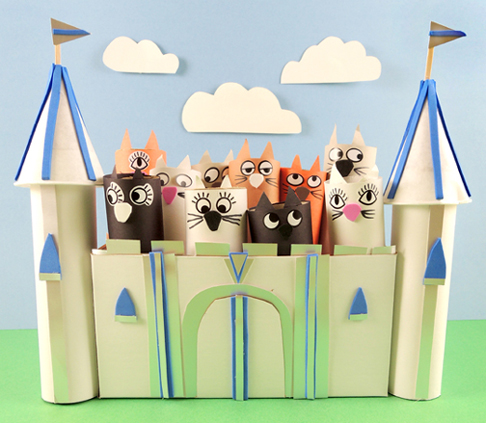
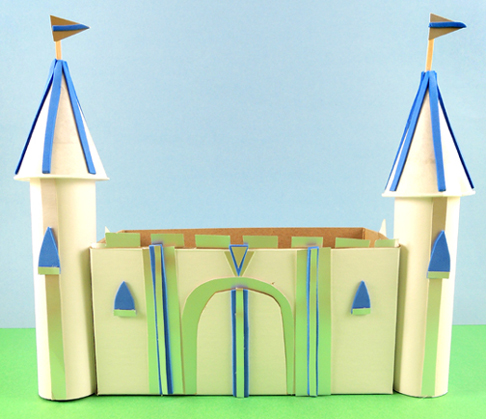
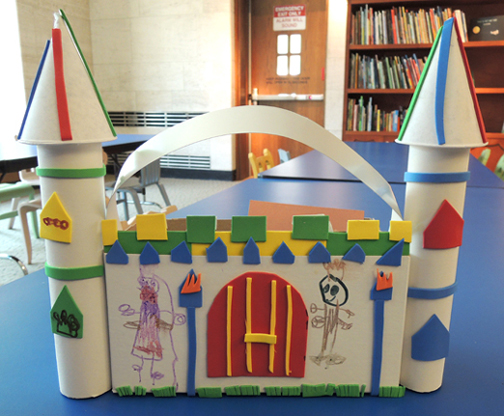 We also decided to add a carrying handle to our castle, so our towers are hot glued slightly to the front of the box. The handle is a 1.75″ x 16″ poster board strip that pivots on 2
 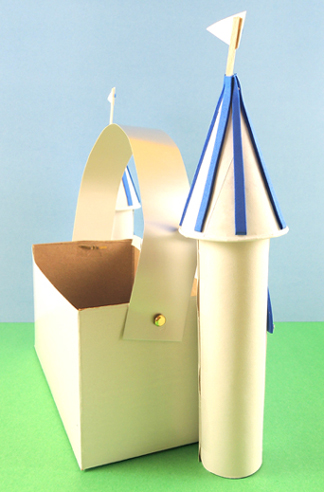 Finally, the CATS. These are variously-sized toilet paper and paper towel tubes decorated with construction paper. We used self-adhesive foam bits and
 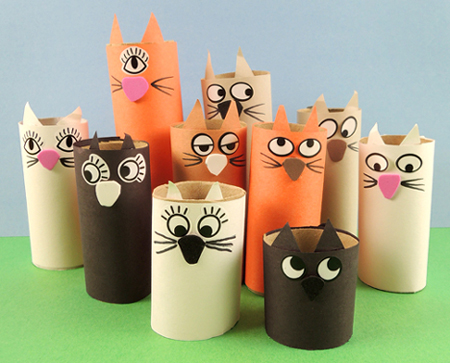 To play the game, place your castle on the floor, and then try to toss all the cats into the box. The more cats that land in the box, the more likely the last few will bounce out, so warning…a major case of the giggles may occur!