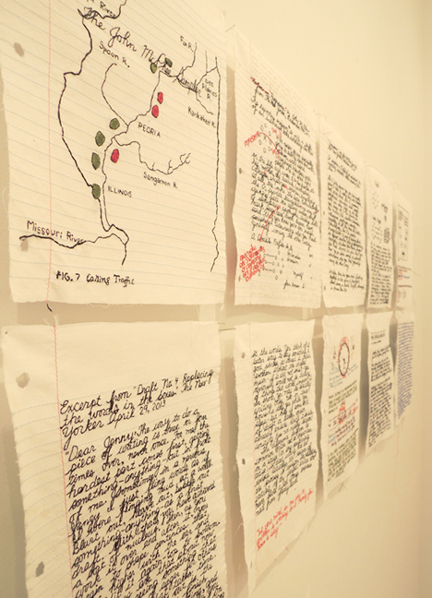
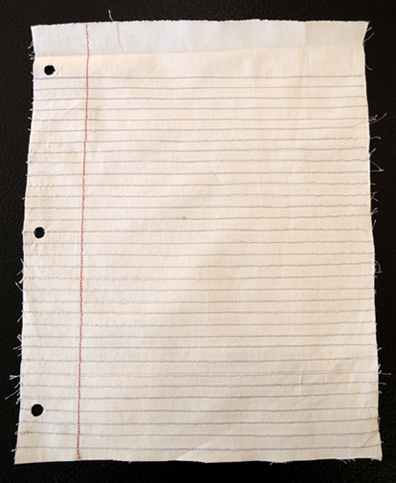
 Look closely and you’ll see that these are not handwritten pages of notes. They’re hand-stitched pages of fabric. The intricacy of the stitching, the re-imagining of lined paper as cloth, and the time it takes to produce a single page make viewing these pieces truly amazing. Also amazing is the touching and mindfully deliberate recording of life – both the extraordinary and the ordinary – through slow and careful stitchery.
 These pages are the works of Diana Weymar, currently the Artist-in-Residence at the Arts Council of Princeton. Diana’s also the curator of Every Fiber of My Being, a group show that explores the use of textiles as a second skin. As part of her residency, Diana has initiated Interwoven Stories, a community stitching project that invites individuals to record their own thoughts, feelings, experiences, and beliefs on fabric pages. Later, the pages will be displayed on five installations around town.
 Please tell us a little about yourself!
I am 46 years-old, have four children ages 12-22, and live in the U.S. and Canada. I graduated from Princeton in 1991 after writing a creative thesis with Joyce Carol Oates. I have worked in publishing and film in NYC and the past five years have been focused on my art practice – the basis of which is using familiar materials in unfamiliar ways – and on community-based art projects.
When did you first re-imagine lined notebook paper as fabric?
When both of my maternal grandparents passed away, boxes of their belongings were sent to me. For some reason, I found their crisp white sheets – they belonged to the generation that saturated their sheets with starch – heartbreaking. At the same time, I was reviewing notes from my writing course at Princeton with John McPhee and found that his rules for writing also applied to my art practice. The continuity between the craft of writing and crafting sculptural pieces was surprising and enriching.
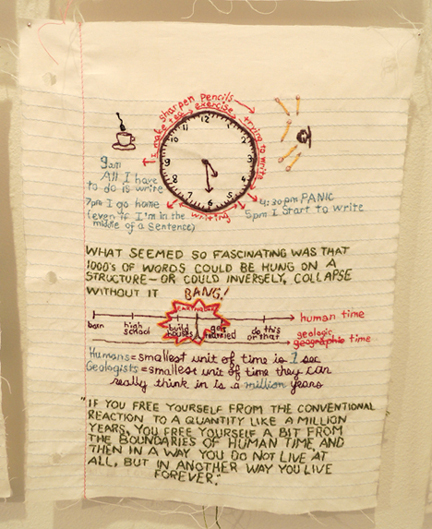
My notes and writing pieces from class with John were, in a way, very much like traditional samplers. Instructive. Practice-based learning. I wanted to spend more time with my notes from class and thought of rewriting them in thread. The term “thread consciousness” is often thrown around when discussing contemporary embroidery but it’s a very basic idea: the process of creation is a process of awareness and the longer you spend on a piece – written or stitched – the more aware you become. Communication is so quick now. Quickly created and quickly consumed.
 Can you describe the process behind creating a single sheet?
I cut 8 ½ x 11 pages out of bed sheets and then create the blue and pink lines by machine. For Interwoven Stories I created 200 fabric pages. They each take about 25 minutes from start to finish. I started to develop pain in my right hip from shifting my weight to the left to press on the pedal with my right foot. Sometimes I can still feel the vibrations of the machine coursing through my right side. Without music and podcasts to distract myself, I don’t think I would have been able to finish machine sewing the pages. Spending a concentrated amount of time with the sewing machine gave me a deep appreciation for labor-based practices. The final touch was to punch holes in the fabric sheets.
 Is it difficult to achieve flow when hand-stitching? I imagine it’s quite a bit slower than writing, painting, or sculpting…
It’s “slow flow” but has exactly the same language and process as painting, drawing, and sculpting. I love the mechanics of stitching, the metaphorical aspects of hand, thread, and fabric. This particular practice has the distinct advantage of being very portable. If I can sit and there is light, I can stitch. With four children and a bi-coastal lifestyle, I’ve worked on planes, while watching squash matches, and at lectures. It’s very hard to put down a piece once I’ve started it.
How do you utilize the different types of stitches in your work?
I’m asked this question frequently because the basic misconception about stitching is that it is exclusively a craft-based language and that to speak it, you must know a series of “trade stitches.” I use thread the same way I use ink or paint. Every stitch is either a line or a dot. There are some fabulous and inventive names for stitches and, at this point, I enjoy the names of technical stitches more than I enjoy them in my practice. The French Knot is essential to many of my pieces but, for now, I am focused on layering, color, and pattern while using a simple stitch.
 In your mind, what is the relationship between the written word and the stitched word? Are they the same? Vastly different?
When I think of the “written word” I think of the handwritten word. For me, the stitched word and the handwritten word are intimately related. The typed word is vastly different. It’s about looking and watching but not about creating a shape. Both the written and stitched word reveal so much about the author. All typed words look the same; all stitched and written words are different.
I realized recently that I have close friends whose handwriting I have never seen. My 12 year-old has not learned to write in cursive. I find all of this a little strange and disorienting. Would you rather hold a handwritten letter in your hand or read a letter on a screen? And if it’s been stitched, isn’t that almost like holding hands with someone? The next best thing? I find stitching to be very intimate. And caring. I have a friend who knit a blanket for me for Valentines Day. This still amazes me.
Though I am not making work for specific people, I am stitching as a way of sharing. What impresses me is that most people want to touch stitched words and images, to read them with their fingers. We touch screens but only to move content around. Not to read with our fingers.
 Please tell us about your community art project involving fabric paper.
Interwoven Stories is a version of a project that I did in Nicosia, Cyprus, Spring 2015, with Build Peace. I watched the lectures from the 2014 conference at the MIT Media Lab on video and I wanted to create a project using an “ancient technology” in a contemporary setting. Build Peace focuses on the use of cutting-edge technologies in peace building and the exploration of art as connection.
Interwoven Stories is also a community-based project in which 200 fabric pages have been handed out in Princeton to be stitched by residents of the community. I was recently at a dinner party in Princeton with someone who explained to me that UNESCO uses “cultural mapping” to promote intercultural dialogue and this resonated very strongly with me. Princeton is a very diverse community and I’m very much looking forward to collecting and curating the pages. I cannot wait to “read” them.
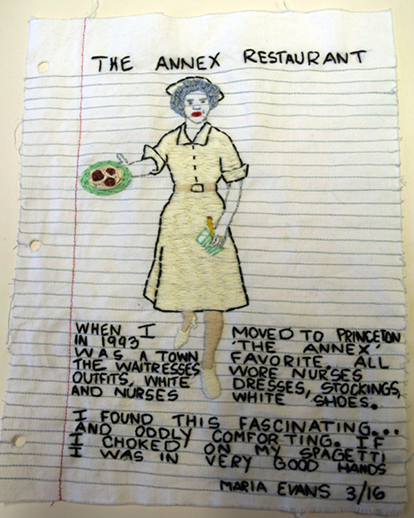
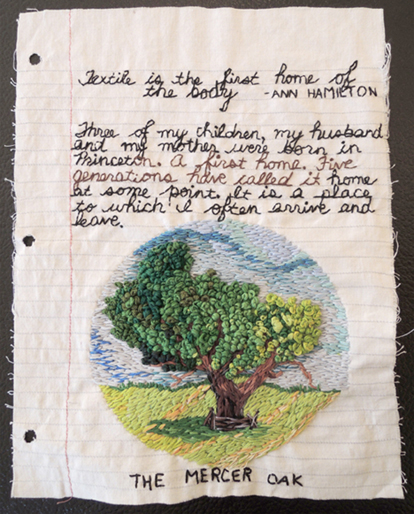
Interwoven Stories submission by Maria Evans
Images courtesy of the artist and the Arts Council of Princeton.

 You’re walking through the jungle when, suddenly…a snake slides onto your shoulders. Stop! Do NOT panic! It’s perfectly safe. This snake is made out of self-adhesive foam!
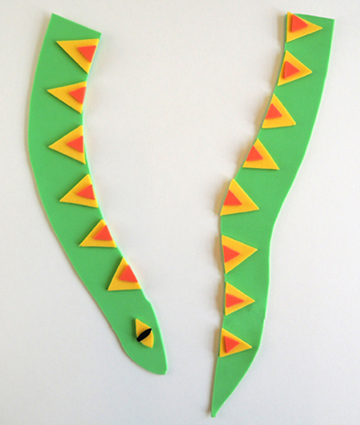 When the snake is decorated to your satisfaction, peel the backing off the big pieces and stick them to the front of your shirt. It looks best if you wrap the ends a little past your shoulders.
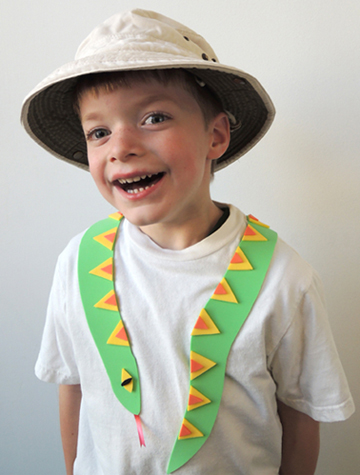 If you’d like to add a tongue to your snake, fork one end of a 2″ piece of curling ribbon, and stick it to the underside of the snake’s head.
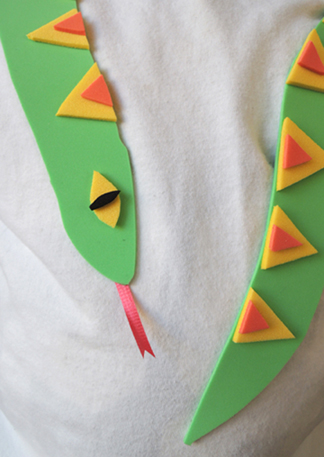 It’s important to note that the snake doesn’t go all the way around your neck. This foam doesn’t do too well on long, uneven curves. I didn’t want it to buckle, pop off, and tangle in (or stick to) longer hair.
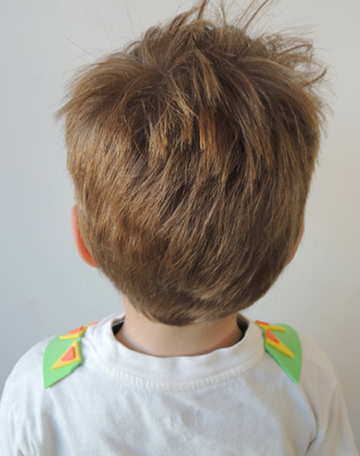 I tested the foam on plain t-shirts, as well as shirts with embroidery, plain decals, and glitter decals. All of them were fine, with the minor exception being the glitter decal. The foam did take some glitter off with it, but no more than comes off when you rub the decal with your fingers. However, when I peeled the foam off a mesh sports jersey with vinyl numbers, bits of the foam ripped off the snake and stuck to the vinyl numbers! So if you’re wearing a mesh sports jersey, peel slowly, and know that you might have to do a little extra peeling where the foam sticks.
 The roar of the audience, the flashing lights, the first strains of your big number thrumming through the arena…grab the mic…it’s time for some kitty karaoke. We made rockin’ oatmeal container cats and then hit the stage to sing our hearts out. But, given the feline nature of this rock star, you could only sing in “meow.”
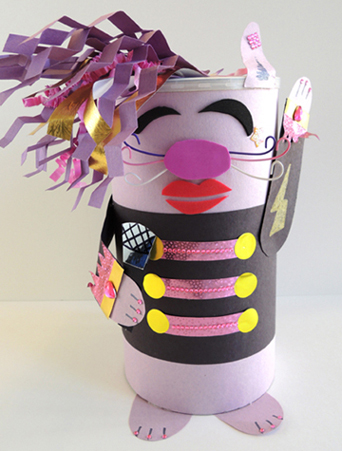 Wrap a large oatmeal container with construction paper, then add an additional strip of black construction paper around the middle for a “jacket.” To make whiskers, tape 3 Twisteez wires to front of the oatmeal container:
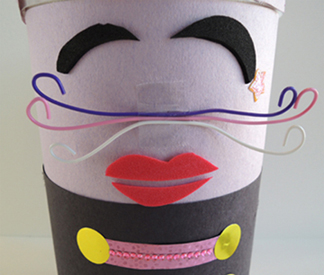 Then peel and stick an oval of self-adhesive foam over the tape.
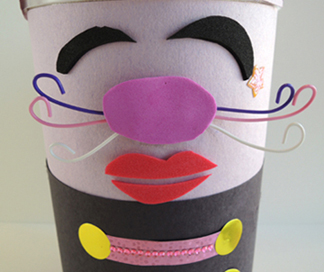 In the above photo, you’ll also notice how I used self-adhesive foam shapes to make eyes and a pair of lips (but you can also just use markers).
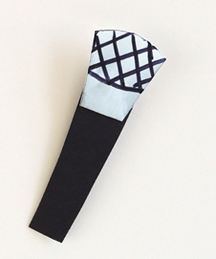 Now for the concert! We made our stage out of an old archive box. As you can see in the image below, we hot glued the lid to the base (and reinforced the connection with packing tape). The stage lights are toilet paper tubes wrapped in black construction paper with black masking tape wrapped around one end. The stage lights are attached with hot glue, then reinforced with a bit of packing tape.
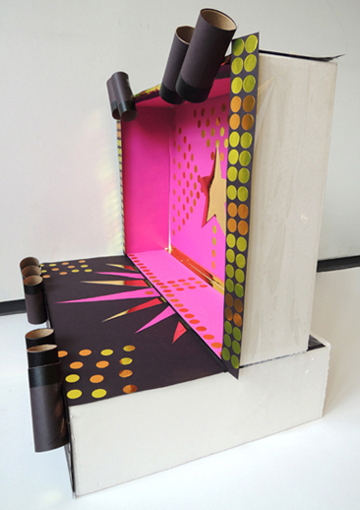 We used black and fuchsia poster board, mirror board, and a ton of metallic dot stickers to create a sparking wonderland of rock-stardom. Oh. Yeah.
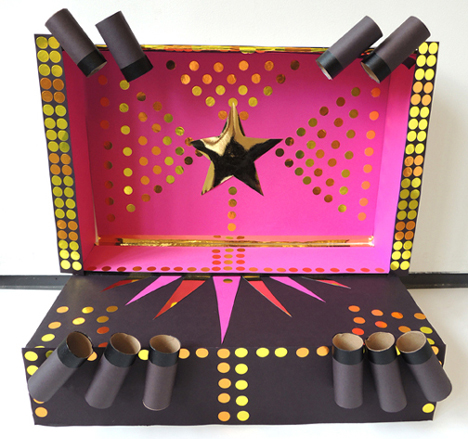 For the final touch, we wrapped two LED floor lights with purple and blue cellophane, and pointed them at the stage. You certainly don’t have to go this elaborate. A shoe box wrapped with tin foil, a sparkly scarf on the floor, a section of carpet with a light shining on it. Really, it all works!
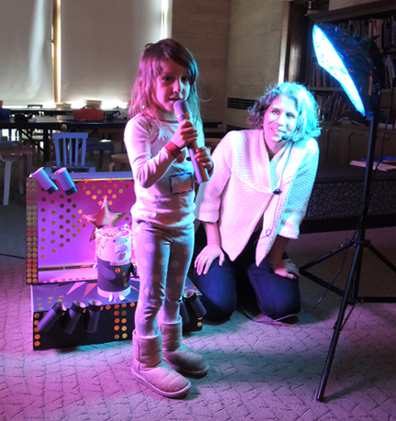 Facing inwards to the stage…
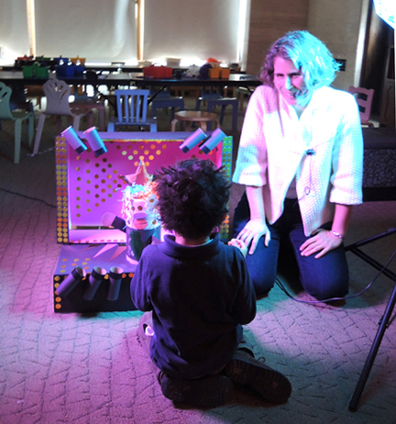 Facing inwards to the stage with backup singer…
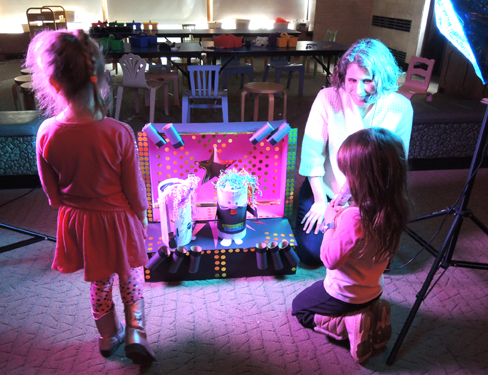 The power duet…
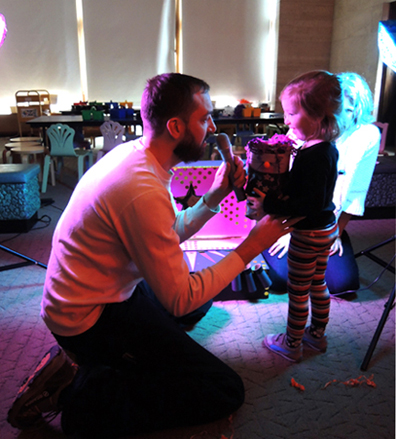 You might notice the kids are using a real microphone! I use a wireless amp for my story time programs, so I busted out a hand-held microphone and let kids experience the power of amplification. A cheaper (and less noisy) option is to make a paper and tin foil microphone. You’ll find instructions for that right