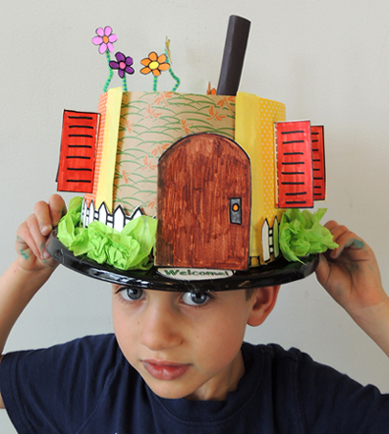
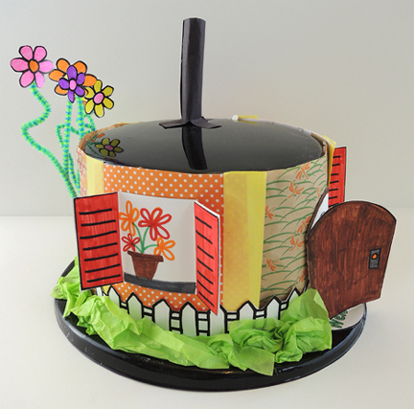
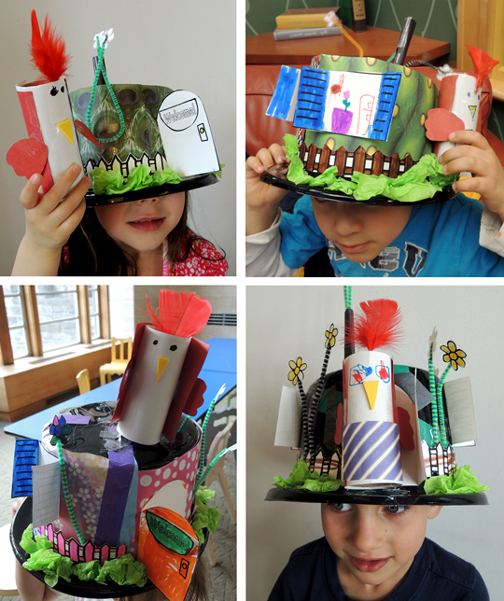
 Every bird needs a home, and this deluxe house has everything one needs – doors, windows, a chimney, flowers, and a white picket fence. Best of all, it’s a HAT!
We read Brimsby’s Hats by Andrew Prahin (Simon & Schuster, 2014). Brimsby the hatmaker lives in a quiet cottage. His life is full of making hats and chatting with his best friend over tea. But one morning, his friend announces that he’s off to pursue adventures on the high seas, and Brimsby becomes very lonely. Trudging through the snow on a solitary walk, he finds some birds who might make good friends. Unfortunately, they’re too busy shoveling snow out of their nests to chat. That gives Brimsby a tremendous idea. He eagerly sets to work, making hat houses for all the birds. Once the hat houses are in place, there’s no more snow shoveling, no more freezing nights, and the birds are free to visit their new friend!
You’ll need:
- 1 plastic top hat (I buy mine from Oriental Trading Company)
- A selection of construction paper and/or patterned paper
- 1 hat house fence template, printed on 8.5″ x 11″ card stock
- 1 hat house windows, door, welcome mat template, printed on 8.5″ x 11″ card stock
- Green tissue paper
- 1 hat house flowers template, printed on 8.5″ x 11″ card stock
- 5 pipe cleaners
- 1 toilet paper tube
- 1 small feather
- Scissors and tape for construction
- Markers for decorating
- Hot glue
This is an incredibly easy project that only involves a few steps:
- Circle the crown of the hat with construction paper and/or patterned paper
- Create a hatband using the white picket fences from the template
- Cut, color, and attach the windows, door, and welcome mat from the template
- Add tissue paper shrubs (hot glue is best when attaching these to the hat)
- Attach flowers from the template to pipe cleaner stems, then tape them to the hat
If you’d like a chimney, roll a piece of construction paper into a 4″ tube, cut three, 1″ tabs in the bottom, spread the tabs, and attach them to the top of hat using tape or hot glue.
 Now for the bird! Wrap a toilet paper tube in white construction paper. Then, wrap another color of construction paper three-quarters of the way around the bird, thus creating a white tummy. Add wings, eyes, and a beak (our beak was a snippet of self-adhesive foam). Tape a small feather to the top of the tube.
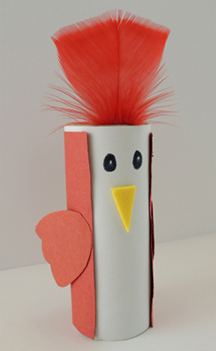 Introduce the bird to its new home (if the hats are a little big, stuff them with tissue paper)!
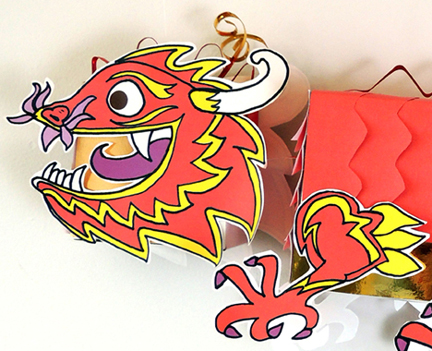 This colorful dragon marionette twists, turns, dives, and flies with you! It was a project at
 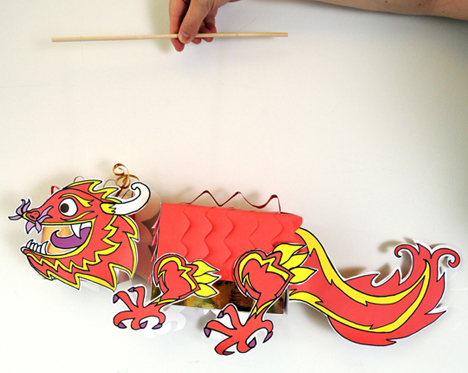 You’ll need:
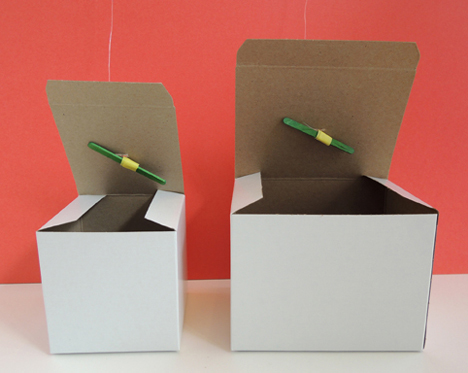 Connect the two boxes together with a 1.25″ x 2.75″ rectangle of poster board that is tabbed at both ends (my tabs were approximately 0.75″ each). Tape the connector’s tabs to each box.
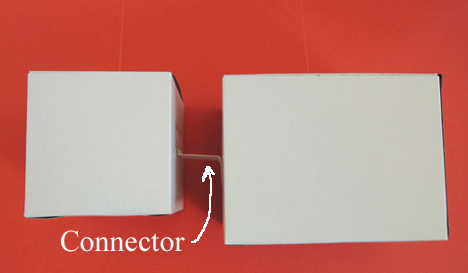 Next, wrap the boxes with construction paper (we went with layered strips of construction paper, cut to resemble dragon scales). Cut and color the dragon pieces from the template and attach them to the boxes. If you don’t have time to color in all the template pieces, here is a
 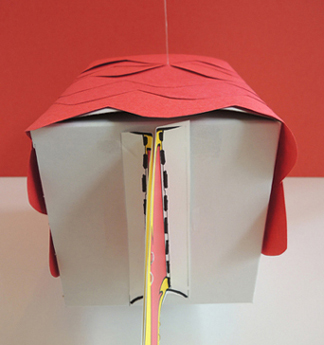 When your dragon is finished, tie the elastic cords to a wooden dowel (and secure the knots with tape if needed). Your dragon is ready to fly!
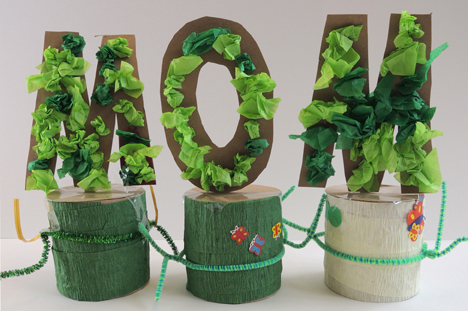
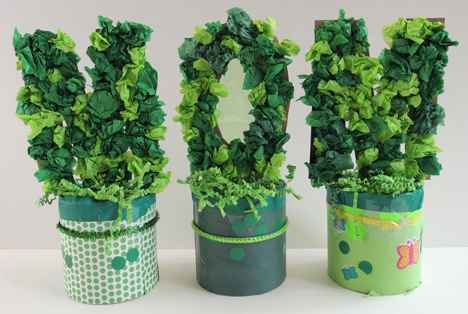
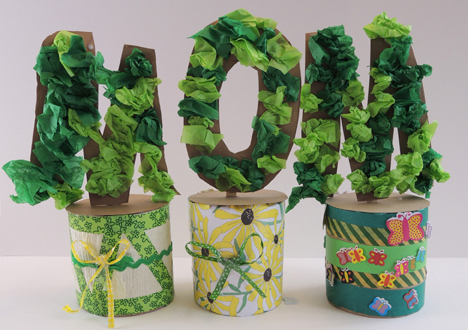
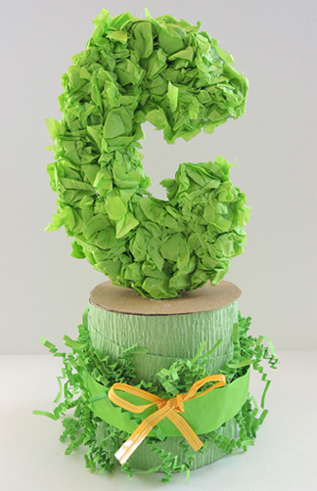 Spell something special with tissue paper topiary letters! Bedeck your initials, festoon your name, or spruce up your favorite word. Your personal topiary is guaranteed to stay green all year round, and no watering is required!
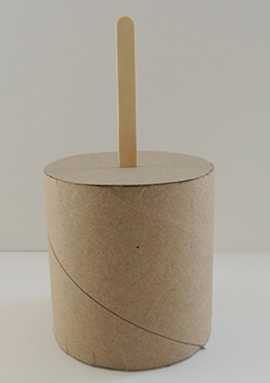 If you don’t have packing tape cores, use paper cups or paper soup containers. Simply flip them over, cut a slit in the bottom, and inset a craft stick into the slit.
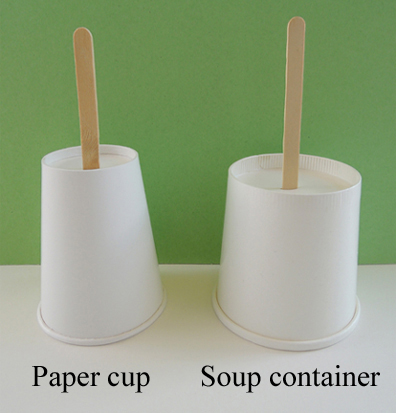 Since these bases are lighter than the tape cores, they run the risk of tipping over after you attach your topiary letters. If this happens, simply hot glue some pennies or
 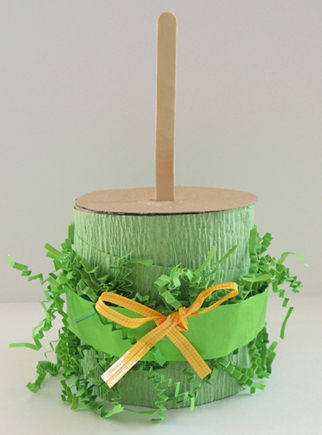 When the bases are finished, it’s time for your topiary letters! We asked the kids to limit themselves to 4 letters or less (and we announced this at the very beginning of the project, so they would know how many bases to decorate). After some experimentation, we determined that 6″ letters looked best. We whipped up some
 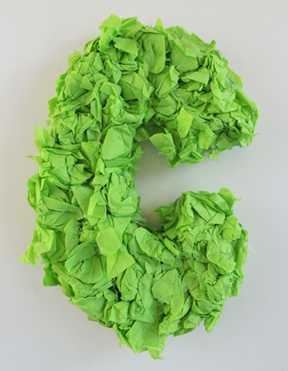 When the letter is done, hot glue it to the craft stick. Repeat until you have all your letters mounted on their bases:
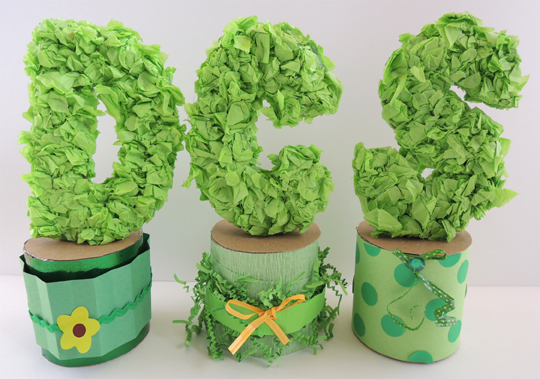 You might wonder why we went with topiary letters instead of animals or objects. We did try a few animals and objects, but they became quite unrecognizable after the tissue paper was glued on. The letters held their shapes extremely well, and it never hurts to get an early start on letter recognition! Some topiary letters did go floppy from the glue, however. If this happens to you, simply use extra craft sticks to reinforce the back of the letter.
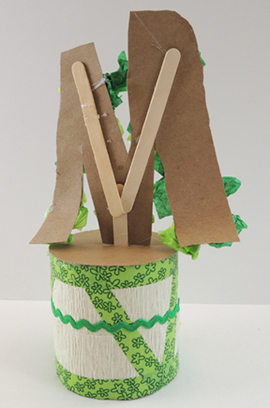 Another thing you can do to reduce floppiness? Use masking tape to secure the craft stick to the base. Here’s a shot of some tape stuck inside the base:
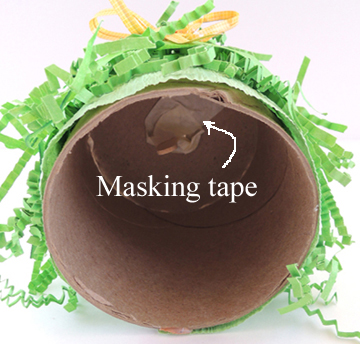 Usually, our craft area is loud and boisterous during the projects. But for this particular project, the room was filled with quiet concentration as kids put their gardens together. Perhaps it was the soothing botanical colors?