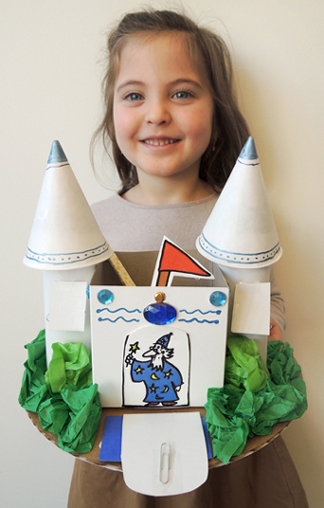
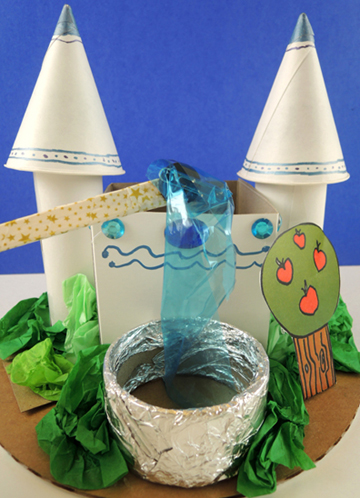
Use your magic wand to reveal the secrets of this enchanted castle – raise the drawbridge, hoist the flag, open windows, discover buried treasure, and more! All it takes is a magnet and a few well-placed paper clips!
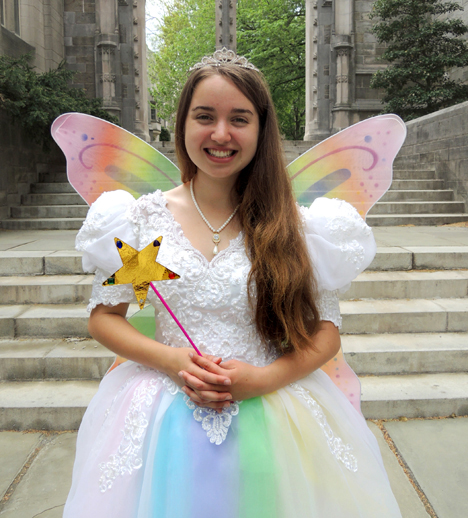
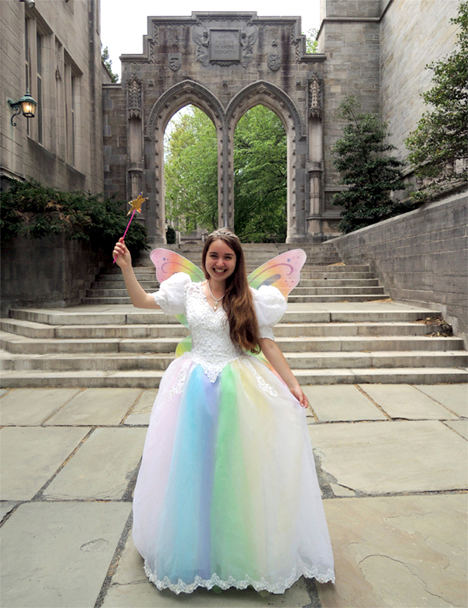
We read I Wished for a Unicorn, written by Robert Heidbreder, and illustrated by Kady MacDonald Denton (Kids Can Press, 2000). A little girl wishes for a unicorn, and wow… one appears! Granted, it looks and acts suspiciously like her pet dog, but that doesn’t stop the two from having amazing adventures in a magic woods and enchanted castle.
You’ll need:
- 1 corrugated cardboard base (we used a 10″ diameter cake circle)
- 1 small box (ours was 4″ x 4″ x 4″ – a small tissue box works too)
- 2 paper towel tubes
- 2 paper cone water cups
- Construction paper
- 1 magnet castle template, printed on 8.5″ x 11″ white card stock
- 1 brass fastener
- 1 pair of unused, intact chopsticks
- 1 button magnet
- 6-7 small paper clips
- Scissors, tape, and glue for construction
- Markers for decorating
- Hole punch
- Hot glue
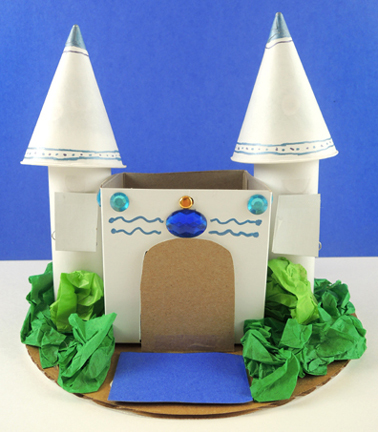
As far as construction, this castle is very basic. We used a 4″ x 4″ x 4″ craft box with the lid cut off, and hot glued it to a corrugated cardboard base. Add 2 shortened paper towel tube towers, 2 cone drinking cup roofs, and some (optional) green tissue paper shrubs . The drawbridge is a hinged piece of cardboard (we used the scrap from our box lid). The moat is construction paper. Wrap the castle with construction paper if you like, then decorate with metallic markers and perhaps a jewel or two. You’re done!
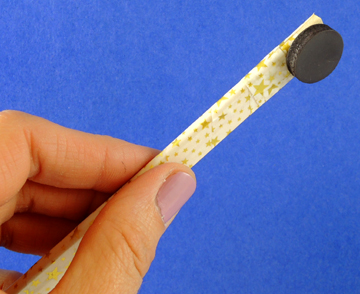
Infusing your castle with magical powers is also easy, thanks to this “magic wand.” It’s a pair of intact chopsticks decorated with markers or patterned tape. Hot glue a button magnet to the wider end:
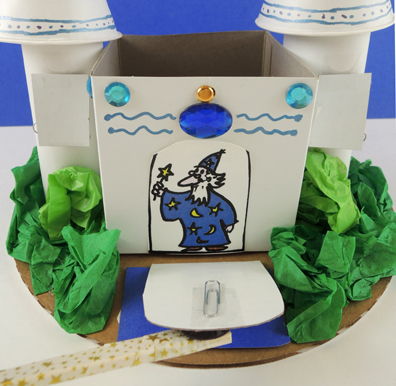
 Next, tape paperclips to various castle elements. Here’s what we did, using our castle template. The drawbridge lowers to reveal a wizard:
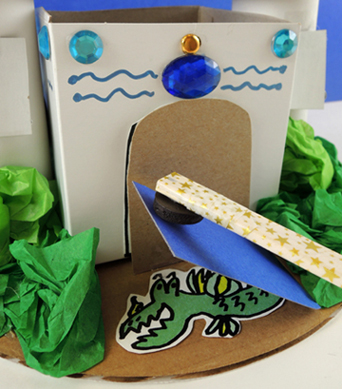
 The moat rises to reveal a water dragon:
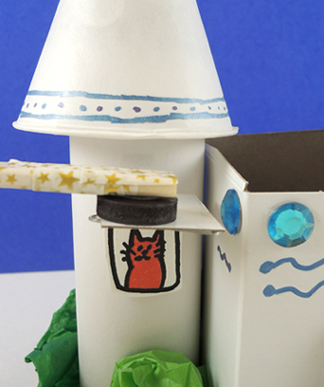
 The castle towers each have a window that hinges upward to reveal something inside. Below you see a cat…the other window has a friendly flower in a pot:
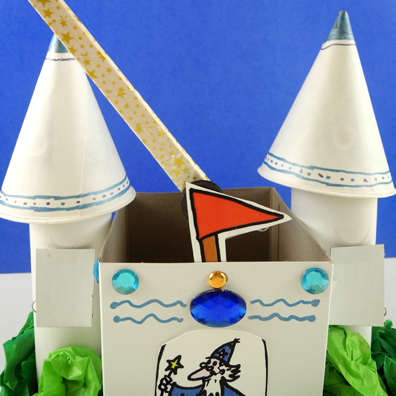
 Above the drawbridge, you can also raise a flag! Use a hole punch to create a hole in the pole of the template flag, and in the wall of the castle. Thread a brass tack through the holes, tape a paperclip to the back of the flag, and fly it high!
 Around the back of the castle is an (optional) fountain. We wrapped a packing tape core with tin foil, then taped a 3″ x 6.5″ rectangle of blue cellophane inside. Use a paper clip and the wand to make the fountain water rise!
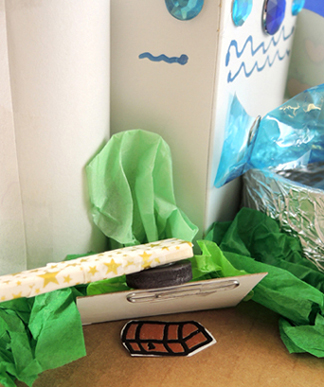
 In the garden next to the fountain was a buried treasure trap door:
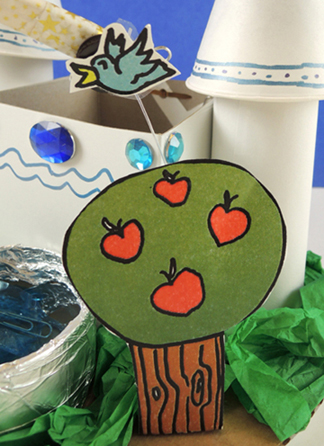
 And on the other side of the fountain is an apple tree with flying bird. We tethered the bird to the tree with clear elastic beading cord, but any string will do:
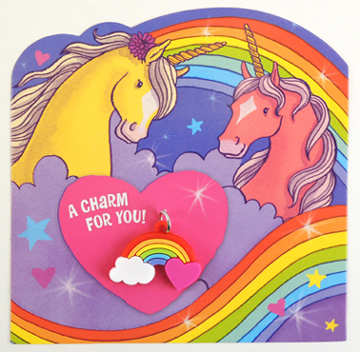
 At this point, you might be wondering…where is the UNICORN? The book is all about an adventure with a unicorn! Well fear not. We scored these awesome unicorn Valentines by Peaceable Kingdom (a set of 28 cards cost $13-15). Each card comes with a little rainbow charm:
 When kids were finished with their castles, DR. MAGICAL PURPLE UNICORN bestowed cards and rainbow charms!
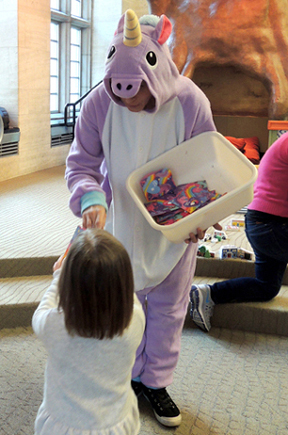 And yes, that unicorn onesie does feel just as comfortable as it looks.
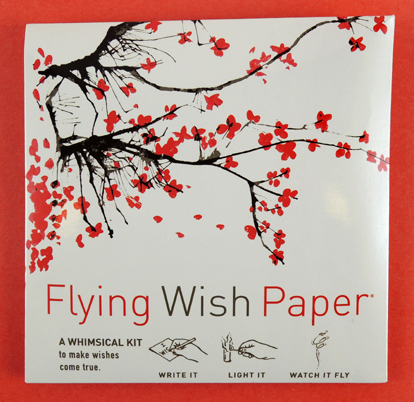 No, it’s not the name of my new romance novel. It’s this…Flying Wish Paper by Hux Creative! Write a wish on the special paper, ignite it, and watch your wish float away, granted. Does this kit actually work? Or will the fickle realities of wish-granting manifest themselves? Our brave yet tempestuous heroine, Katie, tempted cruel fate and tested the kit in her dining room. Take it away Katie!
 The kit contains 15 sheets of Flying Wish Paper, 5 paper platforms for your wishes, a special mini pencil, and a set of instructions. It retails for $12 at our local Paper Source. The first part of the kit is easy enough. You think of a special wish and write it on the Flying Wish Paper, which closely resembles tissue paper. If you choose, you can slide the Wish Platform (more on that shortly) under your Wish Paper to help you write more easily. Our Wish Platform had a gorgeous picture of blossoming cherry trees on it, but there are many other images in different kits to choose from.
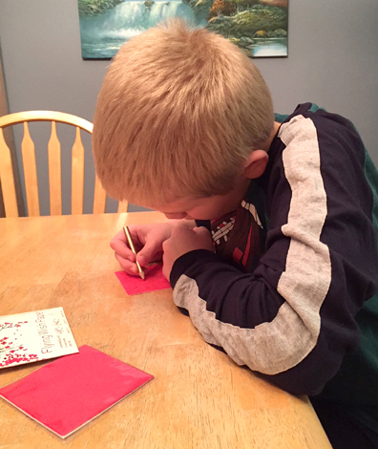 Once you have written your wish, crumble the Wish Paper into a ball about the size of a marble. Next, carefully unwrap and smooth out the paper so it is flat, albeit crinkled from being smashed into a ball.
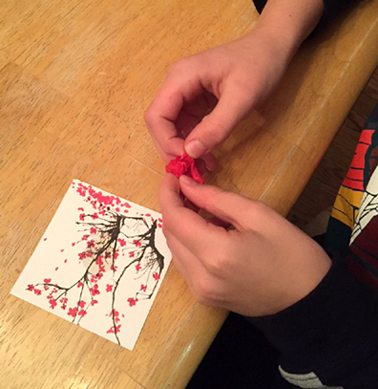 Once the paper is flat, roll it into a tube using the darkened circle on the Wish Platform as a guide. The tube needs to be open enough to allow the Wish Paper to easily burn, just like a chimney. Stand your Wish Paper upright on the Wish Platform and you are ready to send it to the heavens!
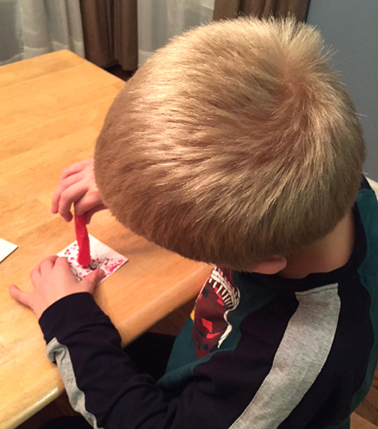 This is when I became a little nervous. I was going to light paper on fire inside of my home. Rather, I was going to let my son (who was thrilled to have full parental permission to strike a match indoors) LIGHT PAPER ON FIRE INSIDE OUR HOUSE! It took a few tries to stand the Wish Paper on the Wish Platform without it toppling over, which also made me nervous.
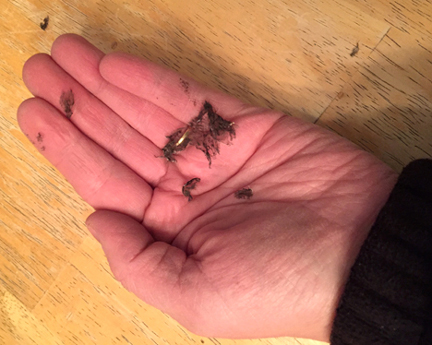 I was also fearful the burning Wish Paper would fall over, (or off!) the Wish Platform. Well, it did fall over during one of our tests. It left a small burn mark on the Wish Platform, but thankfully nothing else happened.
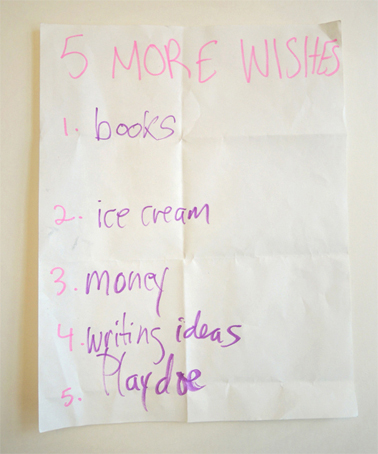
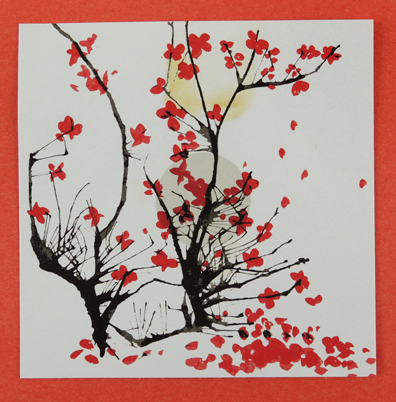 Flying Wish Paper is a fun activity that my son and I thoroughly enjoyed doing together. There are numerous fire concerns and it is definitely something parents can’t let their children do on their own, but I highly recommend it. It’s a whimsical and thoughtful activity for kids to really think about what their deepest wishes may be. It would be awesome for magic spells at a Harry Potter program too (and so would