
Turn down the lights and astound your audience with tales of adventures, hauntings, and astounding plot twists! Best of all, no special screen needed…it’s parchment paper from your home pantry.
We read Gilbert the Ghost by Guido Van Genechten (Clavis, 2014). Gilbert is not like the other ghosts at Ghost School. For starters, he was born blush, not ghostly white. And while other ghosts are shouting “Booooo!” Gilbert can only say “Ba…ba…bahoo!” For this, he is banished to the Abandoned Tower. But it’s not quite abandoned, and thus begins Gilbert’s wonderful friendship with Meow the cat. The roommates claim the tower for their own, and make it into the coziest little haunt you’ve ever seen. Soon, there are many visitors, but only one ghost who can say “Bahoo!”
You’ll need:
- A rectangle of corrugated cardboard (we used a 10″ x 14″ cake pad)
- A theater banner from the template, printed on 8.5″ x 11″ paper
- Small boxes to prop the theater up
- Parchment paper
- Black poster board
- 3 drinking straws
- 2 LED votive candles
- Scissors and tape for construction
- Markers for decorating
- Box cutter
- Hot glue
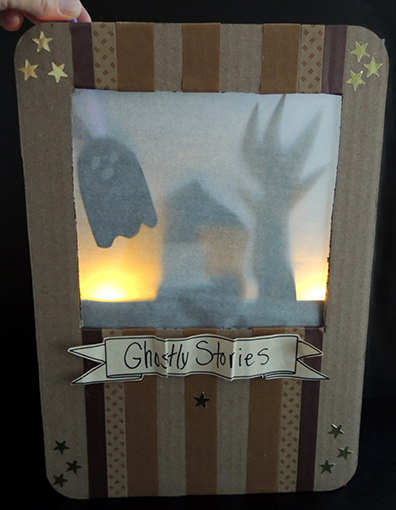
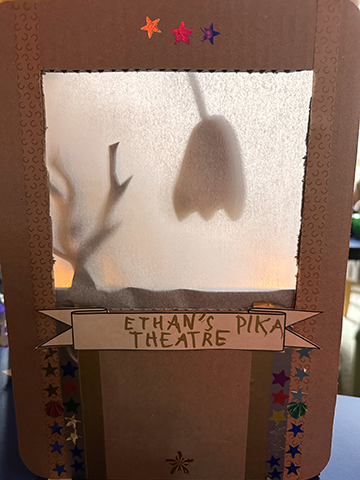
To create the front of your theater, cut a window into a piece of corrugated cardboard. Then use markers to decorate the cardboard stage (or use patterned tape and star stickers like we did). Add a banner from the template, and you’re done!
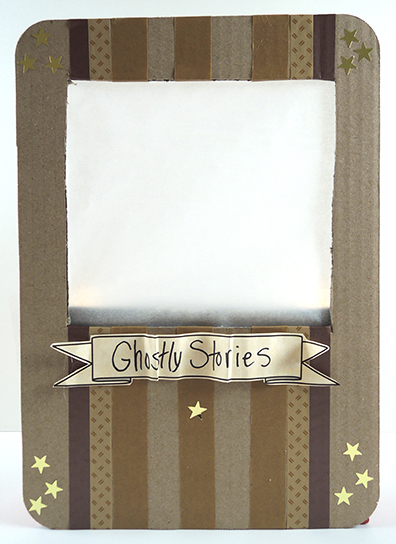
Flip the cardboard over, then tape or hot glue a piece of parchment paper on top of the window. This is your theater screen (quick note: I used Target brand parchment paper – the Reynolds paper had grid marks printed on it). Attach a strip of poster board to the bottom of the screen to create a pocket for your scenery to sit in during performances. Finish by hot gluing small boxes to the base to prop your theater up, making sure they are tall enough for two LED lights to stand on either side of the screen.
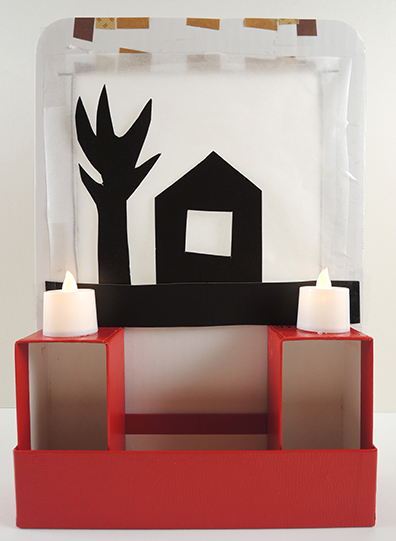
Now for the entertainment! Cut 3 pieces of scenery and 3 puppets from black poster board, then tape drinking straws to the top of the puppets.

It’s showtime! Fire up those LED votive lights and enjoy!
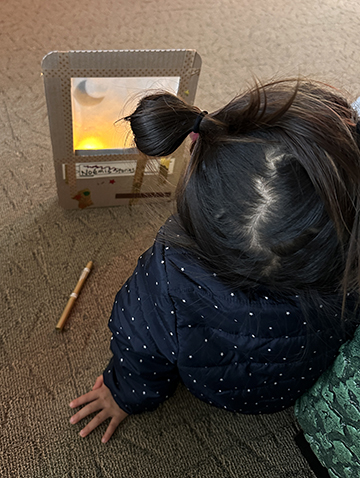
And while we had some wonderful ghostly tales being told at Ethan’s Pika Theater…
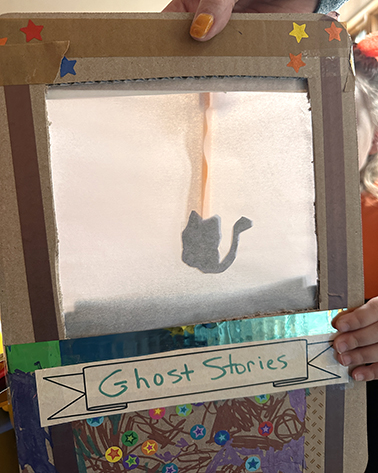
And some intrepid cats on adventures elsewhere in the library…
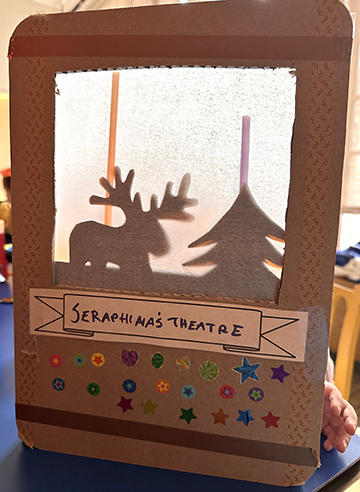
 At Seraphina’s theater, there were some distinct holiday vibes happening!
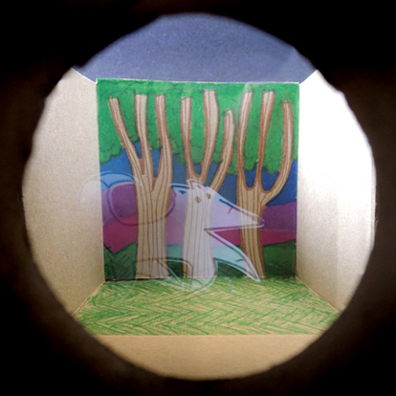 A quiet forest appears empty. But gaze long enough and…a fox spirit will magically appear before your eyes! No, its not Photoshop or camera trickery. It’s a simple physical stage illusion called
 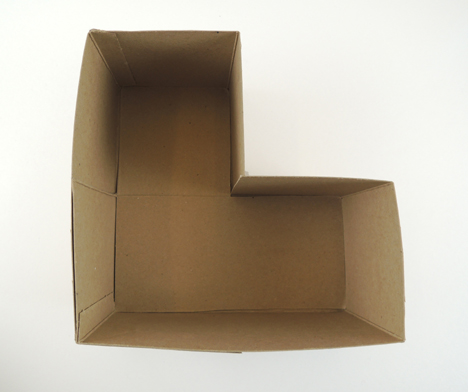 The L shape box is consists of two sections: a “forest section” and a “ghost section.”
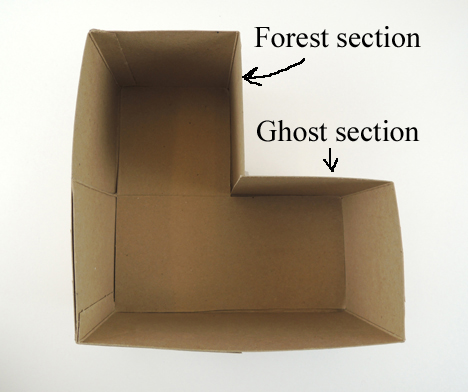 Next, cut a small square (approximately 1.75″ x 1.75″) in the side of the box that faces the forest section. This is your viewfinder.
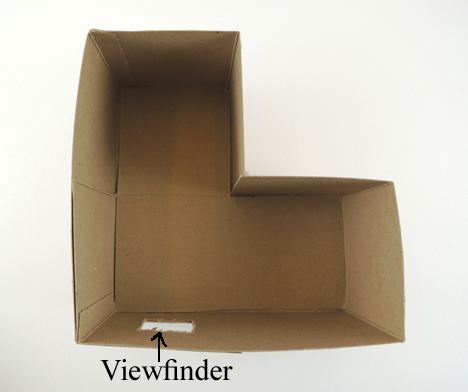 In the book, Arlo gazes through a slipknot, a loop of rope or lacing that allows him to see and travel multidimensionally. In order to replicate that rounded view, we slid a 2.25″ piece of toilet paper tube into the viewfinder as well.
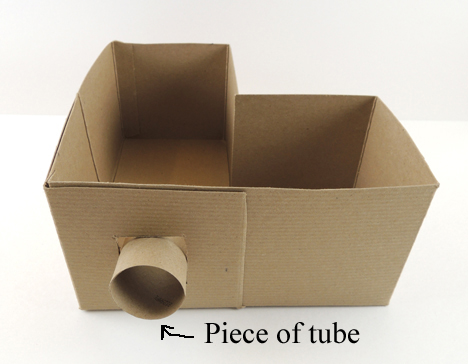 Now draw a backdrop for the wall opposite the viewfinder. I had the kids decorate a pre-cut piece of paper or cardboard, then we glued it to the inside of the box.
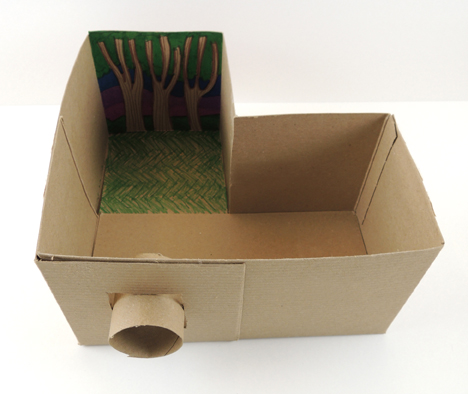 Next, sketch a ghost on a piece of white card stock. Here’s my tribute to Fox, a spirit from the book (and my favorite character):
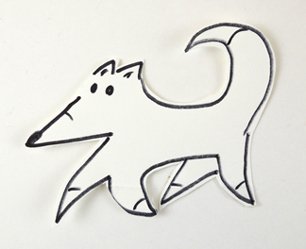 Tape the ghost in the ghost section of the Pepper’s Ghost box. Though you will probably need to do a little adjusting on the exact placement, try to arrange the ghost in the center of the section. I found this gave the best results.
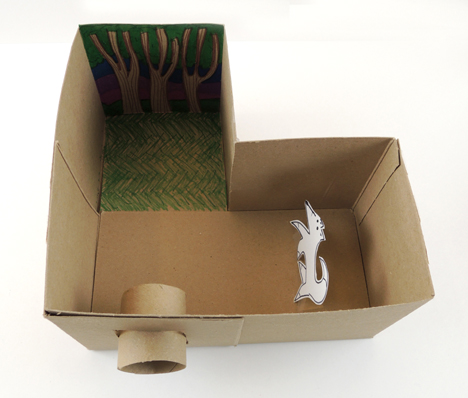 Now for the magic! A Pepper’s Ghost illusion is essentially a reflection. For this model, the reflection is caused by a piece of glass or clear polystyrene set at a 45 degree angle in the junction of the L shaped box.
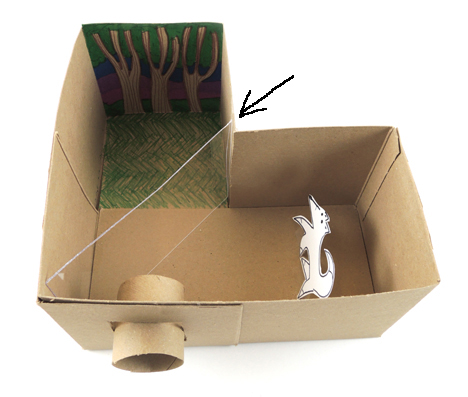 During my initial test, I used a piece of glass from a 4″ x 6″ picture frame. However, I was a little uncomfortable giving multiple 6-8 year-old kids pieces of glass to take home. Luckily, I found clear polystyrene sheets on Amazon (a set of ten, 8″ x 10″ sheets cost $15). Polystyrene is plastic, lighter weight, doesn’t shatter, and you can cut it down to size with a box cutter or scissors. Testing revealed that the reflection illusion works just as well with polystyrene as glass. Yay!
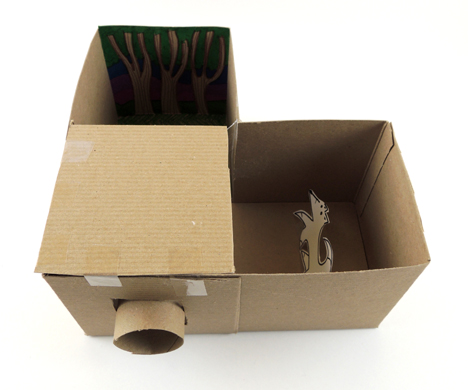 Then hinge a second square of cardboard over the ghost section. It’s important that this flap open and close. With the flap closed, the ghost will not appear through the viewfinder. But when you lift the flap, the ghost section will illuminate, causing a reflection to appear.
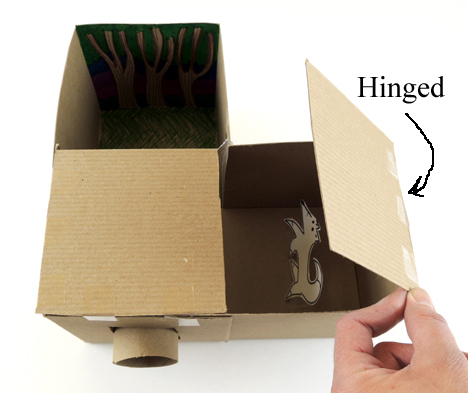 Ready to see the illusion in action? Close the flap and peer through the viewfinder. Keep gazing through the viewfinder, then lift the flap over the ghost section. Your ghost will magically appear! I also encouraged kids to stick their hands in the forest section and try to grab the ghost. Their fingers passed right through it, of course!

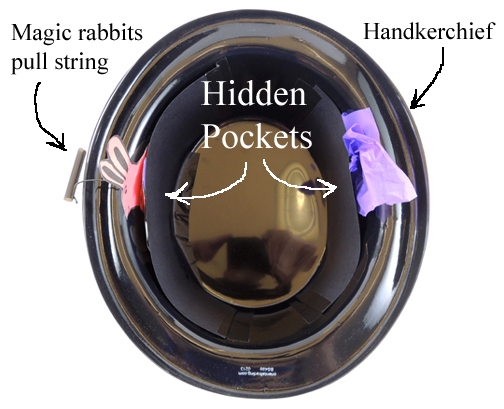 As you can see, the interior of the hat has two hidden pockets. These are made from 2 rectangles of black poster board taped inside the hat. After some testing, we learned that the pockets need to be fairly large (4.25″ x 9.5″) in order for the tricks to works successfully.
 We gave the kids
  If you’d like a add a third trick to your magic show, we highly recommend the “sticky wand” trick. You’ll find it, and other awesome tricks, in this “
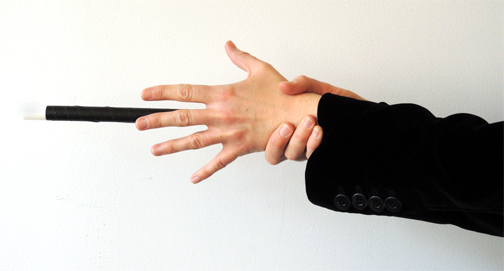
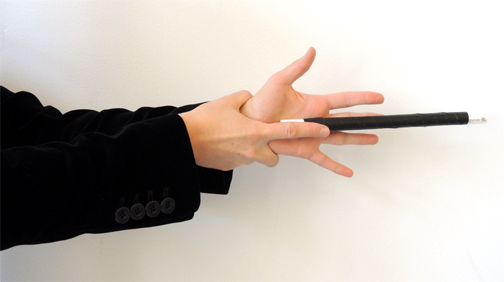 Tell the audience they have magic abilities too. On the count of three, have them audience clap once to “demagnetize” the wand. When you hear the clap, lift your finger to release the wand, and let it fall dramatically to the floor. Then take a big bow!