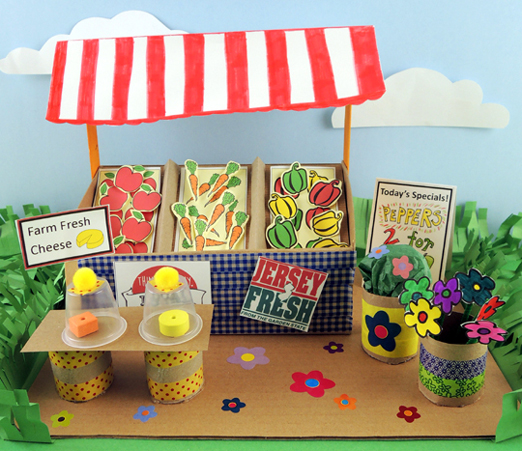
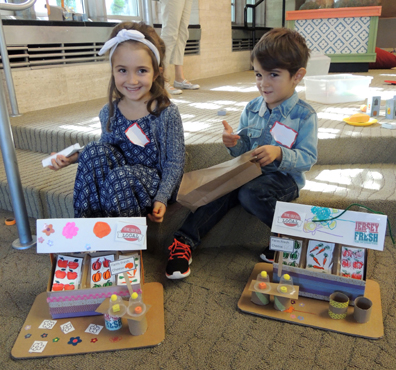
 Stock up your stand and get ready for some customers! We let grown-ups and siblings browse at a farmer’s market full bursting with fresh veggies, flowers, and artisanal cheeses (which, coincidentally, look a lot like foam beads).
We read Farmers’ Market Day, written by Shanda Trent and illustrated by Jane Dippold (Tiger Tales, 2013). It’s Saturday! It’s Market Day! A little girl eagerly searches for the perfect thing to buy with her piggy bank money. Cherries, flowers, pie, herbs, spices, hats, jars of honey, canvas bags – everything is so tempting! Finally, she spots exactly what she wants. A pink watering can, just her size.
You’ll need:
- 1 large box (ours was 4.5” X 4.5” x 9” – a large tissue box works too)
- Some pieces of brown poster board or tagboard for your farm stand’s counters
- A selection of patterned tape
- 1 corrugated cardboard base (we used a 9.75″ x 13.75″ cake pad)
- 2 jumbo craft sticks (our were 8″ long)
- A 4.5″ x 10.5″ card stock awning
- 2 small clear plastic cups (ours were 1oz)
- 2 foam beads (orange and yellow)
- 2 mini pom-poms
- 2 green pipe cleaners
- 2 toilet paper tubes
- Scissors and tape for construction
- Markers for decorating
- Hot glue
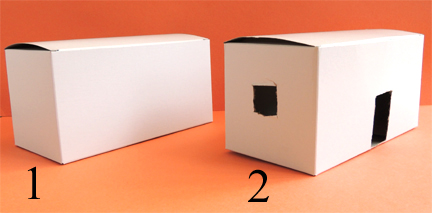
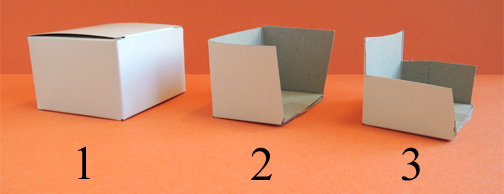
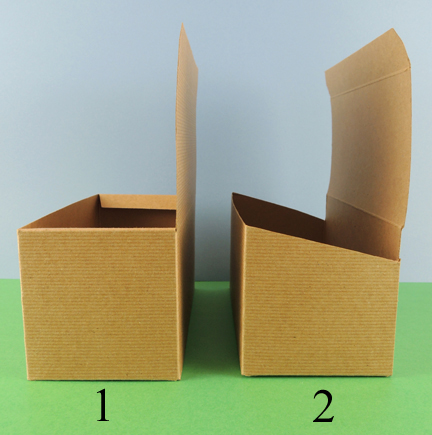
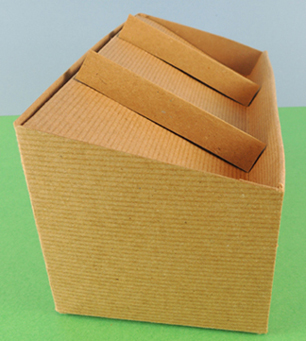
We’ll start with the farm stand’s slanted counter. First, I’ll show you how we did it with brown craft boxes, then I’ll show you how to replicate it with a large tissue box. With the lid of the box raised, cut slants in both sides of the box. The slants are cut downward, towards the lid.
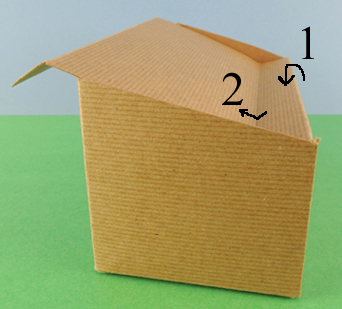
 Now make 2 folds. Fold the lid over the lower edge of the counter. Then fold the lid upwards (a.k.a. a valley fold) so it rests on the higher end of the counter. Your counter will now look like this:
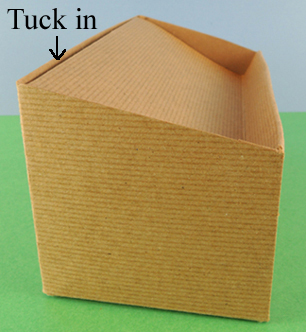
 See the part of the lid that extends past the counter? Push that back down towards the lower end of the counter, then tuck it inside the higher end of the counter. You now have slanted bins that are sunken in the counter.
 Make a pair of folded tagboard bin dividers, but don’t attach them just yet!
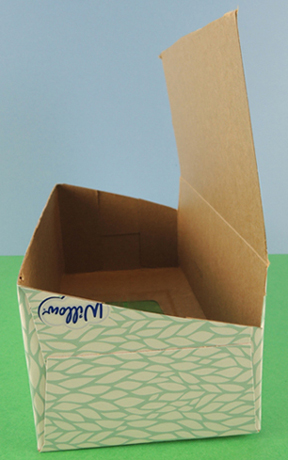
To make a tissue box version of the counter, flip a large tissue box over and use scissors to cut the bottom of the box into a lid. Then, follow the same steps above. Cut slanted sides in the box…
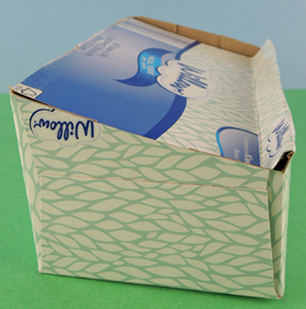
 Fold the lid over the lower edge, then upwards to the higher edge. But instead of tucking the end of the lid into the box, just tape it to the higher edge.
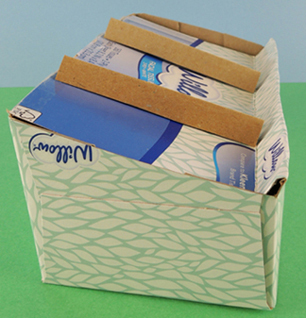
 Finish with a pair of tagboard bin dividers.
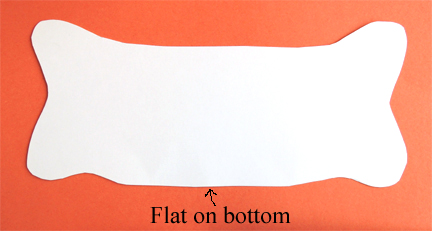
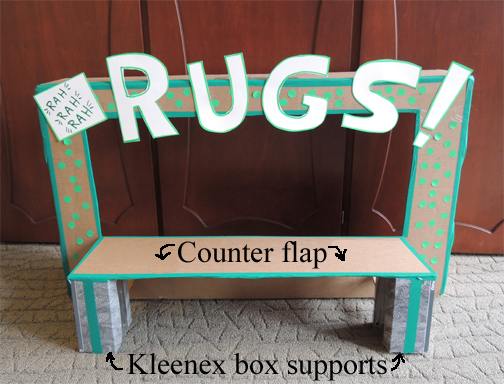
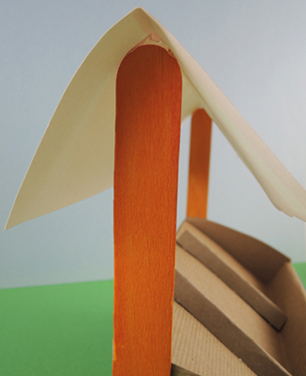
 Use markers and patterned tape to decorate the counter, then hot glue it to the cardboard base. Now for the awning! Hot glue (or tape) 2 jumbo craft sticks to both ends of the counter. Fold a 4.5″ x 10.5″ piece of card stock in half and decorate it with markers. Put generous globs of hot glue on the ends of the jumbo sticks, then gently press the card stock awning in place.
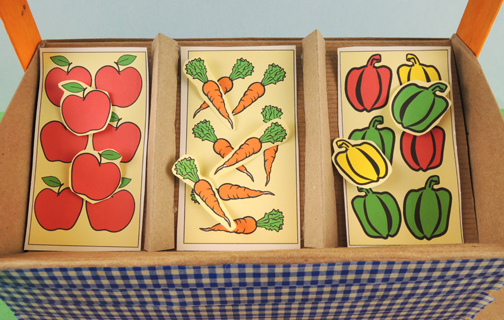
 Color and cut the produce bin backdrops from the farmers market stand template and slide them into the bins. Once you’re sure everything fits, hot glue (or tape) your tagboard bin divider in place.
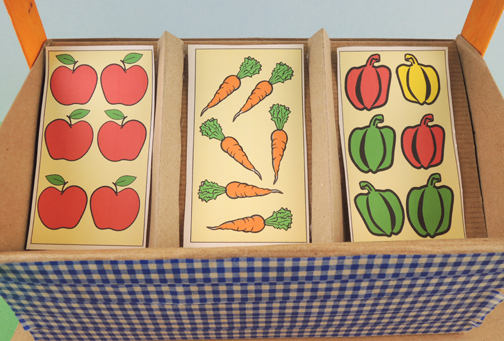 You’ll notice that there are 2 sets of produce bins on the template. One set is for the background. The other set is for you to individually cut, drop in the bins, and sell at market!
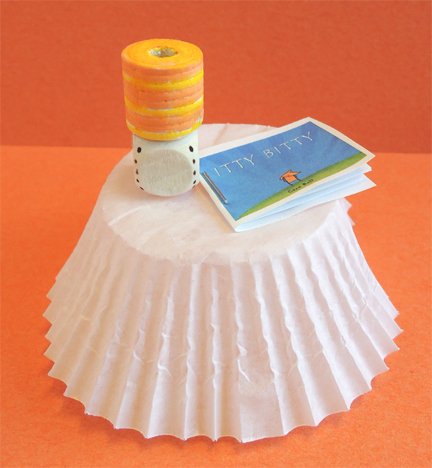
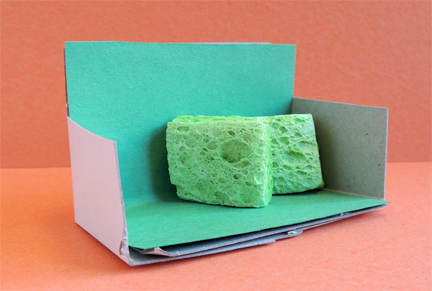
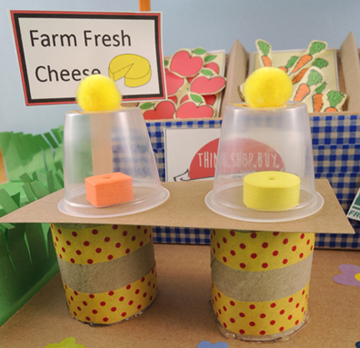
 To create the cheese table, cut a toilet paper tube in half and hot glue the halves to a piece of poster board or tagboard. Place a pair of foam bead “cheeses” on the table, then cover them with a clear plastic cup. Hot glue a mini pom-pom handle to the top of each cup, and finish with a cheese sign attached to a craft stick or wooden coffee stirrer.
 To make the flowers, cut 2 pipe cleaners into thirds, then color and cut 6 flowers from the farmers market flowers template. Tape the flowers to the pipe cleaners, and tuck the stems into half a toilet paper tube (we made a green tissue paper shrub for the other half of the toilet paper tube, but that’s optional!). I’d recommend hot gluing the cheese table and flower vases to the base – they can get a little tippy.
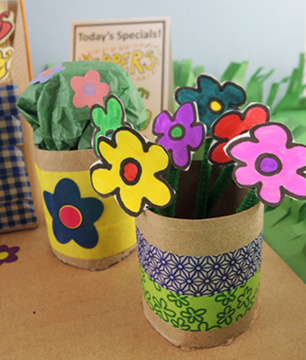 A few more touches. Behind the flowers you’ll see a “Today’s Specials” sandwich board (it’s on the farm stand template). On the front of the stand are “Shop Local” and “Jersey Fresh” signs, courtesy of Google images. Add some cute little flower stickers, and you’re done!
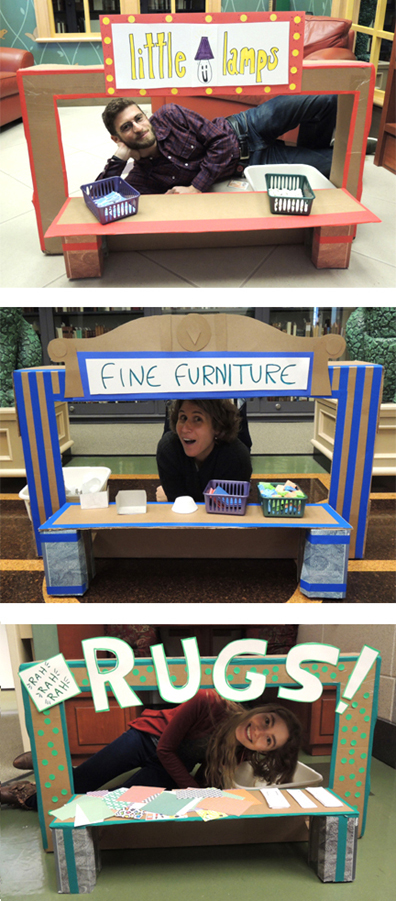
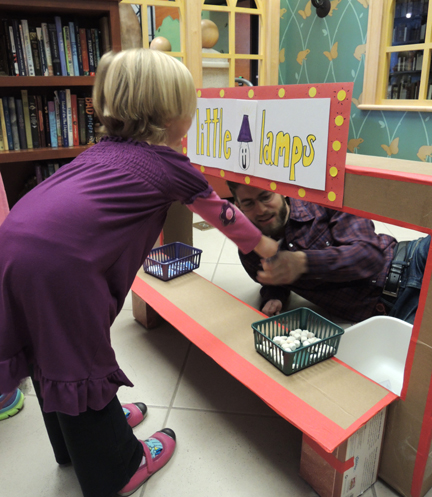
The kids lined up their fantastic stands, and the Farmer’s Market was officially open!
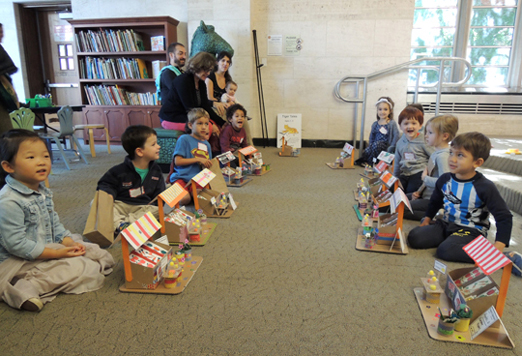 We gave grown-ups and little siblings magic bucks and paper sandwich bags. They browsed the stands, checking out the wares. We made a rule that you had to visit at least three stands and chat with three vendors.
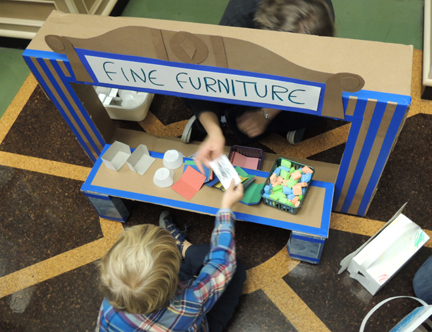
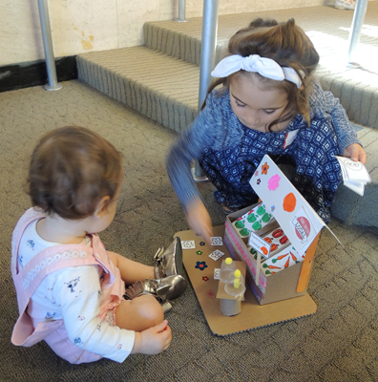
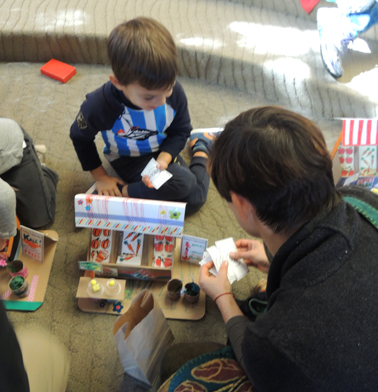 Customers seemed particularly enamored with the foam cheeses. And really, who wouldn’t be? Just keep an eye out to make sure the littlest shoppers don’t enthusiastically sample the wares!
 Roll out the red wagon…this little fox is going to market! We made tissue box wagons, grabbed our shopping lists, and headed to the market to play a vegetable matching game. Sporting fox ears and tails, naturally.
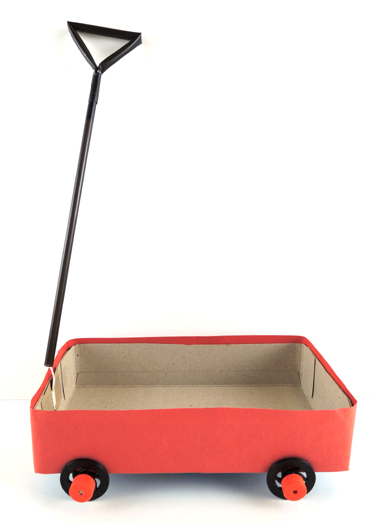 We’ll begin with the little red wagon! Cut a large tissue box down to 1.75″ inches tall, then wrap with red paper. You can go with our standard wheel assembly (instructions
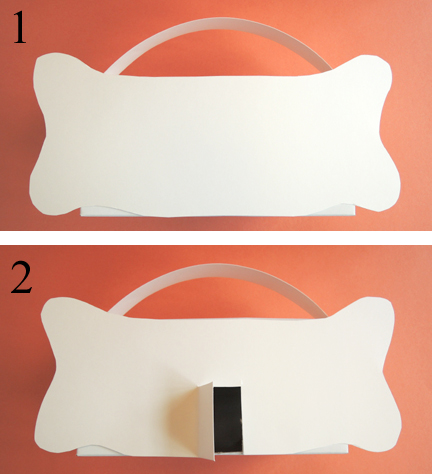
 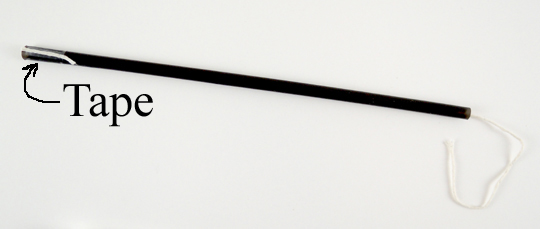 Next, cut two notches the center of a 1.25″ x 2″ piece of tagboard. This is the anchor for your wagon handle. Wrap the string around the notches in the tagboard, but don’t wrap all the string around it! Leave 1″ of string between the tagboard and the end of the straw. This will allow the handle to move left and right while you’re pulling your wagon.
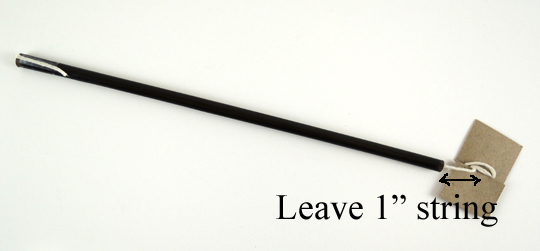 Bend a second drinking straw into 3 sections, pinch the ends together to form a triangular grip on the handle, then tape the ends of the straw firmly together.
 Fold and slide the taped section of the handle into the open end of the first straw. Cover the taped string with colored masking tape if you like (I used black in the photo below).
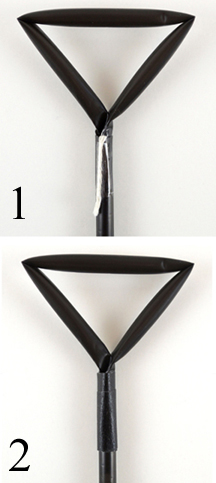 Here’s what a finished wagon handle looks like. A drinking straw handle, a 1″ gap of string, and a tagboard anchor wrapped with the remaining string.
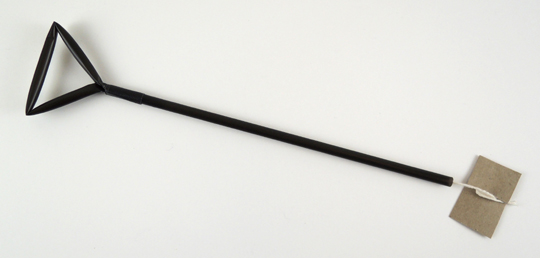 Tape the tagboard anchor to the front interior of the wagon. Done!
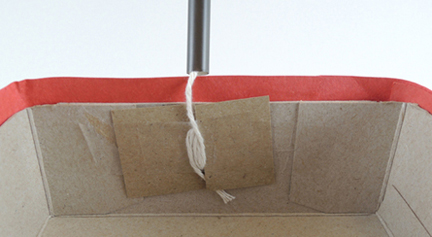 To make your fox costume, circle a strip of red poster board around your head, then staple it. Cut a pair of fox ears from red poster board, and add white construction paper ear interiors. Staple the ears to the headband. We attached our ears close to the front of the headband, and tilted them upwards slightly. Somehow, that just looked more foxy.
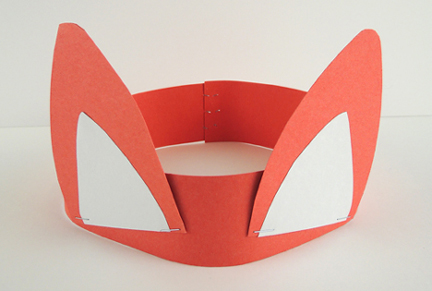 Next, cut a 6″ x 22″ rectangle of red poster board into a fox tail shape. Glue a little brush of white construction paper on the end of the tail, and tab the top. The tab slides inside the waistband of your pants (if you’re wearing a dress, punch two holes in the top of the tail, thread string through them, and tie the string around your waist).
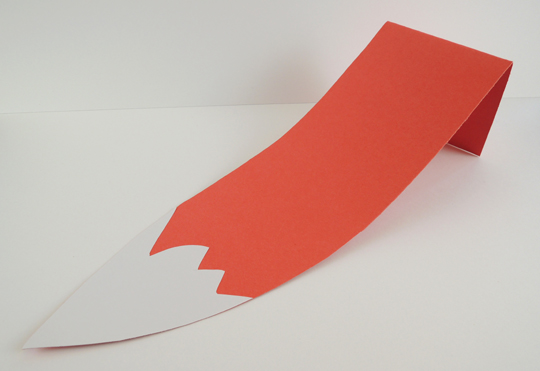 Your wagon and costume are finished…now to market! The matching game is very simple. Print the market signs, then put each sign next to the corresponding veggies from the template. I used 8″ table card holders (which you first met in this
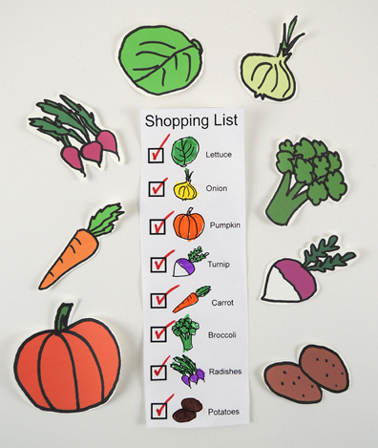
 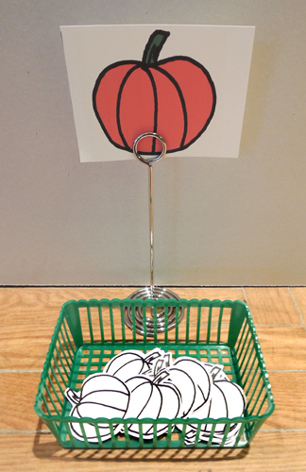 Then we gave each kid a shopping list. You’ll notice the lists are all slightly different. This was to avoid everyone rushing to the same area at once, like some sort of vegetable / woodland creature version of Black Friday. We also gave kids little shopping bags (basically, a brown paper lunch bag cut down to 4″). Following their lists, the kids located the matching sign, loaded the vegetable in their wagons, and checked it off their shopping lists.
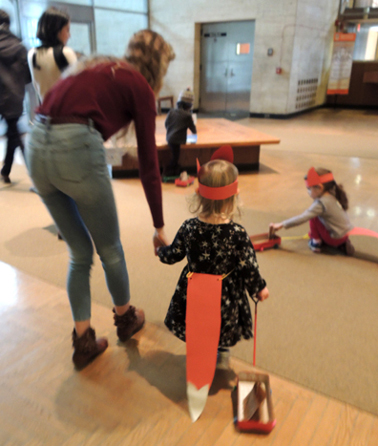 Once they had all their vegetables, they pulled everything back to the project area to color the vegetables and customize their paper bags!