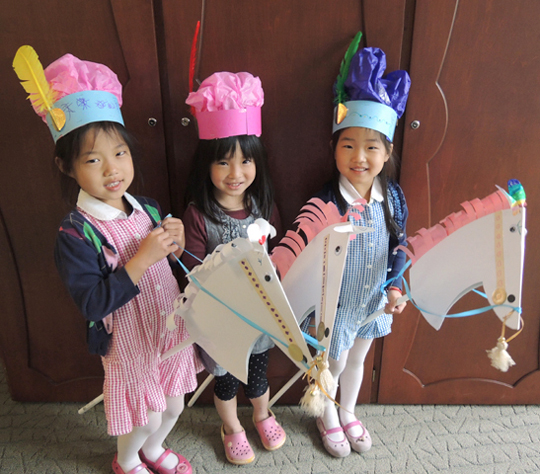
 Don your finery and trot the countryside on a beautiful, ornate steed! And if you happen to see a sturdy little pony named Fritz, don’t forget to stop and say hello!
We read Fritz and the Beautiful Horses by Jan Brett (HMH Books for Young Readers, 1987). Once upon a time, there was a walled city that was famous for it’s beautiful horses. But outside the city lived a plain little pony named Fritz. Fritz wanted to be like the beautiful horses, but no one was interested in a pony with a shaggy mane, fuzzy ears, and a whiskery muzzle. That is until one day, when the bridge is threatening to collapse and the children of the city are stranded on one side. The beautiful horses are too flighty, skittish, and snobbish to cross the river and take the children to safety. But Fritz, being both gentle and kind, is more than willing to help. Now, the walled city is proud of it’s beautiful horses…and it’s hero pony.
You’ll need:
- A 2.5″ x 22″ strip of poster board
- 1 sheet of tissue paper (mine was 19.5″ x 11.5″)
- 1 goose quill
- 1 large embossed foil seal
- 1 pony head template, printed on 11″ x 17″ paper
- A 11″ x 27″ piece of white poster board for head
- 2 rectangles of white construction paper for ears (approximately 2″ x 3.5″)
- Construction paper for mane and forelock
- 2 wiggle eyes
- 2 black dot stickers for nose
- 2 strips cut from a manilla file folder (approximately 0.75″ x 9″)
- 2 small embossed foil seals
- A 41.5″ piece of PVC pipe for stick
- A 35″ piece of ribbon for the reins
- Hole punch
- Packing tape
- Stapler, scissors, tape for construction
- Markers for decorating
- Hot glue
If you’d like to make a jingling tassel for your bridle, you’ll need:
- 1 book (mine was 6″ long)
- 12′ of yarn, plus a separate 3″ piece
- A 9″ piece of curling ribbon
- 1 jingle bell
We’ll start with your noble hat, and then proceed to the pony with optional jingle tassel!
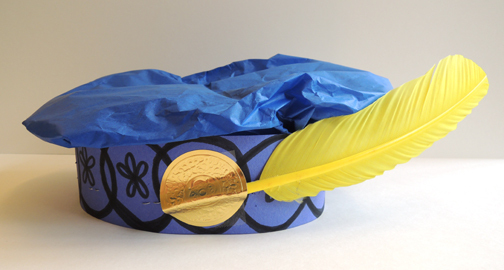 First, use the markers to decorate a strip of poster board. Circle the poster board strip around your head, then remove and staple. To create the poofy top to your hat, lay a sheet of tissue paper flat on a table.
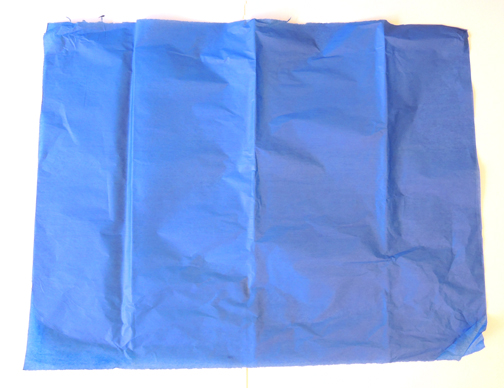 Gently lift and pull each corner of the sheet to towards the middle, gathering the corners together like this:
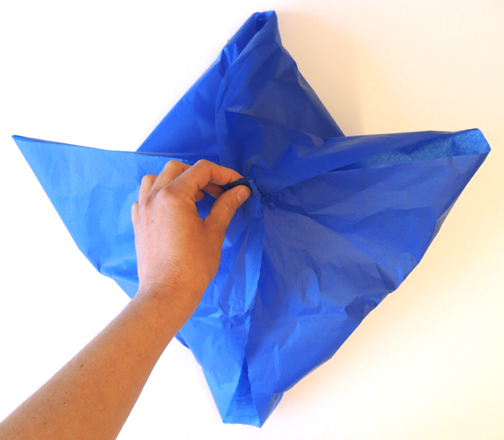 As you can see in the above picture, the tissue paper sheet now has 4 “points” sticking out of it. Fold those points towards the center of the sheet as well.
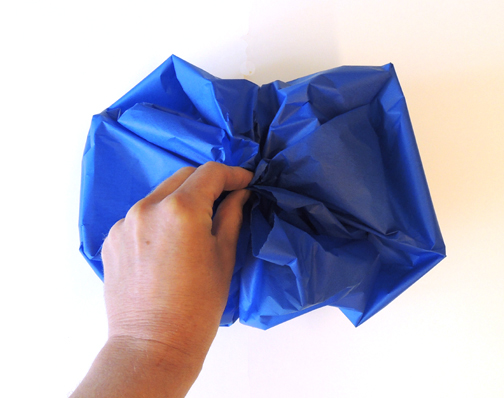 Your tissue sheet is now fully bunched. Carefully drop your hat band on top of the bunched tissue paper, and reopen the bunched edges until they meet the inside of the hat band. Staple the tissue paper around the interior perimeter of the hat band.
 Flip the hat over and tape a jaunty feather to the outside. Stick an embossed foil seal over the shaft of the feather to compete the look.
 Up next…the perfect pony!
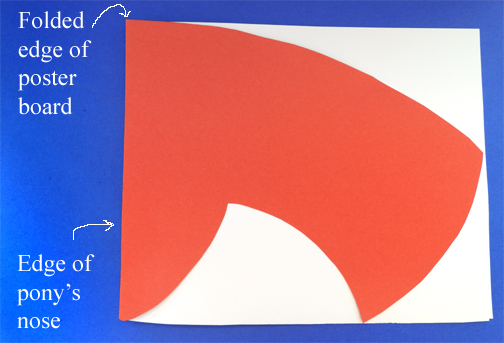
 Fold the large rectangle of white poster board in half to form a smaller, 11″ x 13.5″ rectangle. Then, place the pony head template (shown below in red for better contrast) onto the folded poster board. Make sure that the nose of pony is lined up with the fold in the poster board. Cut along the template, leaving the “nose fold” intact.
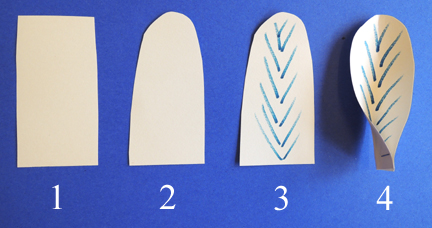
 Next, shape two ears out of the white construction paper rectangles, color the insides with markers, and staple each ear at the bottom.
 Then staple or hot glue an ear to each side of the pony’s head.
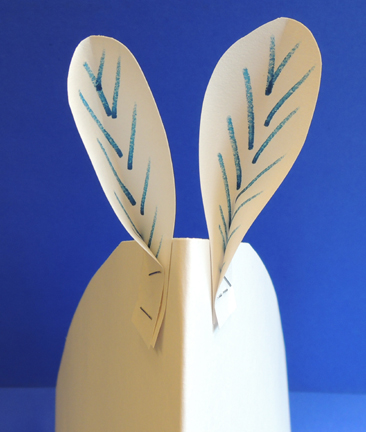 To create a forelock, make a 1.5″ cut down the fold of the head, directly between the ears.
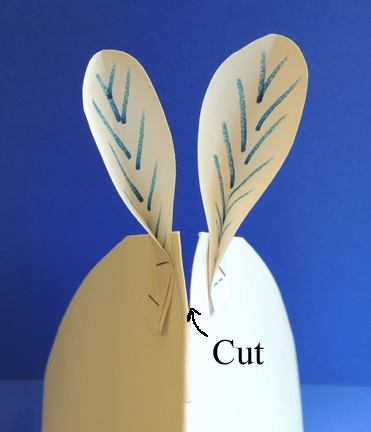 Fringe a small piece of white construction paper. Slide the fridge into the cut and secure it to the interior of the pony’s head with hot glue. Repeat on the left side.
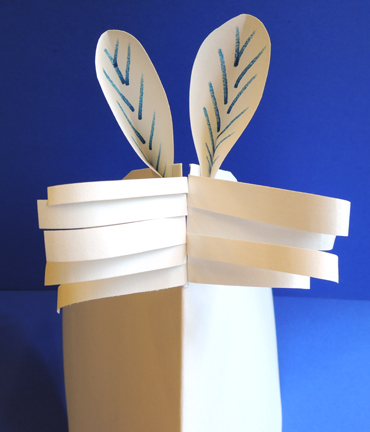 To create the mane, fringe a piece of white construction paper (use a 9″ x 12″ piece for a long mane, or a 4.5″ x 12″ piece for a short mane). Secure the mane inside the pony’s head, along the neck with hot glue. Repeat on the other side of the pony’ head.
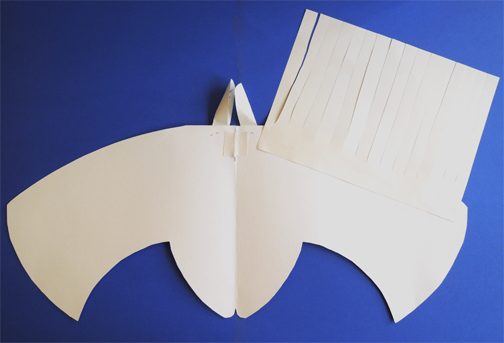 Punch a hole on each side of the pony’ mouth. This is where the reins and tassel will loop through.
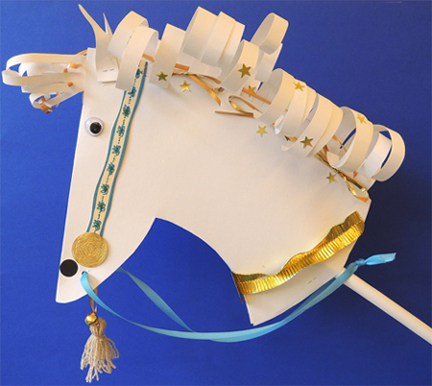
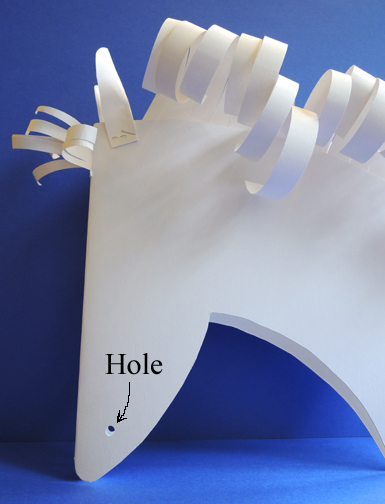 Time to decorate! Hot glue two wiggle eyes onto the head, and create nostrils using black dot stickers (you can also skip these materials and simple use markers to draw the eyes and nostrils). If you’d like a curly mane, wrap the construction paper fringes around a marker or pencil.
To make a bridle, decorate 2 manilla file fold strips with markers, and attach them on both sides of the head with tape or hot glue. Add a pair of small embossed foils seals at the bottom. If you have time, bring out the Bling Bin to add some extra flourishes, wind some curling ribbon through the mane.
 You can see reins and a tassel in the above photo, but don’t put them on just yet! It’s time to attach the pony’s head to the stick. Open your pony’s head. Lay the stick on one side of the head, making sure that the end of the stick is 1.5″ away from the fold. Use packing tape (not regular tape) to attach the stick to the neck. Use at least 4 pieces of packing tape to make it really secure.
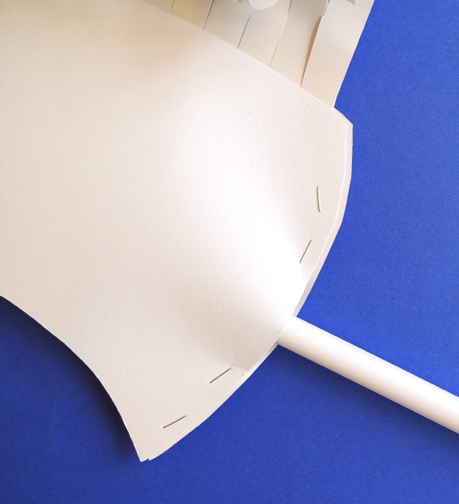
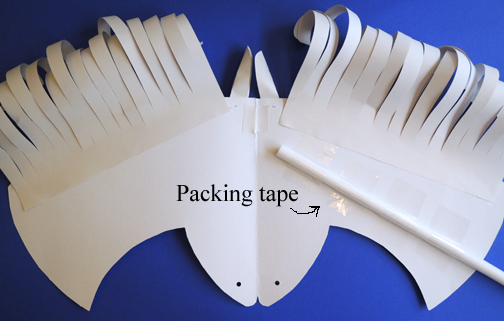 Then, close the head and put a few staples into the base of the head, around the stick.
 Thread a ribbon through the holes in the pony’s head and knot it behind the stick. The jingle bell tassel dangling from the pony’s bridle is purely optional, but I have to say the kids LOVED them. I prepped the tassels in advance. To make a tassel, wrap yarn around a book (my book was about 6″ long).
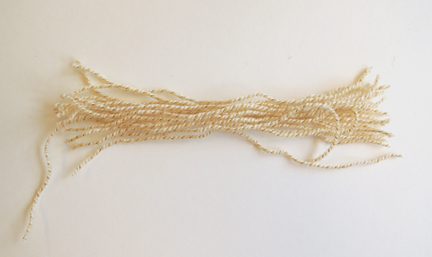
 Cut the yarn off both ends of the book. You now have a little pile of yarn like this:
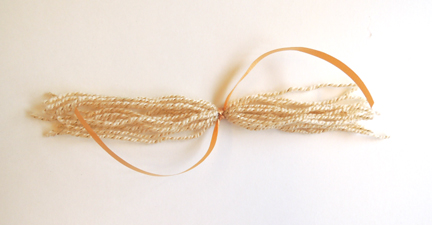
 Knot a piece of curling ribbon around the middle (curling ribbon is easier to thread through the opening of the jingle bell)
 Fold both sections of the yarn downwards and knot another piece of yarn around it like so
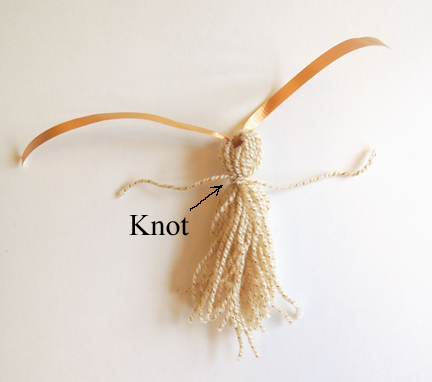 Trim overlong pieces of yarn off the sides and bottom of the tassel and you’re done!
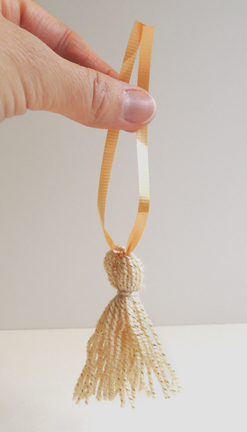 Thread a jingle bell onto the curling ribbon, then thread the curling ribbon through the holes your punched in your pony’s head. Knot securely. Your pony is finished, climb on and ride!
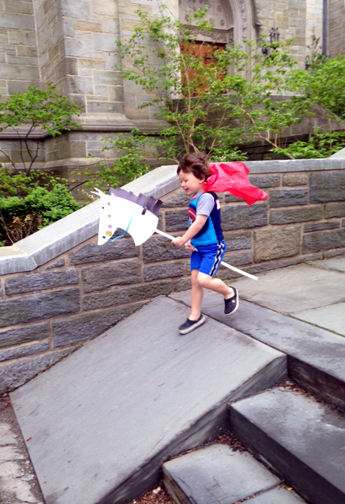
If you’re still not feeling the decadence, may we suggest a cape? Attach a large piece of tissue paper to your shoulders using two embossed foil seals like so:
 Then RIDE LIKE THE WIND!
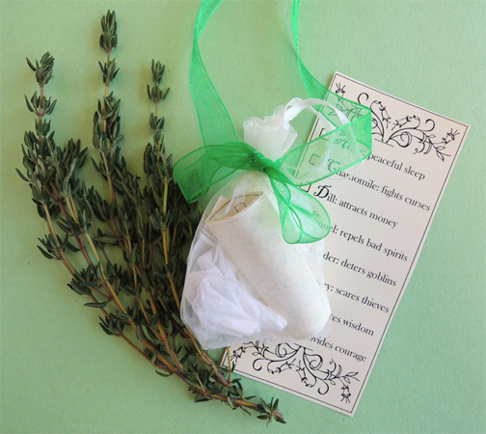 Have issues with goblins? Need a peaceful night’s sleep? Are you seeking wisdom and courage? This herbal amulet is just what you need! We made these amulets at a Robin Hood/ medieval history event, but they would also work splendidly at a Harry Potter program.
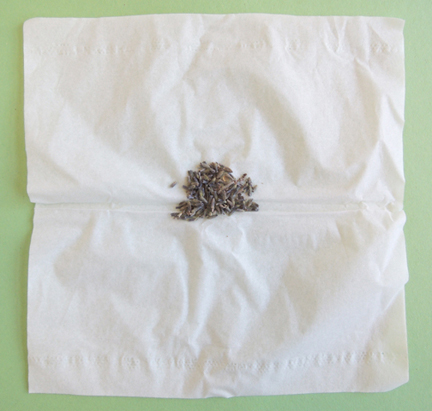
 At the event, kids checked off which herbs they wanted in their amulets. Then a student volunteer helped the kids put dried herbs on squares of tissue. A little herb goes a looooong way, so just a sprinkle is needed – especially if kids select multiple herbs. Here’s about how much you want in your amulet in total:
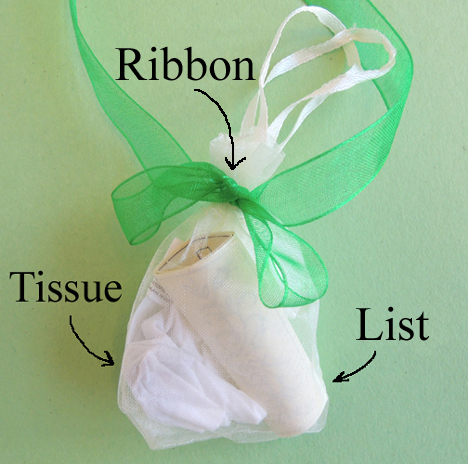
 Next, bunch the tissue around the herbs and slide the bundle into a mini organza drawstring bag. Roll up the herbal list and slide it in the bag too. Tighten the drawstring and tie a 30″ piece of ribbon or string around the top of the bag. Hang the amulet around your neck.
 That’s it! You’re now ready to repel bad spirits, fight curses, attract money, and scare away thieves! At the very least, you will smell quite, quite interesting.


