 Solve the riddles, find 3 keys, and discover an ancient temple at To Be Continued, our chapter book story time for ages 6-8. Crawl inside the temple to find treasure, but be warned – the traps hidden within these dark walls will make your blood run cold. Unless, of course, you like traps. Then it’s going to be AWESOME!
We read Addison Cooke and the Treasure of the Incas by Jonathan W. Stokes (Philomel Books, 2016). Addison Cooke and his younger sister Molly live in New York City with their Aunt Delia and Uncle Nigel, who are world-renowned archeologists. Uncle Nigel has just discovered the first of three mythical Incan keys rumored to lead to a vast treasure. Unfortunately, Uncle Nigel’s nemesis, the ruthless Professor Ragar, wants that treasure very badly. He kidnaps Uncle Nigel and Aunt Delia, expecting them to lead him to the treasure. But what he doesn’t expect is the intrepid Cooke children mobilizing their friends and, with the assistance of Uncle’s credit cards, heading off to South America to beat Ragar to the treasure and rescue their family. Caiman-infested rivers, booby-traps in buried treasure vaults, limousines driven by panicky middle-schoolers…nothing can stop Addison Cooke when he sets his mind to something!
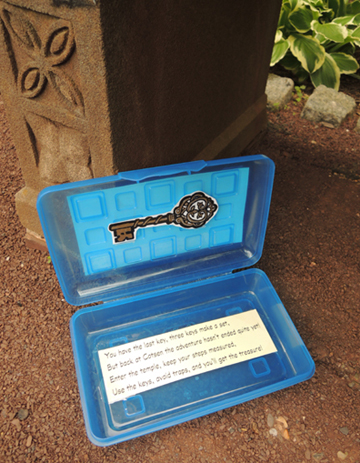
When the kids arrived at story time, I read them the first of 4 clues. This led them to a plastic box with a key and a clue to the next box (here’s the template for the keys if you’d like it).
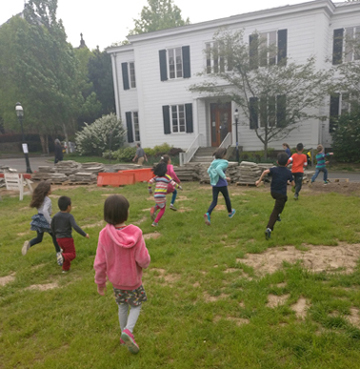
 The 3 box locations were quite some distance apart on Princeton University’s campus, so there was a fair amount of excited running. Marissa went with the gang, and managed to get some great action shots.
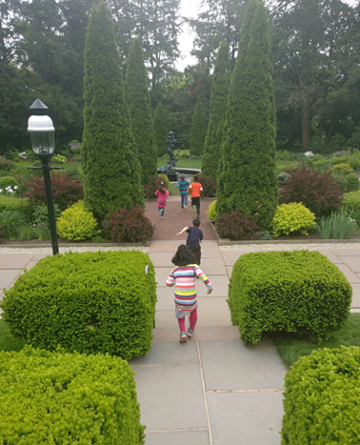 Here’s my favorite. Look at those feet coming completely off the ground!
 I don’t know about you, but I find rhyming clues really challenging to write. Especially when you want the kids to figure out where to go without being too obvious or clunky. I was, however, pretty happy with this one. Here’s a photo of the location:
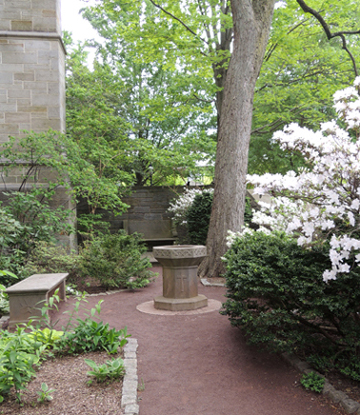 And here’s the clue that led to it:
It’s time to hurry! The last key awaits!
Next to the Chapel, in a special place.
Facing Firestone, peaceful and bright,
Benches of stone and flowers of white.
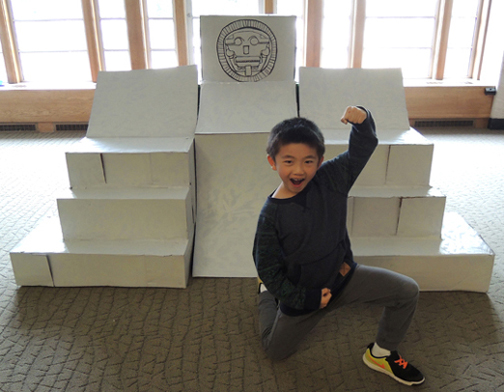
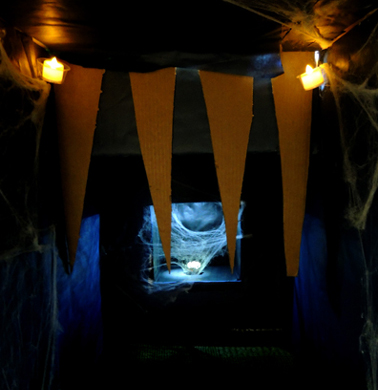
While Marissa and the kids were finding keys around campus, I was busy setting up the mysterious temple back at the library. It was a whopping 87″ long and 50″ high. We used 15 boxes, 2 tubes, 7 cardboard flats, multiple rolls of packing tape, and gray paint we had left over from this knight helmet project. The temple broke into three pieces so we could get it out of storage, hustle it through a doorway, and set it up in the gallery.
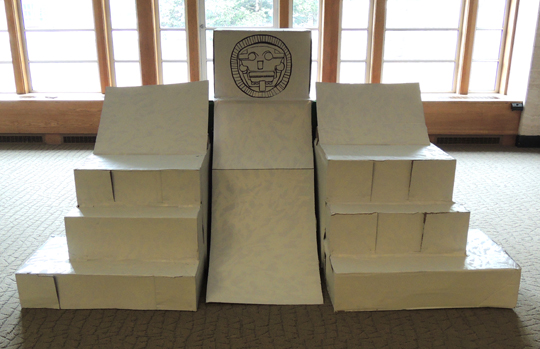 Here’s a shot from the side so you can get an idea of the size and how we constructed it.
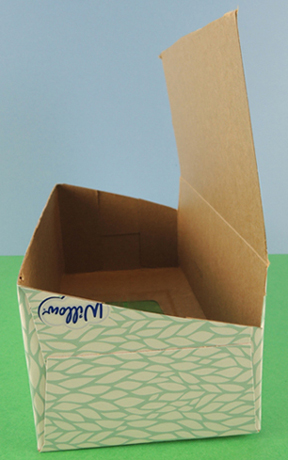
 The ramp in the front of the temple lifted to reveal a felt-covered doorway. From there, kids entered a creepy, cob-web covered chamber illuminated with votive LED candles. One at a time, the kids crawled across a floor rigged with bubble wrap to snag a golden treasure box (which we lit from above with an LED light mounted in the top of the treasure vault box).
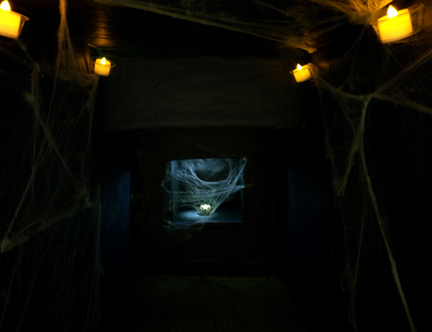 The minute the treasure left the vault, it triggered cardboard spikes dropping from the ceiling! That was me outside the box, manually raising and lowering the spikes from a slit in the ceiling. There was lots of laughing and screaming. Good times!
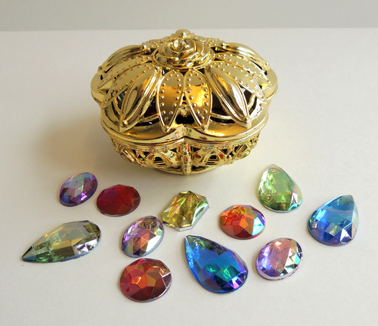
 The characters in the book have a couple run-ins with caiman, so the final touch was an alligator puppet (operated by Marissa) that snapped at the kids as they exited the temple. The hard-earned treasure boxes were plastic jewelry boxes I found at the Dollar Store. They were loaded with plastic gemstones as well. Each kid received a treasure box, and, to make reloading the treasure vault easier, we cut a little trap door in the back of the box.
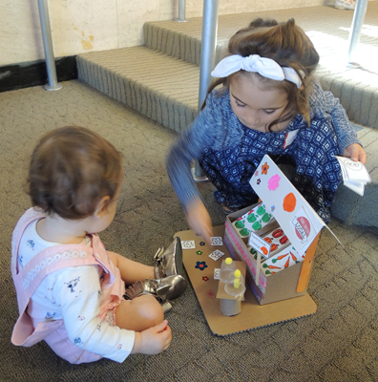
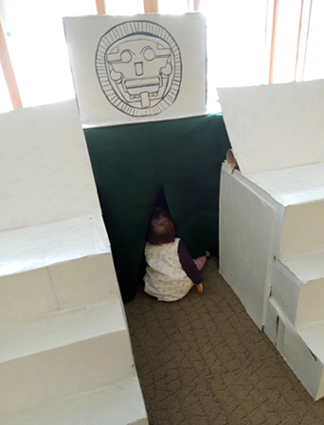
 After everyone had received a treasure box, we opened the temple back up and just let the kids have fun entering and exiting, dodging the spikes. Some of the younger siblings tried too (sans spikes of course). And then there was this little baby who was totally fascinated by the interior of the temple. She hung out for quite a while!
 Addison Cooke and the Treasure of the Incas is a fantastic read-aloud. It’s hilarious, adventurous, faced-paced, with strong strains of Indiana Jones and The Goonies. Definitely looking forward to reading more books in this series!
 Scowls, frowns, crabbiness, and a general feeling of malcontent? Totally fine. Because when it comes to pet ownership, you need to find the pet that works for you. Even when you’re grouchy!
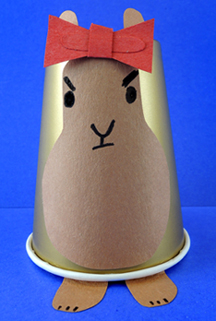 When everyone is finished, it’s time for a game! Line the pets up on a “pet store” table. One by one, have the kids find their pets, then tell the group (or, if they’re shy, their grown-ups) the pet’s name and what the pet hates. However, the kids must have tremendous scowls on their faces while talking. The minute they smile or laugh, their turn is up!
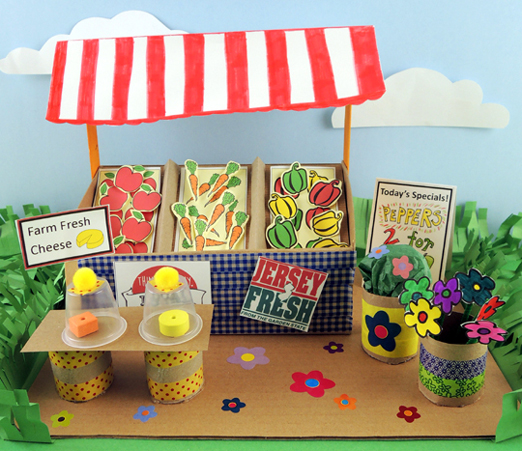 Stock up your stand and get ready for some customers! We let grown-ups and siblings browse at a farmer’s market full bursting with fresh veggies, flowers, and artisanal cheeses (which, coincidentally, look a lot like
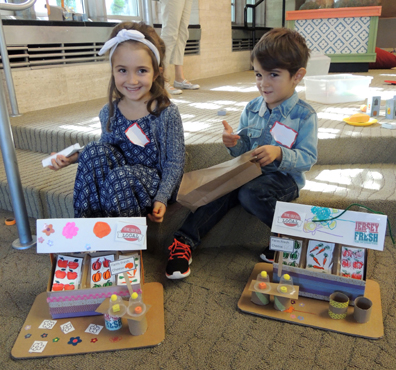
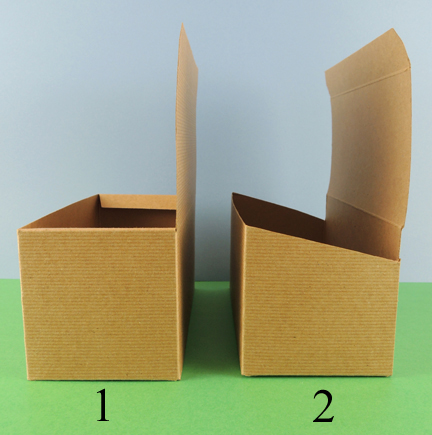 Now make 2 folds. Fold the lid over the lower edge of the counter. Then fold the lid upwards (a.k.a. a valley fold) so it rests on the higher end of the counter. Your counter will now look like this:
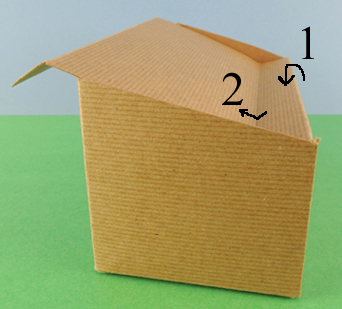 See the part of the lid that extends past the counter? Push that back down towards the lower end of the counter, then tuck it inside the higher end of the counter. You now have slanted bins that are sunken in the counter.
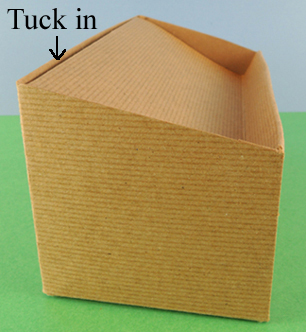 Make a pair of folded tagboard bin dividers, but don’t attach them just yet!
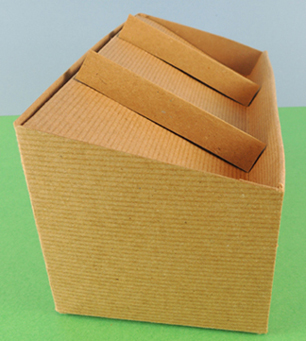
 Fold the lid over the lower edge, then upwards to the higher edge. But instead of tucking the end of the lid into the box, just tape it to the higher edge.
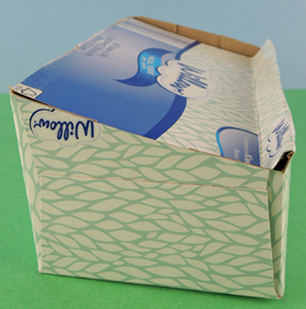 Finish with a pair of tagboard bin dividers.
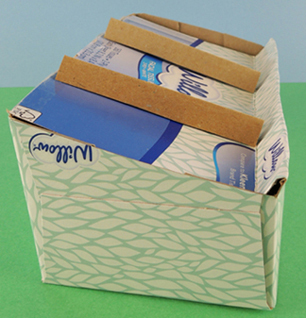 Use markers and patterned tape to decorate the counter, then hot glue it to the cardboard base. Now for the awning! Hot glue (or tape) 2 jumbo craft sticks to both ends of the counter. Fold a 4.5″ x 10.5″ piece of card stock in half and decorate it with markers. Put generous globs of hot glue on the ends of the jumbo sticks, then gently press the card stock awning in place.
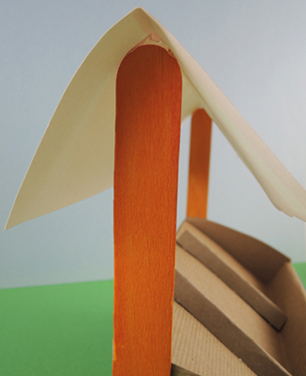 Color and cut the produce bin backdrops from the
 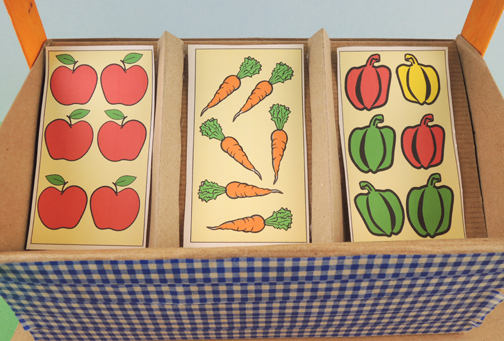 You’ll notice that there are 2 sets of produce bins on the template. One set is for the background. The other set is for you to individually cut, drop in the bins, and sell at market!
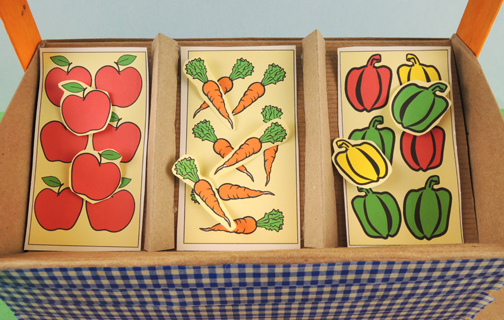 To create the cheese table, cut a toilet paper tube in half and hot glue the halves to a piece of poster board or tagboard. Place a pair of foam bead “cheeses” on the table, then cover them with a clear plastic cup. Hot glue a mini pom-pom handle to the top of each cup, and finish with a
 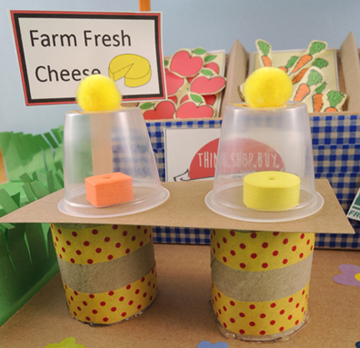 To make the flowers, cut 2 pipe cleaners into thirds, then color and cut 6 flowers from the
 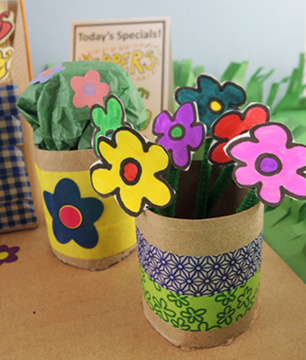 A few more touches. Behind the flowers you’ll see a “Today’s Specials” sandwich board (it’s on the farm stand template). On the front of the stand are “Shop Local” and “Jersey Fresh” signs, courtesy of Google images. Add some cute little flower stickers, and you’re done!
 We gave grown-ups and little siblings
 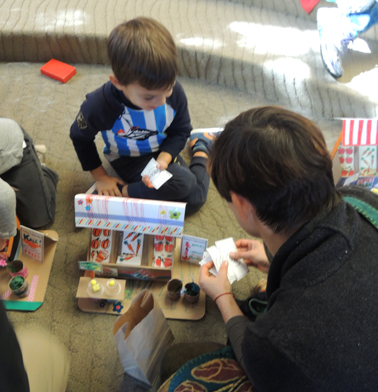 Customers seemed particularly enamored with the foam cheeses. And really, who wouldn’t be? Just keep an eye out to make sure the littlest shoppers don’t enthusiastically sample the wares!