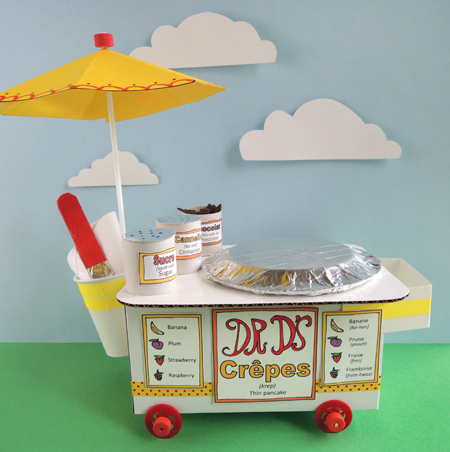
 Make delicious crêpes to order with this fantastic crêpe cart! Pour the fabric batter onto the griddle, add a number of felt toppings, sprinkle on a bit of sucre from your counter top shaker, then use your spatula to fold the crêpe at just the right time. The cart’s signs are printed in both English and French (with helpful pronunciation guides), so your customers can order like Parisian pros! C’est Magnifique!
We read Crêpes by Suzette by Monica Wellington (Dutton, 2004). Suzette sells crêpes from her street cart in Paris, concocting delicious treats with her batter, griddle, and spatula. The postman orders his crêpes with fresh raspberries, a child loves chocolate and banana, a dancer orders zesty lemon. Mmmm! In addition to telling a sweet story, the book is illustrated with photos of Paris. The hand drawings that overlay the photos include nods to van Gogh, Picasso, Cassatt, Matisse, and Degas. In the back of the book is a crêpe recipe, a glossary, and notes on the French artists depicted in the illustrations.
You’ll need:
- 1 large box (mine was 4.5” X 4.5” x 9” – a large tissue box works too)
- 4 plastic, wooden, or cardboard wheels
- 2 bamboo skewers
- 2 drinking straws
- 1 corrugated cardboard rectangle for your cart’s counter top
- 1 strip of poster board for cart’s handle (approximately 1.5″ x 10.75″)
- 1 8oz paper cup
- A selection of patterned tape
- 4 small plastic cups (I used 1.25oz Solo cups)
- 1 small paper plate (mine was 9.75″ in diameter)
- Tin foil
- 1 crepe cart template, printed on 8.5″ x 11″ paper
- 1 umbrella template, printed on 8.5″ x 11″ card stock
- 2 foam beads
- 1 balloon stick
- 1 jumbo craft stick (mine was 8″ long)
- 3 circles of white cloth (mine were 6″ in diameter)
- 2 toilet paper tubes
- 3 circles of silver poster board or mirror board
- Pieces of brown, red, pink, yellow, and purple felt
- Scissors, tape, and glue for construction
- Markers for decorating
- Hot glue
Our cart had plastic wheels (you’ve seen in this pull-along animal, this pig parade float, and this race car post). But you can also use wooden on cardboard wheels. If you don’t want your cart to roll, simply hot glue the wheels to the sides. But if you want a rolling cart, our wheel assembly instructions can be found here.
We slid foam beads on the ends of the axles to keep the wheels from popping off, but tape works too! Next, decorate the box, the corrugated cardboard counter top, the white poster board cart handle, and a paper cup with patterned tape. Attach these items to the cart like so:
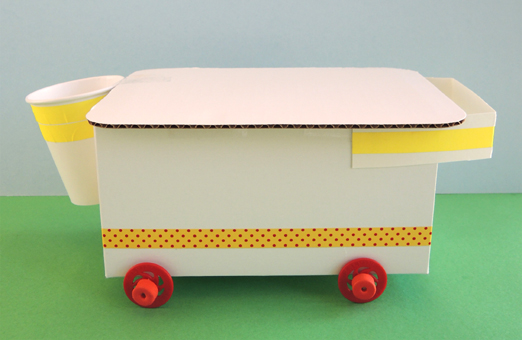 Two important things about the cart’s counter top! 1) Make sure it’s wide enough to fit your small paper plate (our counter tops were 7.5″ x 9.75″); 2) It’s a little hard to tell in the above photo, but make sure the paper cup end of the counter top is flush against the side of the box. Otherwise, your umbrella won’t attach correctly. And speaking of paper cups, notice how ours is taped towards the back of the cart? That’s so you won’t keep bumping into the umbrella while reaching for your crêpe supplies.
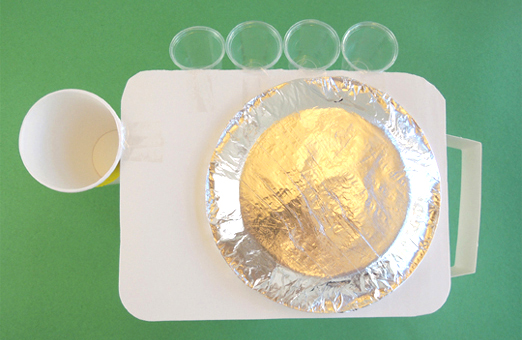
Next, tape 4 small plastic cups to the back of the cart (these will hold your crêpe fillings later). Cover a small paper plate with tin foil, then hot glue it to the side of the counter top closest to the cart’s handle. Here’s a bird’s eye view:
 The umbrella comes next! Cut the umbrella octagon from the template (we printed ours on yellow card stock). Decorate it with markers, then use scissors to cut a slit from one of the points of the octagon to its center.
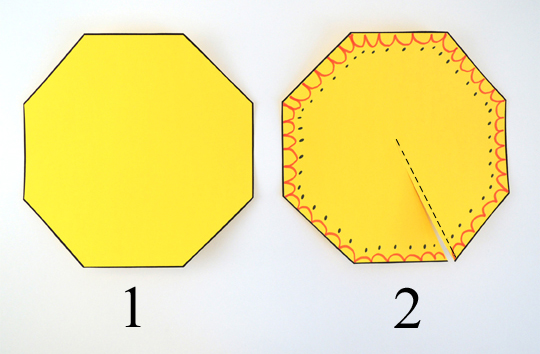 Carefully mountain fold the octagon along its remaining points.
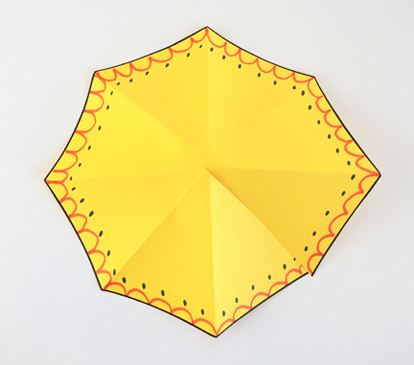 Cut a small slice in the top (this is where your umbrella pole will poke through). Next, slide one of the octagon’s triangle folds under another, then tape the octagon closed.
 This results in a seven-sided umbrella canopy with a hole in the top.
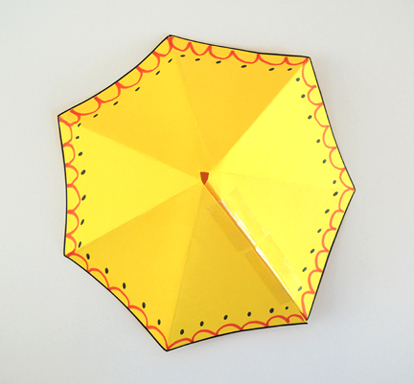 Now stick a foam bead on the end of a balloon stick.
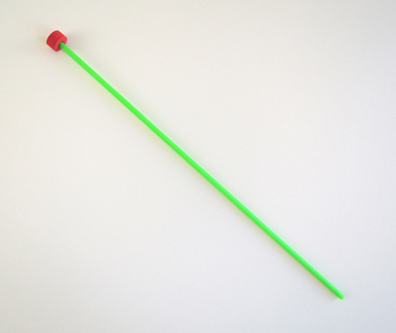 Slide the umbrella canopy up the stick to meet the foam bead.
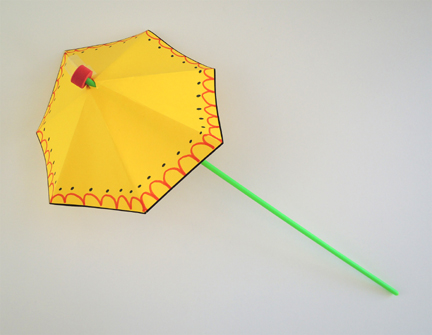 Slide a second foam bead up the stick to secure the umbrella’s canopy in place. In the below photo, you can see the umbrella canopy wedged between a red bead and an orange bead.
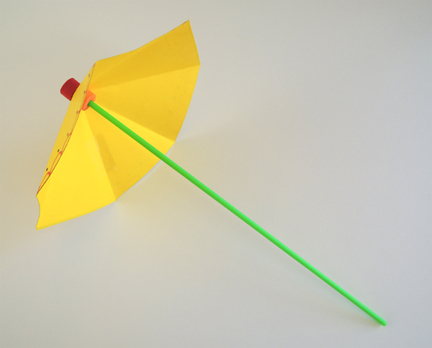 Tape the umbrella to the stand. If the balloon stick extends past the bottom of the cart, use scissors to clip off the excess.
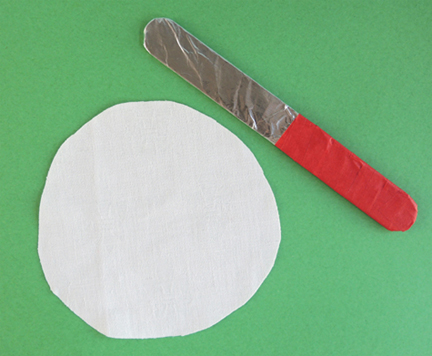
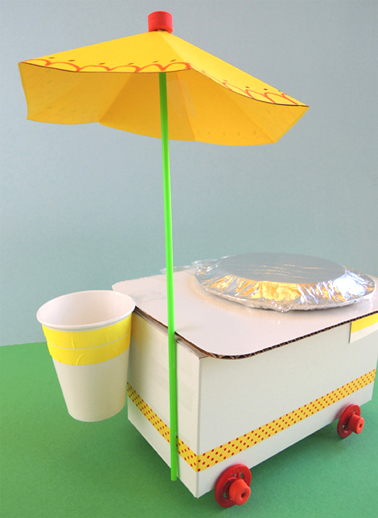 Now it’s time to stock your cart! Cut and decorate the signs from the crêpe cart template, and glue (or tape) them to the front of the cart. The crêpe batter and spatula go into the paper cup. Our “batter” was an old fabric tablecloth (thank you recycling program!). Each batter circle was 6″ in diameter, and there were 3 circles per cart. The spatula was an 8″ craft stick wrapped in tin foil with a colored tape handle.
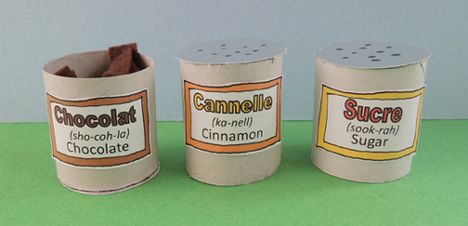
 Sitting on top of the cart are your sugar, cinnamon, and chocolate canisters. Each canister was 1/2 of a toilet paper tube with a template label affixed to it. The sugar and cinnamon had little circles of silver mirror board hot glued to the tops (we used Sharpie to draw little holes in the tops too). The chocolate canister’s circle is hot glued to the bottom of the tube. Then it gets stuffed with bits of brown felt.
 The little plastic cups on the back of the cart are also filled with bits of felt. Pink for strawberry, red for raspberry, yellow for banana, and purple for plum.
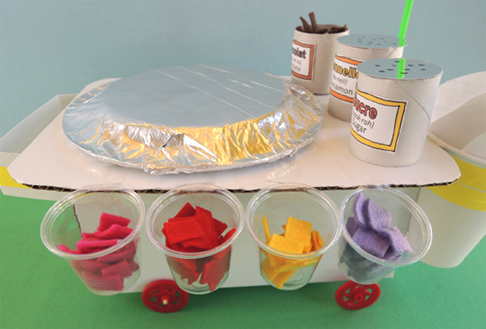 Voilà! Your cart is finished! So, how exactly do you make a crêpe? You put the circle of batter on the griddle, add some felt ingredients, fold the crêpe in half with the spatula, fold the crêpe in half again, then serve it to your customer.
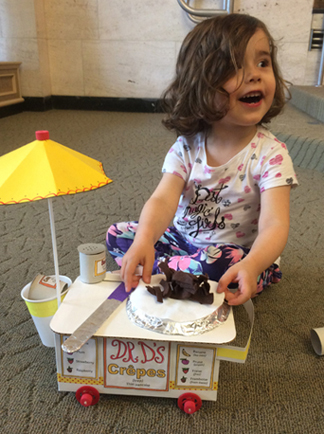 Or maybe it would just be easier to show you…in French no less!
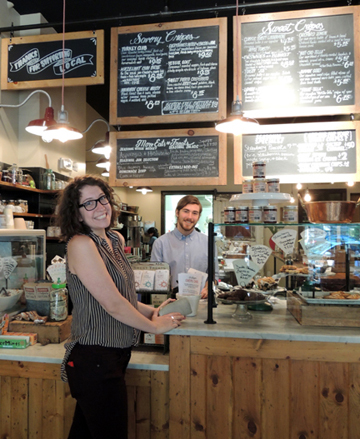
This project did require some research. It just so happens that Princeton has a fantastic, independently-owned, fresh-local-ingredient-loving crêpe haven called Jammin’ Crêpes. Marissa and I dragged ourselves there to make sure our crêpe cart was 100% accurate (we, um, drag ourselves there just about every week too).
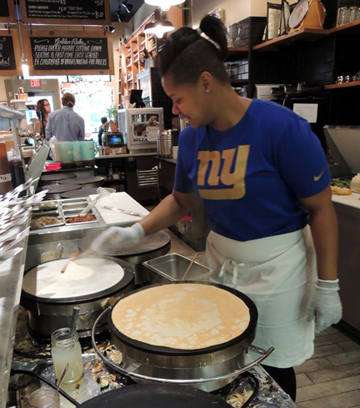
 Here’s a griddle at work. You can just see the special spatula on the white cutting board…
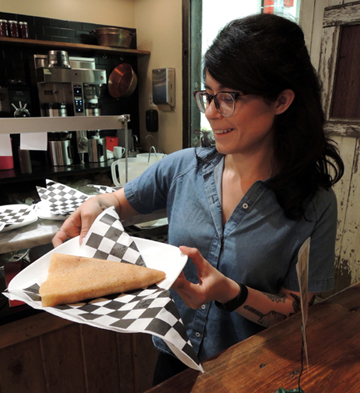
 The crepe arrives at your table in a beautiful, warm wedge of deliciousness. I’m trying to work my way through the restaurant’s generous menu of sweet and savory crêpes, but I keep getting stalled on their hammin’ cheese melty with seasonal pickles and mustard aioli. Mmmmmm…
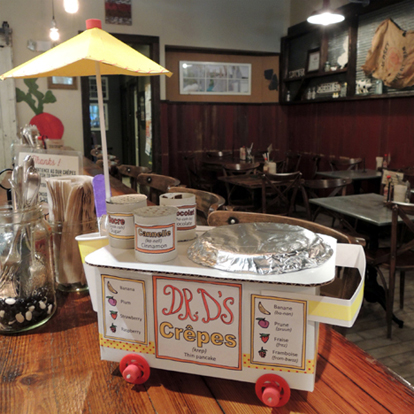
 Jammin’ Crêpes LOVED the little crêpe cart! It received their official stamp of approval.
 Did I – heh heh – mention Jammin’ Crêpes makes their own nutella spread with hazelnuts, almonds, and chocolate? I think…I need to do some more crêpe research. Right. NOW.
(Sound of chair being pushed back and feet tearing out of office)
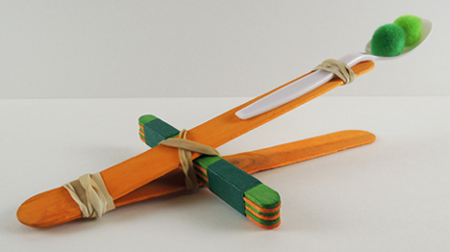
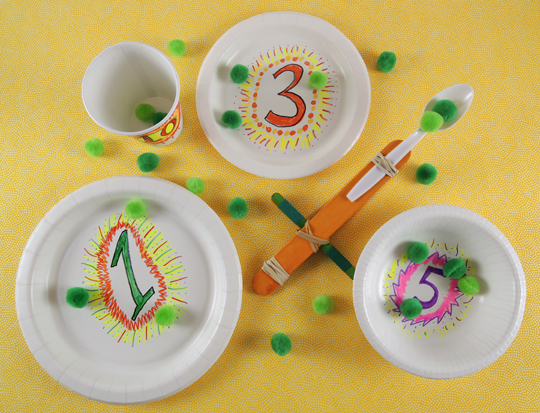 It’s dinner time and the peas are flying! Can your land the pom-pom peas on the plates, bowls, and cups? Bust out your pea catapult and get ready to do some physics and math!
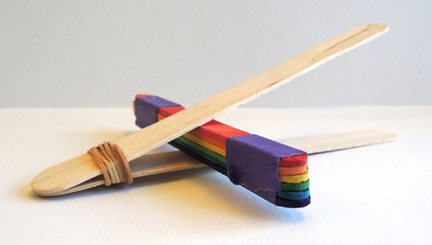
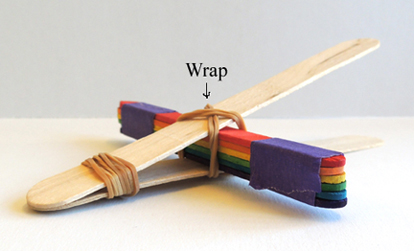
 Wedge the stack of 6 craft sticks in between the jumbo crafts sticks like so:
 Now for your targets! Use markers to decorate paper plates, bowls, and cups. Make sure to assign a numerical value to each item.
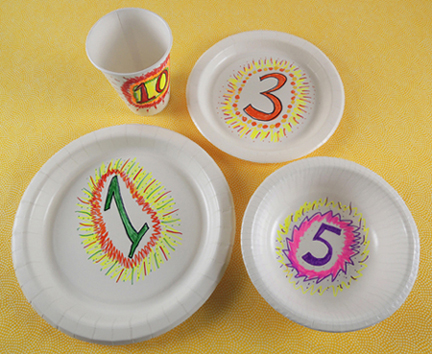 Ready to play? Set your table, load up your catapult, and launch some peas! Use your math skills to tally points, and play around with physics as you adjust your spoon and your catapult to achieve maximum results.
 Q: What books inspired you to do the creative things you do today?
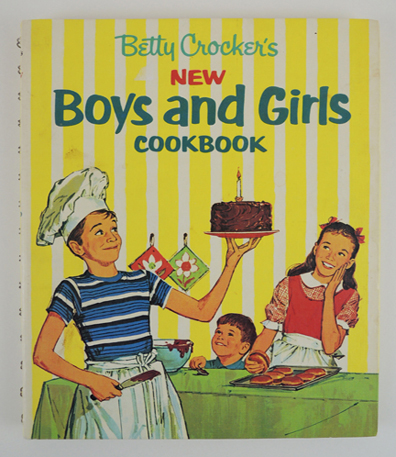 I would look at this book for hours. I would slowly flip the pages, eagerly anticipating the arrival of my favorite section. Can you guess which one it was? Yup. “Cookies, Cakes, and Other Desserts.” Here is the cake of my childhood dreams:
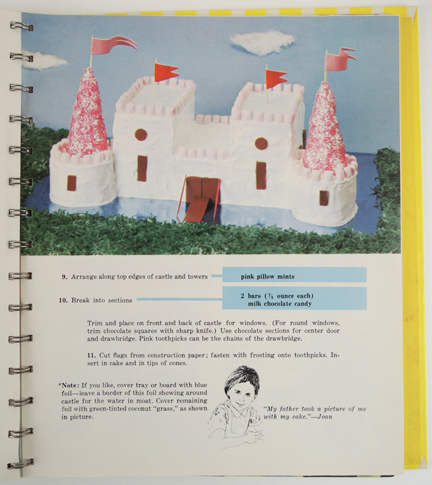 Oh where do I start? I was wholly enthusiastic about cake (and those pink pillow mints – wow, do they even make those anymore?). But even more, I loved that someone had taken food and sculpted it into something imaginative and fantastical. Then fearlessly added non-edible items (such as the toothpick drawbridge chains) to complete the picture. Also, they didn’t just photograph the cake on a table. They set the scene with grass, a shiny moat, and a blue sky with cotton ball clouds. And how about this beautiful creation…
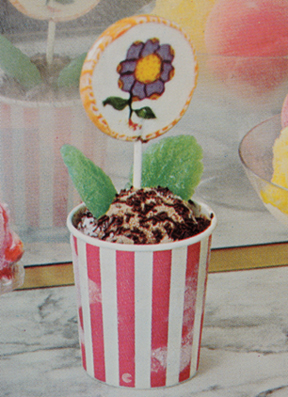 It’s an “Ice Cream Flower Pot.” A waxed paper cup, ice cream and crushed cookie “dirt,” candy leaves, and a frigging lollipop flower! You can put lollipops and ice cream together and make it look like a flower pot? My mind was officially blown.
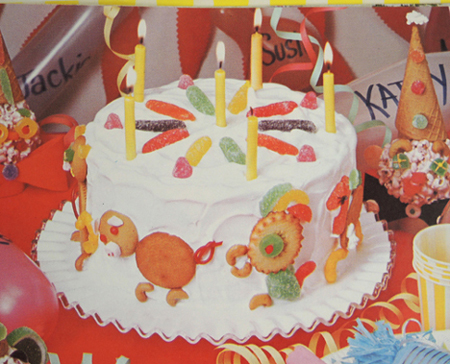 Those wild and crazy Betty Crocker bakers even used holiday-specific candy…on cakes that were totally unrelated to that particular holiday! Like candy canes on a 4th of July “Drum Cake”:
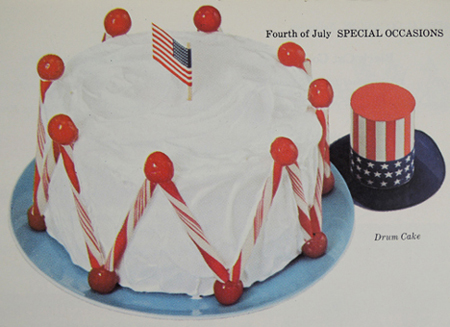 This taught me that you could look at an object, even a familiar one like a candy cane, and see it used for a different purpose or in a different context. That, my friends, is a pretty abstract lesson to be learned from a cake. I still want to eat those cherries too.
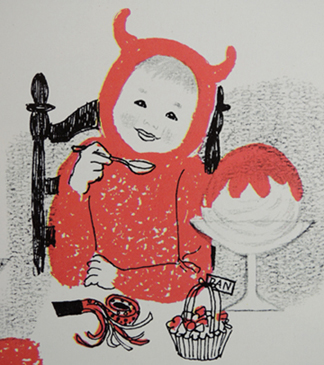 When it came time to dress my firstborn for Halloween 2009, what costume did I choose?
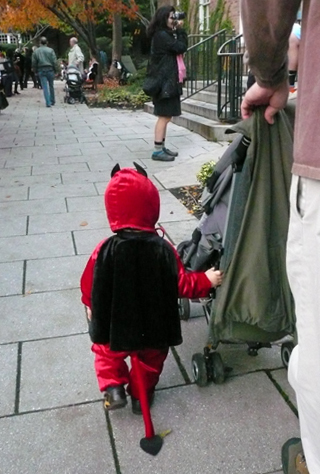 Coincidence? I don’t think so.
 Make delicious crêpes to order with this fantastic crêpe cart! Pour the fabric batter onto the griddle, add a number of felt toppings, sprinkle on a bit of sucre from your counter top shaker, then use your spatula to fold the crêpe at just the right time. The cart’s signs are printed in both English and French (with helpful pronunciation guides), so your customers can order like Parisian pros! C’est Magnifique!
 Two important things about the cart’s counter top! 1) Make sure it’s wide enough to fit your small paper plate (our counter tops were 7.5″ x 9.75″); 2) It’s a little hard to tell in the above photo, but make sure the paper cup end of the counter top is flush against the side of the box. Otherwise, your umbrella won’t attach correctly. And speaking of paper cups, notice how ours is taped towards the back of the cart? That’s so you won’t keep bumping into the umbrella while reaching for your crêpe supplies.
 The umbrella comes next! Cut the umbrella octagon from the template (we printed ours on yellow card stock). Decorate it with markers, then use scissors to cut a slit from one of the points of the octagon to its center.
 Carefully mountain fold the octagon along its remaining points.
 Cut a small slice in the top (this is where your umbrella pole will poke through). Next, slide one of the octagon’s triangle folds under another, then tape the octagon closed.
 This results in a seven-sided umbrella canopy with a hole in the top.
 Now stick a foam bead on the end of a balloon stick.
 Slide the umbrella canopy up the stick to meet the foam bead.
 Slide a second foam bead up the stick to secure the umbrella’s canopy in place. In the below photo, you can see the umbrella canopy wedged between a red bead and an orange bead.
 Tape the umbrella to the stand. If the balloon stick extends past the bottom of the cart, use scissors to clip off the excess.
 Now it’s time to stock your cart! Cut and decorate the signs from the crêpe cart template, and glue (or tape) them to the front of the cart. The crêpe batter and spatula go into the paper cup. Our “batter” was an old fabric tablecloth (thank you
  Sitting on top of the cart are your sugar, cinnamon, and chocolate canisters. Each canister was 1/2 of a toilet paper tube with a template label affixed to it. The sugar and cinnamon had little circles of silver mirror board hot glued to the tops (we used Sharpie to draw little holes in the tops too). The chocolate canister’s circle is hot glued to the bottom of the tube. Then it gets stuffed with bits of brown felt.
 The little plastic cups on the back of the cart are also filled with bits of felt. Pink for strawberry, red for raspberry, yellow for banana, and purple for plum.
 Voilà! Your cart is finished! So, how exactly do you make a crêpe? You put the circle of batter on the griddle, add some felt ingredients, fold the crêpe in half with the spatula, fold the crêpe in half again, then serve it to your customer.
 Or maybe it would just be easier to show you…in French no less
 Here’s a griddle at work. You can just see the special spatula on the white cutting board…
 The crepe arrives at your table in a beautiful, warm wedge of deliciousness. I’m trying to work my way through the restaurant’s generous menu of sweet and savory crêpes, but I keep getting stalled on their hammin’ cheese melty with seasonal pickles and mustard aioli. Mmmmmm…
 Jammin’ Crêpes LOVED the little crêpe cart! It received their official stamp of approval.
 Did I – heh heh – mention Jammin’ Crêpes makes their own nutella spread with hazelnuts, almonds, and chocolate? I think…I need to do some more crêpe research. Right. NOW.