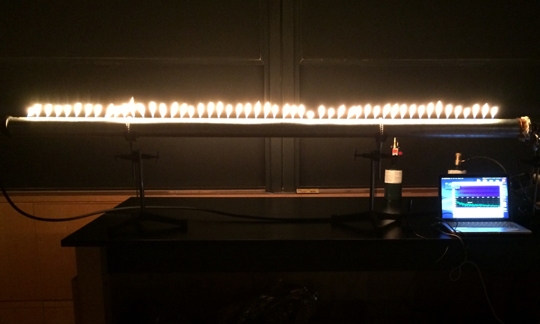
 We always love explosions here at Pop Goes the Page, but today we are going to bring you something truly unique…today, we are going to show you words as fire. Yes, FIRE!
This remarkable demonstration would not be possible without two things: 1) A Ruben’s tube, and 2) Princeton University’s Manager of Undergraduate Labs and Demonstrations, Mr. Omelan Stryzak. There’s an interview with Omelan at the end of the post, but for now, let’s get to the FIRE!
A Ruben’s tube, which was invented by German physicist Heinrich Ruben’s in 1905, is a length of tube with perforations along the top. One end of the tube is attached to a flammable gas, and the other end to a small speaker or frequency generator. Send the gas flowing through the pipe, ignite where it escapes through the perforations, and then introduce sound through the speaker. The flames will oscillate higher and lower according to the pitch of the sound or song.
Here’s “Flight of the Bumblebee,” played through the Ruben’s tube:
Of course, being the literary fans we are, we wanted to see what happens when we read into the Ruben’s tube. Wouldn’t it be cool to see words as FIRE? The short answer is yes. It is waaaaay cool to see words as fire. Here’s Jabberwocky by Lewis Carroll. Please note: I recited it all weird to get the pitch of my voice in different places.
This awesome demo was masterminded by Omelan Stryzak, Princeton University Department of Physics. Here he is, photographed in his office/magical science playground.
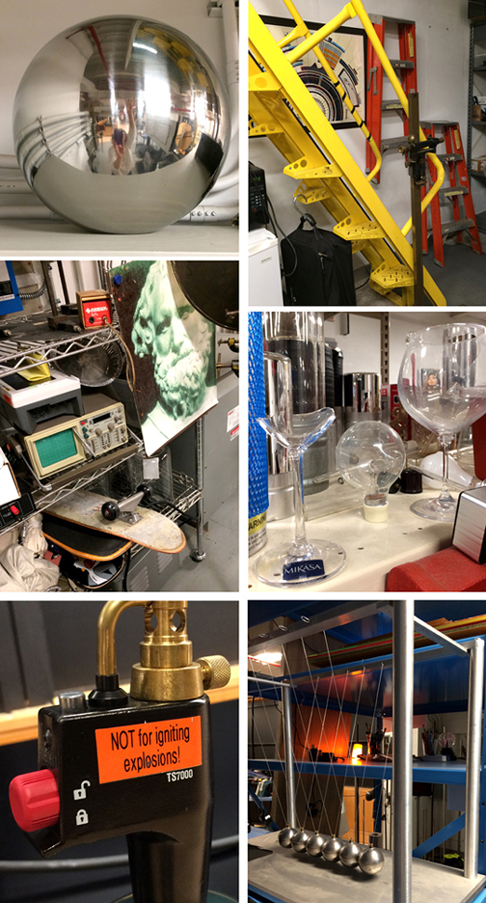
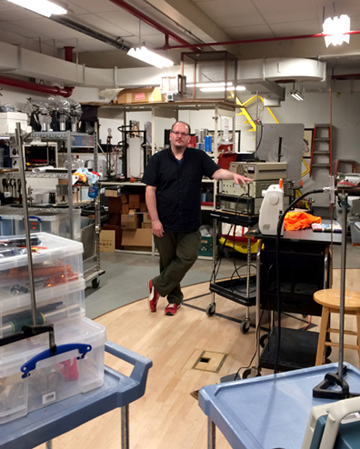 And we do mean magical because look at this! An actual levitating object, just casually sitting on the edge of his desk!
Also! A secret moving wall…which technically allows equipment from Omelan’s office to be smoothly transported to the adjoining auditorium. But we couldn’t resist a turn on it.
There are a number of other way cool objects in Omelan’s realm, from plasma balls, to portraits of Archimedes, to machines that break wineglasses with excruciatingly high tones!
 Omelan hails from Bridgewater, New Jersey, where, as a home schooled youth, he continually curb shopped for thrown out electronics (photocopiers, fax machines, etc.) to disassemble and learn from. Graduating college with a degree in Electrical and Computer Engineering, he has worked for Disney, traveled the world, and adopted a stray kitten who he aptly named “Fizzix.” He’s also a father with a young son, and self-admits a newfound skill of telling “absolutely terrible Dad jokes.”
How did you land this incredibly cool job?
I had come back to NJ from an IT job in Miami and was teaching for the “Mad Science” franchise as a break and I received a call from Princeton…apparently the Physics Department picked out my resume because I had experience with small mechanical devices and electronics (I had learned early on – ALWAYS keep your resume in circulation… you never know who might reach out…). They wanted someone to build the sensor head to the ACT (Atacama Cosmology Telescope) and I could not pass up the opportunity to add the Princeton logo to my resume…
I spent time in the cleanroom assembling parts at the heart of the telescope that were only millimeters in size and making giant cables as wide as my wrist…I even spent a few months working at the telescope in Chile on the Atacama Plateau (at the time it was the highest continuously manned telescope in the world – and it was looking for/at the beginning of the Universe!). As this very cool project was winding down, two elderly gentlemen who were doing the job I have now were retiring – I was a pretty good fit and decided to take the job. Long story short, I kind of fell into this job.
What’s your philosophy on science education?
I wish everyone were gifted with at least a little interest in science and the opportunity to explore: Applied right, it is like having an additional sense or x-ray vision applicable to every-day life. With that said, science will become increasingly more important for future generations of children and their increasingly difficult problems to solve. It should also be more of a communal education/understanding for all – fewer revered specialists or individuals to blindly follow and rely on to make critical mistakes. My part in this? I’ve always described by job as “Bringing the boring science book to life – showing concepts in the real world to aid understanding and entertain at the same time.”
Describe a typical work day:
Its definitely changed a lot with a 13 month old… ^_^
- Wife wakes me up just before 6am as she leaves to go teach high-school….. out the door by 7:30am at the latest.
- My Wife’s brother takes care of our Son during the day. Never thought we’d have a “manny”. ^_^
- If the weather is good, take the bike off the back of my car and bike from the parking lot to my office.
- Prep any last minute demo requests – Professors love to have ideas around midnight/1am and send me an email.
- Deliver any specially requested demos to the smaller classrooms for precepts (different sections of classes where class size is smaller and students get more one-on-one time with Professors and demos)
- Make sure the demos pulled the previous day are ready for Professorial review (basically lecture rehearsal and getting the profs familiar with the equipment – Usually I have to remind/chase down a few Professors to remind them that they need to come down to look at their demos…. Or even remind them that we have demos to reinforce a particular topic that they are teaching)
- Make any requested modifications/create new demos that are relevant to the upcoming classes. (I’ve got carte blanche and training on all the Department’s resources – all of the machine shops (including the machines that can kill you!), stock room, laser cutter, departmental credit card…. Ohh the possibilities)
- Setup the demos on-stage the day’s lecture(s) while being careful of scheduling (the two large lecture halls are multi-purpose – Physics classes are not the only users)
- Run the lecture with the Professor – depending on who is lecturing my interaction can change… sometimes I’m sitting on the sidelines just in case something goes wrong, other times I’m the one describing the science and running the apparatus while the Professor waits/watches.
- Once the lecture is over, hang around the classroom if I can for curious students who want to learn more or have trouble understanding the demo(s). Very rewarding. ^_^
- Break everything down and return it to backstage for cleanup/storage.
- Pull relevant demos from inventory for the coming three days for cleaning/refurbishment/lecture prep.
- If we recorded the lecture, either edit and upload the video myself or offload the workload to a coworker.
- If I’m home first, cook dinner and snuggle with our Son.
- Once baby bedtime is over, a good hour on the computer is spent on emails, making technical drawings, writing code or paying bills. Surprisingly, I don’t participate with any social networking (Facebook, etc..) saves a lot of time!
- Then the typical chores/cleaning/home maintenance before bed.
What’s your favorite science toy in the workshop?
Always a tough question! But I really do like the reactions that I get from the singing Tesla coil exploding a balloon hydrogen filled balloon….. and EVERYONE hates it when I make it sing “Let it Go”. ^_^
Wasn’t sure if I was going to include this in the post, but since Omelan DID mention singing…here’s Katie with her rendition of “You Are My Sunshine,” courtesy of sulfur hexafluoride:
SF6 is an inert, nontoxic and incombustible gas, but…DON’T TRY THIS AT HOME KIDS!

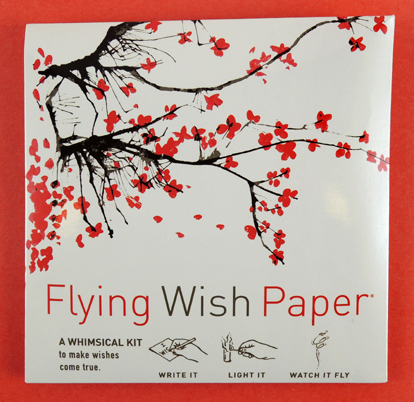 No, it’s not the name of my new romance novel. It’s this…Flying Wish Paper by Hux Creative! Write a wish on the special paper, ignite it, and watch your wish float away, granted. Does this kit actually work? Or will the fickle realities of wish-granting manifest themselves? Our brave yet tempestuous heroine, Katie, tempted cruel fate and tested the kit in her dining room. Take it away Katie!
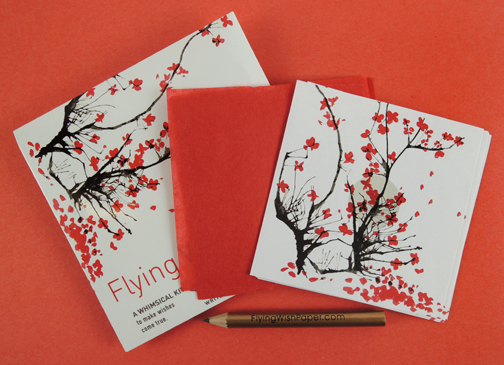 The kit contains 15 sheets of Flying Wish Paper, 5 paper platforms for your wishes, a special mini pencil, and a set of instructions. It retails for $12 at our local Paper Source. The first part of the kit is easy enough. You think of a special wish and write it on the Flying Wish Paper, which closely resembles tissue paper. If you choose, you can slide the Wish Platform (more on that shortly) under your Wish Paper to help you write more easily. Our Wish Platform had a gorgeous picture of blossoming cherry trees on it, but there are many other images in different kits to choose from.
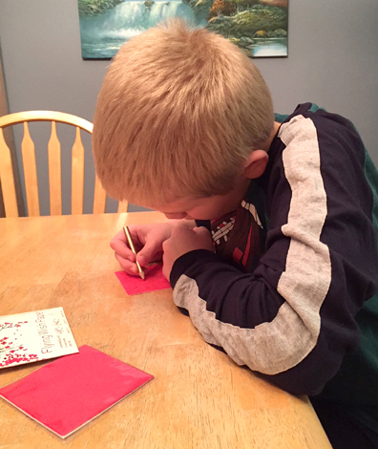 Once you have written your wish, crumble the Wish Paper into a ball about the size of a marble. Next, carefully unwrap and smooth out the paper so it is flat, albeit crinkled from being smashed into a ball.
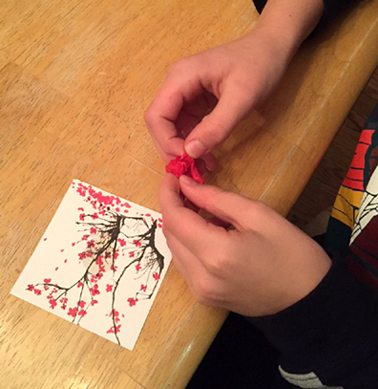 Once the paper is flat, roll it into a tube using the darkened circle on the Wish Platform as a guide. The tube needs to be open enough to allow the Wish Paper to easily burn, just like a chimney. Stand your Wish Paper upright on the Wish Platform and you are ready to send it to the heavens!
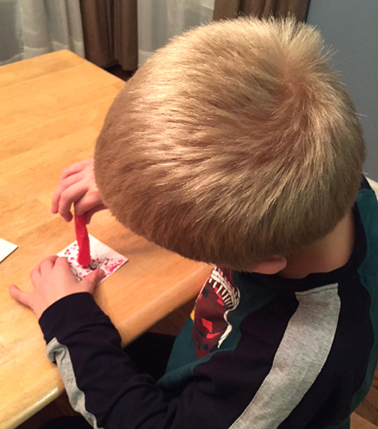 This is when I became a little nervous. I was going to light paper on fire inside of my home. Rather, I was going to let my son (who was thrilled to have full parental permission to strike a match indoors) LIGHT PAPER ON FIRE INSIDE OUR HOUSE! It took a few tries to stand the Wish Paper on the Wish Platform without it toppling over, which also made me nervous.
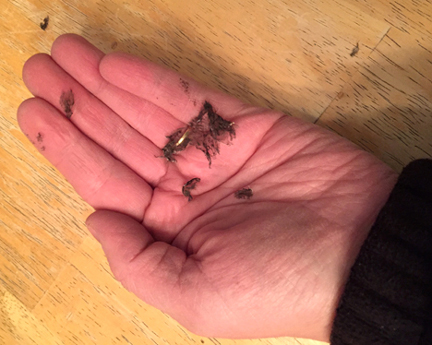 I was also fearful the burning Wish Paper would fall over, (or off!) the Wish Platform. Well, it did fall over during one of our tests. It left a small burn mark on the Wish Platform, but thankfully nothing else happened.
 Flying Wish Paper is a fun activity that my son and I thoroughly enjoyed doing together. There are numerous fire concerns and it is definitely something parents can’t let their children do on their own, but I highly recommend it. It’s a whimsical and thoughtful activity for kids to really think about what their deepest wishes may be. It would be awesome for magic spells at a Harry Potter program too (and so would
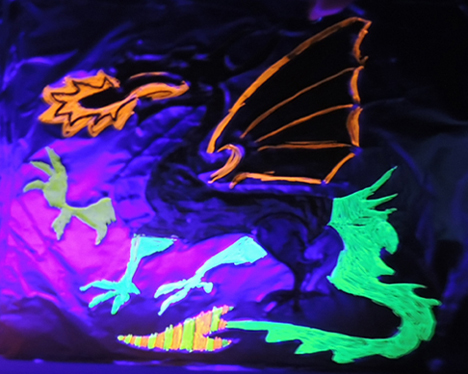
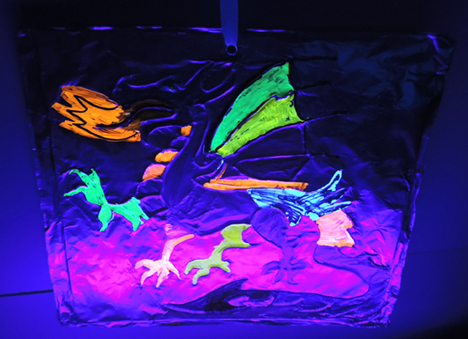
 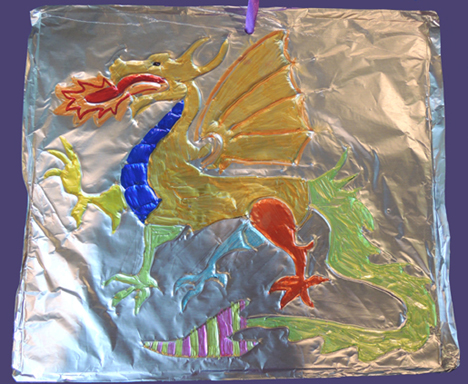 One of our regulars called this her “most favorite project, ever.” It’s amazingly simple to do, yet has fantastically beautiful results. Best of all, if you use the right markers, your metallic marvel of a dragon will illuminate under a black light! Get ready to test your metal at
  We read Lily Quench and the Dragon of Ashby, written by Natalie Jane Prior, and illustrated by Janine Dawson (Puffin Books, 1999). The town of Ashby Water used to be peacefully ruled by a King and Queen. But then the Black Count invaded, usurped the throne, tore up the botanical gardens, and built a grommet factory. Now the town is filthy, the river is polluted, and the people are suffering. To make matters worse, a dragon has landed on the grommet factory, and doesn’t appear to be leaving. Captain Zouche and Miss Moldavia (the baddies in charge), demand that young Lily Quench (a dragon slayer only by inheritance), defeat the dragon. But rather than slaying the dragon, Lily befriends it. With the help of Queen Dragon, Lily learns that there just might be a chance to defeat the Black Count, find a lost Prince, and rescue Ashby Water from ruin.
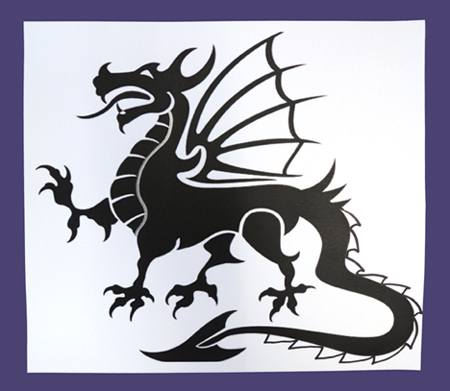 Next, outline the image with hot glue. The more outlines you make, the better the final drawing will look.
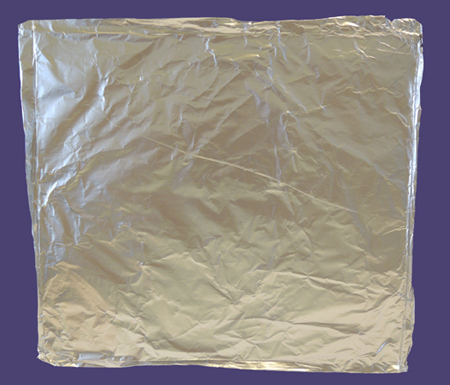
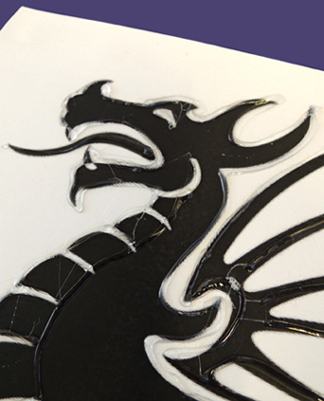 Once the hot glue is dry, cover the drawing with tin foil. Secure the tin foil to the back of drawing with tape – not hot glue! The hot glue will create unwanted ridges later. Below you can see exactly what we presented to the kids – a mysterious sheet of metal for them to explore with their fingers.
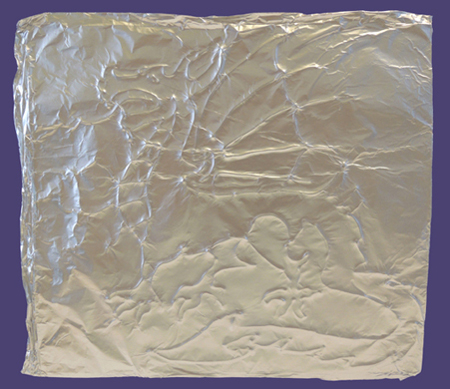
 Use your fingertips to gently, but firmly, press down on the tin foil. As you press, the hot glue ridges will pop out, revealing a raised outline of the the image underneath!
 Here’s another shot that shows the ridges a little better…
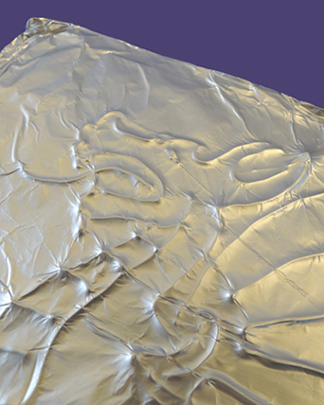 Some kids liked the idea of the image revealing itself from a “blank slate,” but other kids liked having an image to guide them. So have a few copies of the original image on your work tables, just in case.
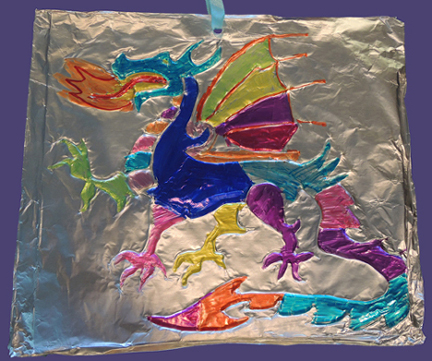 I was excited to learn that certain packs of neon color Sharpies fluoresce under black light (you’ll know because it says so right on the package). Awesome! I totally wish I had used them when we made
  The final step is optional. I punched a hole in the top of each project and looped a ribbon through it so kids could hang their metallic creations up at home.