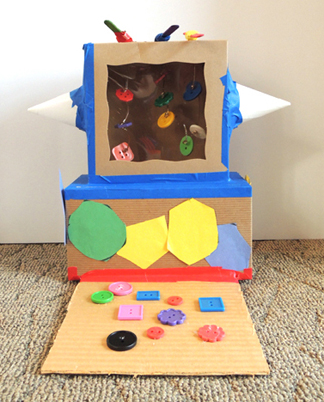
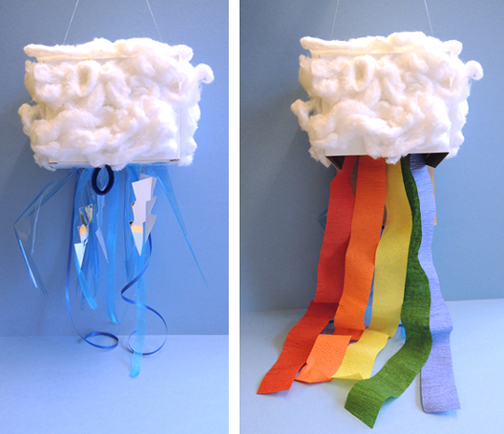
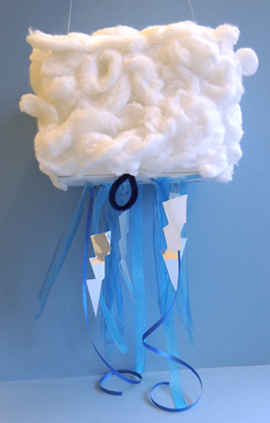
 This dangling storm cloud has a surprise inside. Just tug the secret loop…and release a rainbow!
We read Thunder Bunny by Barbara Helen Berger (Philomel, 2007). Thunder Bunny is a surprise to her rabbit family. She’s the littlest and last, but she’s also…blue! Curious about the sky, Thunder Bunny sails up into the clouds. A scary storm brews, but Thunder Bunny soon realizes that even thunder and lightning are part of who she is. When she returns home, her family recognize what a truly special bunny she is.
You’ll need:
- 1 box with a lid (mine was 4 ½” X 4 ½” x 6”)
- A box cutter
- 2 small craft sticks (mine were 3″)
- Some color masking tape (regular works too)
- A 24″ piece of clear elastic beading cord
- 5, 22″ crepe paper streamers in rainbow colors (red, orange, yellow, green, blue)
- 1/2 blue pipe cleaner
- 6-8 Strips of blue cellophane (mine were 8″ long)
- 3-4 pieces of blue shimmer ribbon (mine were 8.5″ long)
- 2-3 pieces of blue curling ribbon (approximately 18″ long)
- 2 – 4 extra pieces of clear elastic beading cord (approximately 3″ – 5″ long)
- A piece of mirror board
- 1 thunderbolt template printed on 8.5 x 11 card stock
- White cotton balls
- Scissors, tape, and white glue for construction
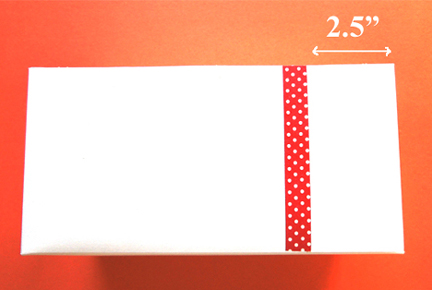
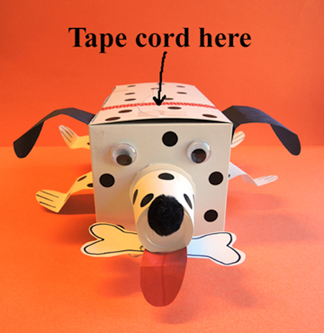
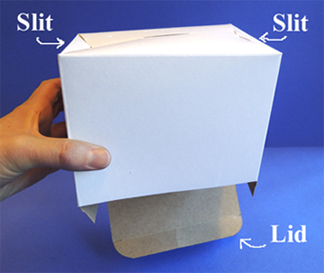
The funny thing about this project is that the box’s lid, which technically is always on top is going to be the trap door at the bottom. So begin by flipping the box over so the lid is on the bottom. Then, up at the “top,” cut two small slits on each side.
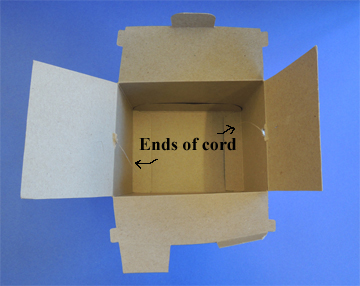
 Use your scissor blades to enlarge the slits into holes (large enough to thread the elastic beading cord through). Slide the ends of the cord through the right and left holes. The ends should now be poking into the interior of the box.
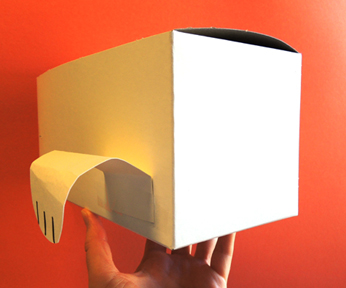
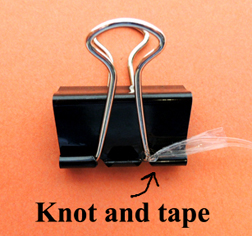
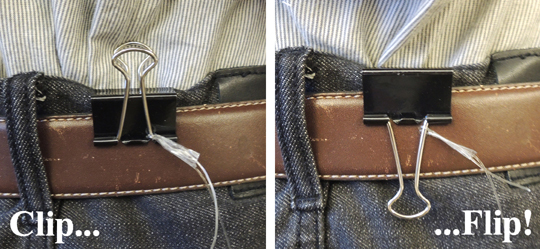
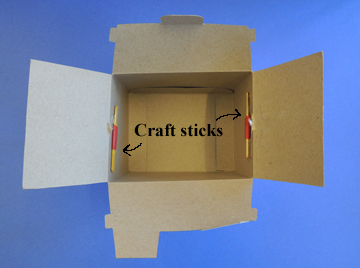
 Next, use this wrapping technique to wrap and secure the cords around the craft sticks. Tape the craft sticks to the interior walls of the box.
 Next is the secret loop that will release the rainbow from the trapdoor.
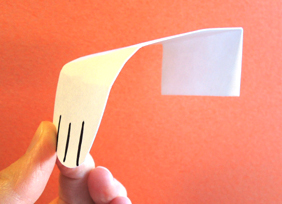
 Fold 1/2 of a pipe cleaner into a loop and twist the ends together to secure.
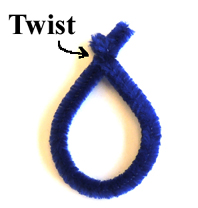 Tape the loop to the inside edge of the lid.
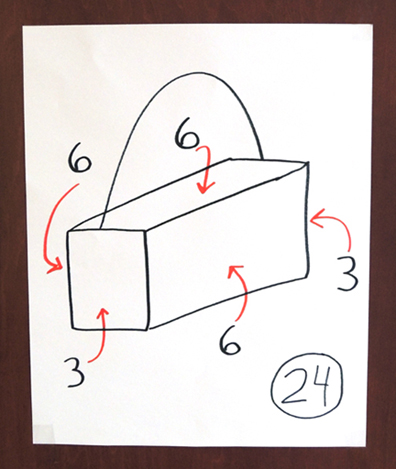
 Time to decorate the cloud! I showed the kids how to pull apart a cotton ball so it will cover more space on the box’s surface. Then I made a diagram to show kids approximately how many cotton balls they would need for each side. Otherwise, one zillion cotton balls will be glued on there. Trust me.
 To attach the cotton balls, squirt some white glue on the box, and then press the cotton ball on top. Repeat on all sides of the cloud EXCEPT the trap door on the bottom! That needs to remain cotton ball free so you can attach the “rain” and thunderbolts to it.
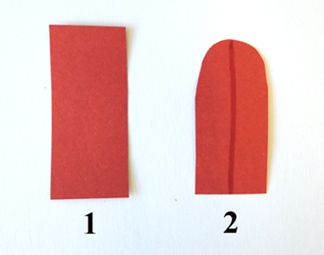
Next, use tape to attach the blue cellophane, blue shimmer ribbon, and blue curling ribbon rain to the bottom of the trapdoor. We prepped the thunderbolts in advance by using the template to trace the bolts onto mirror board (or you could skip the mirror board and just have white card stock bolts). Tape the 3″ – 5″ pieces of elastic beading cord to the back of the bolts, then tape the cords to the box.
 The storm cloud is done, now for the rainbow! Red goes first. Attach a piece of tape to the end of the red streamer. Press the tape to the ceiling of the box, all the way to the left. Repeat with each color until you have a row of rainbow streamers from left to right.
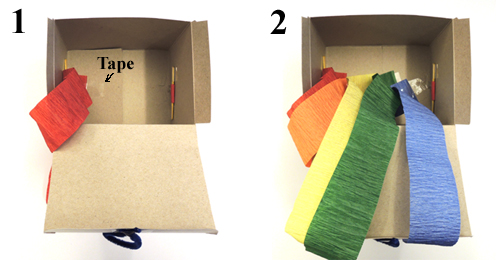 Gently tuck the streamers into the box and shut the trapdoor. Suspend the cloud from its cord, then tug the pipe cleaner loop. Your rainbow will appear! Try to refrain from bursting into song.
Refraining…
Refraining…
SOOOOMEWHEEEERE…OVER THE RAAAAINBOW…
Doh!