 Square eggs with unique, artisanal patterning? A beauty contest? Princess chickens? Yes, there is a book that brings all these elements together!
We read The Most Wonderful Egg in the World, by Helme Heine (Margaret K. McElderry imprint, 1983). In a kingdom, long ago, three hens got in an argument. Which hen was the most beautiful? Could it be Dotty, with her beautiful feathers? Stalky, with her beautiful legs? Or Plumy, with her beautiful crest? They decide to take matters to the king. Being a practical man (“What you can do is more important than what you look like”), he decreed that whoever laid the most wonderful egg would become a princess. Dotty laid the most perfect, shimmering, spotless egg the kingdom had even seen. Stalky laid the biggest egg the kingdom had ever seen. And Plumy…laid a square egg with a different color on each side! Since the king could not decide which egg was the most wonderful, he made all three hens princesses. And they lived happily ever after.
You’ll need:
- A strip of white poster board (approximately 2.25″ x 22″)
- A sturdy, 7″ paper plate
- Nest making materials (brown construction paper, raffia, and paper crinkle)
- A small box (mine was 4″ x 4″ x 4″)
- Egg decorating materials (complete list a little later in the post!)
- A couple of name tag stickers
- 2 pieces of gold ribbon (approximately 2.25″ each)
- Stapler, scissors, tape, and glue stick for construction
- Hot glue
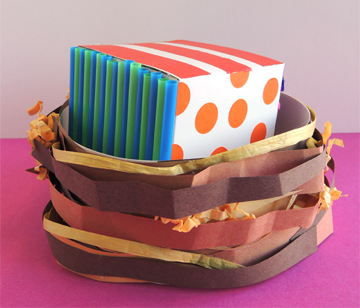
For this project, we made a nest, decorated a “square” egg, and then held an egg-tastic beauty contest in which everyone took home a prize!
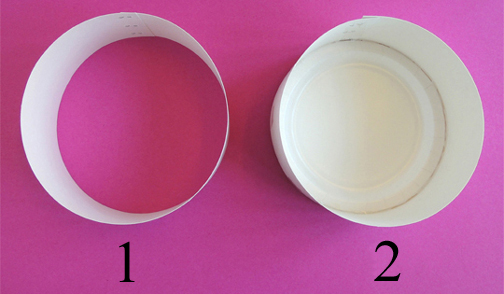
 We’ll begin with the nest. Circle a strip of white poster board around the outside of a paper plate and staple it securely (you’ll need to remove the circle from around the plate to staple it properly).
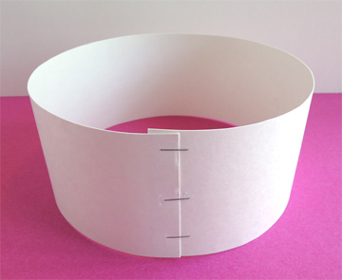 Slide the paper plate back inside the circle, pushing it all the way to the bottom.
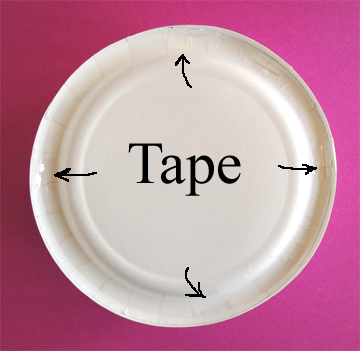
 Now flip the “nest” over and use tape to reinforce the connection between the plate and the circle. I used at least 4 pieces of tape:
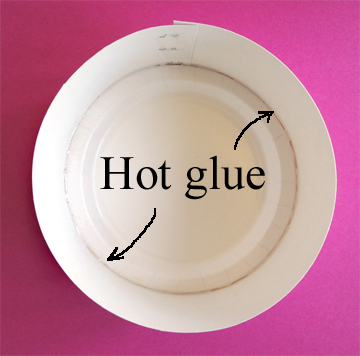
 I also reinforced the inside connection with a ring of hot glue.
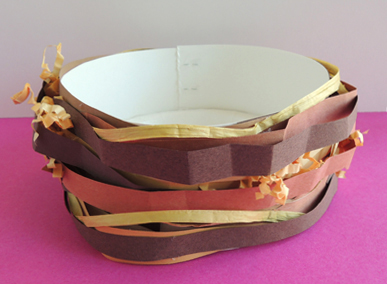
 Time to decorate! I offered strips of brown construction paper, raffia, and paper crinkle. Kids attached these materials to their nests with tape and/or glue.
 Now for the egg! We used dot stickers, craft ties, ribbon, tissue paper, small feathers, sparkle stems, self-adhesive foam shapes, drinking straws, cotton balls, patterned paper, and color masking tape to jazz thing up. You can also forgo all these things and simply use markers to fancy your egg up.
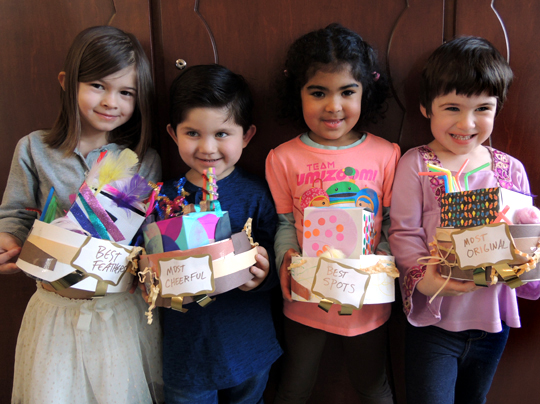
 While the kids were decorating their eggs, Miss Joani and I circled around, making note of who was putting the most dot stickers on his/her egg, who was doing lots of stripes, who was going to town with the sparkly materials. Later, we used our notes to award the beauty contest prizes.
In my story time contests, everyone is awarded a prize ribbon, and no 2 categories are the same! Here are some of the “categories” from our egg beauty contest:
- Best spots
- Best stripes
- Most colorful
- Best use of red
- Best use of blue
- Best use of pink
- Best use of purple
- Best use of sparkle stems
- Best pattern
- Most original
- Fluffiest egg
- Most imaginative
- Most mysterious
- Best nest
- Most cheerful
- Best feathers
- Most shiny
You can make up a few prize categories on the spot, but I’d recommend having some ready-made ones handy. The contest’s “parade” only lasts a few minutes, and I find it difficult to come up with prize categories quickly, especially if you’re awarding ribbons to 22 kids at once!
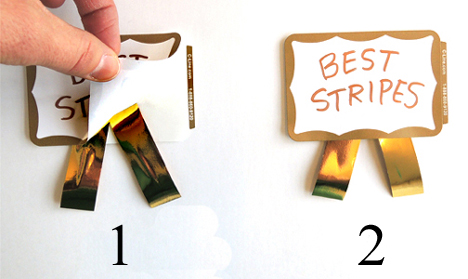
Making the prize ribbons is super easy. I purchased some gold-bordered name tag stickers from Office Max, and used a gold metallic Sharpie pen to write the category on each sticker. Next, I peeled back the sticker and placed two, 2.25″ pieces of gold ribbon near the bottom. Then I lowered the sticker gently back in place. During the award ceremony, all you have to do is peel and stick the ribbon on the nest!
 When it was time for the contest, everyone placed their eggs in their nests and followed “Judge Joani” out to the lobby of the library.
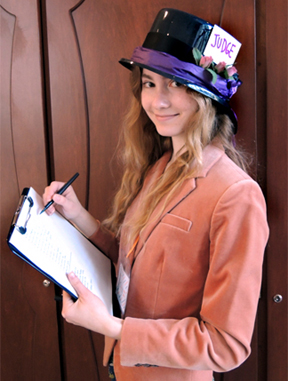 Once in the lobby, the contestants circled, reversed directions twice, and stood in line while the judge examined their eggs. Then everyone sat down while I announced the prizes, to the hearty applause and cheers of the grown-ups!