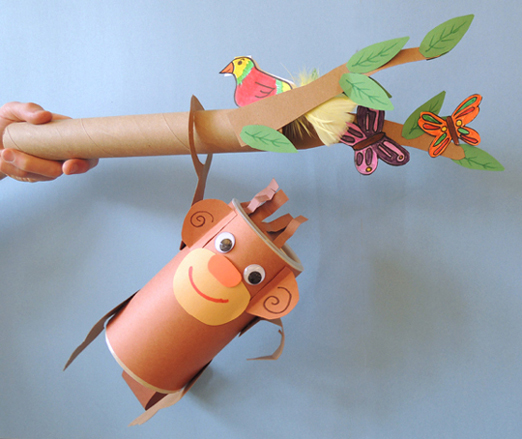
 With a turn of the wrist, this gymnastic little money swings around (and around and around) his colorful rainforest branch!
 We read BIG Little Monkey, written by Carole Lexa Schaefer and illustrated by Pierre Pratt (Candlewick, 2008). A little monkey wakes up one morning, ready to play, and finds that his family still wants to sleep. He decides he’s ready to be a Big Little Monkey and leave the tree to find some new friends to play with. He encounters a sloth, a parrot, and finally…Sly Boa. The game “curl my tail around in tricky ways” doesn’t sound too good to Big Little Monkey, so he quickly scoots back to his family, happy to be their Little Monkey once again.
You’ll need:
- 1 small oatmeal container
- Dark brown construction paper for body, hair, and ears.
- Light brown construction paper for mouth (approximately 2.25″ x 3.5″)
- 1 oval of self-adhesive foam (approximately 1″ x 1.5″)
- 2 wiggle eyes
- 1 strip of brown poster board for the tail (approximately 2″ x 10.5″)
- 1 monkey business template, printed on 8.5″ x 11″ card stock
- An 8.5″ x 8.5″ square of tagboard for arm & leg templates and tree branches
- A box cutter
- 1 brass fastener
- 1 paper towel tube
- A pencil for tracing
- 6 – 8 green construction paper leaves
- 2 small feathers
- Scissors, tape, and glue stick for construction
- Markers for decorating
- Hot glue
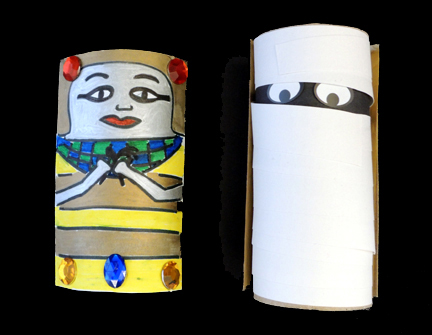
Begin by wrapping the oatmeal container with dark brown construction paper. Fringe more dark brown construction paper and tape it to the top of the lid for hair. IMPORTANT: Make sure you don’t tape the lid to the oatmeal container closed! You’ll open the container later to secure your monkey’s swinging arm.
Cut the light brown construction paper rectangle into an oval, and glue to the front of the head. Attach the wiggle eyes (using hot glue), the self-adhesive foam oval, and two dark brown construction paper ears. I used the markers to drawl little swirls in the ears and put a smile on my monkey’s face.
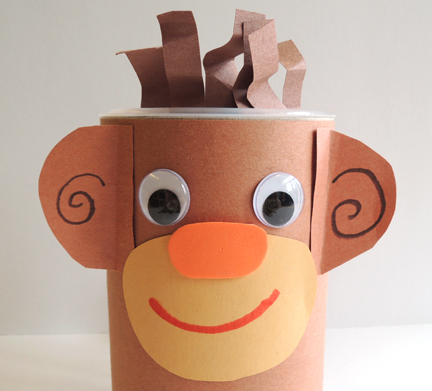 You’ll notice that the ears very close to the eyes and mouth. This is so the ears don’t hamper the movement of the monkey’s swinging arm.
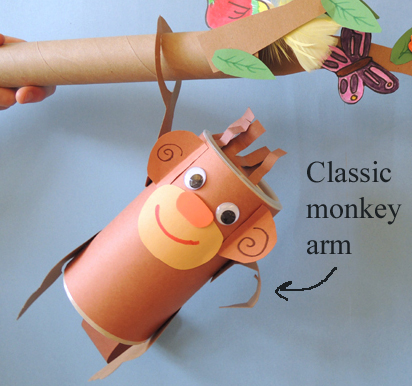
The face is done, now for the body! Curl one end of the brown construction paper tail around a marker, then tape or hot glue it to the back of the oatmeal container. Cut the arms and legs out of the template and tape (or hot glue) the two legs and the short arm to the container. I curled the short arm up in the classic monkey “hand in the armpit pose.”
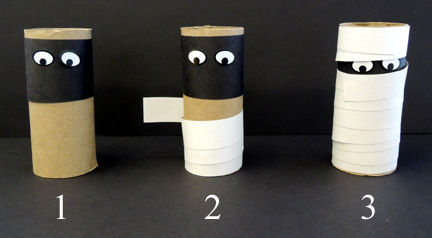
 Finally, the monkey’s swinging arm. Cut a tagboard arm from the template, then place the paper towel tube on the round part of the swinging arm. Use the pencil to trace the diameter of the tube onto the template. Then cut the circle out.
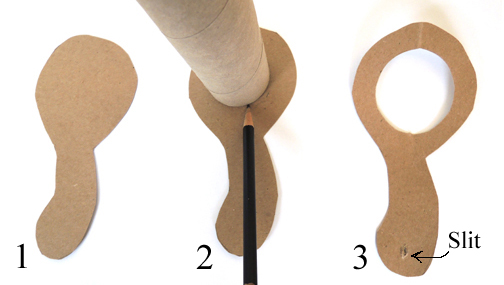 Use the box cutter to make a small slit at the bottom of the swinging arm (you can see it in Step 3 of the image above). Make another slit in the side of the oatmeal container. Push the brass fastener through the slit in the swinging arm:
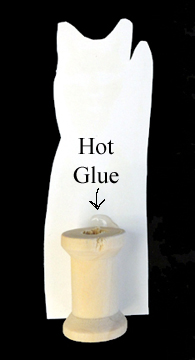
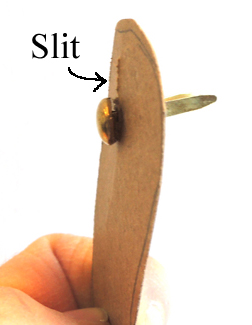 Then remove the oatmeal container’s lid and push the brass fastener through the slit in the oatmeal container.
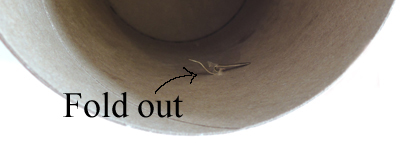
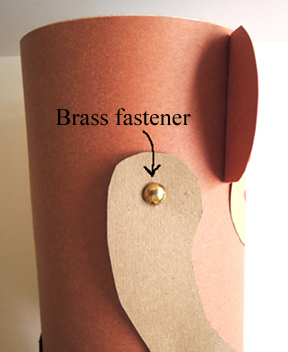 Reach inside the container to unfold the prongs, then replace the oatmeal container lid.
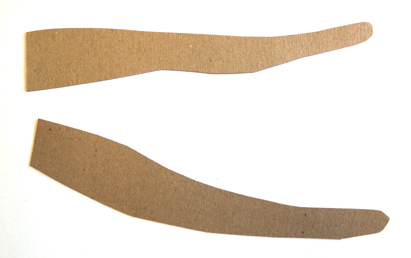
 The monkey is done, now for the rainforest swinging branch! Cut two tagboard branches (mine were about 8.5″ long):
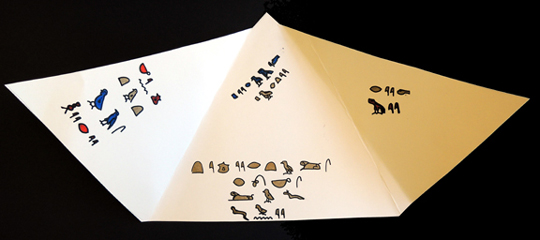
 Hot glue or tape the tagboard branches to the very end of the paper towel tube. Use markers to color the bird and the butterflies. The butterflies and green construction paper leaves can be glued of taped onto the tagboard branches. The bird requires just a few extra steps. First, fold the template like so:
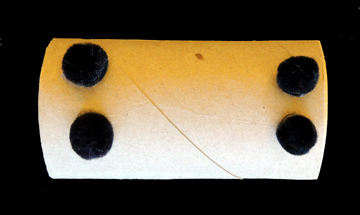
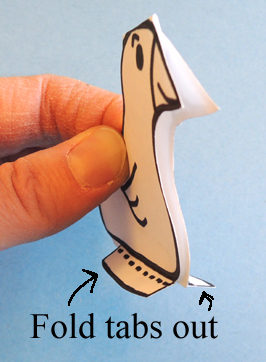
 Using the dotted lines as guides, fold the two tabs outwards.
 Use tape to attach 2 small feathers to the bird template as a tail. However, when you finally tape or hot glue your bird’s tabs to the branch, make sure the bird is at the very end and the tail faces away from the monkey’s swinging area.
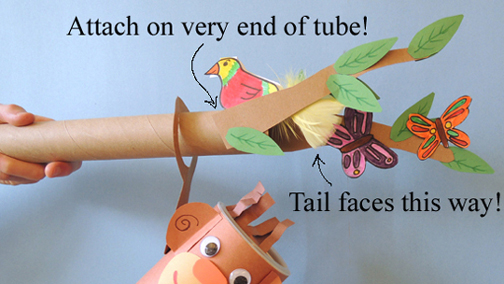 Again, attach the branches and bird on the very end of the tube! Otherwise, those items will be smacked repeatedly (or completely taken out) by the swinging monkey. We had a few tangled monkeys and squashed birds at story time, and had to do some quick repairs.
To operate the monkey, slide the swinging arm over the paper towel tube, hold it at arm’s length, and begin swaying the tube back and forth. As you build more momentum, the monkey will circle around and around on it’s branch. It’s virtually impossible to not make monkey noises while you’re doing this. Go on. We dare you to not make monkey noises!