
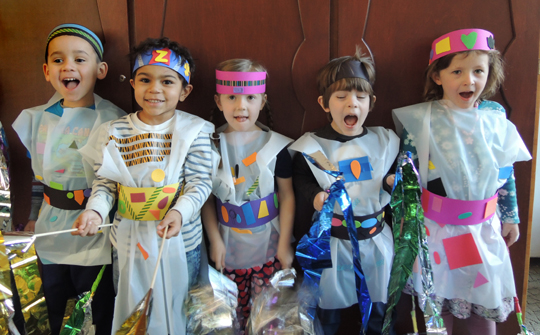
 They say ninjas should be silent, composed, and invisible…we are not those ninjas. Make a truly eye-catching headband, belt and tunic. And forgo the nunchucks in favor of some fantastic dancing ribbons!
We read Wink, the Ninja Who Wanted to be Noticed by J.C. Phillipps (Viking, 2009).
Wink is a student at the Summer Moon School for Young Ninjas, taught by the formidable Master Zutsu. Unfortunately, Wink can’t be silent, can’t stop dancing, can’t stop showing up in brightly patterned clothes, and just can’t stop drawing attention to himself. Expelled from the school, Wink happens across a young boy unsuccessfully training for the circus. When Wink offers to help him find his inner balance, he discovers that while his desire to be noticed isn’t great for ninjas, it’s PERFECT for the Lucky Dragon Circus!
You’ll need:
- 1 poster board for belt
- 1 poster board for headband
- 1 big rectangle of plastic table cloth for tunic
- Yarn, string, or ribbon
- A selection of patterned tape
- A selection of self-adhesive foam shapes
- 2 wooden dowels
- 1 mylar table cloth
- A selection of color masking tape
- Hole punch, stapler and scissors for construction
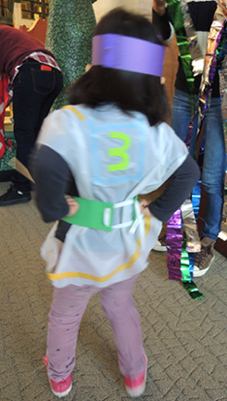
Our headbands were 2.25″ x 21″ pieces of poster board cut down to the appropriate diameter and decorated with patterned tape and self-adhesive foam shapes. The belts were also poster board, but slightly wider and longer (we started at 3″ x 28″ and then cut them down to the appropriate girth).
You can use a stapler to secure the headband together, but for the belt, we punched holes in either end and laced ribbon through the holes. Here’s a shot of the headband and belt from the back. Sorry this is a bit blurry (LOTS of jumping, dancing, and running that day!)
 To make the tunic, cut a slit in the center of a big rectangle of plastic table cloth (I definitely don’t recommend going any bigger than a 39.5″ x 47″ rectangle). Stick your head through the slit and let the tablecloth drape like a poncho. Next, tie the poster board belt around your waist. Instant tunic! Trim the bottom and shoulders of the tunic as needed, then decorate it with patterned tape and self-adhesive foam shapes.
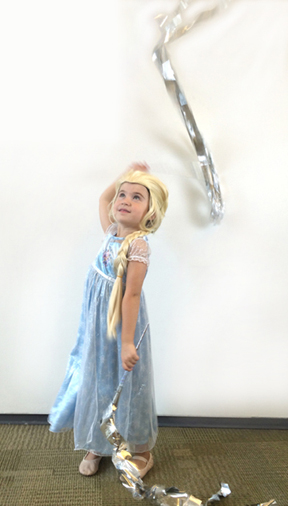
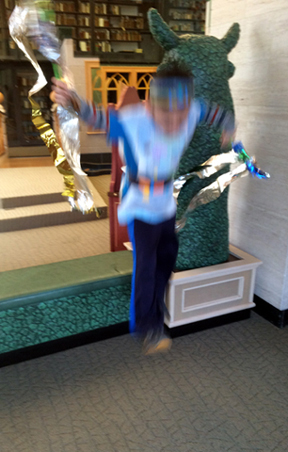
They kids had a great time putting together their costumes, but the REAL fun came when we made dance ribbons. These are the exact same dance ribbons I created for a Frozen magic project. All you need are 2 dowel rods, a metallic tablecloth, and tape.
I bought my metallic tablecloths from Oriental Trading Company (a 54″ x 6′ tablecloth costs $3.25). To make 1 set of dance ribbons, spread out the tablecloth and cut 8 ribbons from it. Here are my ribbon measurements (you can adjust yours according to the height of your child):
- 2 ribbons measuring 2.25″ x 41″
- 2 ribbons measuring 2.25″ x 49″
- 2 ribbons measuring 2.25″ x 60″
- 2 ribbons measuring 2.25″ x 66″
Bunch 4 ribbons (one of each size) together, twist tightly, and tape securely to one end of a wooden dowel with color masking tape. Continue wrapping the tape downward and around the dowel until it’s covered. Repeat the above steps with a second dowel. Definitely wait until the very end to make ribbons, because once the kids get them…it gets crazy!
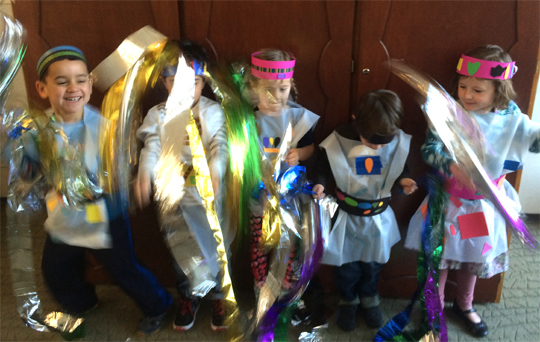 Without a doubt, this is a high-energy-get-your-wiggles-out-lots-of-fun story time project. So make sure you have plenty of space. For there will be bouncing, kicking, twirling and leaping!
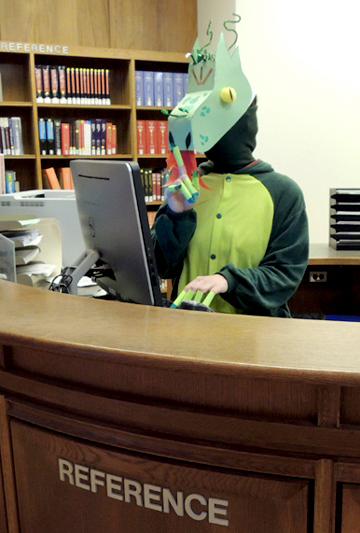 Wow I hear that new librarian is a total dragon. Like…literally.
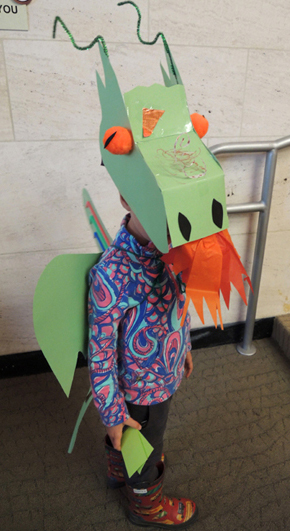 You’ll need:
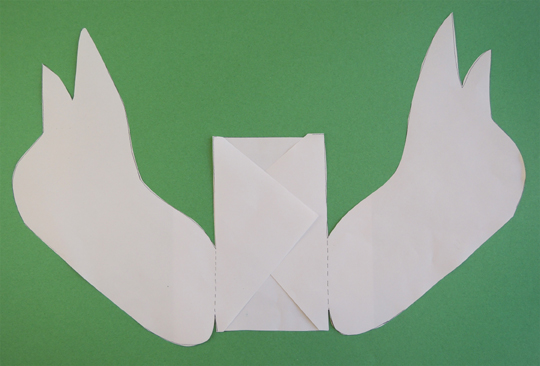 Next, lay the paper template on a piece of poster board (we ultimately decided to use light green). Trace the template on the poster board, then cut the entire thing out as one big piece. You’ll notice that there are 2 dotted lines on the paper template. Fold the poster board template downwards along the dotted lines. Then slide the poster board template on top of the box, and hot glue the sides of the template to the sides of the box.
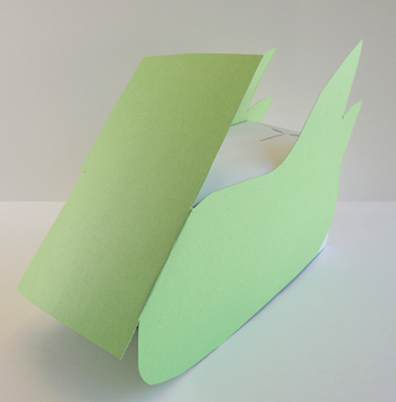 Next, hot glue the middle section of the template to the top of the box.
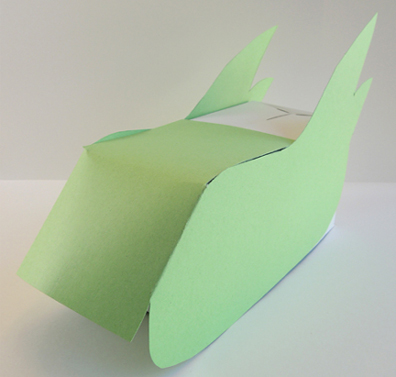 Trace the forehead template onto green poster board, and tape it to the front of the dragon’s head.
 Now decorate! We used markers to create spots, slivers of
 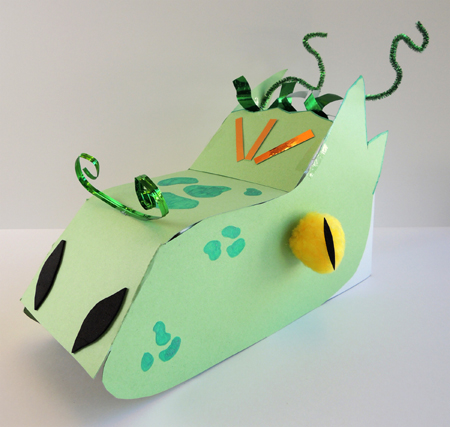 To create flames, cut 2-3 rectangles of tissue paper into flame shapes, then staple them together. Hot glue (or tape) the flames to the underside of the nose. Make sure to attach the flames to the end of the poster board nose, not the end of the box. Otherwise, the flames won’t flutter properly. Here’s a shot of the underside of the box, so you can see where the flames are attached.
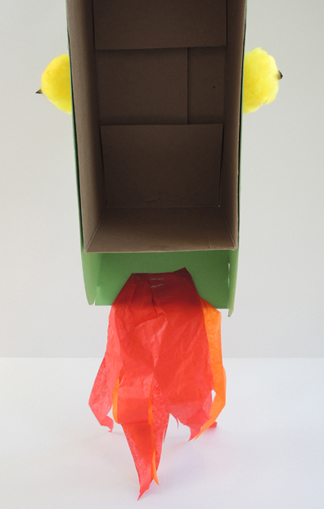 Try your head on. If it’s a little loose, stuff the back and front of the box with sheets of tissue paper. To breath fire, simply blow upwards and outwards on the tissue paper flames!
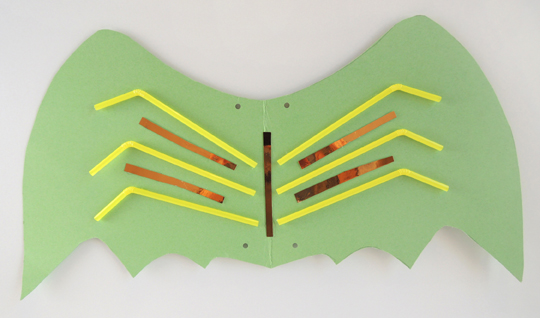 Here’s our dragon tail, which was roughly 6″ x 19″. We decorated ours with a couple pieces of mirror board (some kids went with drinking straws or just markers).
 You’ll notice that the tail in the above photo has a 2.25″ fold at the top. The folded end tucks into the back of your pants (or, if you’re wearing a dress, punch a hole in the tail and run a yarn belt through it).
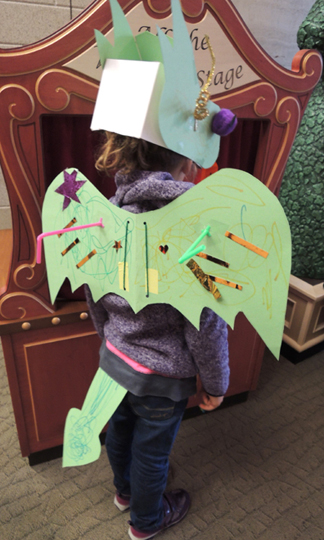 If you’d like dragon claws (and some kids really liked this part), wrap a 3.5″ x 4″ piece of green paper around your finger, then secure the tube with tape. Wrap one end of the tube with green masking tape and cut the masking tape into a point. Here’s Marissa modeling a fine set of claws and a truly awesome dragon onesie.
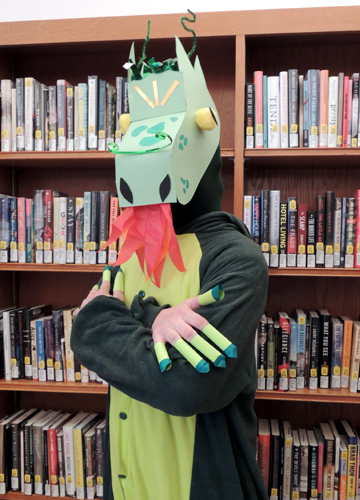 Now go forth dragon, and guard some books!