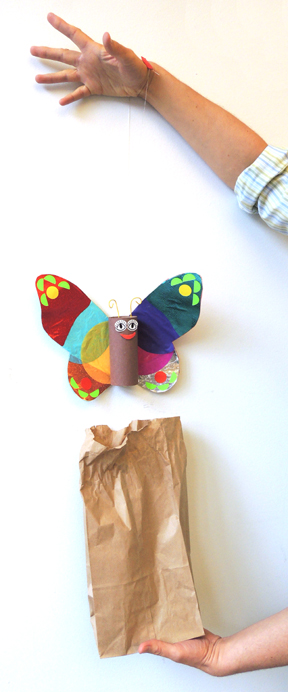
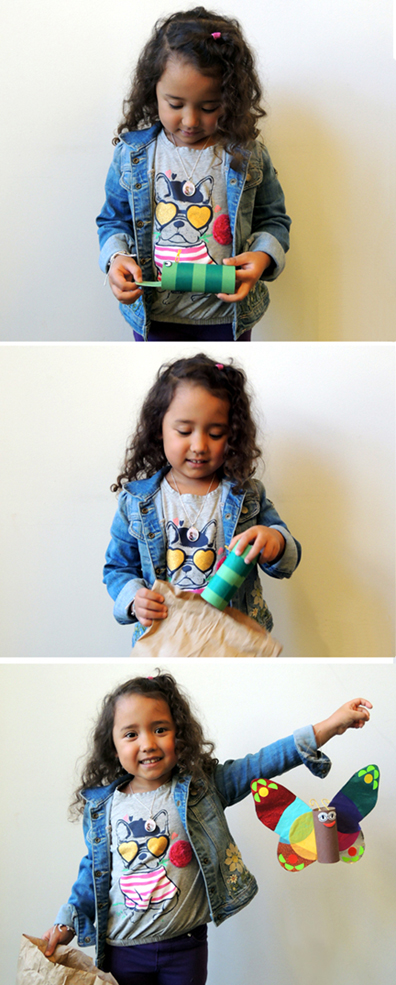
 Feed the caterpillar some leaves, place it in a chrysalis, and watch it dramatically emerge as a colorful butterfly! Thanks to the hidden elastic cord, the butterfly appears to soar on it’s very own! It’s a super simple story time project that combines science, art, and magic all in one.
We read Arabella Miller’s Tiny Caterpillar by Clare Jarrett (Candlewick, 2008). While climbing trees, Arabella Miller discovers a tiny caterpillar. She makes him a shoe box home, feeds him cabbage and parsley, observes him shedding his skin, and finally watches him spin a chrysalis. When he emerges weeks later, Arabella Miller discovers that he is something quite new! As he flies into the sky, she calls out an enthusiastic good-bye to her special butterfly.
You’ll need:
- 2 toilet paper tubes
- Green and brown construction paper
- A selection of color masking tape
- A selection of eye stickers
- 2 pieces of twisteez wire (or pipe cleaners)
- 1 butterfly wings template, printed on 8.5″ x 11″ card stock
- Wing decorating materials – I offered cellophane, embossed foil paper, tissue paper circles, and dot stickers
- A 27″ piece of clear elastic beading cord
- 1 large brown paper lunch bag (mine was 6″ x 12.5″)
- Scissors, tape, glue stick for construction
- Markers for decorating
- Hole punch
- Hot glue
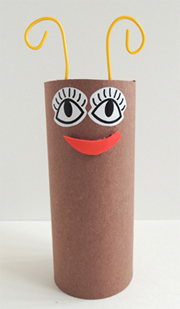
Begin with the butterfly! Wrap a toilet paper tube with brown construction paper. Attach sticker eyes (or draw them on with markers) and a smiley mouth (I used a piece of self-adhesive foam, but you can use markers too). Curl an 8″ piece of twisteez wire (or pipe cleaner) and tape on the inside of the tube for antennae.
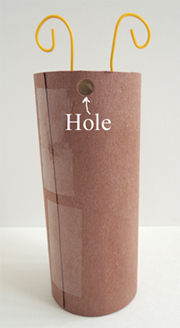
 Turn the body around, and punch a hole in the back, near the top of the head.
 Cut the butterfly wings from the template (we used manilla card stock, and it looked great). Hot glue your butterfly’s body to the wings – just make sure the wings don’t cover the hole you punched in the back.
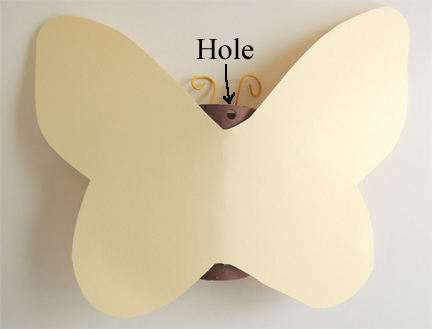 Now decorate both sides of the wings! I offered glue sticks, cellophane, embossed foil paper, tissue circles, dot stickers, and markers.
When the wings are finished, thread a 27″ piece of elastic beading cord through the hole. Knot the ends together, and wrap the knot with a piece of color masking tape. The taped knot is an important part of the magic trick, so make sure you don’t skip this step! Your finished butterfly is now dangling on an elastic cord loop, secured with a taped knot.
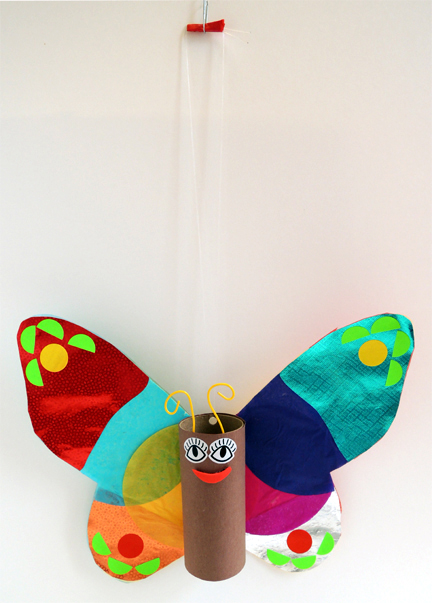 We set our butterflies aside so the glue could dry. Just look at these little beauties (Katie shot this with the panorama function on her phone)…
 Next is the caterpillar! Wrap a toilet paper tube with green construction paper, add some stripes with color masking tape, and attach eye stickers (or draw some eyes on with markers). Use a 4″ piece of twisteez wire (or pipe cleaner) to make antennae. Attach the antennae with tape.
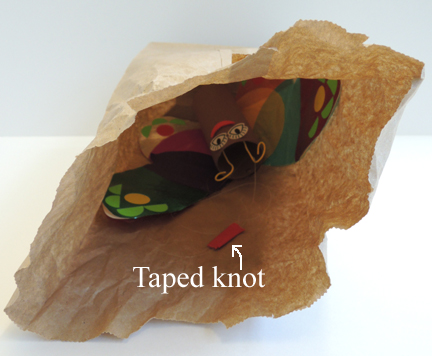
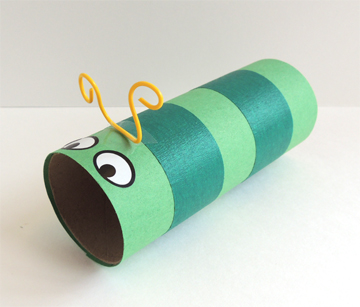 Finally, we distributed construction paper leaves (which we prepped in advance) and brown paper bags. All that’s left is the magic trick! To work some metamorphical magic, load your butterfly in the bag. Keep the taped knot near the front of the bag where you can easily see it.
 Now “feed” your caterpillar some leaves (the kids LOVED this part).
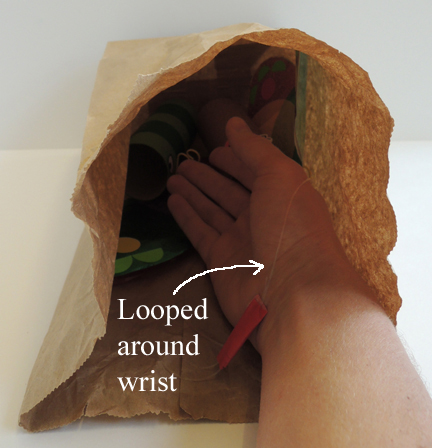
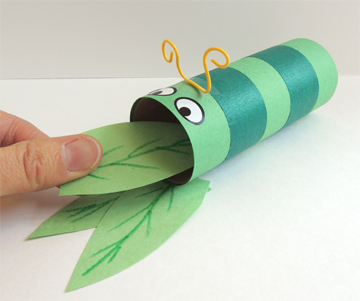 When it’s “full,” place the caterpillar inside the bag (a.k.a. the “chrysalis”). Keeping your hand inside the bag, locate the taped knot. Put the looped cord around your wrist.
 Bring your hand outside the bag and grab the top. The cord should still be looped around your wrist.
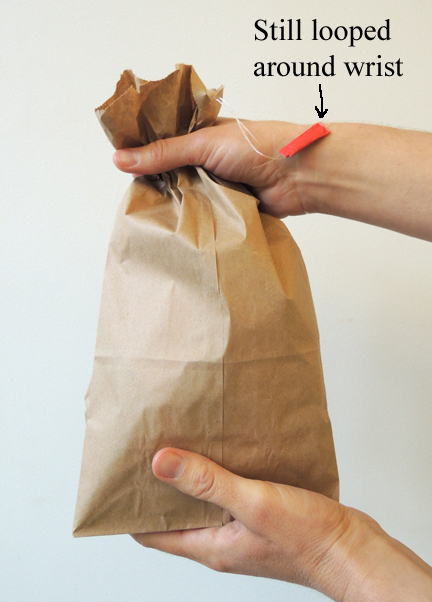 Say something like “Behold the magic of nature!” Pull your hand away from the top of the bag. The cord around your wrist will pull the butterfly from the chrysalis as if by magic!

