 We are delighted to announce the winners of this year’s 350 for 50 contest! An author from three age categories was challenged to write a 350-word story that included the sentence, “There was a rattling noise.” Enjoy!
Sleepless, the Squirrel
By Samantha Gunton, age 10
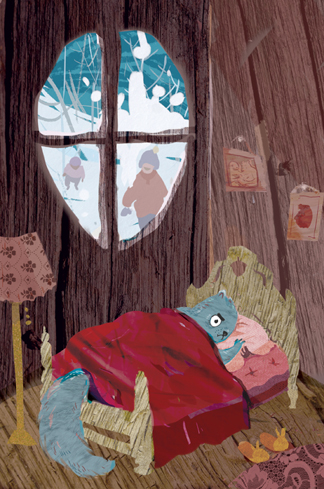 My eyelids open. I look out the window to see what’s making the noise; three kids in a snowball fight. I get out of bed and put on my slippers. Groggily, I walk down the hallway and out my front door.
“Hey! You’re trespassing!”
The kids don’t even glance my way. I watch as a boy with bad aim throws a snowball at MY tree, which doubles as my house. Grr – how am I going to get rid of them? You know, I wouldn’t have to deal with this if it weren’t for my real estate agent, Larry…
“It’s a great deal!” Larry had exclaimed, “No human beings will bother you!” Regretfully, I had believed him. Now, I was awake during hibernation. I needed to visit Professor LeNut, the genius, to see whether he could help. I hopped to Professor LeNut’s house and knocked on his bedroom door.
“Hello? You awake?”
There was a rattling noise. What was that?
“Ughh…is it spring yet?” the professor moaned.
“You’re awake! Good. I need your help.” Professor LeNut finished putting his retainer back in its case (that was the rattling sound) and turned to me. “You see those humans out there? I can’t get them to leave. I need to hibernate.”
“First of all, WHY IN THE NAME OF WALNUTS DID YOU WAKE ME UP?!! Second, just pretend you have rabies. And lastly, how were you able to wake me?? It’s physically impossible to be awoken during hibernation. So either this is a dream or -”
Cutting him off, I said “Thanks!” and ran out. Once outside, I squeaked my way to the smallest kid and started foaming at the mouth.
The little humans got it, shouting, “Rabid squirrel!” They dashed away. I ran like my tail was on fire back to my tree house bedroom. I collapsed on the bed, closed my eyes and thought, “When I wake up, it better be Spring. If not…Larry, you’re going to get it!”
 The Last Cabin
By Hugo Kim, age 11
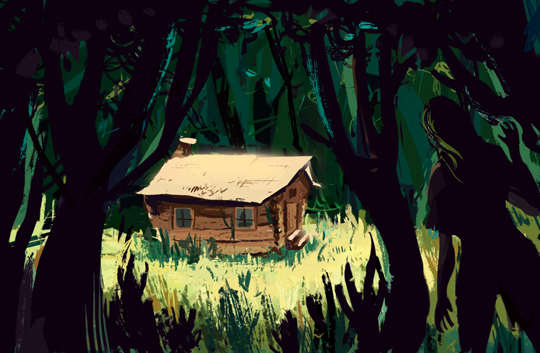
There was a rattling noise. The sound appeared to come from the front door, thought the last man on earth. Two months earlier, the man came to this remote cabin up state to shut the world out and finish his first novel. The cabin didn’t have an address for mail, TV, telephone, or any connection to the civilized world. Disconnected to civilization, he busily typed away on his manual typewriter. He was almost done. Tomorrow, he planned to drive forty miles the nearest post office to drop off his manuscript to a publisher.
What this man didn’t know was that a terrible epidemic had swept around the world. Somehow, a virulent strain of avian flu had combined with a lethal swine flu, mutating into a deadly pandemic. Scientists who discovered this flu called it N8H9 and it was spread through tiny droplets when people coughed. The incubation period lasted a week. N8H9 was highly contagious and completely resistant to all types of antivirals. In just forty-three days, the entire world’s population had ceased to exist.
He heard the sound again. This time, he could hear someone turning the doorknob. The man got up and walked to his front door. No one knew about this place, so how could he have a visitor? He unlocked the door and opened it. Standing outside was a beautiful woman. She looked very pale and tired. The man asked if he could help the woman. She came closer as if to say something very important. The man leaned close to her face to hear what the last woman on earth had to say. He felt it was going to be something very, very important. That’s when the woman coughed.
The Dragon Princess
By Angelina Han, age 14
 There was a rattling noise beginning somewhere deep inside the dragon’s chest, softening into a delighted clicking sounds and a low purr as the girl tickled the soft skin underneath his chin. The dragon rolled onto his back, spraying green fire from his nostrils for the girl’s amusement. The girl clapped and chortled, running around on her short legs. “Dragon!” The girl babbled, laughing. “Good dragon!” Her tightly curled hair bobbed in tandem with her small white dress. The dragon tilted his head to the side, pondering the strange little creature. He’d never seen anything like this before, and what were those noises she was making? It didn’t matter. He liked her already, and with a swoop of his great golden wings, he picked her up. She squealed with happiness as she flew for the first time, oblivious to the shouts below and the crown that had fallen off of her head into the dewy grass. The dragon carried her to his nest, and she stayed there with him.
Fourteen summers had tumbled by with laughing footsteps and constellation-filled nights when the girl and the dragon returned again to the spot where they had first met so long ago, though neither knew it. The girl had grown into lovely young lady with golden ringlets looping down her back, and she had all but forgotten her brief time with the humans. The dragon was her father now, and they communicated in sounds that dragons used. As they walked silently through the field still hung with morning dew, the girl tripped over an object that lay half sunken and long forgotten in the mud. She picked it up curiously, and it glinted in the rising sun like the dragon’s scales. A silver crown, bent and tarnished with moss crawling over it in spongy strands. A memory came to port on the foggy sea of her consciousness, and the girl slowly lifted the crown to her head.
“Dragon,” she whispered, her lips struggling to form the once-familiar words. She smiled at the dragon, who looked at her with large iridescent eyes. “Good dragon.”
Artwork by Aliisa Lee