 Today, it’s cuts, burns, nosebleeds, and more! Our intrepid kid tester reviewed the Disgusting Special Effects Make-up Kit by Science Explorer (ages 8+, retails for $15-$25). Warning…some of the images really are quite gross. If you don’t feel like scrolling through the post, I’ll cut to the chase. The kit received 3.5 out of 5 stars. The pros were: fun, lots, of activities, fascinating in a gross way. The cons were: messy, some of the activities didn’t work too well, time consuming, and skin remained dyed for a few days. And now, I’ll turn things over to Hope…
Hello, folks! I’m back again, and this time with a revolting twist! As the name suggests, this kit was DISGUSTING!!! I mean like ugh, blech, *gag*, barf, disgusting. Gross. Repul- okay, I don’t want to discourage you from buying this kit and using it, because it was pretty fun. But I’m sure you got the message. This kit was not for the weak stomached.
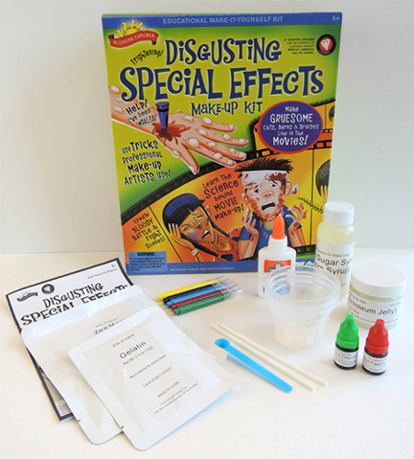
The kit came with petroleum jelly, corn syrup, corn starch, gelatin, food coloring (red and green), 5 water based markers (red, blue, green, black, yellow), Elmer’s brand white glue, 3 plastic cups, 2 “stir sticks”, and a measuring scoop. It also came with a little instructions booklet.
In addition to what came with the kit, you’ll need:
Cocoa powder
Vegetable oil
Toilet paper
Crayon
Paper the same color as your skin
Black thread
Clear tape
White construction paper
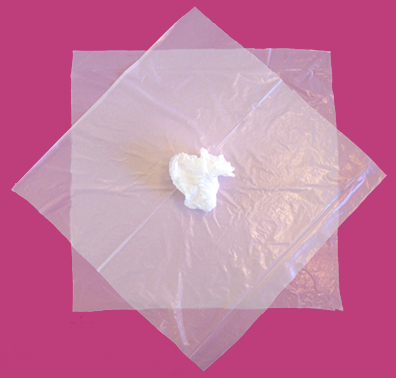
Plastic wrap
Tweezers
Scissors
Paper towels
Dr. Dana’s fabulous new assistant Marissa had already assembled these additional supplies, so I opened up the instructions and got to work.
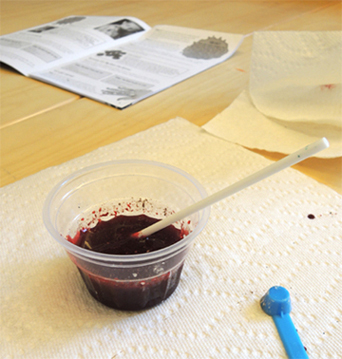
ACTIVITY 1: “A Bloody Mess”
Yes, the first activity was called “A Bloody Mess.” (Sorry, British friends). It called for corn syrup, a cup, red food coloring, a stir stick, cornstarch, a measuring scoop, green food coloring, cocoa powder, water, and paper towels. The instructions in the booklet were straightforward: mix corn syrup and red food coloring. Observe. Add some green food coloring to make the “blood” darker, add cornstarch to make the blood thicker, add some cocoa to both darken and thicken the mixture. The result? Fake, delicious smelling blood.
 Wait, you might be thinking. Did she really just say it smelled delicious!??! What is this insanity!?!?!?!?!?!
Well, it smelled delicious because of the cocoa powder and corn syrup. Chocolate and sugar. YUM. But I’ll admit, it was really weird to like the smell of thick, goopy red stuff that was supposed to be blood. Ah. Goopy. AND sticky. The blood was SUPER sticky as a result of the corn syrup.
Even though the directions had me add all that stuff to thicken and darken the blood, it was still pretty pink. So I went out on a limb, adding more green food coloring, more red food coloring, and more cocoa. It turned out pretty dark, but definitely more realistic than before. The Weasley Brothers and their nosebleed nougats would be proud.
ACTIVITY 2: “All Dried Up”
This activity called for white glue, a plastic cup, red food coloring, green food coloring, and a stir stick. Additionally, it called for paper towels, cocoa powder, and plastic wrap.
The directions said, “Pour ¼ cup glue into the cup.” However, as there was no way to measure exactly 1/4 cup (a measuring device for that amount was neither provided nor mentioned) this was rather inconvenient. Then the directions called for “10 to 15 drops of red food coloring and one drop of green food coloring.” Then, following the directions, I mixed the food coloring with the glue. The result looked more like washable paint than blood.
 I made an executive decision, and added some of the experimental blood from the previous activity to the mix. After I had stirred it up a bit, it looked dark enough to pass as real blood. I used one of the stir sticks to put a stripe of the blood onto a paper towel. While Marissa and I waited for it to dry, we started Activity 3.
ACTIVITY 3: “Pop Goes the Blister”
Blech! I mean, honestly! Naming an activity for children “Pop Goes the Blister?” That’s just absurd! (and kind of a bad joke, considering the name of this blog). It kind of turned me off to the activity in general and made me want to gag. But Marissa and I pressed on, collecting the supplies needed for the activity and assembling them on the table in front of us.
The supplies provided by the kit were a stir stick, petroleum jelly, and red food coloring (or the red marker). Marissa and I had to collect paper towels and scissors. Toilet paper was also on the list, but I just grabbed a tissue instead.
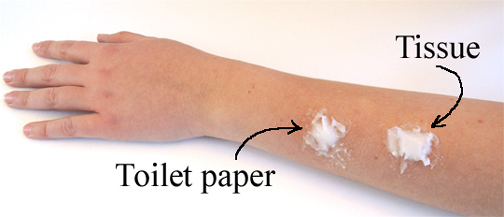
The directions asked you to “Form the petroleum jelly into the shape of a bubble.” So I pulled out the jar of petroleum jelly, grabbed one of the handy stir sticks, and got to work putting a ‘bubble’ of petroleum jelly on Marissa’s arm.
As I was doing this, I noticed a strange smell. The petroleum jelly smelled like… Home Depot. (If any of you folks have ever been to a Home Depot, it has an extremely distinct smell. In fact, when Marissa and I had Dr. Dana take a look at our handiwork, she too commented that the petroleum jelly smelled like Home Depot. What’s up with that?)
 Anyhow, even though I tried to avoid physical contact with the petroleum jelly, I ended up having to shape it by hand. It was greasy. I’m talking worse than pepperoni pizza greasy. Blech. Definitely not on my Top Ten Things I Want On My Hands List.
The next step of the directions asked me to “Cut or tear a piece of toilet paper into the same shape and size as the glob of petroleum jelly.” Well, as my hands were greasy, I tried to just rip a piece of tissue (remember, we were using that instead of toilet paper), into a small piece, but it was nearly impossible. Marissa ended up cutting a small piece for me. I placed the little piece of tissue on top of the petroleum jelly to let it soak up the grease.
Then I applied more petroleum jelly on top of the tissue. By the time we were finished, Marissa had a nasty large white bump on her arm. Marissa then tried two blisters on me, one with toilet paper, and one with tissue. The one with toilet paper looks slightly less pathetic. When we showed it to Ian, the Curatorial Assistant at Cotsen, he said, “Looks like you were reaching for the best doughnut and got frosting on your arm.” Sad, but completely accurate.
 Before we started on Activity 4, we checked back on our dried blood. It was dry, crusty, and dark. Perfect! I applied a bunch of blood to Marissa’s arm. We were ready for the next activity.
ACTIVITY 4: “Cut It Out!”
 Activity 4 required red food coloring, a stir stick, petroleum jelly, and fake and dried blood from previous activities. We also needed water, white paper towels, scissors, cocoa powder, white construction paper, clear tape, thick black thread, and paper towels.
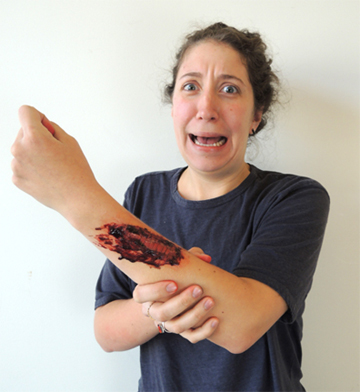
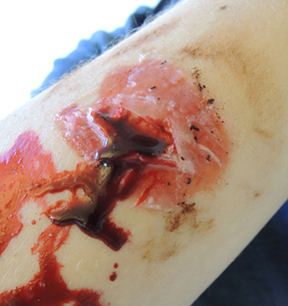
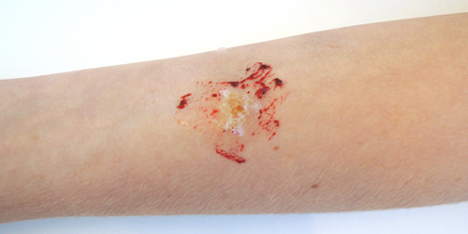
The first step was to smear red food coloring on the area where the cut was to be made. I smeared some food coloring on Marissa’s forearm, directly above the dried blood. After applying some petroleum jelly to the red area, Marissa and I cut two pieces of toilet paper the same size and shape as the petroleum jelly glop.
Marissa used the arm that wasn’t covered in goop to arrange the toilet paper in just such a way that it looked like (gross alert) freshly torn skin. Then I smudged and sprinkled cocoa around the cut for a dirt bespeckled touch. After I had dripped some blood in the “cut,” it looked positively repulsive (and eerily realistic)!
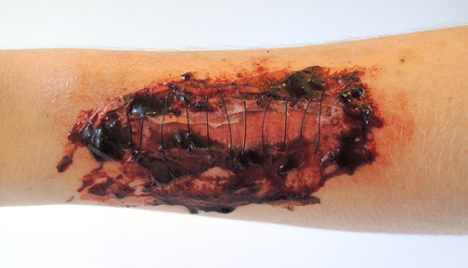
 There was a little section beneath this activity that had directions for a cut with stitches showing the bone. The directions were almost exactly the same, with two exceptions: at the beginning, after you smudged the red food coloring on your skin, you soaked a white piece of paper in a cocoa powder- water paste, and added it atop the red as the ‘”bone.” And, at the very end, you added little pieces of black thread, representing stitches. Blegh. Cutting the thread was definitely a two person job. I cut the threads, and Marissa placed them across her gaping “wound.”
 Blood, blisters, cuts, and stitches done. Now it was time for Dr. Dana to be “wounded.” What could be more ironic for an artist to be impaled with a crayon and a pencil?
ACTIVITY 5: “Take a Stab at It”
 In this activity, you impale yourself with a crayon/golf pencil. The supplies needed were red food coloring (or red marker), a stir stick, petroleum jelly, and dried blood (previously made). Marissa had to assemble, a crayon, a golf pencil, a small piece of paper the same color as your skin, scissors, white toilet paper, cocoa powder, clear tape, and paper towels. Step one had us, once again, smearing red food coloring onto the site of the future “injury.”
 Then we had to, once again, apply petroleum jelly to the area (sarcastic “Hooray!’”). After that, we had to lay a golf pencil on the red area and slather it with petroleum jelly.
Next, we had to lay a piece of construction paper about the same color as Dr.Dana’s skin across the middle of the pencil (we used multicultural construction paper), making it appear as though it had been jammed through her skin. Then we had to smear petroleum jelly over the piece of skin colored paper, and put toilet paper over everything.
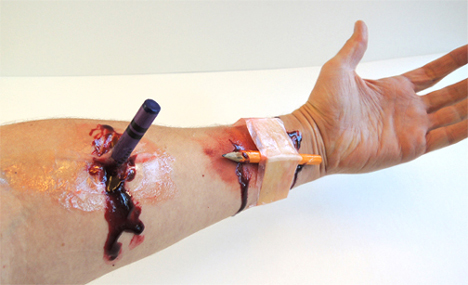
Drizzling blood came next, my real favorite part However, because the piece of paper wasn’t exactly the same color of Dr.Dana’s skin, and because the paper wouldn’t lay quite right, it did not look at all like she’d been impaled. Not even a little bit. It looked like something you would see in kindergarten or preschool, where she had been playing with art supplies and then stuck them to her arm with glue.
We decided to attempt the impaled crayon next. This was much easier. I broke a crayon in half, and, using the half that didn’t have a point, taped it to Dr. Dana’s arm. Then Marissa and I smeared petroleum jelly onto the tape, so it lost its shine. Finally, we added toilet paper on top of the petroleum jelly, and dripped blood onto it. A despicable masterpiece.
 ACTIVITY 6: “Black & Blue”
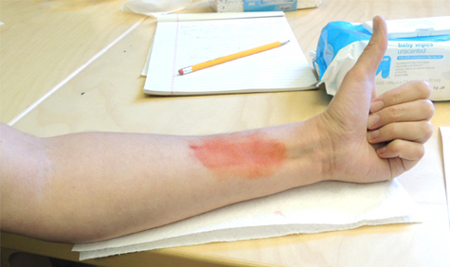
Activity 6, bruises, was by far the simplest. All we needed were the markers included in the kit. Marissa used the red marker first, attempting to smudge it around with her finger. However, the ink dried too fast, so it really looked like I had wiggly chicken pox. Pulling out the black and blue markers, Marissa dotted the middle of the bruise, adding to the poxy effect. Finally, she added some green and yellow to the edges. It looked an infected monkey bite at first. But after I got home and it became smudged with water, it looked so much like a real bruise that my parents asked me how I had gotten it!
 The real con about this activity was that the markers took a day or two to come off completely, so putting it somewhere like the face could be problematic.
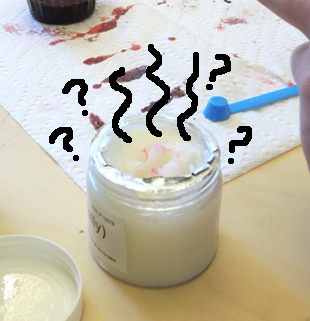
ACTIVITY 7: “Sizzling Skin”
This activity wins the WORST award. To make burned skin, we had to put some glue on my arm and wait for it to dry. And wait. And wait. And wait and wait and wait and- well, you get the idea. It took more than 30 minutes for some glue the size of a quarter to dry. Then, Marissa had to peel it off of my arm with tweezers, which hurt terribly, because it pulled my arm hair. (Not Marissa’s fault!!) Glue + Arm hair = PAIN!!!!!!!! It’s like oil and water. They just don’t mix.
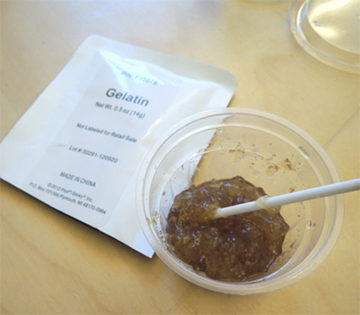
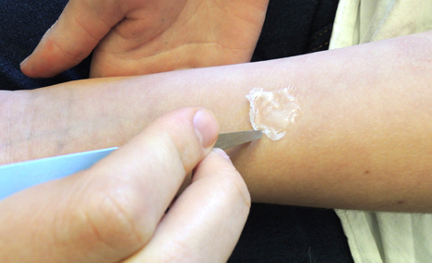 This little circle of glue was supposed to be fake skin (which would’ve been pretty cool if it hadn’t involved both tedium and pain). Next, we mixed gelatin and warm water together to get an amber, clumpy mess.
 Marissa tweezered out the smallest possible piece and put it on my arm, covering it with the fake skin we made .Then, as the directions suggested, she added some blood to nastify it.
 It looked nasty all right, but it didn’t look at all like a burn. It looked like an infected hive or inflamed…something.
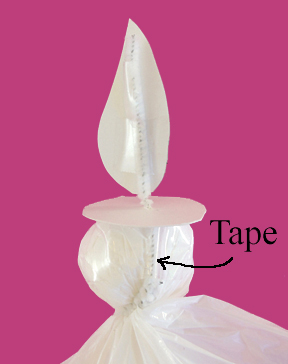
FINAL ACTIVITY: The Bloody Nose
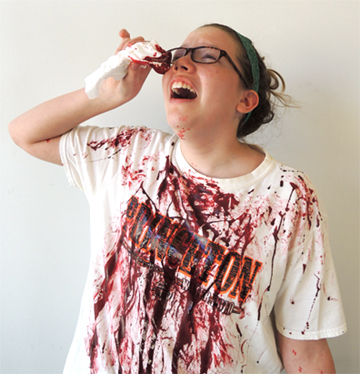 At the end of the testing, Dr. Dana wanted a bloody good photo of me (sorry again Brits!). I had brought along an old Princeton shirt that we decided to splatter with blood in front of the Cotsen Library.
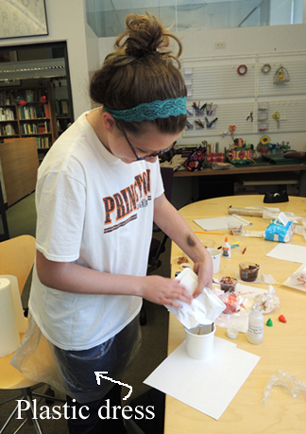
I didn’t want to stain my underclothes, jeans, or shoes, so Dr. Dana found me a plastic garbage bag. A cut here… a cut there…VOILA! Plastic bag dress. I slipped it on, threw the old shirt over it, and headed outside to be splattered.
Marissa applied liberal amounts of blood to the shirt as innocent passersby gawked at our shenanigans. Then Dr. Dana had to cut the shirt off my back so that the blood didn’t splatter onto my other clothes or the floor.
 Overall, this kit was fairly fun, but I definitely had some issues with it.
First of all – the recommended age. This product is advised for ages 8+. That would be all well and fine, except that the kit is extremely hands-on, and with all the setup, applications and dripping stuff you definitely need someone else to help you. Additionally, some of the things were pretty gory (the cut, the stitched up cut), and might not be suited for an 8 year old. And of course, the tedium and pain of the burnt skin activity made me want to scream, and I’m thirteen.
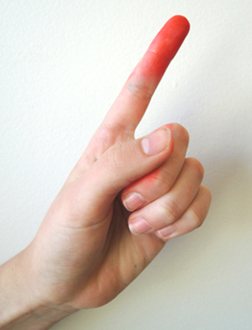
Secondly, the whole mess factor was overwhelming. My hands were sticky and dyed red from the blood, greasy from the petroleum jelly, and cakey-dry from cocoa. The testing table was littered with paper towels, and a low pressure system of blood blobs and cocoa powder had moved through the area, leaving so much cleanup that the president of FEMA would’ve resigned. The red dye on my fingers didn’t come off for several days.
 And lastly, in my opinion, the directions had a tone directed to an audience of four year-olds, not second graders. For example, in the directions it says, “Real blood is red. What makes fake blood red? Food coloring! Add 3-4 drops of red food coloring to the corn syrup and use your stir stick to mix until completely combined. Is this starting to look like blood?”
In my opinion, it sounds slightly condescending, in the way adults talk to toddlers. I would’ve worded it more like… “Real blood is red. So when we make fake blood, we use food coloring. Go ahead and add 3-4 drops of the red food coloring to the corn syrup, mix, and observe how it changes.” I know that this sounds similar to the original phrasing, but I also think that wording it this way sounds more scientific and less condescending.
As for the science, that’s great, as they’re trying to enhance the educational value of the kit. There were little boxes sprinkled throughout the directions that had little science tidbits in them.
 That was pretty cool, and added a unique edge to the kit. In my opinion, most kids are more eager to do the actual activities, and aren’t as focused on the science. They’re all for looking like a zombie.
RATING: 3.5 STARS
PROS: pretty fun, lots of activities (7!), gross-out factor (the cuts that we did)! The gross-out was kind of a disgusted fascination, like when kids hold a tarantula at the zoo.
CONS: messy (testing table), some of it lame (blisters = doughnut frosting!), time consuming (3-4 hours!), dye stained my skin for a couple of days.
I think that kids ages 8-14 would like this product because of both the fun and fascination factors. I liked the blood brewing and the cut making, but the blisters didn’t look realistic and were just plain gross. I would recommend it to those who enjoy makeup, disgusting stuff, and laugh out loud fun. Marissa and I had a GREAT time testing this project, with much laughing, giggling, chuckling, guffawing, and grossing out.
Marissa seemed to have the most fun while we tried to apply the blisters, and during the cut making. My parents thought that the bruise on my arm was real, but they didn’t seem shocked by my red-dyed fingers (probably because I mess with food coloring all the time). In addition, this is not the type of kit that I would have bought for myself. I’m not exactly your Walking Dead or Twilight enthusiast. I’m also not a fan of gaping wounds or stitches.
Finally, I definitely DO NOT (!!!!!) recommend the kit for those with weak stomachs or fears of gore. Because there is a lot of blood. And gore. And stomach-wrenching.
So I hope that you guys enjoyed the review- SHRIEK! There’s a vampire coming my way, and it’s wearing a shirt that says I HEART CHOCOLATE… Uh oh. I’m covered in cocoa blood!! Got to RUUUUUUUUUNNNN!!!!!

 Cue the marching music and rev up the float…it’s a pig parade! If, of course, the pigs cooperate. They might not, you know.
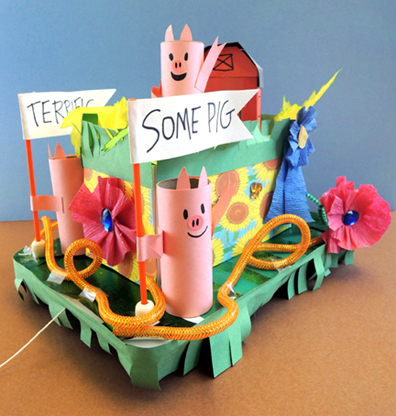 You’ll need:
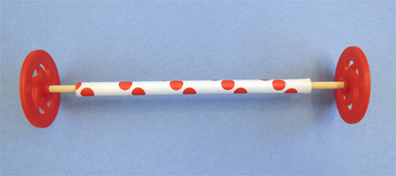 As you can see in the above image, the skewer is the axle, and the straw is what allows the axle to turn freely (you might need to wrap the ends of the skewers with masking tape to keep the wheels/spools from sliding off). Tape each drinking straw to a small, flat box. I found that leftover tape roll boxes were the perfect size. Hot glue the tape boxes to the bottom of a corrugated cardboard base.
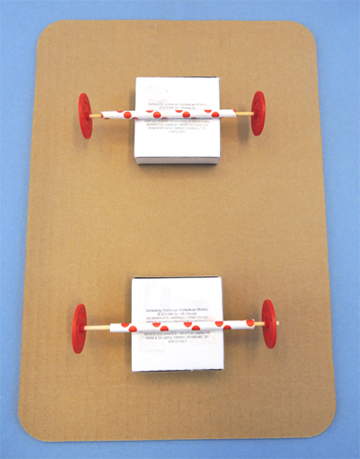 Knot a piece of string around a small craft stick, and tape the stick to one end of the base. This is the pull string for your float.
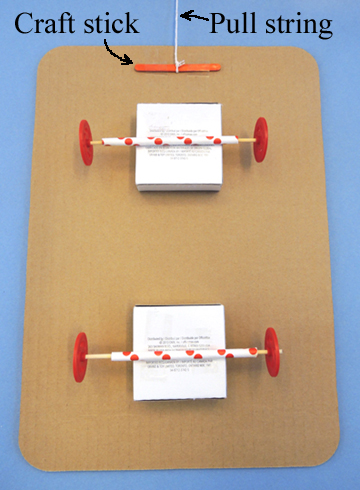 Flip the base over, you’re ready to decorate! To get the juices flowing, we suggested a number of parade float “themes,” such as:
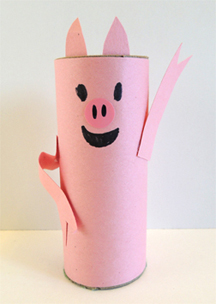 You can also use the decorating supplies to fancy up your pigs. Such as these “Rock n’ Roll” pigs. Love how the artist stuck jumbo pom-poms in the top to create hair!
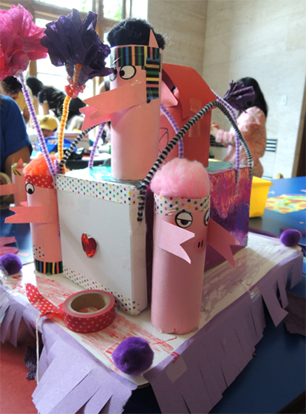 When the floats were finished, I handed everyone a kazoo and we marched around the gallery. 18 kazoos at once was…pretty interesting. I bought the kazoos from the party supply section at Target. Buy extra, because some didn’t work!
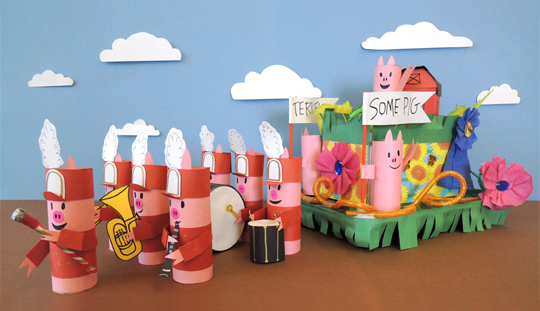
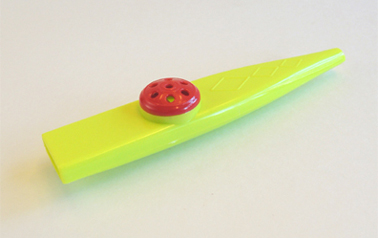 And speaking of music and marching, major props to Marissa for crafting the pig band that started off the post. You can really appreciate the detail in this shot:
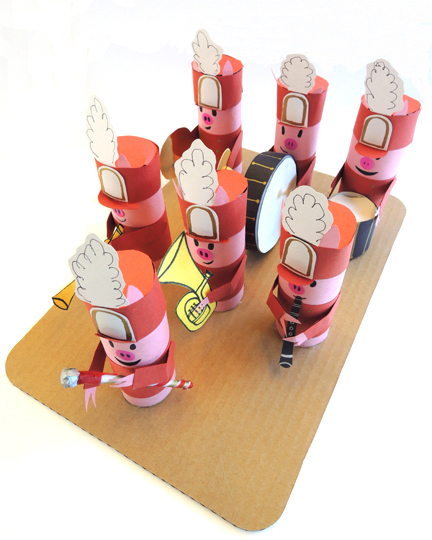 Seriously amazing stuff Marissa!