 It’s dinner time and the peas are flying! Can your land the pom-pom peas on the plates, bowls, and cups? Bust out your pea catapult and get ready to do some physics and math!
We recommend reading Eat Your Peas, Ivy Louise by Leo Landry (HMH Books, 2005). Toddler Ivy Louise has been tasked with eating her dinner. However, those energetic peas are running a full-scale circus on her plate, complete with acrobatics, impressive weight-lifting, and a high dive act. The grand finale? We’ll let you guess. Very entertaining for Ivy Louise. Not so much fun for Mom and Dad to clean up!
You’ll need:
- 2 jumbo craft sticks (ours were 8″ long)
- 6 medium craft sticks (mine were 4.5″ long)
- Masking tape
- 4 medium rubber bands
- 1 plastic spoon
- 5-10 green pom-poms
- Paper plates, bowl, and cup
- Markers for decorating
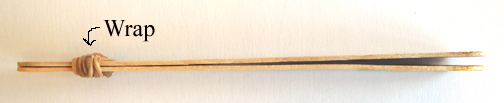
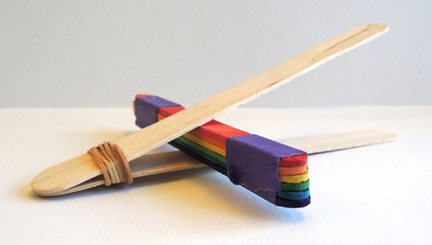
Our awesome craft stick catapult is from this bouncing bedtime post, so I’ve repeated the instructions below. Stack 2 jumbo craft sticks on top of one another, then wrap a rubber band tightly around one side.
Now stack 6 medium craft sticks on top of one another and wrap both ends tightly with masking tape.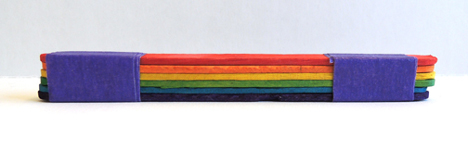 Wedge the stack of 6 craft sticks in between the jumbo crafts sticks like so:
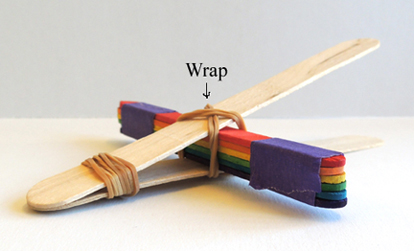
Then wrap 2 rubber bands around both sets of craft sticks to secure the catapult mechanism in place (a criss-cross formation works best).
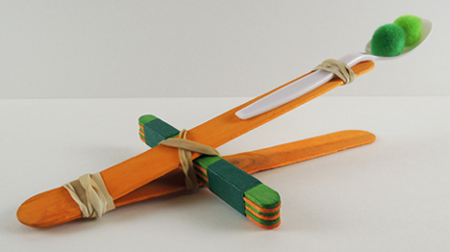
An additional step for you pea catapult…secure a plastic spoon on the end of the catapult arm with a rubber band. Don’t secure the spoon with tape – you might want to adjust the placement of the spoon later when you’re launching peas. Here’s our finished pea catapult, all loaded up:
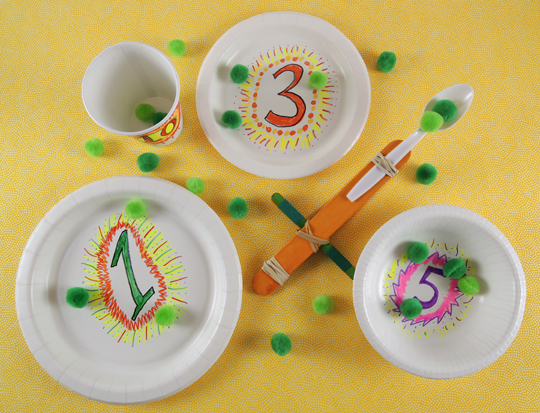
 Now for your targets! Use markers to decorate paper plates, bowls, and cups. Make sure to assign a numerical value to each item.
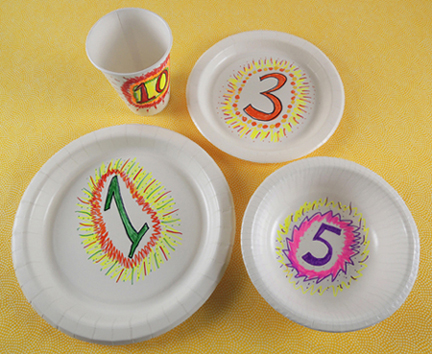 Ready to play? Set your table, load up your catapult, and launch some peas! Use your math skills to tally points, and play around with physics as you adjust your spoon and your catapult to achieve maximum results.
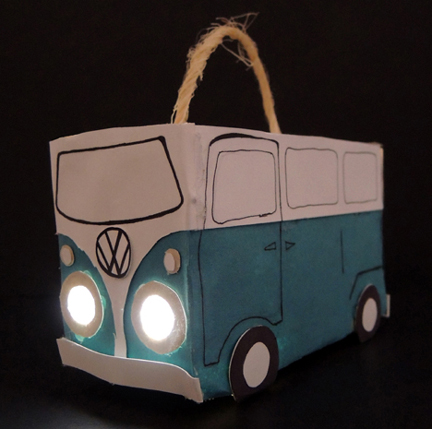
 We used a submersible LED to light Marissa’s van. You can find them in the floral section of Michaels craft store – 9 cost $21, but I always use a 40% off coupon.
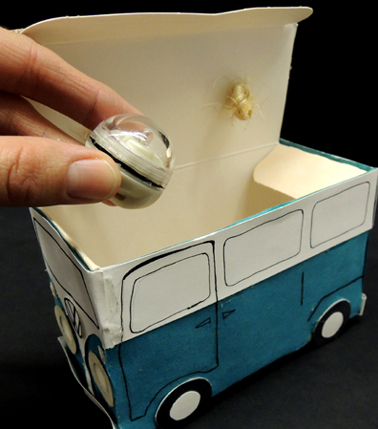 If the LEDs are too pricey, a glow stick will do the trick. Drop the illumination of your choice in the vehicle box, close the lid, and you’re done. Vroom vroom vroom!
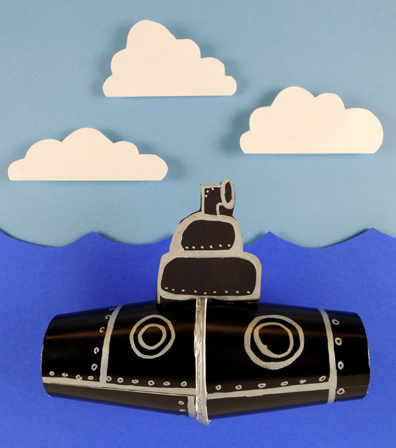
 We recommend Rub-a-Dub Sub, written by Linda Ashman, and illustrated by Jeff Mack (Harcourt, 2003). Zooming around in an orange submarine, a little boy encounters numerous ocean creatures – a seal, a manta ray, a horseshoe crab, and an eel to name a few! But an encounter with an enormous shark forces him to quickly retrace his steps to the surface, where he finds himself safe and sound – in his very own bathtub.
 Next, turn the cups end-to-end and connect them together with hot glue. If you can’t do hot glue, simply connect the cups with tape. We used black masking tape for the photo below, but regular tape works just as well.
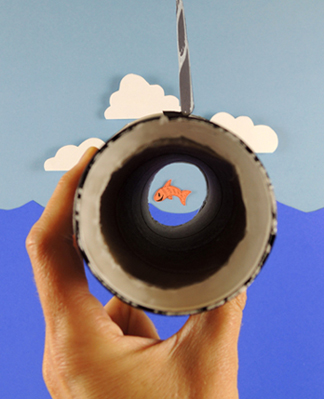
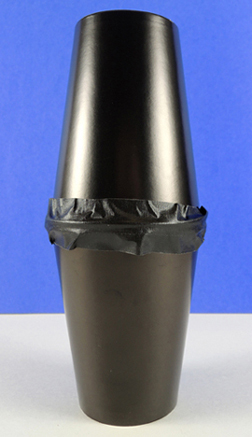 For the paper towel tube version of the project, cut the holes in the bottoms of the cups. Then place a piece of paper towel tube inside the bottom cup (our tube piece was 6.75″ long but you might have to adjust yours a little). Place the second cup over top of the first…
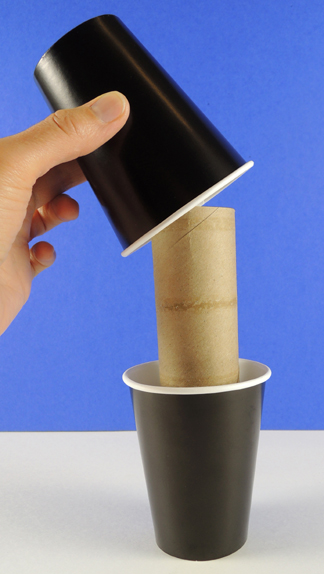 Then hot glue (or tape) the two cups together. So…is the extra effort for the paper towel version worth it? You decide! Here’s a side-by-side comparison of the 2 projects. One could argue that the paper towel tube version looks more like a spyglass, but the cups-only version is cute too.
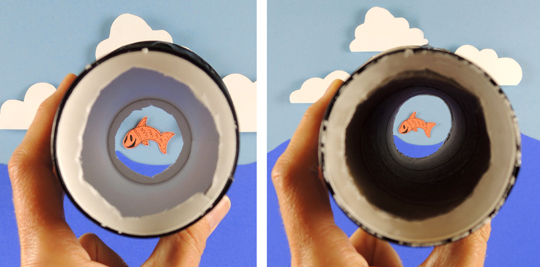 Next, cut a periscope shape out of construction paper, tab the bottom, and attach the periscope to the top of the sub. Finally, use markers to give your sub portholes, plates, rivets, and bolts. Any markers will do, but we really liked how silver metallic marker looked on the black paper cups.
 Miss Marissa designed this awesome project, and she made a fantastic I-Spy game to go with it! To play, print up the characters in this template (click