On Cupcakes and Pogo Sticks

814xz0vzykl 
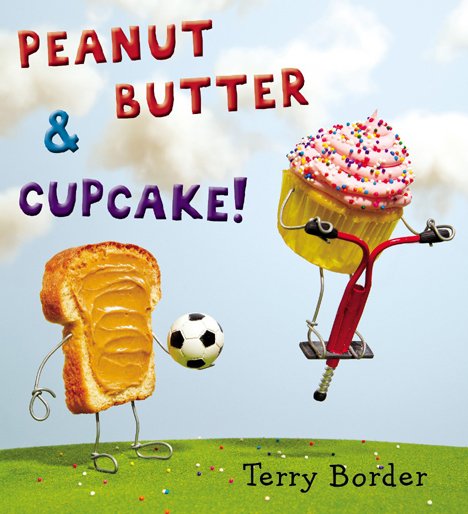
I was meandering past the new picture book section in our local library when I saw it. A cupcake. On a pogo stick! What genius was this? Intrigued, I opened Peanut Butter & Cupcake (Philomel, 2014).

Peanut Butter is the new kid in town, and he sets out to find a friend to play with. But everyone seems to have something else to do. It’s going to take someone super nice, super special, and super compatible to be the perfect play pal for Peanut Butter. I wonder who it could be?

pbj_playing copy
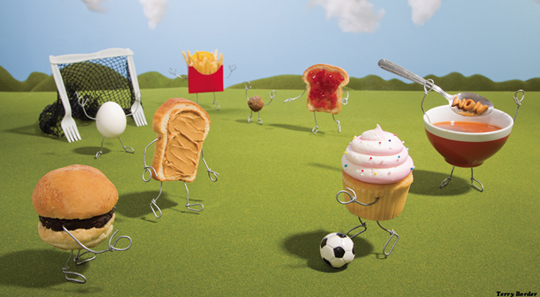
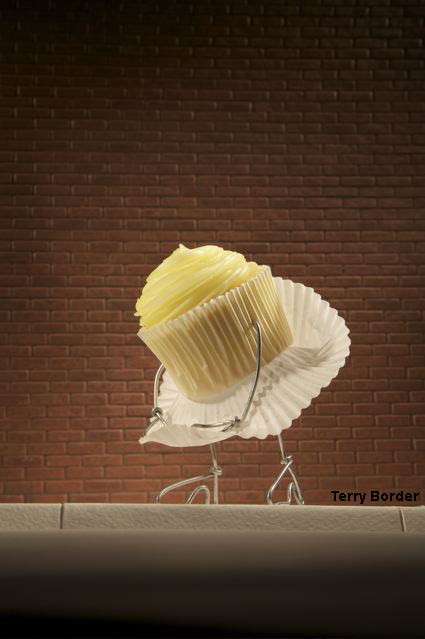
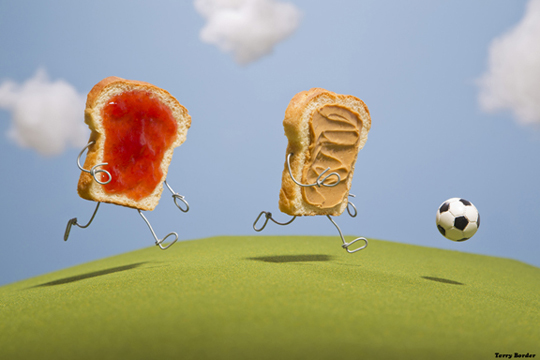
Accompanying the rhyming text are amazing photographs of 3-D objects. A slice of bread with a soccer ball, a hamburger walking a pair of hot dogs, a box of fries reading a book, an egg riding a unicycle. This could only be the work of artist, photographer, humorist, and now children’s book author, Terry Border.

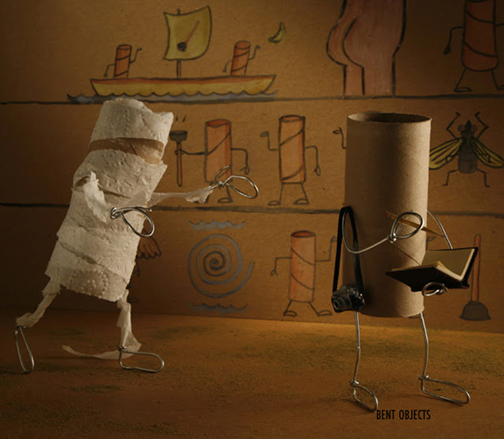
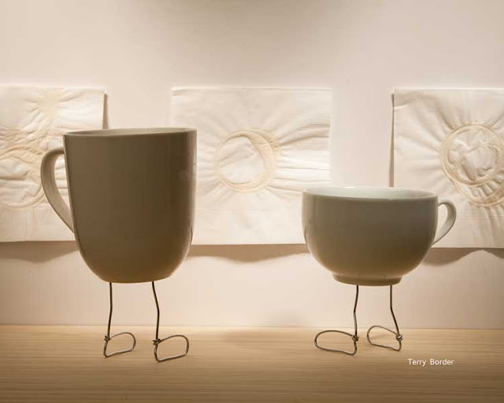
Terry Border is the creator of Bent Objects, which started as a blog but lead to a number of art books, calendars, greeting cards, and jigsaw puzzles. Often featuring everyday objects with wire legs and arms, Border’s images are humorous, satirical, poignant, and in some cases, rather touching.

mummy2coffee-ringschristmas1Can you tell us a little about the beginnings of Bent Objects?
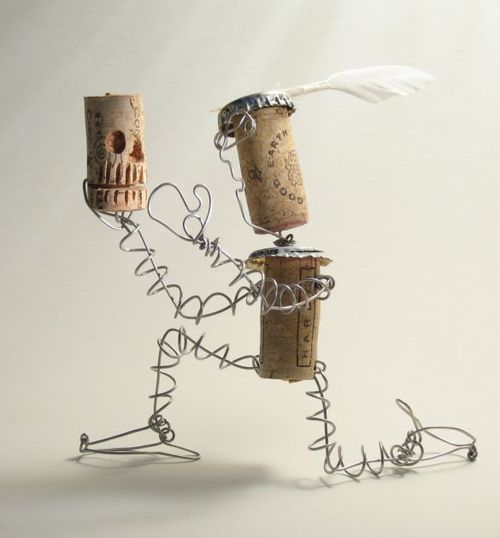
Way back in 2006 I began making some tiny sculptures out of wire and household objects. When I realized that the final art should be a photograph and not an actual sculpture I knew I could use real food because things just had to last long enough for a photograph.  Somewhere along the way I decided to make jokes and observations and much to my surprise other people “got” it and started sharing my work.

What type of wire do you use for most of your work?
Usually 20 gauge to 14 gauge wire that is available at a hardware store. Ordinary stuff.

hamlet

What does your studio look like?
If it were empty you would swear that it looks like a small bedroom in a suburban 1980’s era house, because that’s what it is.  It’s always terribly messy. The fun part of my work takes place in my head. Looking at where I actually make it a physical reality isn’t so exciting. I do have a Homer Simpson clock on the wall though.

What came first with Peanut Butter & Cupcake…the images? Or the story?
The story, although it was influenced greatly by how I visualized what could be interesting.  That’s why I had Peanut Butter visiting so many other “kids” so that I could have lots of opportunities making small jokes about the different foods.

As a first time children’s book author, what was it like to write the story? Was it easier, or more difficult than you expected?
Writing the book was a lot more difficult than I expected to tell you the truth. Like a lot of people I thought it would be easy to write a children’s book. Well, it IS easy to write a children’s book, it’s only hard to write a good one.

My editor, Jill Santopolo helped a LOT with rewrites. She really helped put things together, shaped things up, etc. I couldn’t have done it without her help. I learned sooo much from this book. I think my second (which I’m working on now) will be better, and the third (if I get so lucky) will be much better than the previous two. I’m just now learning what I can do.  :)

Did you test the story out on any kids and, if so, were you surprised at the feedback they gave you?
I’m not one for preview audiences! ha!  I was confident in my ability to make some good photographs and hoped that would strengthen any possible shortcomings in the written department. Luckily (and like the old quote “I’d rather be lucky than good”)  I think it worked out.

How many slices of bread went into the making of the book?
I actually baked small loaves half the size of normal ones to make him from, and not all of the slices made the cut (rimshot). I probably put arms and legs on 25 or 30 slices to make both him and jelly.

What was the hardest part about composing a scene for your book?  
The big soccer match towards the end was the most difficult because it was so large with every character in it. Crumbs are constantly falling off the characters, and the more I move them around the more they fall apart. By the time I actually take the final photo the characters are usually barely able to stay together.

thebiggameWho made the cupcakes in the book? Num num num.
I have to make the cupcakes, because the ones from stores and bakeries are too soft and moist to work with!

Can you give us your special cupcake recipe?
Just buy the cheapest cupcake mix you can. The extras will taste “okay”, and the ones that are the stars of the show won’t be so moist that they’ll fall apart as soon as they’re on set! I hollow out a bit of the cupcake and make a little hot glue core for some wires in there. All the food is really food except for something to keep the wires attached to it if needed.

marilyn-_MG_6027-credit

What’s your next children’s book about?
My next book is to be called Happy Birthday Cupcake. It’s about Cupcake from the first book wondering what kind of birthday party she should have. Lots of funny pictures are being made for this one!

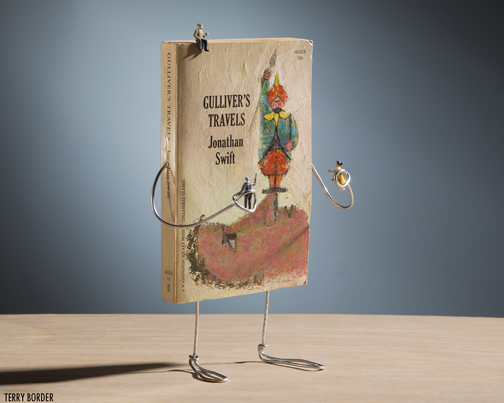
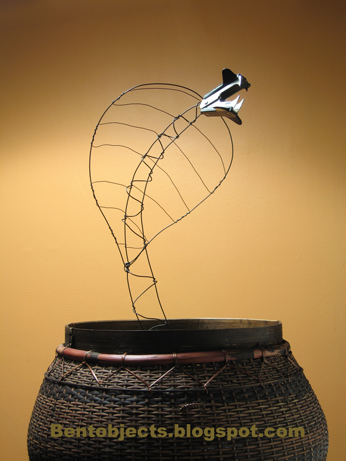
You can see more of Terry Border’s work on his website and his blog, including some amazing portraits of old paperback books. For those who have constantly told their children that a stapler remover is not, in fact, a dangerous creature, take a look at the second image below! Awesome.

GULLIVERHow-Business-was-done-(snaksnow-white
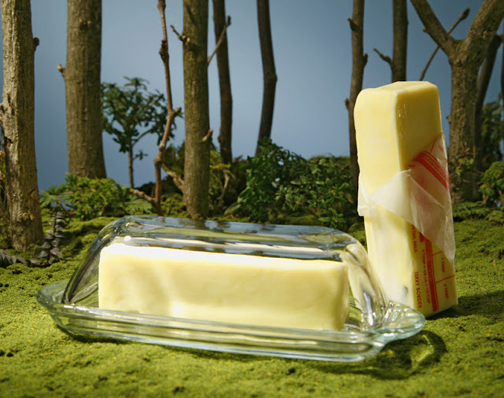
And the butter lived happily ever after (sorry, couldn’t resist).


All images are used with the permission of Terry Border. Images from Peanut Butter & Cupcake are used with permission of Philomel Books, an imprint of Penguin Young Readers Group.

Wish Fish

wish fishA goldfish is a lovely pet…unless, of course, you had your heart set on a pony. But what if the fish could talk and grant you a wish?

We read The Birthday Fish by Dan Yaccarino (Henry Holt and Co., 2005). More than anything else, Cynthia wants a pony for her birthday. Every year, she wishes for a birthday pony, and every year, she gets something else. This year, as Cynthia blows out her candles she wishes for a pony called Marigold. She gets a goldfish. Upset, Cynthia is about to pour the fish down the drain when it speaks! The birthday fish will grant her wish, but first she must take it to the lake and set it free. So Cynthia loads the fishbowl in her toy stroller and departs for the lake. During the journey, they meet and overcome many obstacles (bumpy roads, hungry cats, hot sun, etc.). At last, they arrive at the lake and…Cynthia decides she’d rather keep her new friend. She names him Marigold.

You’ll need:

  • 2 large clear plastic plates (mine were 10″ in diameter)
  • 1 small tissue box
  • A couple cups of uncooked rice (or aquarium gravel)
  • fish and castle template printed on a piece of 8.5″ x 11″ white card stock
  • 2 small paperclips (mine were 1.25″)
  • 1 large paperclip (mine was 2″)
  • Green construction paper
  • Fish decorating supplies (I used orange & yellow construction paper, cello sheets, crepe paper streamers, embossed foil paper, and patterned paper
  • A 5″ piece of clear clear elastic beading cord
  • Scissors, tape, glue stick and stapler for construction
  • Markers for decorating

We’ll begin with your fabulous fishbowl! Place 2 clear plastic plates rim-to-rim like this:

rim to rim plates Then tape the lower half of the plates together. Don’t tape the entire thing because you still need to put things inside your fishbowl!

taped-plates-3
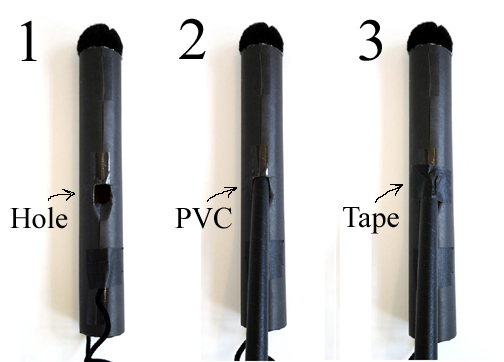
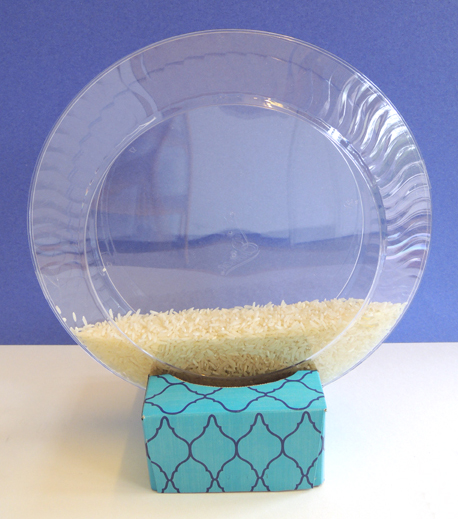
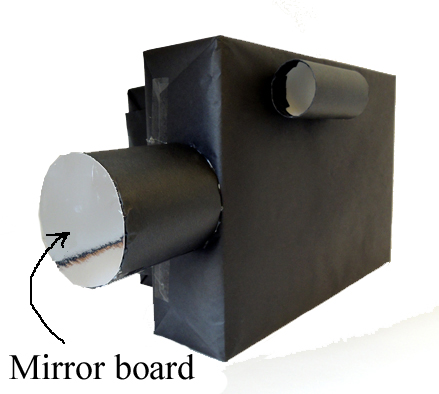
Now for the base. Cut a small tissue box in half. Recycle the bottom half. You now have a 2.5″ base with an opening at the top.

tissue box cut downIf there is any plastic around the opening of the tissue box, remove it. Then, on both sides of the box, cut from the opening to the edge of the box. Then cut diagonally downward into the sides of the box. This leaves your base looking like this:

cut baseDrop your fishbowl into the base. You might have to do a little cutting and adjusting to get the fishbowl to sit upright snugly. Secure the fishbowl to the base with tape. Pour some uncooked rice in the opening at the top of the plates. This is the “sand” for your fishbowl.

rice in baseNow for some fish-friendly decor! Both the castle and the aquatic plant are anchored in the rice by paper clip “stakes.” We’ll start with the castle. Color and cut the castle from the template. Make sure you keep it in once piece (later, you’ll fold it so it can be viewed from both sides of the fishbowl).

Flip the castle over and tape two small paperclips to one side. You’ll notice that I taped just the very tops of the paperclips to the castle. This is so there would be plenty of paperclip  to stick into the rice. Fold the castle in half and tape it closed.

castle tapedTo make the aquatic plant, cut 3 curvy plant pieces out of green construction paper. Make sure they don’t exceed 6″ in height (otherwise, they start to tip over in the fishbowl). Staple the 3 pieces together, then tape a large paperclip to the bottom.

stapled and taped plantOpen the top of your fishbowl and gently push the castle and aquatic plant paperclip stakes into the rice. I recommend placing the castle all the way to the right, and the plant all the way to the left to make room in the middle for your dangling fish.

And now…the fish! Cut and color the fish from the template. Like the castle, the fish is double-sided. So leave it all in one piece.

Flip the fish over to the blank side and decorate. I offered construction paper, cello squares, crepe paper streamers, embossed foil paper, and patterned paper in hues of orange and yellow. When you’re done decorating, tape a piece of elastic beading cord to one side of the fish:

fish with taped cordThen fold your fish over and tape it closed (to make my fish plump, I taped it shut using tape loops). Next, dangle your fish in the fishbowl, adjust for height, and tape the free end of the cord to the outside of the bowl. Tape the top half of the fishbowl closed. Done!

wish fishIf you have a little extra time, I suggest playing “Pin the Tail on the Goldfish” before taping your fishbowls completely closed. I whipped up a simple game poster and made some construction paper fish tails. A white bandana served as our blindfold (and kids who didn’t like things over their eyes had the option of simply closing their eyes).

pin the tail on the fishThe prize for playing – regardless of where the tail was pinned – was a lovely little sea shell for your fishbowl. The shells were dropped in and THEN we taped the fishbowls securely closed. There was some spilled rice, but a quick vacuuming took care of that.

Still hankering for a pony? Perhaps you should check out this post.

Lights, Camera, Action!

a star is bornWhether you’re covering a celebrity event or conducting an in-depth interview, you’ll need the right equipment to get the job done. Namely a camera, a handheld microphone, and a boom microphone!

We’ve successfully “filmed” story time fashion shows, spoken with future presidents, covered red carpet entrances, and chatted with entomologists about a new bug species they’ve discovered. We’ve also let kids take over the equipment. It’s guaranteed to hold up to even the most enthusiastic documentarion.

You’ll need:

  • Black paper or paint
  • 2 cereal boxes (one extra large, one small)
  • 1 packing tape core
  • A 4″ x 4″ square of mirror board
  • 1 toilet paper tube
  • A selection of dot stickers (optional)
  • 2 paper towel tubes
  • 2 black pipe cleaners
  • 1 black jumbo pom-pom (mine was 1.5″)
  • A 38″ piece of PVC pipe
  • A roll of black masking tape
  • Scissors and tape for construction
  • Hot glue

 CAMERA

cameraWrap the cereal boxes, packing tape core, and toilet paper tube with black paper (we used a roll of bulletin board paper, but you could also use black paint). Hot glue the 2 cereal boxes together. Katie glued a “Channel P” sign to the side of the small cereal box as well.

To make your camera lens, cut the mirror board to fit the circumference of the packing tape core, then attach the mirror board to the core with hot glue. Hot glue the core to the front of the extra large cereal box.

camera other side 
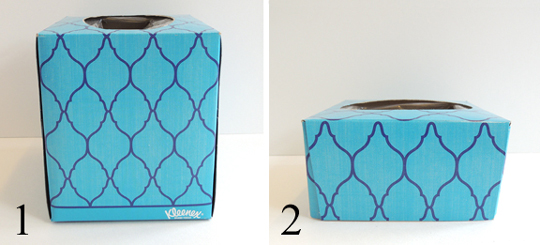
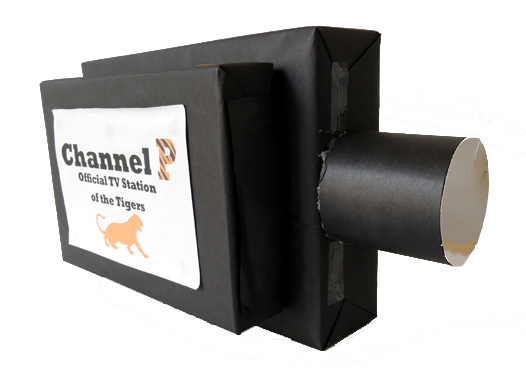
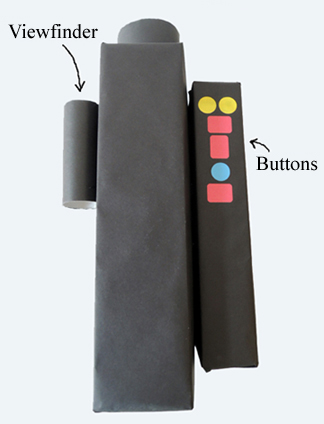
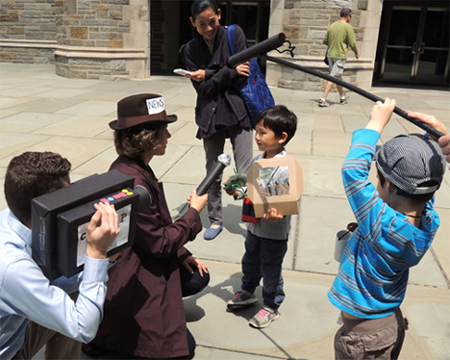
Hot glue the toilet paper tube “viewfinder” to the extra large cereal box. Put dot sticker “buttons” on the small cereal box (or draw your own button panel on white paper and attach to the box). Here’s a bird’s eye view of the camera with all of its parts in place.

camera topMake sure the viewfinder is on the opposite side of the camera from the small cereal box. Otherwise, you won’t be able to hold the camera on your shoulder!

HANDHELD MICROPHONE

microphoneCut a paper towel tube down to 8″ then wrap with black paper (or use black paint). To make the spiral cord, curl a black pipe cleaner around a marker. Then tape the pipe cleaner inside the bottom of the tube.

For the microphone’s “windscreen,” bunch pieces of tin foil into a bulbous cone shape. It should look like this:

mic foil 1Layer more piece of tin foil on top of the bulb so the windscreen bulges over the rim of the paper towel tube. Then hot glue the foil to the tube.

mic foil 2Feel free to add some dot sticker buttons if you like. Your microphone is ready to record!

BOOM MICROPHONE

boom micThe camera and the handheld mic are great, but the boom mic REALLY makes this set!

First, wrap the paper towel tube with black paper (or use paint). Then hot glue a jumbo pom pom on one end. To make the cord, curl a black pipe cleaner around a marker. Tape one end inside the tube. Tape the other end of the pipe cleaner to the outside bottom of the tube.

boom mic extrasTo create the boom, wrap a 38″ piece of PVC pipe with black masking tape. Use scissors (or a box cutter) to make a hole in the middle of the tube. Insert the PVC pipe into the hole, and keep pushing until the pipe touches the interior of the tube. Secure with black masking tape.

boom mic stepsYour set is complete! When covering a news story, I sometimes throw on a coat and matching fedora. To make things more official, you know.

news crew