 The circus is coming to town! See the juggler! Chuckle at the clown! Gasp at the amazing acrobat! But you’ll need some very tiny tickets, because this circus…is for mice.
We read The Secret Circus by Johanna Wright (Roaring Brook Press, 2009). Somewhere in the city of Paris, there is a secret circus. Only the mice know how to get there and enjoy its many splendors. But we’ll give you a hint: check under the carrousel in a park by the Eiffel Tower. But keep it a secret!
You’ll need:
- A large rectangle of white poster board (approximately 11″ x 25.5″)
- A box cutter
- 1 paper towel tube
- A selection of color masking tape
- 2 pipe cleaners
- 1 wooden dowel
- A 8.5″ x 14″ tagboard base (optional)
- 4 toilet paper tubes
- 2 rectangles of white construction paper (approximately 4.5″ x 6″)
- 2 rectangles of grey construction paper (approximately 4.5″ x 6″)
- Extra white and grey construction paper for mouse ears and tails
- A selection of patterned paper
- 1 strip of white construction paper for ringmaster pants (approximately 1.25″ x 6″)
- 1 strip of red construction paper for ringmaster jacket (approximately 1.5″ x 6″)
- 1 rectangle of black construction paper for ringmaster hat (1.5″ x 2″)
- A 5″ piece of craft tie for ringmaster bow tie
- 2 small feathers
- A circle of white card stock (2″ in diameter)
- 3 mini pom-poms (mine were 0.5″)
- Markers for decorating
- Scissors, tape, hole punch for construction
- Hot glue
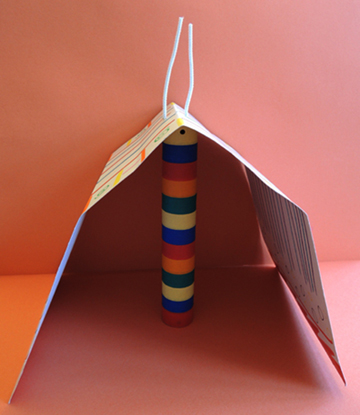
First, we’ll raise the tent. We designed the tent to be easy to collapse and carry home. We tried the tent set up on a hard tabletop and carpeted floor. It was pretty sturdy on both surfaces!
Use markers to decorate your large rectangle of white poster board tent on both sides (I left the example tent undecorated for the steps below). Remember – one side of the paper is your exterior (stripes are always nice), and one side is the interior (you can draw audience members if you like!).
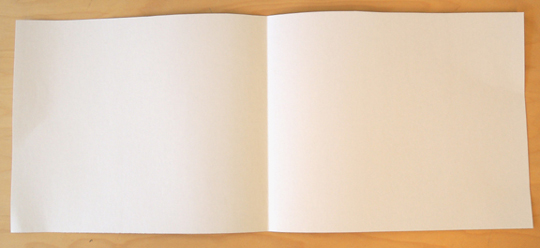
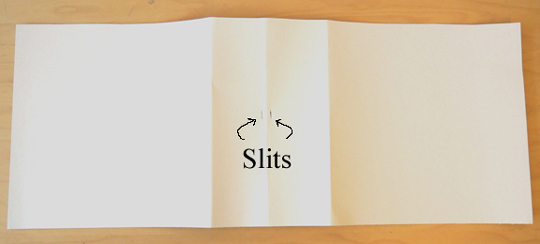
Lay the poster board on the table in front of you. Fold it in half like a book, then unfold it.
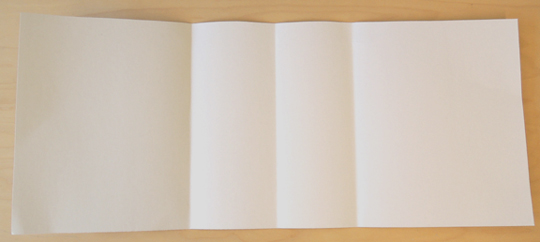
 Take the right end of the tent and fold it towards the center line. The fold should begin 5″ from the center line. Repeat with the left side of the tent. It should now look like this:
 Flip the poster board over. Use the box cutter to make two, 0.25″ slits on either side of the center line, right in the center of the poster board tent.
 Pick the tent off the table and gently roll the areas between the folds inwards.
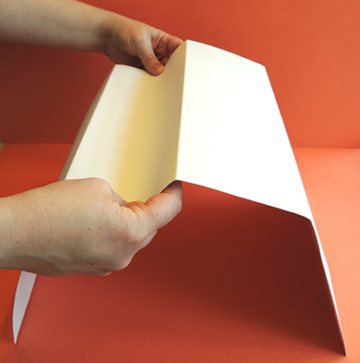 This will give your creation that “droopy circus tent” look.
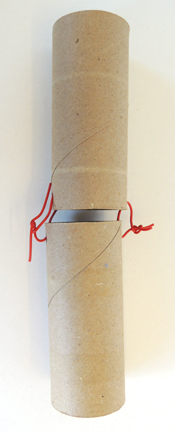
 Now for the tent pole. Wrap a paper towel tube in color masking tape, and punch four holes in the sides of the tube, near the top. Thread a pipe cleaner through one set of holes:
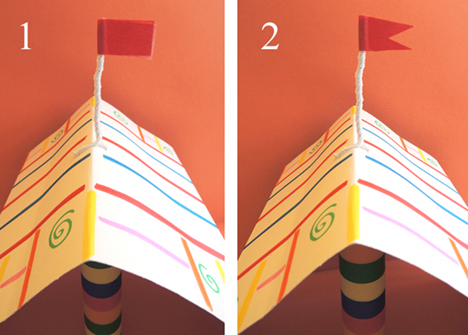
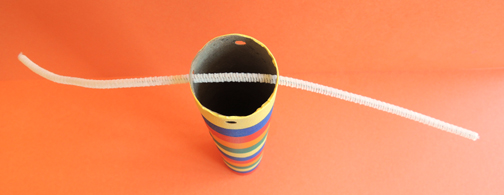 Fold the ends of the pipe cleaner upwards. Push the ends of the pipe cleaner up through the slits at the top of your tent.
 Twist the ends of the pipe cleaner together tightly to create a flag pole. Wrap a piece of color masking tape around the top of the pole, then trim the masking tape with scissors to create a banner flag.
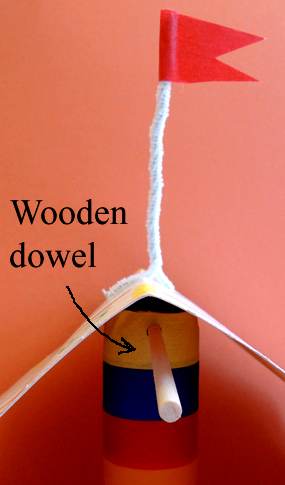
 Lastly, inset a wooden dowel through the remaining pair of holes on the paper towel tube (your acrobat will swing from this “trapeze” later).
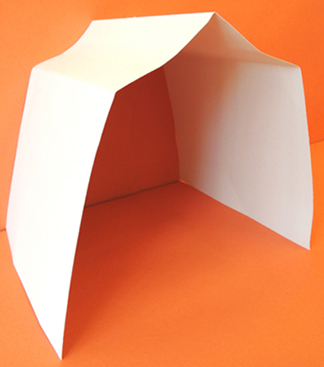
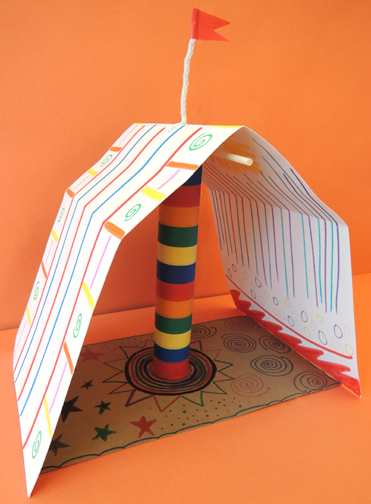
 Your tent is finished! If you’d like, you can add a tagboard floor, but it’s totally optional. We didn’t attach the tagboard floor to the tent, opting instead to leave it loose so the tent would be more portable and collapsible.
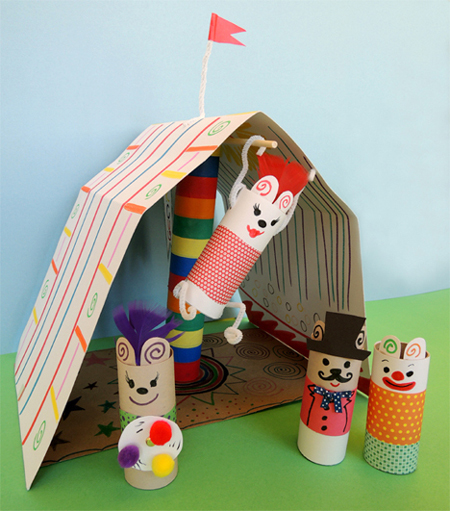
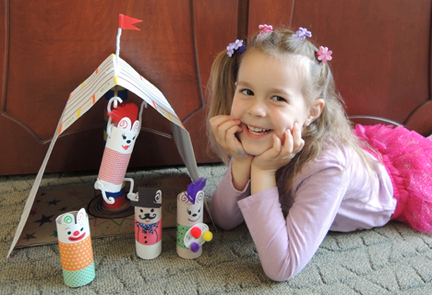
 Now for the performers! We have an acrobat, a juggler, a ringmaster, and a clown!
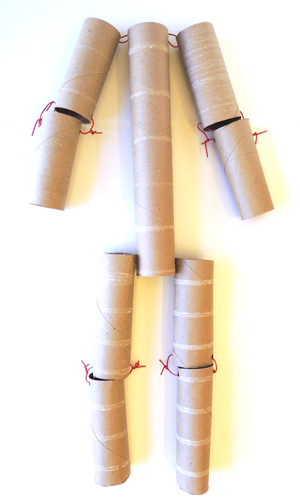
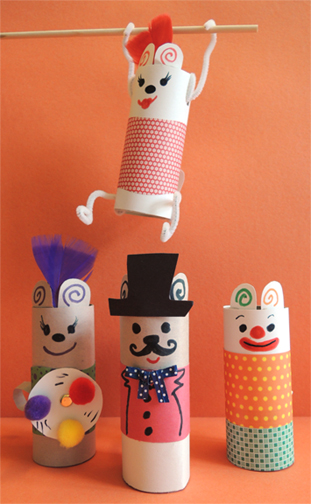 Begin by wrapping 4 toilet paper tubes with white and grey construction paper (we made 2 white mice and 2 grey mice). Make ears out of extra pieces of construction paper and tape (or hot glue) them to the tops of the tubes. Once you finish those steps, it’s time for some details!
CLOWN
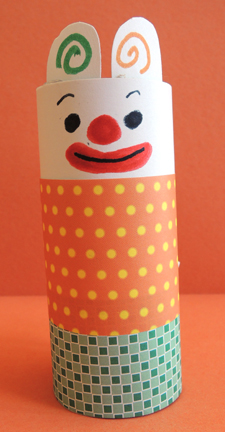 Wrap 2 pieces of patterned paper around the tube for a shirt and pants. Use markers to draw a face, and add a curled strip of construction paper for the tail.
JUGGLER
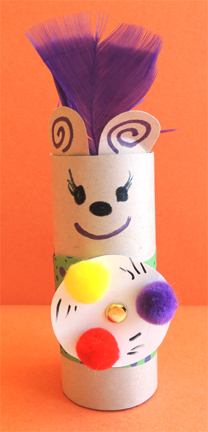 Wrap 1 piece of patterned paper around the middle of the tube. Tape a feather at the top of the tube, behind the ears. Attach tail. Then use the box cutter to make a small slit in the middle of the juggler’s “chest.”
Next, use the hole punch to create a hole in the center of the 2″ card stock circle. Hot glue 3 mini pom-poms “juggling balls” on the circle (if you don’t have pom-poms, you can use markers to draw balls on the circle). I also used markers to add little “motion lines” behind the balls to accentuate that they are in motion.
Insert a brass tack through the hole in the juggling circle, then push it through the slit in the tube. Open the tack’s prongs inside the tube. Spin the circle and the mouse will juggle!
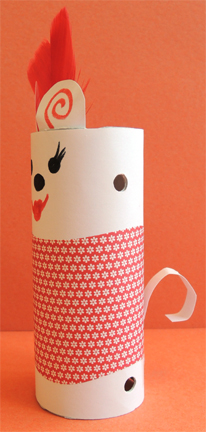
ACROBAT
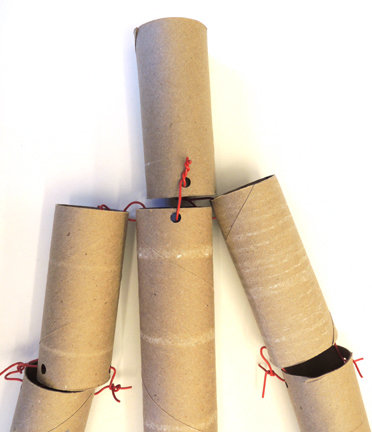
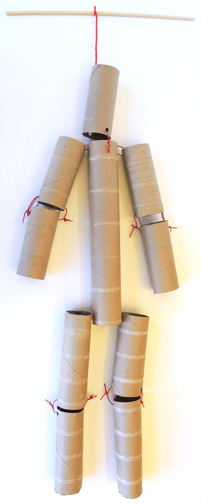
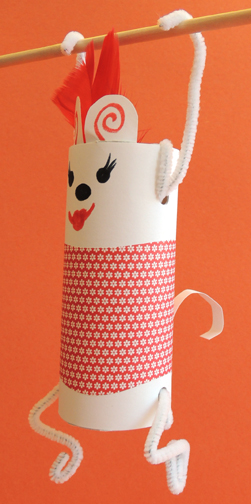 To make the acrobat, follow the same steps as the juggler. But instead of cutting a slit in the chest, punch two sets of holes into the top and bottom of the tube like so:
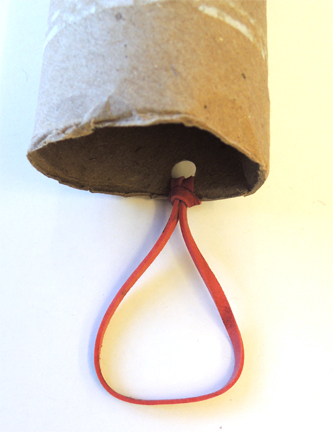
 Thread a pipe cleaner straight through the top set of holes…
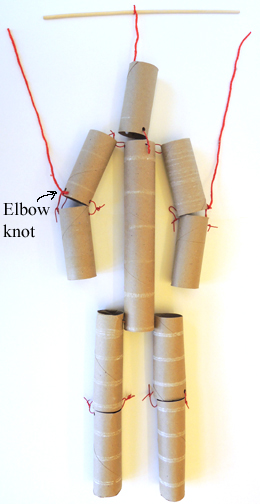
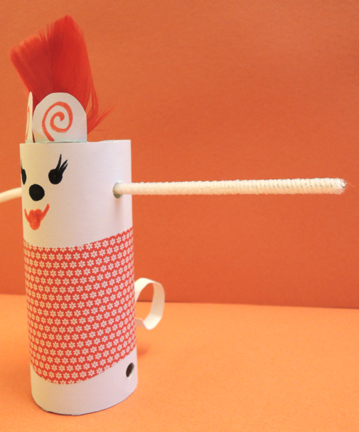 Then loop the right end of the pipe cleaner through the right hole again.
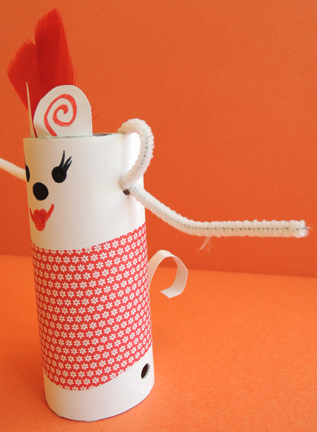 Bend the pipe cleaner up and hook the very end. This is how the mouse will hang on the trapeze bar.
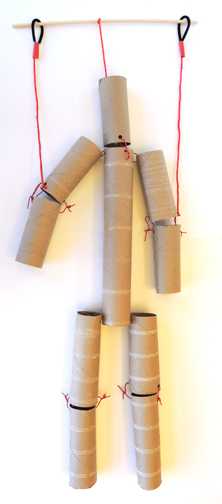
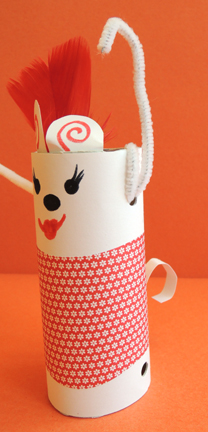 Repeat the above steps on the left arm. To make the legs, follow the same steps as the arms, but simply bend the ends pipe cleaner up to make feet. However, some kids decided to hook the feet so the acrobat could hang upside down as well.
THE RINGMASTER
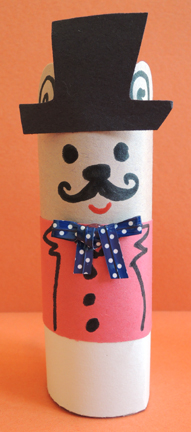 Wrap a white construction paper strip around the bottom of the tube for pants, then wrap a red construction paper around the middle for the jacket. Cut a top hat shape out of black construction paper and tape (or hot glue) it to the top of the tube. Attach tail. Use markers to draw a face (don’t forget the mustache!) and details on the jacket. Top the outfit off with a bow tie (we made ours with a craft tie, but if you don’t have any handy, you can use markers).
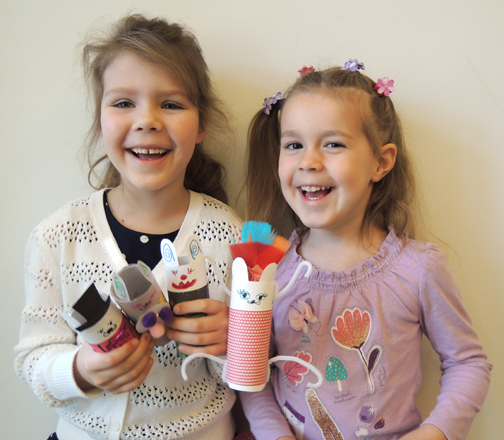
Your circus is complete! Gather up your troupe of performing mice…
 …and let the greatest little show on earth BEGIN!
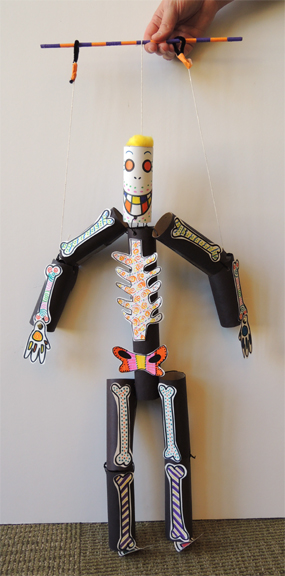
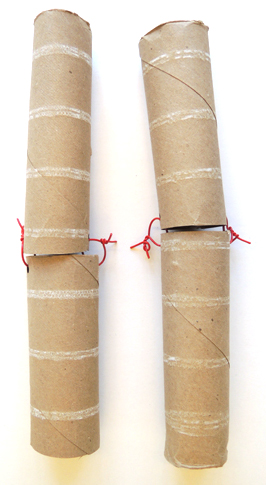
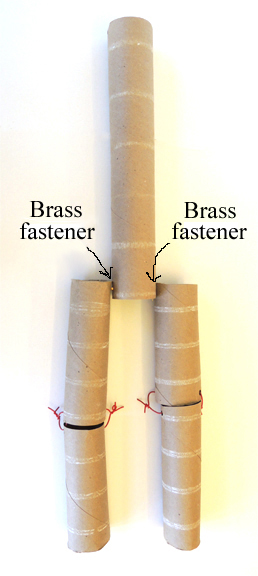 Making an arm is just like making a leg, except you’ll be using toilet paper tubes instead of paper towel tubes. Punch holes in the top of one toilet paper tube and the bottom of the other toilet paper tube. Thread twisteez wires though the top and bottom holes on each side of the tubes, joining them together. Twist the ends of the wire together.