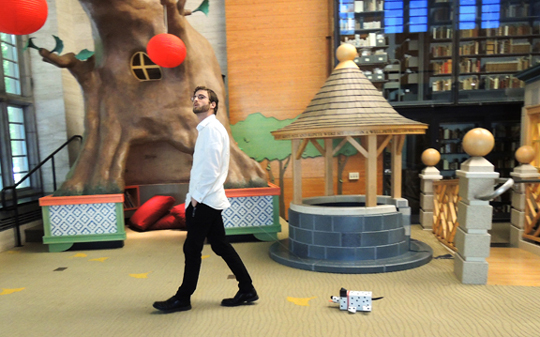
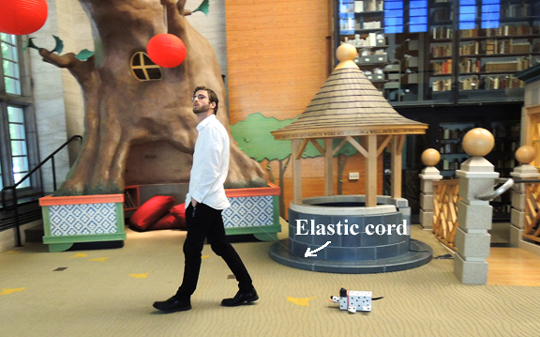
 Ready for a walk? Don’t be surprised when a friendly pup follows you home, courtesy of a long piece of clear elastic beading cord that clips to the back of your pants (you can juuuust see it if you squint at the screen).
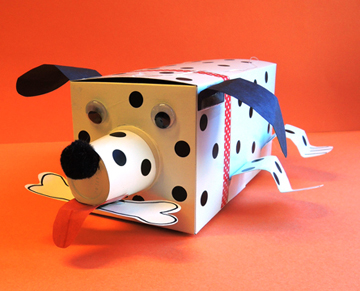
 The dog doesn’t just tag along behind you…it also carries a bone in its mouth (with the assistance of magnet tape and a paperclip).
 We read The Best Pet of All by David LaRochelle (Puffin, 2009). A boy wants a dog. Really, really, really wants a dog. But his mother gives him plenty of reasons why he can’t have one. But when he asks if he can have a dragon, well, mom says yes if he can find one (pretty clever mom!). It takes some searching but the boy finally finds a dragon and invites him home. Unfortunately, the dragon is loud, messy, and completely naughty. So what’s a boy to do? Get a dog to chase the dragon away of course!
You’ll need:
- 1 box (mine was 4 ½” X 4 ½” x 9”)
- A selection of construction paper for the dog’s body, ears, tail, and muzzle
- A selection of patterned tape
- 4 rectangles of white poster board for the legs (approximately 3″ x 5.5″)
- Black dot stickers if you’re going dalmatian
- 1 3oz. plastic cup
- 1 jumbo pom-pom
- 1 small rectangle of red construction paper for tongue (approximately 1.25″ x 3.25″)
- A 1.5″ strip of self-adhesive magnetic tape
- 2 large wiggle eyes
- A dog bone template printed on 8.5″ x 11″ card stock
- 1 jumbo paper clip
- A 4′ piece of clear elastic beading cord
- 1 binder clip (mine was 1.25″ wide)
- Tape and scissors for construction
- Markers for decorating
- Hot glue
Begin by wrapping three sides of the box with construction paper to create your dog’s body. We offered the following “dog” colors: brown, black, yellow, and…ahem…pink. Since our boxes were white, kids desiring a white (or dalmatian) dog left the box uncovered. If you are using construction paper, make sure to leave the bottom of the box construction paper free, so it slides along the floor easily.
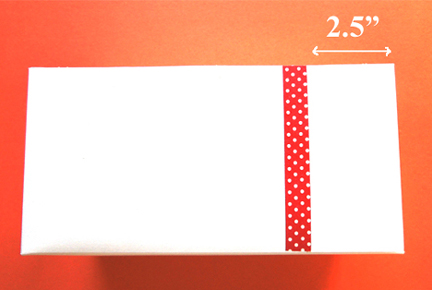
Now for the collar! Use the patterned tape to add a collar on three sides of the box. You’ll want to indent the tape 2.5″ from the front of the box so you have room for your dog’s ears.
 The collar is done, now for the feet! Round one edge of each poster board rectangle to create a “paw” (you can also use markers to draw “paw lines” on the poster board too). Then fold the straight edge of the rectangle downward like so:
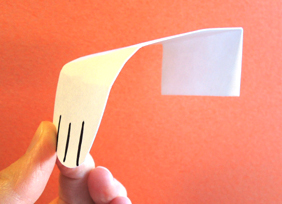 Attach to the side of the box with tape. Make sure the leg doesn’t actually touch the ground, or your dog will have trouble sliding across the floor.
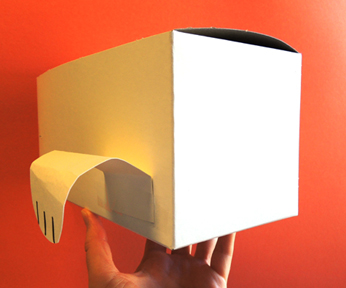 Use construction paper to make ears and a tail. To create the muzzle, tape construction paper around the plastic cup and then hot glue the cup to the front of the box. Attach the wiggle eyes and pom-pom nose with hot glue as well. This is a good time to add any extra doggy details with markers or, if your pet is a dalmatian, use the dot stickers to create spots.
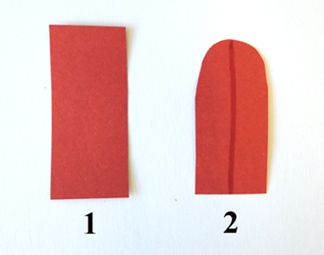
I had a little extra time when I was prepping this project, so I made the tongues in advance. I simply rounded one edge of the red construction paper rectangle, and then drew a red line down the center.
 Tape the tongue securely to the underside of the muzzle cup. Then, peel and stick a 1.5″ piece of self-adhesive magnet tape on the underside of the muzzle, but…make sure it’s on top of the tongue. Some kids put the magnet tape under the tongue and the magnet’s connection to the paper clip wasn’t strong enough. It should look like this:
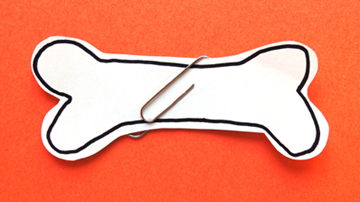
 Now for the dog bone! Cut the card stock bone from the template, then slide the jumbo paper clip on the middle. It’s best to position the paper clip diagonally, so there’s more contact on the magnet tape.
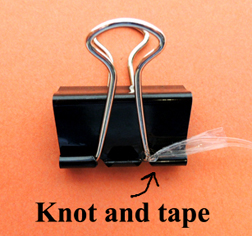
 The last step is the invisible cord. I gave each kid 4′ of cord, and then let them adjust it to the desired length. Attach one end of the cord to the binder clip by knotting the cord around the bottom of one of the silver handles. Reinforce the knot with tape.
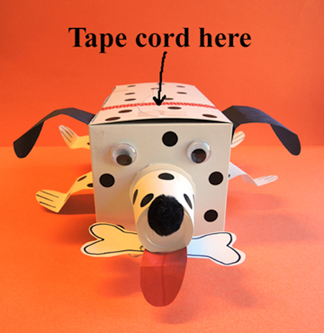
 The other end of the cord gets taped to the TOP of your dog box, directly above the forehead. We tested this and concurred – the top / forehead placement results in the best pull on your dog!
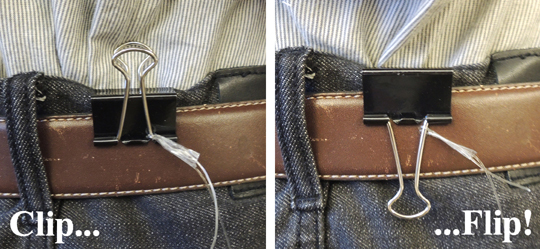
 To walk the dog, attach the binder clip on the back of your waistband, and then flip the handles down for extra stability (if you’re wearing a dress, just bunch up some of the fabric and attach the clip to that).
 The cord is attached…start walking and your dog will follow! And, just in case you’re wondering, Ian (our fabulous dog walking model) IS whistling “How Much is that Doggy in the Window?” in the photo. We’re into details like that.
Would you prefer that a dragon follow you home? No problem! Click here.