 No wind in the sky? No worries. With a little arm action, these kites fly indoors!
 We read Ping-Li’s Kite by Sanne Te Loo (Front Street, 1998). Captivated by the beautiful kites in the sky, Ping-Li goes to Mr. Fo’s shop to purchase kite-building supplies. As he departs, Mr. Fo warns Ping-Li not to offend the Emperor of the Sky by flying an unpainted kite. But Ping-Li can’t resist a little test run. Unfortunately, his unpainted kite is spotted by the Emperor of the Sky, who hauls Ping-Li up to his dragon ship. Furious at the boy’s cheek, he demands that Ping-Li make the most beautiful kite in the sky or forever remain his prisoner. Clever Ping-Li paints a portrait of the Emperor on his bold and beautiful kite, winning both the Emperor’s admiration, and his freedom.
You’ll need:
- 1 large rectangle of white poster board for kite (approximately 12″ x 19″)
- Hole punch
- Pieces of white poster board for decorative templates
- 1 pencil
- A selection of tissue paper (cut into 8″ x 10″ rectangles)
- A selection of crepe paper streamers (approximately 23″ long)
- 1 balloon stick
- A selection of color masking tape
- A length of string (mine was 45″)
- Scissors, stapler, and tape for construction
- Markers for decorating
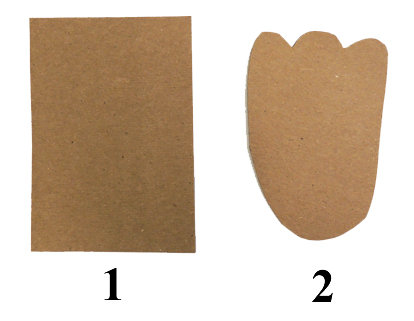
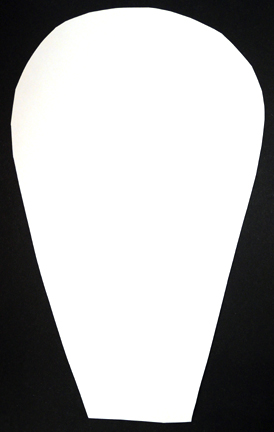
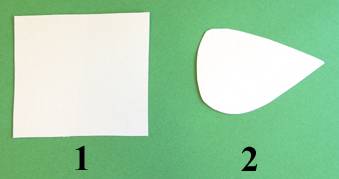
First, cut the kite shape out of the large poster board rectangle. After some trial and error, we determined that this shape works best. Note that the top is rounded. You don’t want any sharp corners on the top of your kite, lest it bonk you on the head!
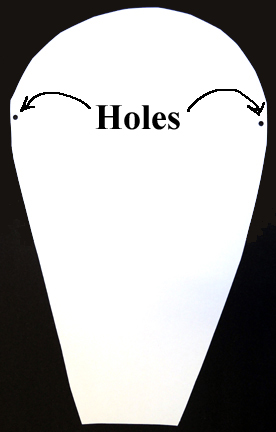
 Punch two holes on the right and left of the kite:
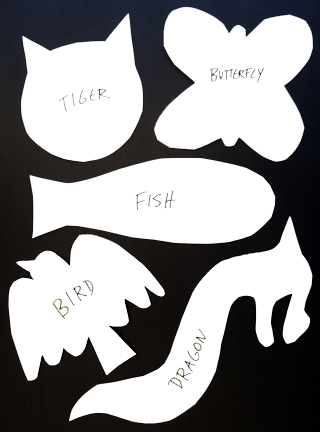
 Now it’s time to decorate! I created a selection of poster board templates (tiger, butterfly, fish, bird, and dragon) and invited kids to trace their favorite onto the center of the kite with a pencil. When the tracing was done, they used markers to decorate the kite. I also circled the program area, Sharpie in hand, to add legs and wings to dragons, fierce eyes to tigers, antennae to butterfly, etc.
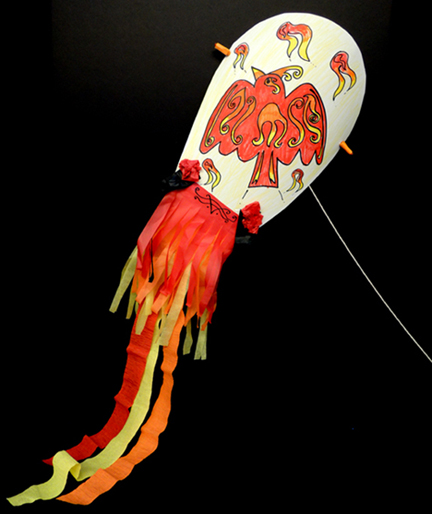
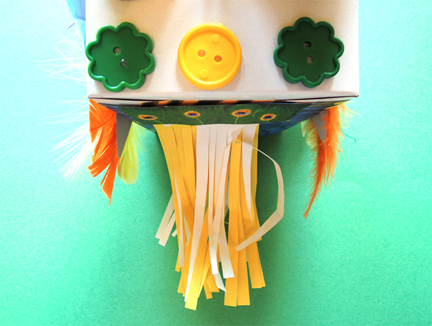
 With the body of the kite decorated, select at least 3 crepe paper streamers, and staple them to the bottom (and only the bottom) of the kite. Then, fringe the tissue paper rectangles and tape them to the lower section of the kite.
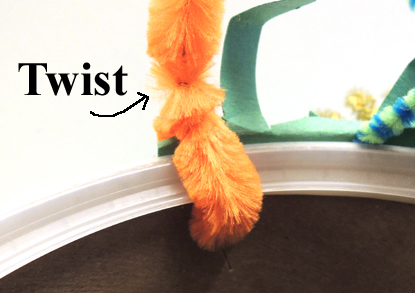
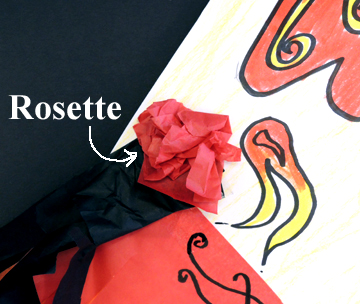
 Not only do the fringes look great, they sound great! As the kite is circling around you, they pop and snap just like a real kite up in the sky. If you’re interested in adding a tissue paper rosette, crumble up a tissue paper rectangle, then staple it to the bottom (and only the bottom) of the kite. Make sure to attach an even number of rosettes on the kite, so it remains balanced.
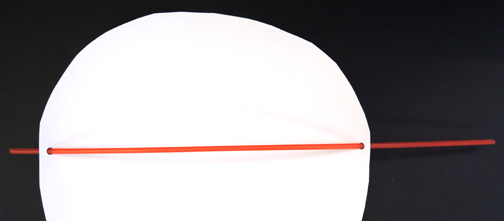
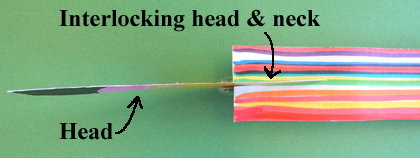
 Place the kite face-down on a table. Thread the balloon stick through the two holes.
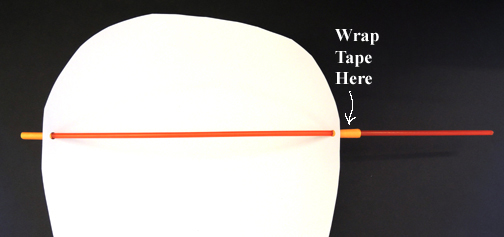
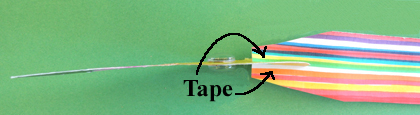
 Wrap a 5″ piece of color masking tape around the left-hand side of the stick.
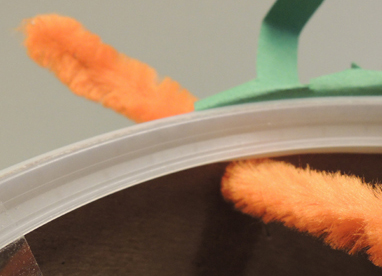
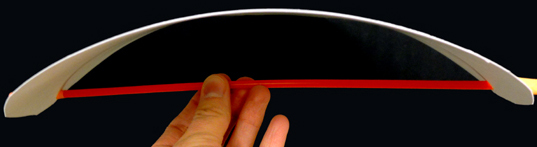
 Next, use your fingers to push the poster board up against the taped end of the stick. The goal is to make your kite curve away from the stick slightly (so it can get some lift when you swoop it around on the string). The curve should look something like this:
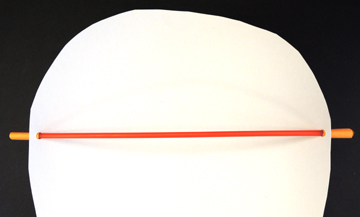
 Keeping the poster board curved, wrap a 5″ piece of color masking tape around right-hand side of the stick.
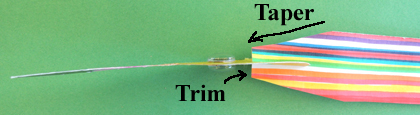
 Then use scissors to cut off the excess stick.
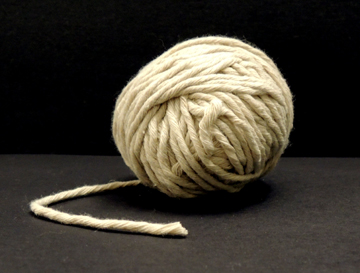
 The final step is to attach the kite string. I tried a couple different types of string and determined that this heavier string was easiest for kids to grip while still allowing the kite to fly. Definitely don’t use yarn. It’s way too stretchy!
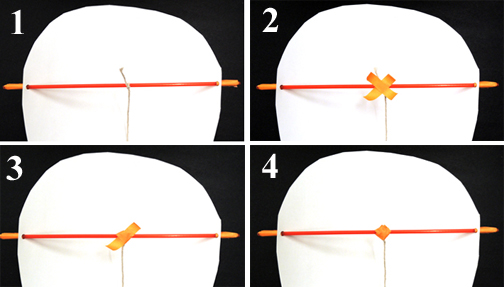
 Knot one end of the string tightly to the center of the kite stick, then make a small “x” of color masking tape over the knot. Fold each piece of tape down tightly to secure the knot.
 Ready to fly your kite? Go to a clear, open space (if you have lots of little kids, make sure they s-p-r-e-a-d o-u-t and don’t cluster together). If you are right-handed, use your right hand to hold the string approximately 1.5 feet from the knotted end. Hold the other end of the string in your left hand. If you are left-handed, reverse the above instructions. Extend your right (or left) arm (i.e. the arm closest to the kite) outward and:
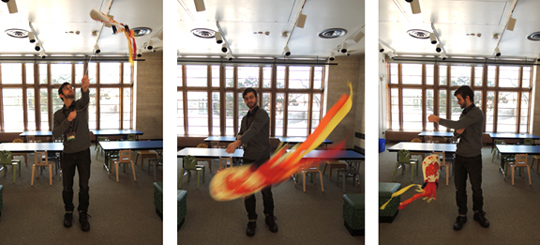
- Twirl in a circle and watch the kite spin around with you.
- Use your arm to circle the kite around your head like a cowboy lasso.
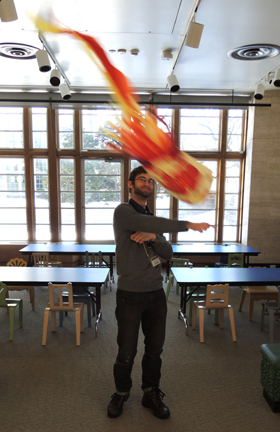
- Swoop the kite in a criss-cross / infinity symbol motion in front of you.
All three methods of flying worked at our story time, even though the criss-cross / infinity symbol motion yielded the best results (as demonstrated by the talented Mr. Ian).


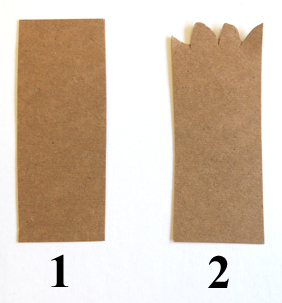 Cut the monster feet out of tagboard as well.