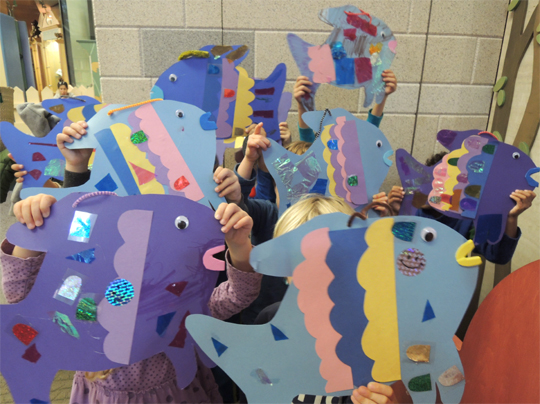
 Join this beautiful school of fish with their bright, sparkling scales! These easy-to-make fish were created with poster board and construction paper. Then we grabbed a set of sparkling rainbow scales and had a glittery share-fest. That’s right! You could only stick your scales on other peoples’ fish!
We read The Rainbow Fish by Marcus Pfister (North-South Books, 1992). With his sparkling silver scales, Rainbow Fish is the most beautiful fish in the ocean. He’s also the most stuck up, making it clear that he’s too beautiful to accept invitations to play. When a little fish dares to ask for a silver scale, Rainbow Fish rudely tells him to go away. That does it. The other fish decide to ignore the snobby Rainbow Fish. With no audience to admire him, Rainbow Fish grows lonely. Seeking the council of the wise octopus, she advises him to give his shining scales away to the other fish. Only then will he discover what happiness is. So Rainbow Fish gives away his silver scales, and as he sees them glittering and flashing around him on the other fish, he realizes that he finally feels at home among his new friends.
You’ll need:
- Poster board
- A piece of self-adhesive foam (mine was a 1.75″ x 3″ oval )
- 2 wiggle eyes
- Hole punch
- Construction paper
- Small bits of cellophane
- 1 pipe cleaner
- Rainbow scales (more on this below!)
- Scissors, glue for construction
- Markers for decorating
Cut a fish shape from poster boar (we offered a choice of dark blue, purple, and light blue poster board). Because we wanted to leave plenty of room for decoration, our fish was extra-large (16″ from nose to end of tail). Here’s the outline:
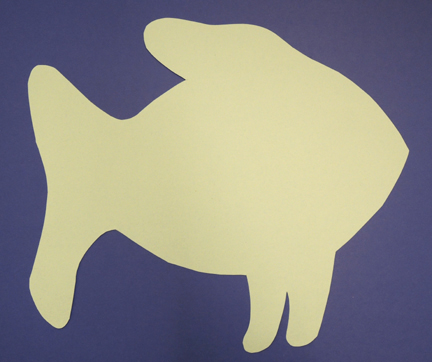
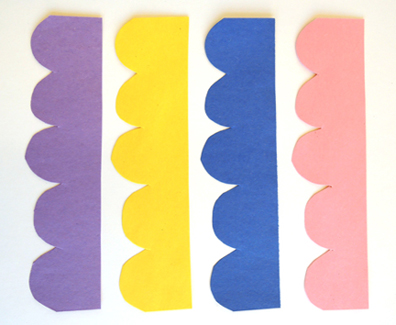
If you’d like a fish that fits on an 11″ x 17″ piece of paper, here’s the large fish template. Need something smaller? This small fish template fits on an 8.5″ x 11″ pieces of paper. I recommend cutting the fish shapes out in advance of story time. Another thing to cut in advance? Construction paper scales. We offered strips of purple, yellow, dark blue, and pink.
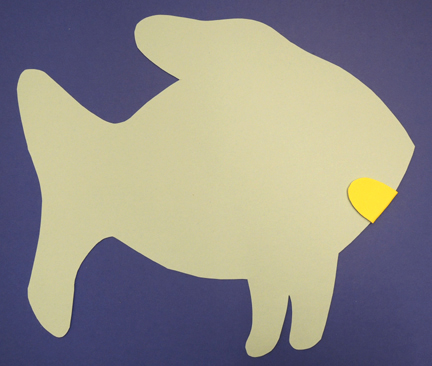
 To create puffy lips for your fish, start with an oval of self-adhesive craft foam.
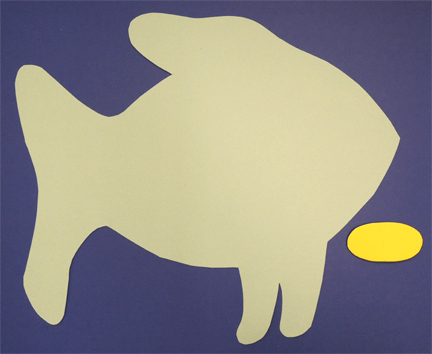
Peel and stick it over the fish’s mouth.
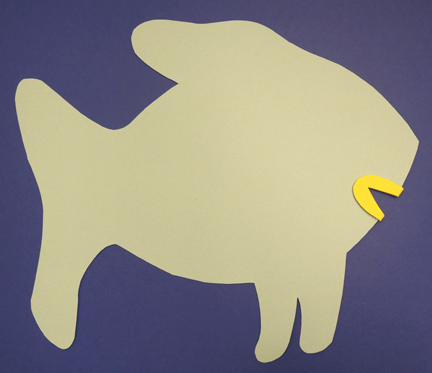
Finally, use scissors to cut a smiley face in the foam.
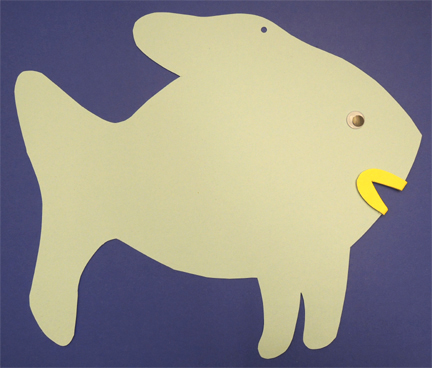
Glue (or hot glue) a wiggle eye on both sides of the fish, and punch a hole in the top fin.
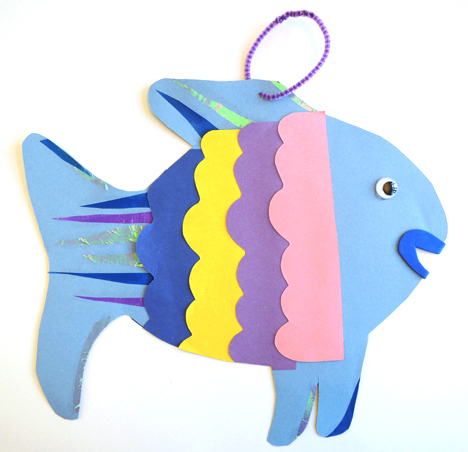
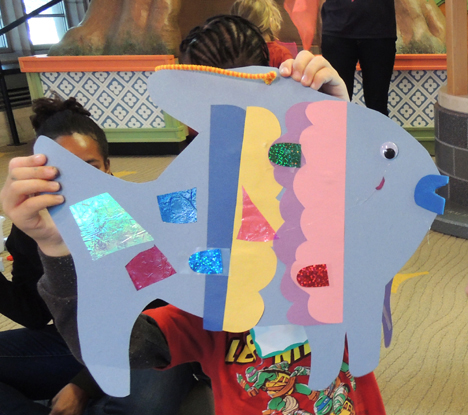
Decorate both sides of your fish with the construction paper scales and pieces of cellophane to add some shimmer (we offered blue and iridescent cello to add some shimmer). Just make sure you don’t cover the hole you punched in the top fin! Use markers to add some designs if you’d like. The final step is to loop a pipe cleaner through the hole so you can carry your fish easily.
 Now for the sharing game…and…duh duh DUH…an EPIC STORY TIME CRAFTING FAIL!
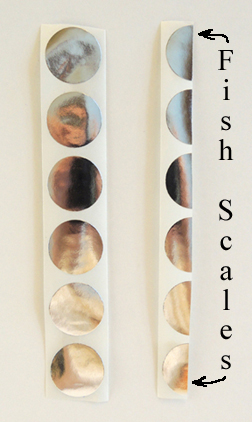
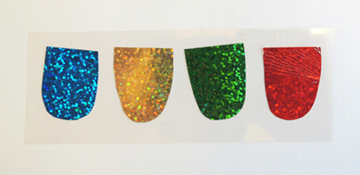 Look at these beautiful glittering scales! I found some sheets of self-adhesive hologram paper at Party City. Marissa painstakingly cut and peeled zillions of scales, and stuck each set on mylar. We tested peeling the scales off the mylar to make sure kids could do it quickly and easily.
It worked! Great. No problem.
To play the sharing game, we first gave kids a silver scale to start their fish off. Then we gave them a set of 4 scales (as seen above). The kids mingled around the gallery, sticking scales from their set onto other kids’ fish, making sure to share each color with a new person. At the same time, kids were accepting scales from other kids (the only rule was that you couldn’t accept a repeat color). Marissa, Joani and I circulated with extra sets of scales, to make sure no fish were going to be left out.
At least, that’s how we planned it.
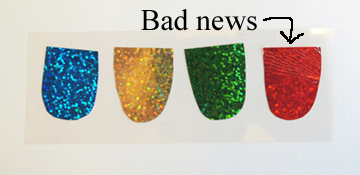
Somehow, overnight, the hologram paper cooked onto the mylar. They were now impossible to peel off. Look at the scales again. Do you see how wrinkled the red one is at the top? That’s from me scrabbling at it with my fingernails, going “Nooo! No! NOOOO!”
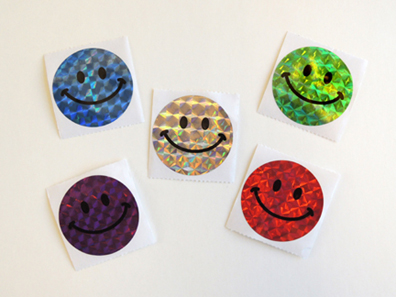
 No scale stickers meant no sharing game. Refusing to admit defeat, I sent Marissa and Joani over to quickly cut the strips of scales into individual scales. To buy them some cutting time, I whipped a roll of hologram smiley face stickers out of the cabinet.
 I asked the kids to line up and, one at a time, tell me something nice that they had done for someone recently. Their good deed earned their fish a smiley face sticker AND a trip to see Marissa and Joani to get a set of scales hot glued onto their fish. Sure, it wasn’t the sharing game, but you still got a sparkly fish in the end.
 If I was to do this again, I would definitely do the original sharing game. But I would use metallic dot stickers cut in half to replicate fish scales.
 Because I’ve learned my lesson. Peel the stickers off the original paper they come on. Don’t stick them on anything except the final product. Oooooooh yes.Interested in some other sharing and cooperative story times? Try this flower pot exchange, or these awesome viking vs. pirate cooperative games.

 Thread the wheels on pieces of bamboo skewer, and then thread the skewers through drinking straws taped to the bottom of the box like so:
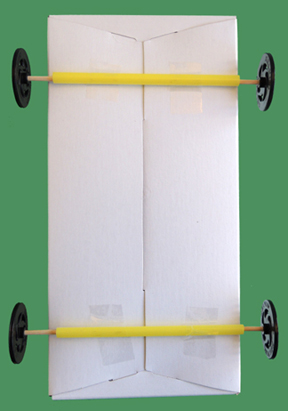 You could also use wooden spools instead of plastic wheels. Or, if you’re planning to stay indoors, skip the wheels and just drag the box on the floor (like the dog from