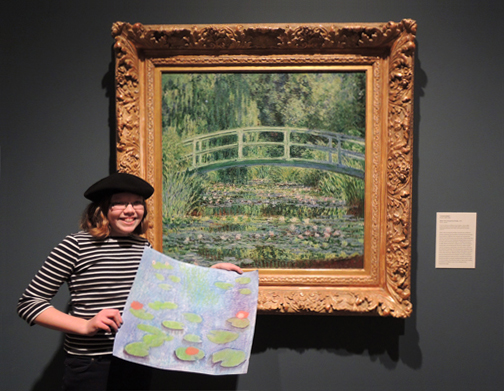
 Ah, Monet. The play of light, of shadow, a moment of time captured, suspended, like a ripe fruit for the viewer to feast upon. What must it be like to create such artwork? Well, now you can find out!
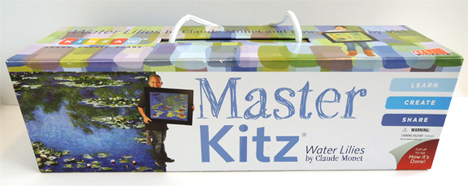 This is a snazzy little art kit by a company called Master Kitz. Using the provided materials (templates, paint, roller brushes, stencils, pastels, etc.) kids can recreate works by Van Gogh, Klimt, Hokusai, Matisse, and others. When I spotted their “Water Lilies by Claude Monet” kit discounted on Amazon for less than $20, I couldn’t resist. Now all I needed was a kid to test the kit.
 Enter Hope, Pop Goes the Page’s official kid-tester! Last year, Hope was a member of Cotsen Critix, our children’s literary group. She’s a smart and savvy writer with a great sense of humor. In other words, the perfect person to test a product and write about it. So, what did Hope think of this kit? Below is her complete report!
This kit had really cool packaging! The kit includes includes soft pastels (blue, green, violet, light blue, white, pink, red, yellow, and aqua), two pieces of artist’s paper, stencils (a green lily pad stencil and a yellow flower stencil), two “shadow makers” (i.e. plastic yellow lily pads), instructions (the instructions were two sided and were a beautiful fold out poster that included valuable information about Monet), and a “shammy”(i.e. a piece of cloth). The stencils and paper were rolled up inside the box, so they were understandably bent. However, all of the other materials were in great condition.
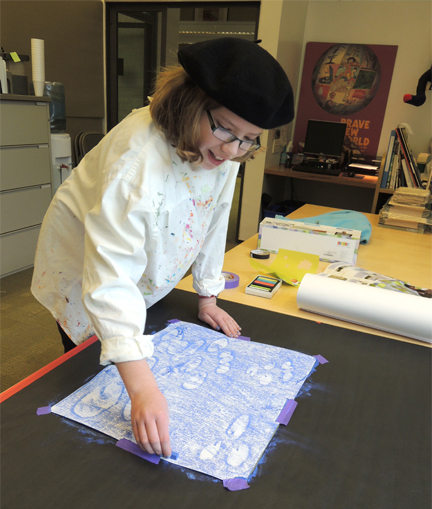
 The directions recommend taping a piece of newspaper to the table you are working on and doing the project over the newspaper. LISTEN TO THE DIRECTIONS!!! This project is incredibly messy, and you should wear an artists’ smock or an old t-shirt to protect your clothes! To get started on the project, you tape a piece of the provided artists’ paper on the table (masking tape works best because it won’t rip the paper as easily as regular scotch tape, but you should test it on an inconspicuous place first). However, doing this leaves the places the tape covered uncolored, so at the end of the project, you should smudge the pastels to cover the blank spots.
 It’s not made clear in the directions, but to follow “artsy etiquette,” make sure you have the rough side of the paper facing down (it doesn’t make a significant amount of difference whether or not you use the rough side or the smooth side of the paper, but it’s proper to use the smooth side).
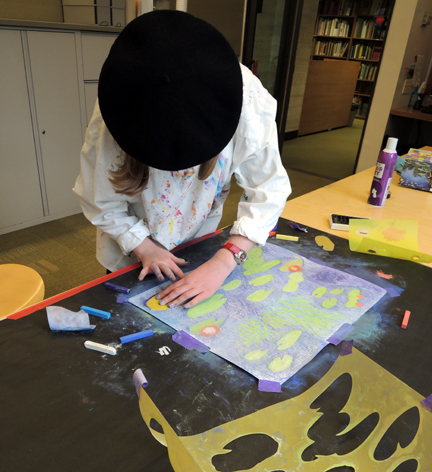
After taking these preliminary cautionary steps, it’s time to begin your masterpiece! First you slide the lily pad stencil underneath the paper. Taking a colored pastel (blue, violet, or light blue works best, because you’re coloring the water) out of the box, rub the pastel all over the paper until an impression of the lily pads is visible. You can use several colors (same pastel(s) as above) to give your art a truly “Monet” effect. Using the “shammy,” gently rub over the whole paper, blending the pastels (this step justifies how messy the kit is! POOF! Dust everywhere!).
 Removing the lily pads out from underneath your “canvas,” tape it on top of the paper so it lines up with the outlines you just made. Use green, yellow, white – or anything you like to shade in the shapes. To make the job go faster, use your finger to blend the pastels (by this point my fingers were all brownish). But be careful! When I was testing this kit, the sharp parts of the stencils pricked me! OUCH!
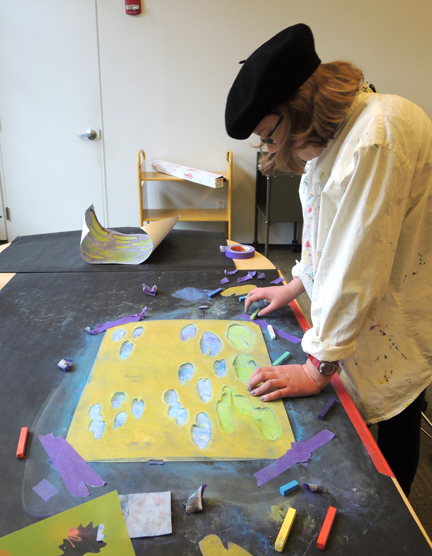 When you are finished making the lily pads, you carefully (SLOWLY!) take the stencil off the paper. Be sure not to jerk! If you do, the pastel dust will spray EVERYWHERE!
Time to take out the flower stencil! Using the same method of shading in, choose a few places to put flowers. You can be creative with this step, but it’s not necessary to do at all. Now it’s time to draw some reeds! Just draw a few green wisps in the desired section. I found that drawing the reeds in the darkest area of the water made the reeds show up the best.
Shadow making time! The “shadow makers” are the two plastic lily pad shapes I mentioned. Theoretically, you place them over the identical lily pad on your sheet, and trace around the front part, then smudge it down for a shadow effect. However, since there are only two shadow makers, it’s pointless to give shadows to two lily pads. I used the two shadow makers provided, but then I improvised, carefully traced around the lily pads (without a shadow maker) and smudged the pastel down to create a shadow.
 The step above is technically the last step, but I recommend this additional step (which is not mentioned in the instructions). To seal in the prodigious amount of dust caused by the project (remember, it’s not cool when dust is flying everywhere! Especially colored dust!), Dr. Dana rushed out to CVS to buy some cheap hairspray as sealant. The hairspray (Aqua Net, to be exact) was “unscented” but was still really smelly! We attempted to use it outside, but due to some wind we used the library’s restroom. The effort was successful, and the pastels stayed on!
The box of this kit recommends itself for “Ages 4-104,” but I strongly disagree. This project is better suited for ages 9-104! Although, for you 104 year-olds out there: this project may take a toll on your back!
 I found this kit easy to use, quick to complete (30 minutes), and fun to do! It was SUPER messy, and sometimes the instructions were unclear, but all in all, I’d rate this project 4 out of 5 stars.
Claude Monet, Water Lilies and Japanese Bridge, 1899. Oil on canvas. From the Collection of William Church Osborn, Class of 1883, trustee of Princeton University (1914-1951), president of the Metropolitan Museum of Art (1941-1947); given by his family. Courtesy of the Princeton University Art Museum.
