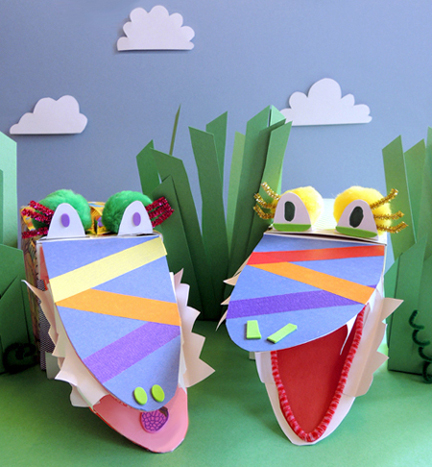
 Copy cats? How about copy crocodiles? What happens when everyone has to copy at least ONE element from a highly artistic crocodile? Ravishing repetitious reptiles of course!
We read The Copy Crocs, written by David Bedford and illustrated by Emily Bolam (Peachtree Pub Ltd, 2004). Crocodile is sick and tired of being bashed about in the croc pool by all of his friends. So he slips away to be alone. But everywhere he goes – slippery mud, a sun-filled river bank, a floating log in the river, even the top of a mountain – the copy crocs follow and do exactly what he’s doing. Finally, Crocodile manages to shake his friends and enjoy the splendor of his pool, all alone. But is he really enjoying it? It turns out that having some friends around is actually pretty wonderful. But so is being alone – every once in a while.
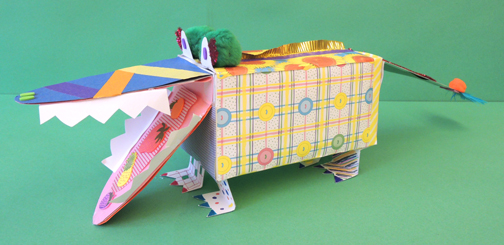
Each kid built a crocodile and decorated it, but while decorating, he/she also had to copy at least one thing from my model crocodile. We’ll begin, as we did at story time, with building the crocodile body first.
 You’ll need:
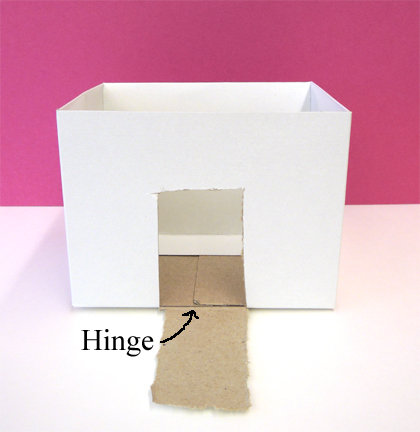
- A rectangular box (mine was 4 ½” X 4 ½” x 9”)
- 4 small rectangles of poster board for the legs (approximately 2″ x 3.5″)
- 1 medium rectangle of poster board for the tail (approximately 3.5″ x 11.5″)
- 1 large rectangle of poster board for the mouth (approximately 4″ x 15″)
- 4 small strips of white construction paper for the teeth (approximately 1.5″ x 4″)
- 2 small rectangles of poster board for the eyes (approximately 1.5″ x 2″)
- Materials for decorating (more on that later!)
- Scissors, tape for construction
- Hot glue
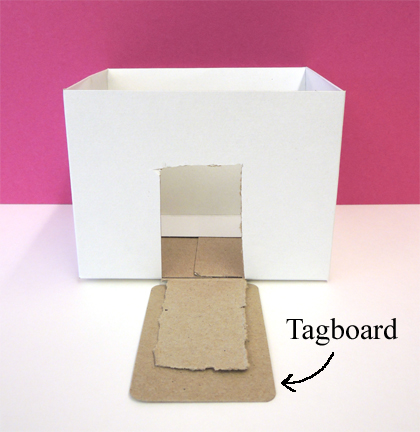
First, cut crocodile toes in one end of 4 small rectangles of poster board. Bend the bottom of the poster board to make a foot, then bend the top to create a tab
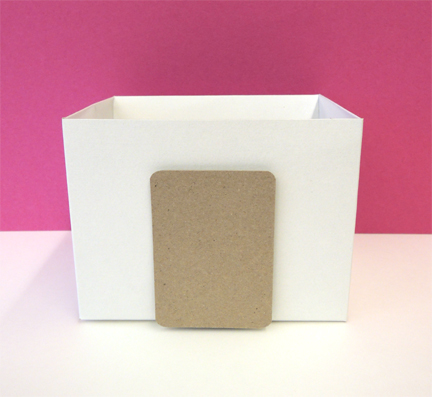
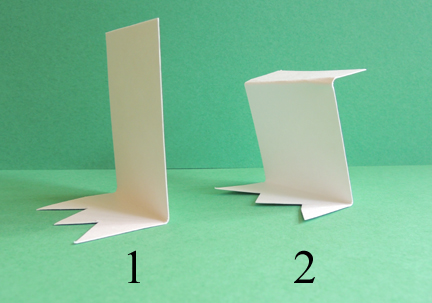 Squeeze some hot glue on the top of the tabs, and attach each leg to the bottom of the box. For the tail, cut a medium rectangle of poster board into a pointed tail, tab the non-pointy end, and then hot glue (or tape) the tab to one end of the box. For the mouth, fold a large rectangle of poster board like so:
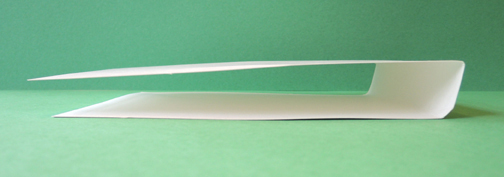 But before you attach it to the box, round the upper and lower edges to make it look more like a crocodile snout.
 Hot glue the mouth to the box. If you’d like to add teeth, cut pointy tooth shapes into strips of white construction paper (definitely use construction paper, poster board is too heavy). Tab the tops of the tooth strips, the hot glue or tape inside the mouth. Last step – the eyes! We found that a tall and slightly rounded eye shape looked best.
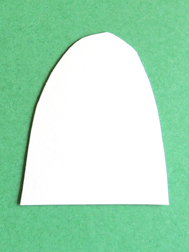 Cut the eye shapes out of the small poster board rectangles, tab the bottoms, and hot glue (or tape) them to the top of the box. Done!
At this point, everyone had the same croc. So we turned the kids loose with plenty of art supplies and let them decorate. Again, the only rule was to copy at least one thing from my example croc. And we made sure there was no lack of options…
 Decorating supplies included:
- A selection of patterned paper
- Tissue paper circles in various colors
- A selection of color masking tape
- Construction paper in various colors
- Baking cups
- A selection of small feathers
- A selection of self-adhesive foam shapes
- A selection of patterned tape
- Pipe cleaners
- A whole lot of sparkle stems
- Pom-poms in various sizes
- A selection of dot stickers
- A selection of crepe paper streamers
- Some lizard print paper I unearthed from the supply closet
- Some self-adhesive foam fruit shapes, also unearthed from the supply closet
- The Bling Bin
- Markers
The resulting crocs were magnificent. I would guess that the pom-pom eyes, sparkle stem eyelashes, and the self-adhesive foam fruit shapes inside the crocodiles’ mouths were the most copied elements.
 When everyone was finished, we celebrated by taking our crocs for a swim in our cozy crocodile pool (i.e. a blue sheet sheet stretched on the floor)!