Seeing Spirits

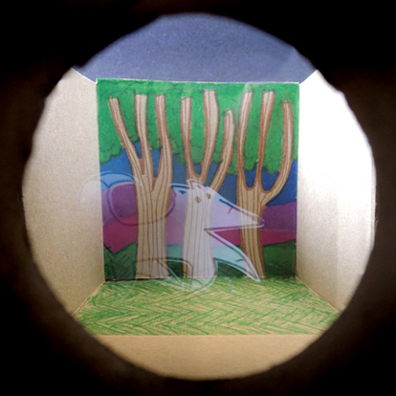
seeing spiritsA quiet forest appears empty. But gaze long enough and…a fox spirit will magically appear before your eyes! No, its not Photoshop or camera trickery. It’s a simple physical stage illusion called Pepper’s Ghost (invented by English scientist John Henry Pepper in 1862). We conjured it at To Be Continued, our chapter book story time program for 6-8 year-olds. Scroll to the bottom of the post to see a video of the illusion in action!

We read Arlo Finch in the Lake of the Moon, written by John August (Roaring Brook Press, 2019). Summer camp for most kids means bonfires, canoeing, and hiking. But for Arlo Finch and his friends, it means surviving the supernatural forces of the Long Woods. Doppelgangers, menacing strangers, talking foxes, locations both in and out of time, and a mysterious object unearthed after decades in hiding test both Arlo’s courage, and his friends’ loyalty.

In the book, Arlo has a special ability to see the spectral world. And I’ve wanted to make a Pepper’s Ghost project for kids for AGES. Through an afternoon of happy experimenting, I was able to construction this inexpensive and kid-friendly tabletop version.

You’ll need:

  • 2 large tissue boxes
  • A box cutter
  • 1 toilet paper tube
  • 1 piece of glass or clear polystyrene (more on this below)
  • White card stock
  • Scissors, glue, and tape for construction
  • Markers for decorating

First, cut the lids off the top of a pair of large tissue boxes. Then cut the boxes in such a way as to create an L shape box like so:
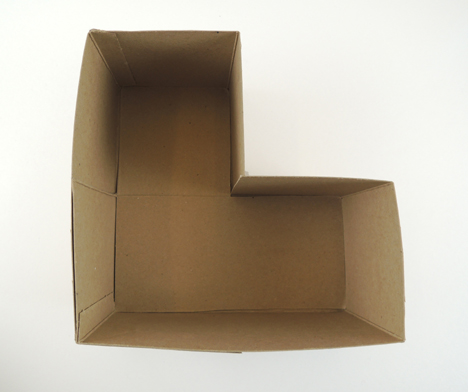
ghost box step 1The L shape box is consists of two sections: a “forest section” and a “ghost section.”
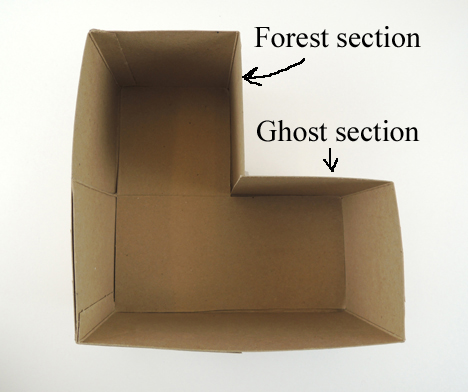
ghost box sectionsNext, cut a small square (approximately 1.75″ x 1.75″) in the side of the box that faces the forest section. This is your viewfinder.
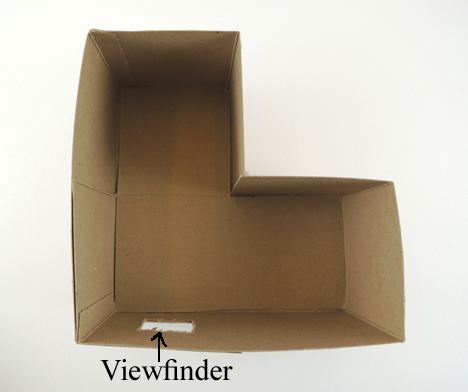
ghost box step 2In the book, Arlo gazes through a slipknot, a loop of rope or lacing that allows him to see and travel multidimensionally. In order to replicate that rounded view, we slid a 2.25″ piece of toilet paper tube into the viewfinder as well.
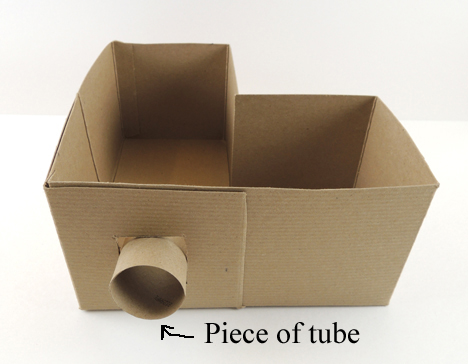
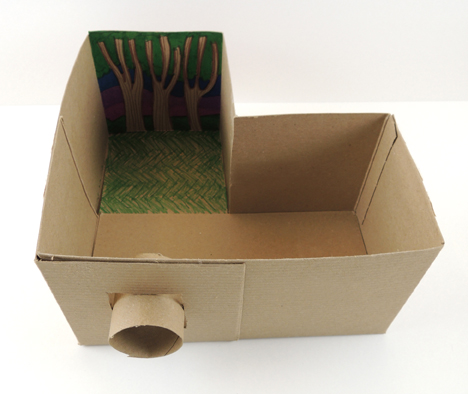
ghost box step 3 Now draw a backdrop for the wall opposite the viewfinder. I had the kids decorate a pre-cut  piece of paper or cardboard, then we glued it to the inside of the box.
ghost box step 4Next, sketch a ghost on a piece of white card stock. Here’s my tribute to Fox, a spirit from the book (and my favorite character):
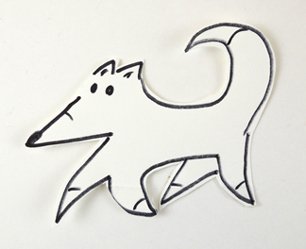
fox spiritTape the ghost in the ghost section of the Pepper’s Ghost box. Though you will probably need to do a little adjusting on the exact placement, try to arrange the ghost in the center of the section. I found this gave the best results.
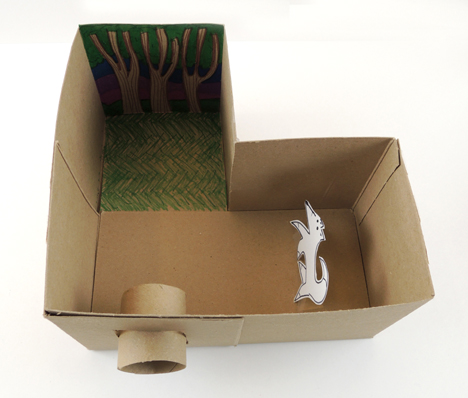
ghost box step 5Now for the magic! A Pepper’s Ghost illusion is essentially a reflection. For this model, the reflection is caused by a piece of glass or clear polystyrene set at a 45 degree angle in the junction of the L shaped box.
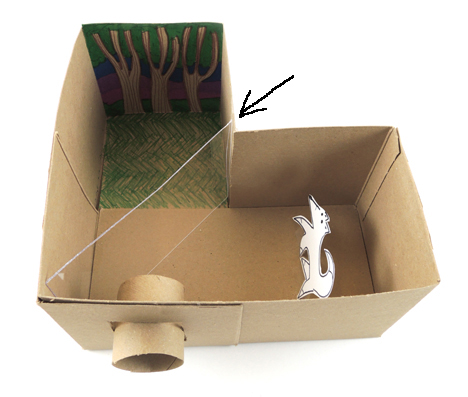
ghost box step 6During my initial test, I used a piece of glass from a 4″ x 6″ picture frame. However, I was a little uncomfortable giving multiple 6-8 year-old kids pieces of glass to take home. Luckily, I found clear polystyrene sheets on Amazon (a set of ten, 8″ x 10″ sheets cost $15). Polystyrene is plastic, lighter weight, doesn’t shatter, and you can cut it down to size with a box cutter or scissors. Testing revealed that the reflection illusion works just as well with polystyrene as glass. Yay!

The final piece of the Pepper’s Ghost illusion is the lighting. First, cover the area above the view finder with a square of cardboard…
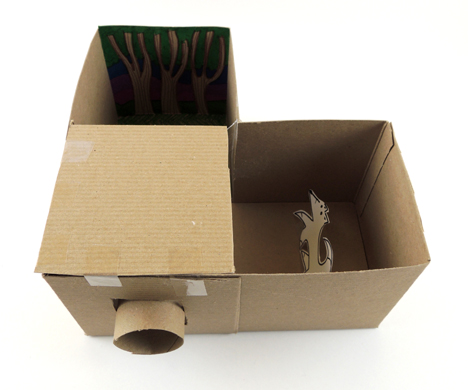
ghost box step 7Then hinge a second square of cardboard over the ghost section. It’s important that this flap open and close. With the flap closed, the ghost will not appear through the viewfinder. But when you lift the flap, the ghost section will illuminate, causing a reflection to appear.
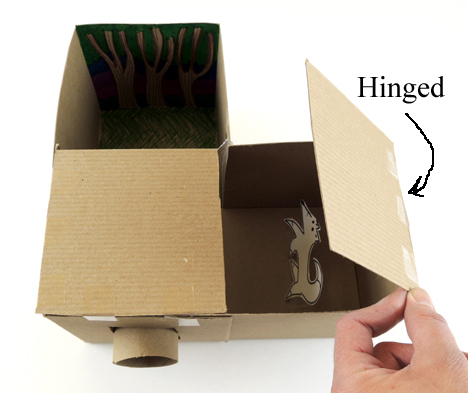
ghost box step 8Ready to see the illusion in action? Close the flap and peer through the viewfinder. Keep gazing through the viewfinder, then lift the flap over the ghost section. Your ghost will magically appear! I also encouraged kids to stick their hands in the forest section and try to grab the ghost. Their fingers passed right through it, of course!


This isn’t the first time the To Be Continued kids have adventured with Arlo Finch and his friends. We read the first book, Arlo Finch in the Valley of Fire earlier in the program (you can see the project we did here). The kids voted unanimously to read the sequel. It did not disappoint. The Arlo Finch books are full of action, intrigue, mystery, and humor. I highly recommend them!

O Frabjous Day

go ask aliceThis year marks the 150th anniversary of the publication of Alice in Wonderland, and we decided to honor the occasion at Princeton University’s Community & Staff Day! Our event table was stocked with some super, yet simple-to-assemble, thaumatropes. There was also some breakdancing. Well, sort of. Scroll to the bottom of the post to see our mashup of Alice and the 1980s.

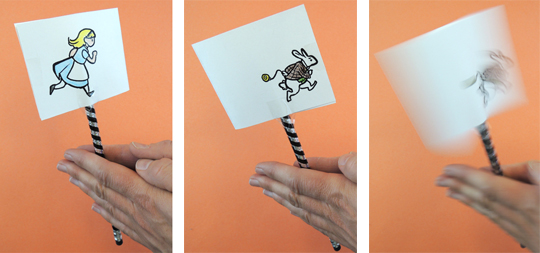
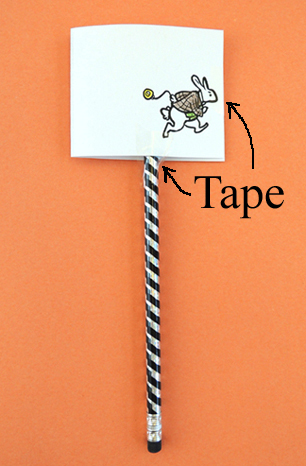
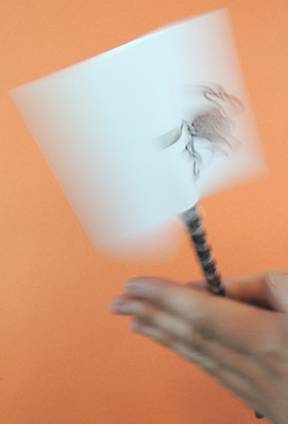
A thaumatrope is a Victorian optical toy. It consists of two images printed on opposite sides of a paper disc or card. When you twirl the thaumatrope, its two pictures appear to blend into one. Most thaumatropes are twirled using string. We decided to mount ours on pencils.

thaumatrope demoYou’ll need:

  • 1 Alice thaumatrope template, printed on 8.5″ x 11″ white card stock
  • 1 pencil (I ordered terrific ones from Oriental Trading Company)
  • Scissors and tape for construction
  • Colored pencils (or crayons) for decorating

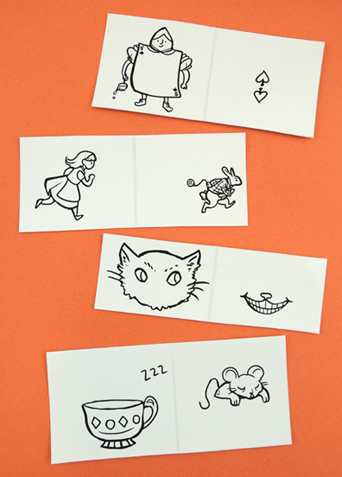
We offered 4 Alice-themed templates, drawn by our amazing student artist, Aliisa Lee.

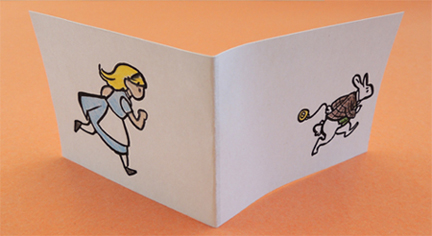
thaumatropesFirst, select a template, and use colored pencils or crayons to color it. Then, fold the template in half (along its faint grey line).

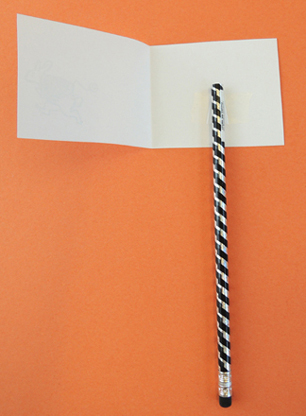
folded thaumatropeFlip the thaumatrope over, and tape a pencil to the back of one of the panels like so:

thaumatrope step 2Fold the thaumatrope closed, then secure the panels together with a piece of tape. You’ll also want to tape both sides of the thaumatrope to the pencil, to make it extra sturdy.

thaumatrope step 3Hold the pencil between your palms and roll it briskly back and forth. Your thaumatrope will turn, and the two images will appear as one!

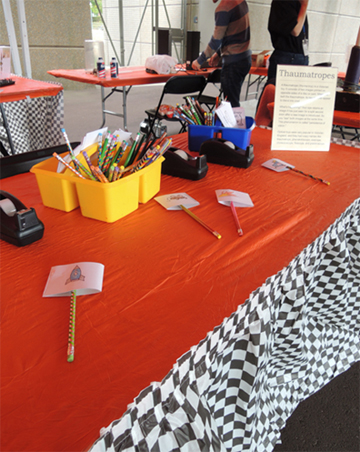
twirlingHere’s what our craft table looked like (and, if you’d like to explain a bit of the science behind how the device works, here’s a pdf of our thaumatrope table sign):

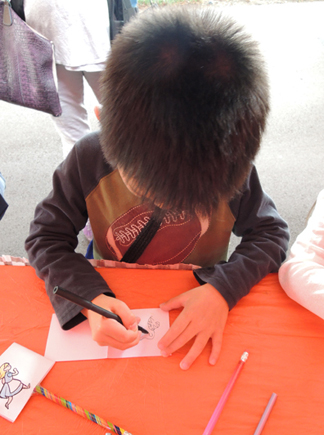
thaumatrope work tableWe also had some pens and blank thaumatrope cards on hand, just in case kids wanted to try their hands at making one from scratch.

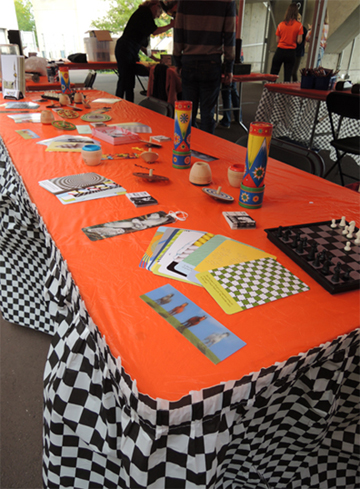
blank thaumatropeOn the other side of our event tent, we loaded a table with optical illusions cards, tops, Photicular bookmarks, flip books, replicas of vintage thaumatropes, kaleidoscopes, and mini chess boards.

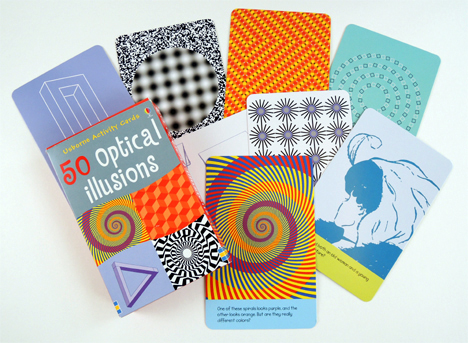
optical illusion tableWhile color print-outs of optical illusions work just fine, I highly recommend this pack of Usborne optical illusion cards. There are 50 illusions in the pack. They’re colorful, sturdy, and the science behind the illusions is explained on the back of the cards. The deck retails for $10.

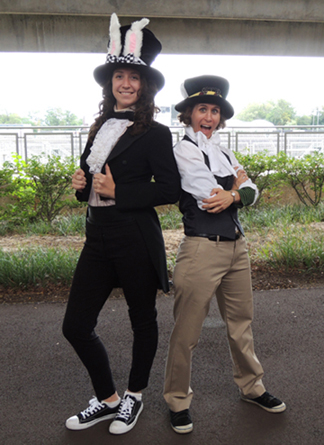
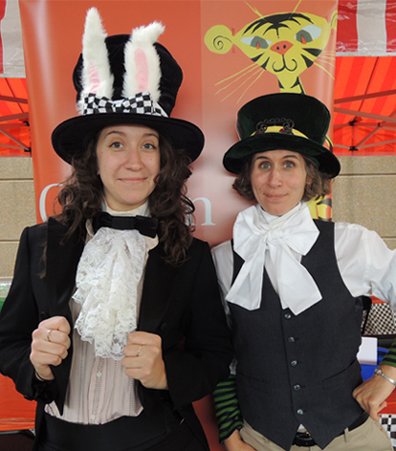
optical illusion cardsNo event is complete without a little costuming, and Marissa and I raided both our closets and the Costume Shop at the Lewis Center for the Arts for our garb. This was completely unintentional when we snapped the shot, but…don’t Marissa and I look like we’re going to bust out some 80s breakdancing moves?

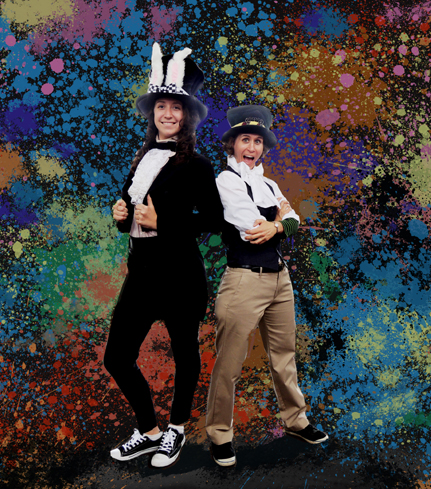
break danceMaybe it’s the shoes? The jaunty pose? Hmmmm. What if we adjust the backdrop a little…

welcome to the 80sOh yeah. I dare you to pin it.


Many thanks to the Costume Shop at the Lewis Center for the Arts for the costume loans, and to Aliisa Lee for triggering some totally radical 80s flashbacks.

Incredible Illusions

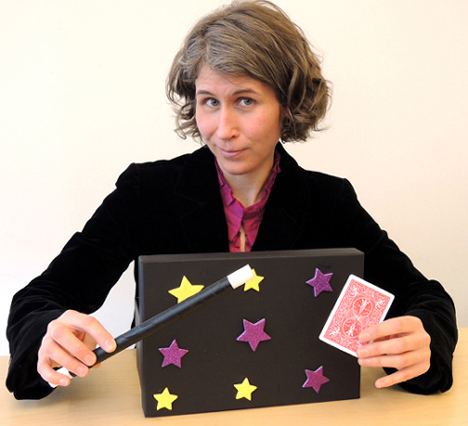
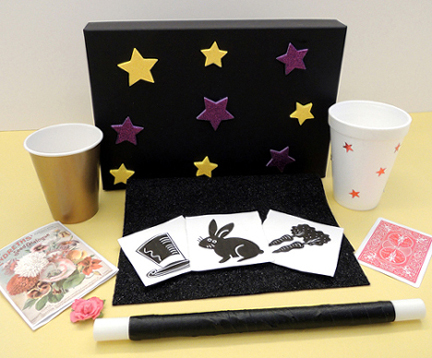
incredible illusionsBehold the mystery…the wonder…the spectacle…of your very own mini magic show!

magic tricksThis project was the culminating event at To Be Continued, our weekly story time for 6 to 8-year-olds. Every week, we read from a chapter book and celebrate the the end of the entire book with a project and/or activity.

We read Horten’s Incredible Illusions by Lissa Evans (the sequel to Horten’s Mechanical Mechanisms (Sterling Children’s Books, 2012)). Young Stuart Horten moves to the town of Beeton and expects to be thoroughly bored. However, he soon discovers that he is part of a magical legacy left by his Great Uncle Tony, who was a stage magician and illusionist. In the first book, Stuart and his friend April solve a series of complicated clues and find Uncle Tony’s secret workshop. In the sequel, the friends again embark on a journey. This time, they’re searching for Great Uncle Tony’s will, which bequeths the contents of his workshop to whoever finds the document first. Clues are hidden in each of his magical stage illusions, but…the magical worlds inside the illusions are real and in some cases, dangerous. And Stuart and April aren’t the only one interested in getting their hands on those tricks.

We definitely needed some incredible illusions to celebrate the conclusion of these awesome books. I designed these individual mini magic shows to be easy enough for 6-year-olds to do, but intriguing enough for 8-year-olds. After consulting a number of children’s magic books, I found Amazing Magic Tricks: Beginner Level by Norm Barnhart (Edge Books, 2008) to be the most useful. The 4 tricks described in this post are from this book.

You’ll need:

  • 1 memory box (more about this below)
  • A 10.5″ piece of PVC pipe (05.” in diameter)
  • A selection of color masking tape
  • 1 paper cup
  • 1 paper (or fabric) flower
  • 1 empty seed packet (or small envelope simply marked “Magic Seeds”)
  • A 9″ x 12″ piece of felt (I used the glitter variety)
  • hat rabbit carrot template printed on 8.5″ x 11″ card stock
  • 1 Styrofoam coffee cup
  • A selection of foil star stickers
  • 2 playing cards
  • A 1″ foam paintbrush (or regular paintbrush)
  • Scissors and tape for construction

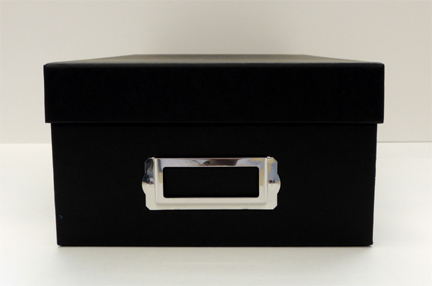
You’ll need a box with a lid to store your tricks and shield your hands from the audience as you prepare your tricks. A memory box is perfect for this. I purchased mine at Michaels Craft store. I went with black, but they come in all sorts of colors and patterns.

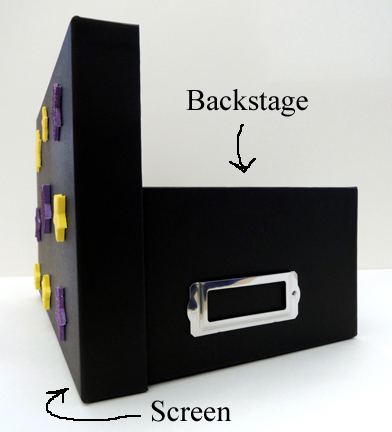
memory boxDecorate the lid of your box however you like (I found some self-adhesive glitter foam stars in the clearance section at the craft store) then slide the lid onto the box like so. This creates a “screen” and a “backstage” area to prep your tricks.

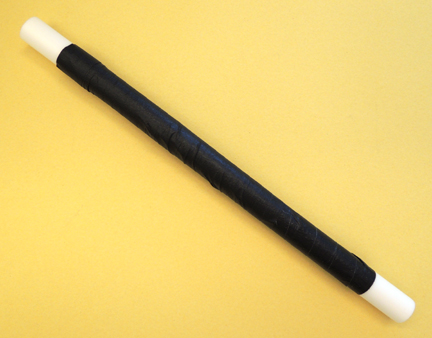
magic boxNext, wrap color masking tape around the PVC pipe. Your magic wand is ready!

wandTRICK #1: HIDDEN FLOWER

The most important thing about this trick is making sure the flower is small enough to hide in your fist. I purchased 1.25″ paper flowers for the kids (scored on discount from the scrap booking section of the craft store).

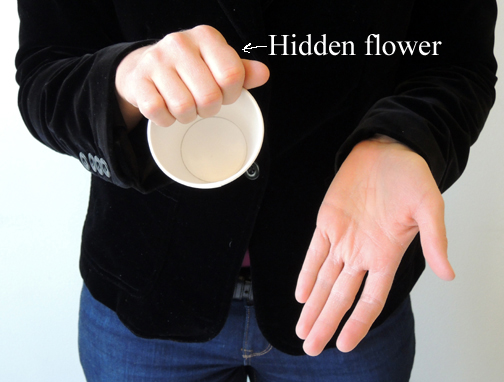
flowerBehind your box’s screen, grab the flower in your fist. Then use the same hand to hold the paper cup with your fingers.

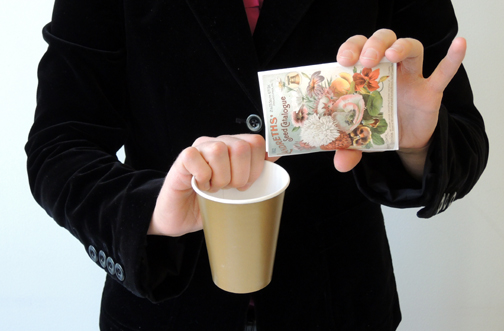
flower trick 1To perform the trick, show the audience that your cup is empty. Then say “Oh no! It’s empty. Well, good thing I have some stupendous magic seeds!” Pick up the empty seed packet and pretend to pour seeds into the cup.

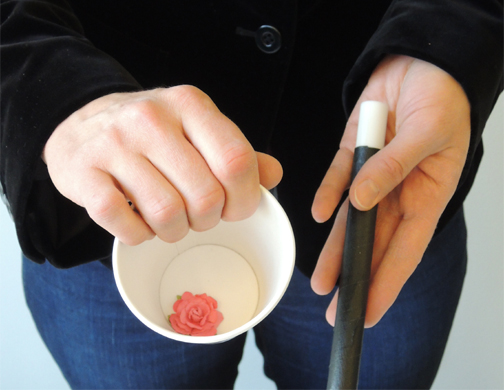
flower trick 2Wave the wand around muttering magical incantations. While the audience is distracted by the wand, open your fingers and drop the flower into the cup. Shout “Ta da!” and show them that a flower has magically appeared!

flower trick 3TRICK #2: FIND THE RABBIT

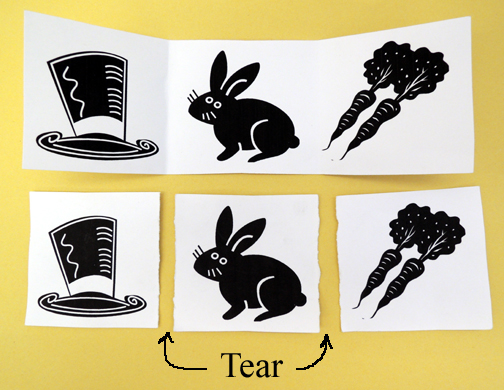
Print the hat, rabbit, carrot template. Fold and tear the strip in 2 places, like your see below. It’s really important that your TEAR the strip. Don’t cut it with scissors!

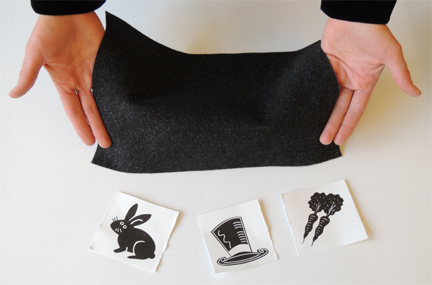
rabbit trickTo perform the trick, hold up the 3 image cards and say “You see a hat, a rabbit, and some carrots, but with my amazing magical skills, I will pull the rabbit from under this cloth every time!” Turn your back and have an audience member arrange the 3 image cards on the table and cover them with felt.

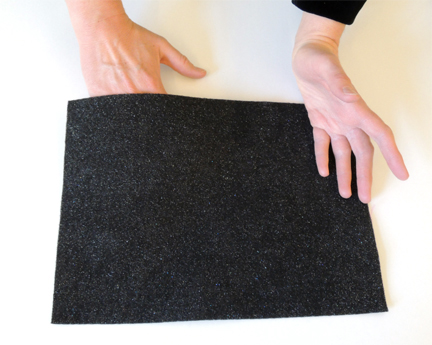
rabbit trick 2Reach underneath the felt and feel the edges of the image cards with your fingers.

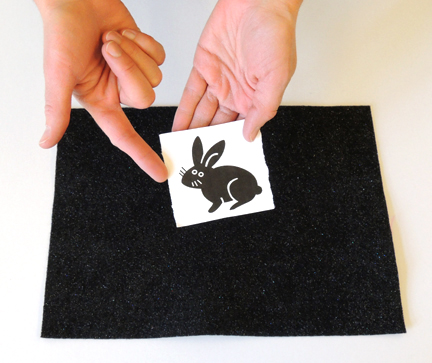
rabbit trick 3The rabbit will be the only image card with two torn edges. Remove it from under the cloth with a flourish! Repeat with a difference audience member. Astounding!

rabbit trick 4TRICK #3: BALANCING CUP

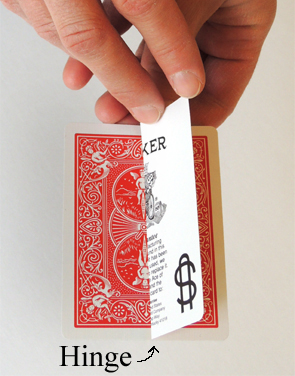
First, decorate a Styrofoam cup with foil star stickers. Next, cut a playing card in half, lengthwise. Tape one half of the cut playing card to the back of another card. The half of the playing card should “hinge” outward like so

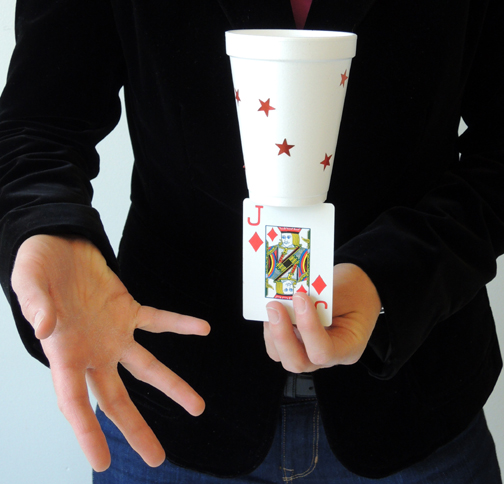
cup trick 1To perform the trick, flatten the hinge to the card and hold it up to your audience, keeping the taped side facing your body. Invite an audience member to come forward and try to balance the Styrofoam cup on top of the card. Then say “You see it is impossible. But I will now use magic to make the impossible, possible!”

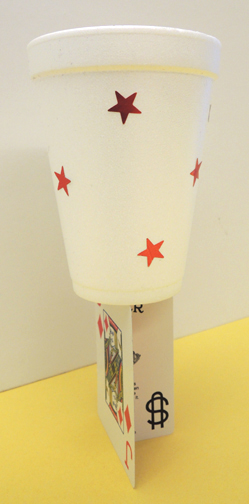
While you’re talking, sneak a finger up the card and open the hinge on the back, forming an area for the cup to balance. From the side, it looks like this:

cup trick 2But from the front, it looks like the cup is now balancing on the card!

cup trick 3TRICK #4: MAGIC GLUE

To perform this trick, tell the audience that you have magic glue. Hold up a paintbrush and Invite an audience member to come up and “paint” your hand with the magical glue. For my version of the trick, we used 1″ foam paintbrushes I had left over from another program.

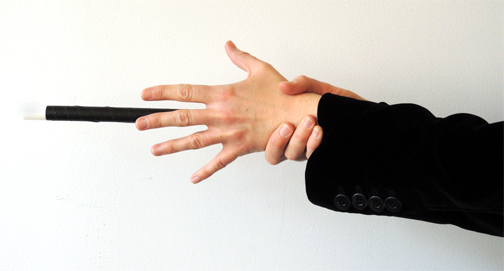
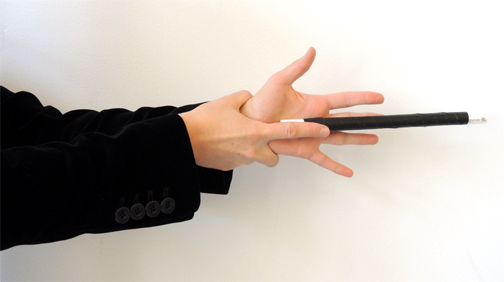
wand trick 1Now hold the wand in your “glued” hand. Say “Observe my stupendous magical glue!” Extend your arm across your body and out to your side, still grasping the wand. Next, wrap your free hand around the wrist of your wand hand. Slowly and dramatically, lift each finger from the wand until you no longer appear to be holding it.

wand trick 2But you are holding it of course. Because when you grasp your wrist, you sneak a finger behind your wand hand and hold the wand like this:

wand trick 3Now have the audience clap once to have the wand “detach” from the magic glue. Carefully lift your finger to release the wand, and let it fall dramatically to the floor. Take a big bow.

The kids absolutely loved this project. I performed the whole show first, and then I deconstructed all the tricks and each kid made his/her own set. If, by the way, you’d like to see the awesome mechanisms we made after reading Horten’s Miraculous Mechanisms (the first book in this set), click here.

In May 2015, I interviewed Lissa Evans about her fantastic books. If you’d like to hear it, click here!