Running with the Royals

running with the royalsA princess or prince to pal around with? Check! Gleaming castle with banners flying? Check! Bejeweled crown to wear upon thy head?

crownCheck! You’re ready to run with the royals!

We read Princess Me, written by Karma Wilson and illustrated by Christa Unzner (Margaret K. McElderry Books, 2007). This sweet rhyming book describes all the qualities of “Princess Me,” a kind, gentle, mannerly, and just princess who benevolently reigns over her land of toys and dolls. The twist comes at the end, after the princess is tucked into bed with a kiss from the king and queen. That’s when we learn that Princess Me is, in fact, Princess You!

You’ll need:

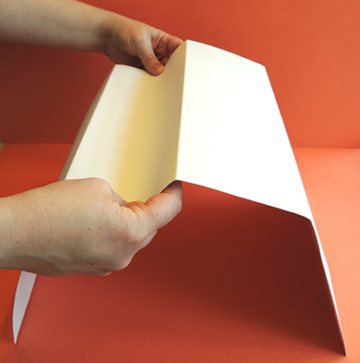
First, use the box cutter to cut a drawbridge out of the front of the box. Make sure, however, that the door’s “hinge” remains attached to the bottom of the box.

drawbridge step 1
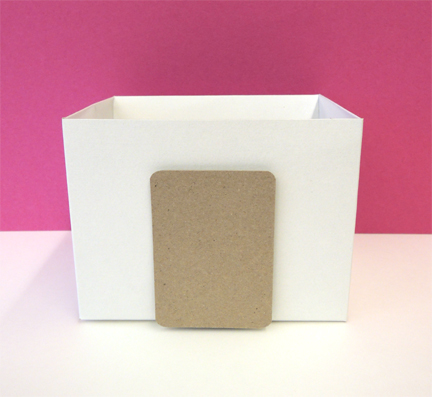
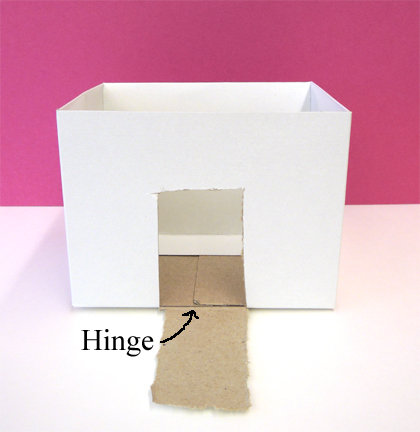
Next, hot glue a rectangle of tagboard to the outside of the door.

drawbridge step 2
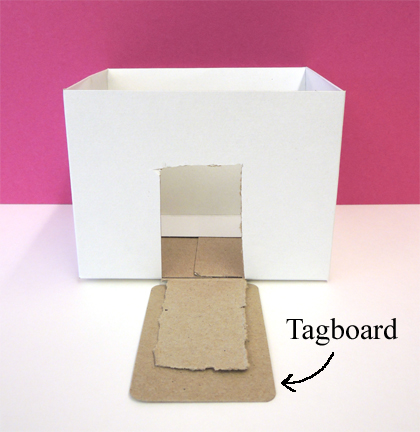
The tagboard will give the drawbridge some some heft and weight as it opens and shuts.

drawbridge step 3
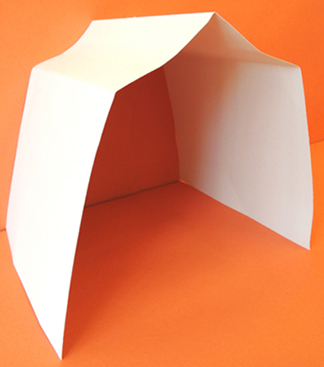
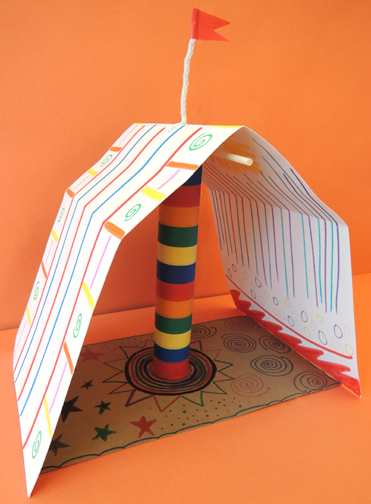
Use scissors to cut the paper towel tube “towers” to the desired height for your castle  (my tubes were 7″ tall). Now decorate the tubes and your castle with metallic paper, construction paper, aluminum foil, mirror board, foil seals – whatever you like! When you’re finished decorating, hot glue the towers to the sides of the castle.

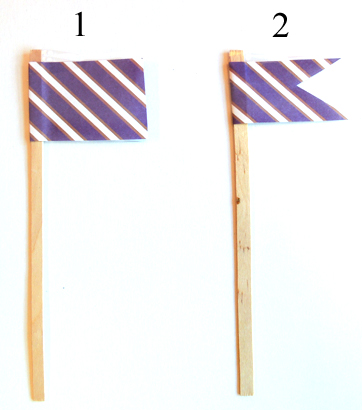
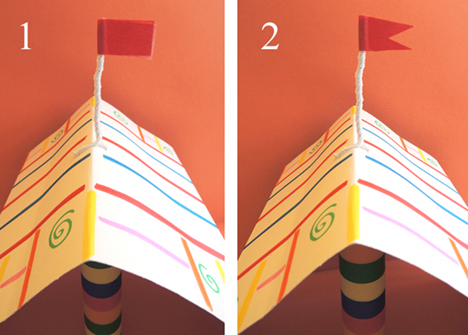
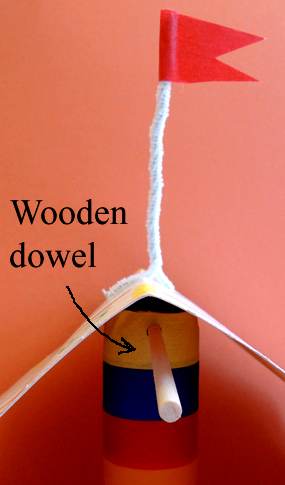
Wrap a piece of patterned paper around the top of each coffee stirrer, then secure with glue or tape. Trim one edge to create a banner-style flag.

banners
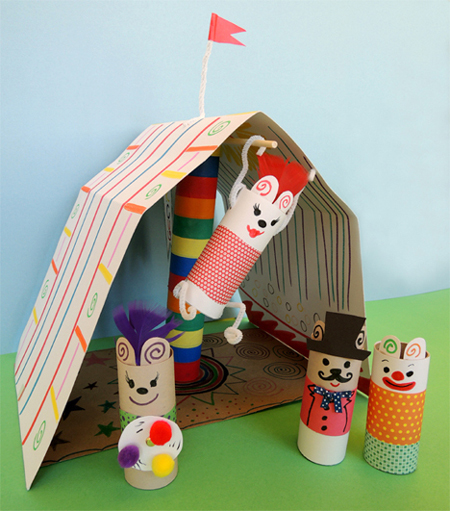
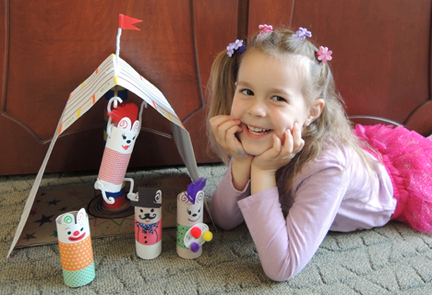
If you’re looking for an easier flag to assemble, use color masking tape to make a banner flag (as seen from this mini circus tent project).

circus tent flag
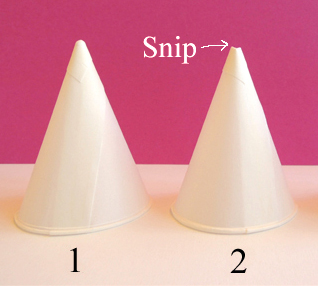
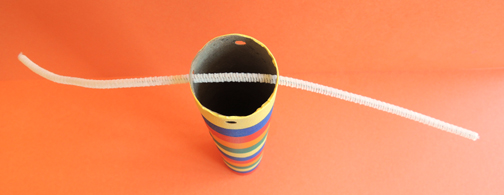
To make “turrets” for your castle towers, snip the top off a cone water cup like so:

flag steps
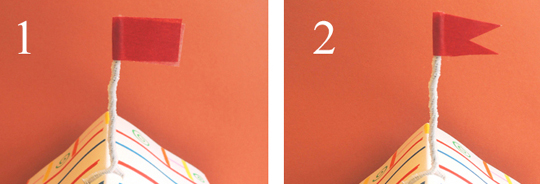
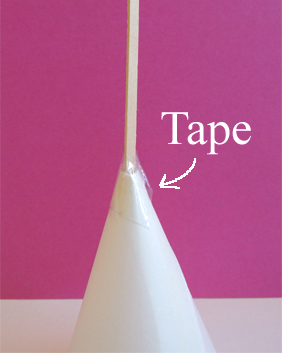
Then drop the flag’s pole into the top of the cup. Center it, then wrap it with tape to attach it to the cone cup. Repeat with the other cup and flag.

taped flagpole
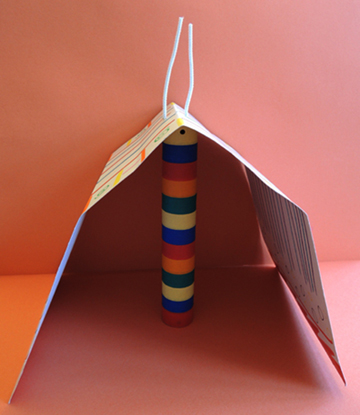
Hot glue the turrets to the tops of the castle towers. Ta da! Your castle is complete!

castle
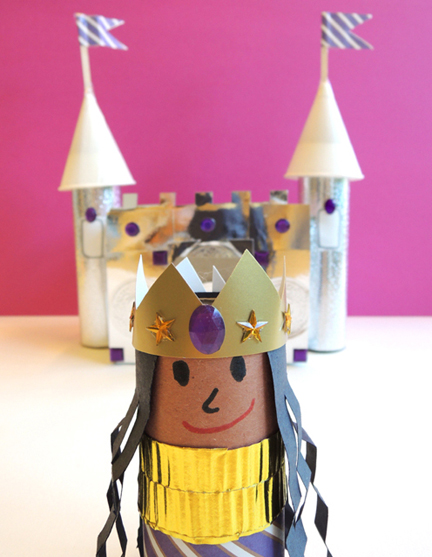
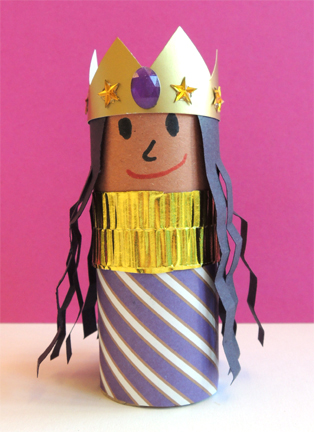
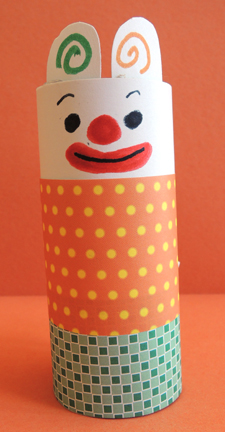
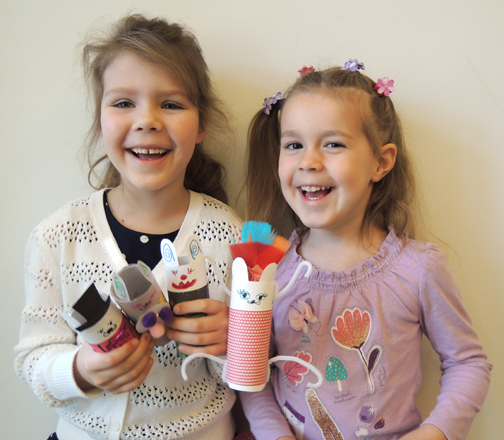
To make your princess or prince, wrap the top of a toilet paper tube with multicultural construction paper, then use markers to draw a face. Wrap the remainder of the tube with a piece of patterned paper and add a fancy collar if you like. Attach construction paper hair and a gold poster board crown. This project definitely cried out for gemstones, which we attached to the crown (and castle) with hot glue.

princess
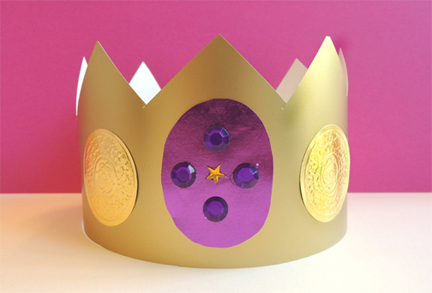
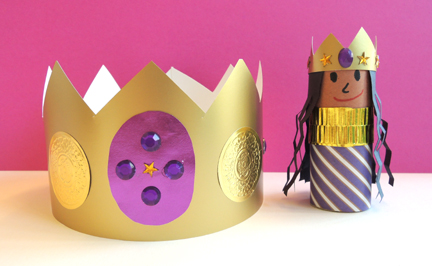
Now it’s time for your crown! Cut a crown pattern out of a large rectangle of gold poster board, wrap around your head, remove, then staple. Decorate your crown with the remaining art supplies on the table. We encouraged kids to have their crowns somewhat match their tube counterparts. Finished!

crown and friend
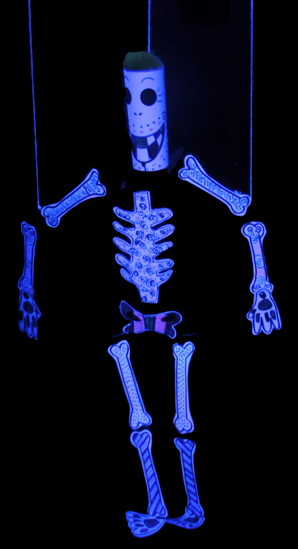
Need a little entertainment at your castle? Perhaps this post would be of some assistance!

Little Big Top

little big topThe circus is coming to town! See the juggler! Chuckle at the clown! Gasp at the amazing acrobat! But you’ll need some very tiny tickets, because this circus…is for mice.

We read The Secret Circus by Johanna Wright (Roaring Brook Press, 2009). Somewhere in the city of Paris, there is a secret circus. Only the mice know how to get there and enjoy its many splendors. But we’ll give you a hint: check under the carrousel in a park by the Eiffel Tower. But keep it a secret!

You’ll need:

  • A large rectangle of white poster board (approximately 11″ x 25.5″)
  • A box cutter
  • 1 paper towel tube
  • A selection of color masking tape
  • 2 pipe cleaners
  • 1 wooden dowel
  • A 8.5″ x 14″ tagboard base (optional)
  • 4 toilet paper tubes
  • 2 rectangles of white construction paper (approximately 4.5″ x 6″)
  • 2 rectangles of grey construction paper (approximately 4.5″ x 6″)
  • Extra white and grey construction paper for mouse ears and tails
  • A selection of patterned paper
  • 1 strip of white construction paper for ringmaster pants (approximately 1.25″ x 6″)
  • 1 strip of red construction paper for ringmaster jacket (approximately 1.5″ x 6″)
  • 1 rectangle of black construction paper for ringmaster hat (1.5″ x 2″)
  • A 5″ piece of craft tie for ringmaster bow tie
  • 2 small feathers
  • A circle of white card stock (2″ in diameter)
  • 3 mini pom-poms (mine were 0.5″)
  • Markers for decorating
  • Scissors, tape, hole punch for construction
  • Hot glue

First, we’ll raise the tent. We designed the tent to be easy to collapse and carry home. We tried the tent set up on a hard tabletop and carpeted floor. It was pretty sturdy on both surfaces!

Use markers to decorate your large rectangle of white poster board tent on both sides (I left the example tent  undecorated for the steps below). Remember – one side of the paper is your exterior (stripes are always nice), and one side is the interior (you can draw audience members if you like!).

Lay the poster board on the table in front of you. Fold it in half like a book, then unfold it.

tent step 1Take the right end of the tent and fold it towards the center line. The fold should begin 5″ from the center line. Repeat with the left side of the tent. It should now look like this:

tent step 2Flip the poster board over. Use the box cutter to make two, 0.25″ slits on either side of the center line, right in the center of the poster board tent.

tent step 3Pick the tent off the table and gently roll the areas between the folds inwards.

tent step 4This will give your creation that “droopy circus tent” look.

undecorated tentNow for the tent pole. Wrap a paper towel tube in color masking tape, and punch four holes in the sides of the tube, near the top. Thread a pipe cleaner through one set of holes:

tent pole step 1Fold the ends of the pipe cleaner upwards. Push the ends of the pipe cleaner up through the slits at the top of your tent.

tent pole step 2Twist the ends of the pipe cleaner together tightly to create a flag pole.  Wrap a piece of color masking tape around the top of the pole, then trim the masking tape with scissors to create a banner flag.

tent flag stepsLastly, inset a wooden dowel through the remaining pair of holes on the paper towel tube (your acrobat will swing from this “trapeze” later).

tent dowelYour tent is finished! If you’d like, you can add a tagboard floor, but it’s totally optional. We didn’t attach the tagboard floor to the tent, opting instead to leave it loose so the tent would be more portable and collapsible.

tent floorNow for the performers! We have an acrobat, a juggler, a ringmaster, and a clown!

circus troupeBegin by wrapping 4 toilet paper tubes with white and grey construction paper (we made 2 white mice and 2 grey mice). Make ears out of extra pieces of construction paper and tape (or hot glue) them to the tops of the tubes. Once you finish those steps, it’s time for some details!

CLOWN

clownWrap 2 pieces of patterned paper around the tube for a shirt and pants. Use markers to draw a face, and add a curled strip of construction paper for the tail.

JUGGLER

juggler with ballsWrap 1 piece of patterned paper around the middle of the tube. Tape a feather at the top of the tube, behind the ears. Attach tail. Then use the box cutter to make a small slit in the middle of the juggler’s “chest.”

Next, use the hole punch to create a hole in the center of the 2″ card stock circle. Hot glue 3 mini pom-poms “juggling balls” on the circle (if you don’t have pom-poms, you can use markers to draw balls on the circle). I also used markers to add little “motion lines” behind the balls to accentuate that they are in motion.

Insert a brass tack through the hole in the juggling circle, then push it through the slit in the tube. Open the tack’s prongs inside the tube. Spin the circle and the mouse will juggle!

ACROBAT

finished acrobatTo make the acrobat, follow the same steps as the juggler. But instead of cutting a slit in the chest, punch two sets of holes into the top and bottom of the tube like so:

acrobat step 1Thread a pipe cleaner straight through the top set of holes…

acrobat step 2 Then loop the right end of the pipe cleaner through the right hole again.

acrobat threadedBend the pipe cleaner up and hook the very end. This is how the mouse will hang on the trapeze bar.

acrobat handRepeat the above steps on the left arm. To make the legs, follow the same steps as the arms, but simply bend the ends pipe cleaner up to make feet. However, some kids decided to hook the feet so the acrobat could hang upside down as well.

THE RINGMASTER

ringmasterWrap a white construction paper strip around the bottom of the tube for pants, then wrap a red construction paper around the middle for the jacket. Cut a top hat shape out of black construction paper and tape (or hot glue) it to the top of the tube. Attach tail. Use markers to draw a face (don’t forget the mustache!) and details on the jacket. Top the outfit off with a bow tie (we made ours with a craft tie, but if you don’t have any handy, you can use markers).

Your circus is complete! Gather up your troupe of performing mice…

excited about acrobats…and let the greatest little show on earth BEGIN!

ready for the show

Them Bones

them bonesWhat’s cooler then a skeleton marionette that glows? How about a skeleton marionette that glows, attaches to your feet, and dashes around with you?

marionette bonesHere’s my assistant, Katie, showing off some fancy skeleton footwork…

foot loops in actionWe read Skeleton for Dinner, written by Margery Cuyler and illustrated by Will Terry (Albert Whitman & Company, 2013). Big Witch and Little Witch whip up a tasty brew and decide to invite skeleton to share it. “We must have Skeleton for dinner!” is what they say, but Skeleton, who is strolling nearby, thinks they mean that HE’S on the menu! Panic ensues, which soon envelopes Ghost and Ghoul (who are also on the invite list). Finally, Clever Crow figures out the problem, sets things straight, and the friends enjoy a tasty meal together.

You’ll need:

  • 3 paper towel tubes
  • 5 toilet paper tubes
  • Black construction paper (or black paint)
  • A rectangle of white card stock for the skull (approximately 4.25″ x 5.5″)
  • 12, 4″ pieces of twisteez wire (pipe cleaners work too)
  • 2 brass fasteners
  • 1 wooden dowel
  • A selection of color masking tape
  • String for puppet’s head & arms
  • 1 pipe cleaner
  • 2 medium rubber bands
  • 1 arms, legs, hands, feet template, printed on 8.5″ x 11″ white card stock
  • 1 ribcage, pelvis template, printed on 8.5″ x 11″ white card stock
  • 1 jumbo pom-pom (mine was 1.5″)
  • Markers for decorating
  • Scissors, tape for construction
  • Hole punch
  • Hot glue
  • Black light (or custom glow-in-the-dark glue…more about that here)

If there’s ONE thing that would make this project faster to assemble, it would be to paint all the tubes black. We can’t do paint in our library (see the FAQs), so we wrapped all of our tubes in black construction paper. It took some time!

tubesFor the assembly photos in this post, I decided to show you unwrapped rolls on a white background with red twisteez wire, red yarn, and red rubber bands so all the pieces would be more visible. On  the actual skeleton the tubes were black, connected with black twisteez wire, and I used white string. So please excuse the blah assembly photos. I just wanted to make sure all the steps were clear!

We’ll start from the legs up. Cut a paper towel tube in half. Punch holes on the top of one tube half, and the bottom of the other tube half. Thread twisteez wires though the top and bottom holes on each side of the tubes, joining them together. Making sure to leave some space and twist the ends of the wire together.

legRepeat the above steps with the second paper towel tube. You now have two legs that bend at the “knee.”

two legsThe third paper towel tube is your skeleton’s torso. Attach the legs to the torso by punching holes on the bottom outside of the torso tube, and the top inside of each of the legs (it’s easier to see this step in the image below). Attach the legs to the torso using brass fasteners.legs to torso 2
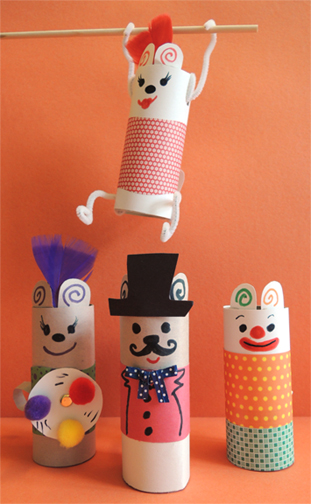
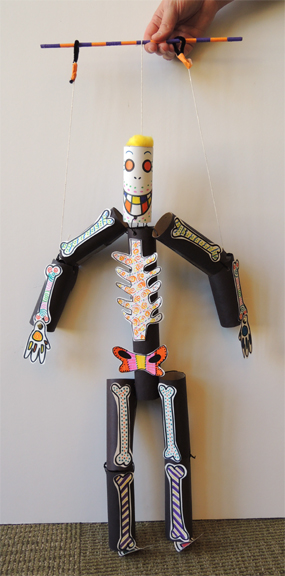
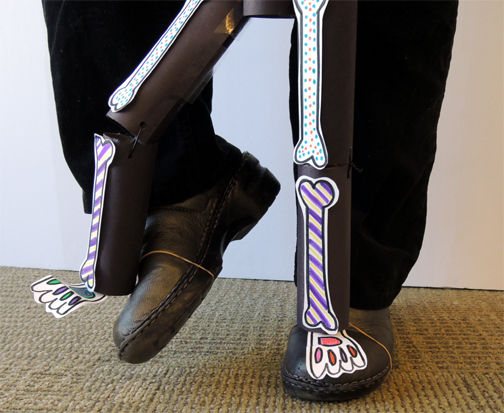
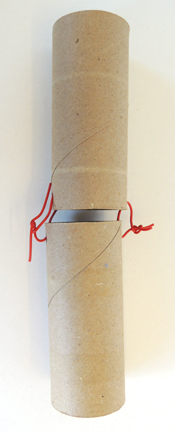
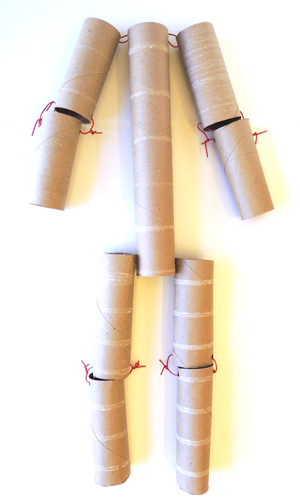
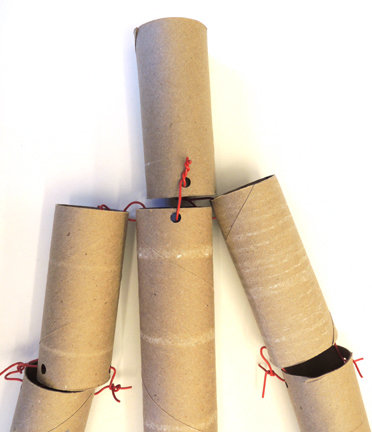
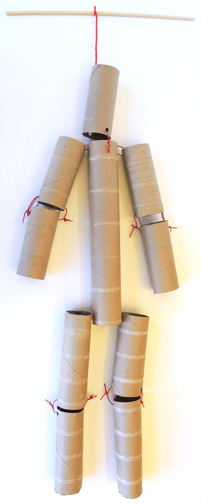
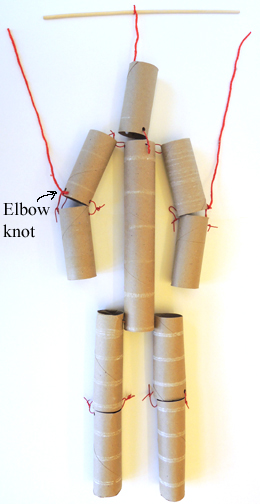
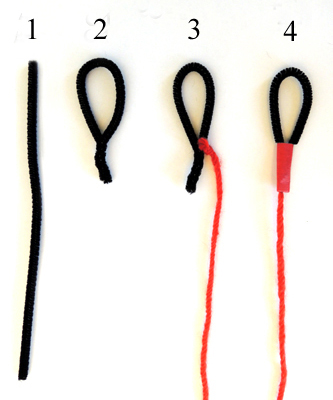
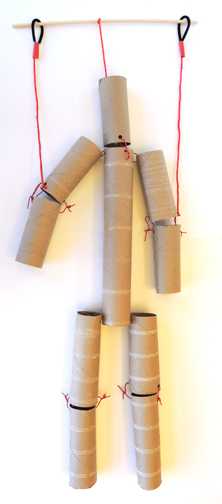
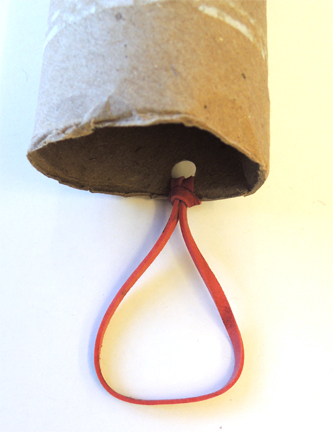
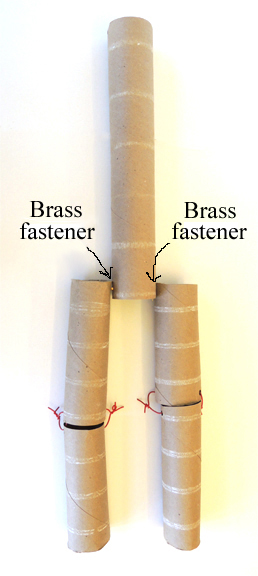
Making an arm is just like making a leg, except you’ll be using toilet paper tubes instead of paper towel tubes. Punch holes in the top of one toilet paper tube and the bottom of the other toilet paper tube. Thread twisteez wires though the top and bottom holes on each side of the tubes, joining them together. Twist the ends of the wire together.

armRepeat the above steps with 2 more toilet paper tubes. You now have two arms that bend at the “elbow.” Attach the arms to the torso by punching holes on the top outside of the torso tube, and the top inside of the arms (again, it’s easier to see this step in the image below). Attach the arms to the torso using twisteez wire.

arms to torsoTo make the skull, draw a face on a rectangle of white card stock (alas, white construction paper doesn’t fluoresce under black light). Wrap the skull face around a toilet paper tube.

To attach the skull to the torso, punch holes in the front and back of the bottom of the skull (i.e. the base of the neck and the skeleton’s “chin”). Punch matching holes in the front and back of the torso tube. Attach with twisteez wire.

headThe tube body is done, now for the strings! Quick note: I used red yarn for the instructions below, but for the actual skeleton, I used thin white string.

stringFirst, wrap the wooden dowel with color masking tape. Now punch a hole in the back of the skull tube, near the top of the head. Thread a piece of string through the hole and knot. Attach the other end to the middle of the wooden dowel.

head stringNext, punch a hole in the “elbow” of each arm tube (i.e. the outside bottom of the top arm tube). Knot a piece of string through the hole.

arm stringsBut wait! Before you tie the arm strings to the wooden dowel, may we introduce one delightfully dynamic option? If you want to be able to move your skeleton’s arms, follow the following steps:

Cut a pipe cleaner in half. Bend the half pipe cleaner into a loop and twist the bottom together tightly. Tie an arm string to the loop, then reinforce with a piece of color masking tape.

loop stepsRepeat with the remaining half of the pipe cleaner.  You now have 2 pipe cleaner loops that slide on and off the wooden dowel, allowing you to manipulate your skeleton’s arms!

finished bodyFinally, punch a hole in the “heel” of each leg and loop a rubber band through it.

foot loopThe rubber band stretches over your shoe so you can walk your skeleton around!

foot loops againWith the body all rigged up, the last step is the bones! Color the bones in the template, then tape (or hot glue) them to the fronts of the tubes. Pop a jumbo pom-pom in the top of the skull tube to round off the look (I secured the pom-pom with a little hot glue)

bones We rigged up a black light and mirror in a storage closet and invited kids to march in and  watch their skeletons boogie. They absolutely loved it – especially when their skeleton’s feet matched their own dancing feet!

night bones