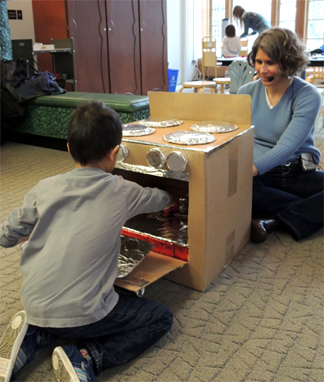
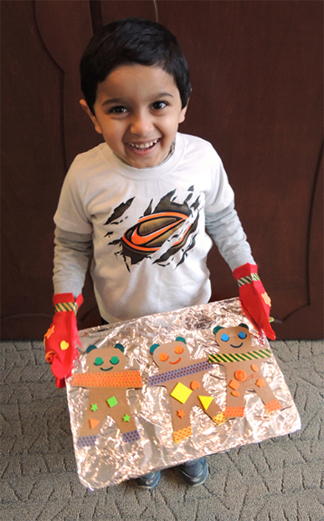
 What could be better then stepping into a warm, fragrant kitchen and whipping up a tasty batch of cookies? Especially when the cookies magically appear in our one-of-a-kind story time oven!
 We read Ginger Bear by Mini Grey (Knopf Books for Young Readers, 2004). Horace and his Mum make cookies, but the consumption of Horace’s ginger bear is continually delayed by trifling matters such as the cookie being too hot, the hour being too close to dinner, and Horace’s freshly brushed teeth. So Horace puts the cookie on his pillow for tomorrow. That night, Ginger Bear wakes up and marches to the kitchen. A few simple ingredients, some delicious toppings, and Ginger Bear creates a massive cookie circus! The revelers are having a grand time when they are intruded upon by Bongo the Dog, who really, really likes cookies. You can imagine what happens next. Ginger Bear just manages to get away, and realizes that he needs to find a safer place to live. The next morning, Horace awakes and Ginger Bear is gone. The clever cookie has found a new home in a pastry-shop window, where, as star of the elaborate displays, he will never be eaten!
You’ll need:
- 4 rectangles of felt, any color (approximately 5.5″ x 8.5″)
- 1 pencil
- A selection of fabric tape (optional)
- 1 cookie template, printed on 8.5″ x 11″ white card stock
- A 6.75″ x 14.5″ piece of tagboard for cookies (brown poster board works too!)
- Cookie decorating supplies (we used self-adhesive foam shapes, a selection of patterned tape, and dot stickers
- A corrugated cardboard base (mine with 9.75″ x 13.75)
- Tin foil to cover the cardboard base
- 1 magic oven (more on this later!)
- Scissors for construction
- Markers for decorating
- Hot glue
First, your oven mitts! Stack 2 rectangles of felt on top of one another, then place your hand on top of the stack (thumb out, fingers close together). Use a pencil to trace the outline of a mitt around your hand. You don’t want the mitts to be too snug, so make sure to leave plenty of room! Use scissors to cut your tracing from the stacked felt.
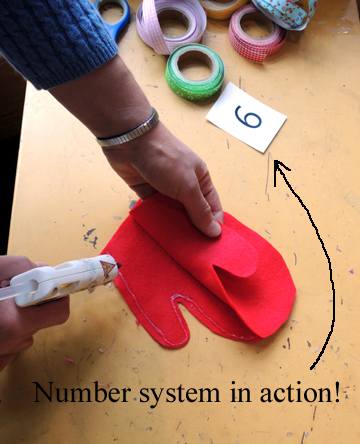
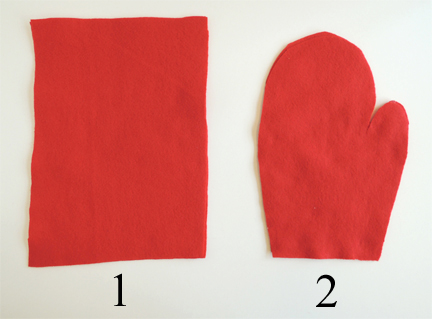 Now run a line of hot glue along the inside perimeter of the mitt (like you’re “stitching” the felt pieces together with hot glue). Make sure, of course, to leave the bottom of the mitt unglued so you can stick your hand in later. Next, attach a piece of fabric tape along the bottom of the mitt for decoration. Repeat the above steps with the second set of felt rectangles to make a second mitt.
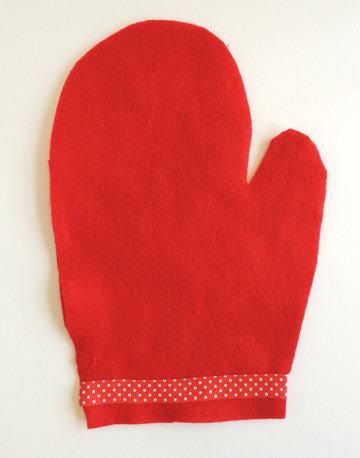 If you are attempting this project with a large number of kids, I have a helpful hint to share. Gluing pairs of mitts for close to 20 kids takes some time. To avoid long waits at our hot glue stations, I devised a number system not unlike the “Now Serving” mechanism at delis or bakeries. First, everyone cut their mitts from felt. Then, we handed out a number card to each child, as well as the materials for the next phase of the project – tagboard cookies and decorating supplies.
During the cookie decorating, we called out numbers. When your number was “up,” you paused your decorating and brought your mitts to a hot glue station. We glued your mitts, let you choose from a selection of fabric tape, and then sent you back to your table to resume decorating. Then we called the next number. The system worked like a charm!
 Making the cookies is quite simple. Cut the cookie shape from the template, then trace its shape onto the rectangle of tagboard (or brown poster board). You could also use brown construction paper for your cookies, but it helps to use a material like tagboard or poster board to gives the cookies some thickness. We made 3 cookies per kid. We offered markers, self-adhesive foam shapes, patterned tape and dot stickers as cookie decoratives, but you can also just use markers.
 To finish the project, wrap a corrugated cardboard base with tin foil to create a “baking tray.” Place the cookies on the tray, slip on your mitts, and you’re done!
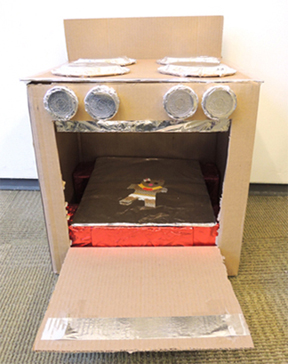
You can stop here, or you can add a magic oven activity. We happened to have a big box and some cardboard scraps on hand (the scraps were left over from this project), so we made a magic oven.
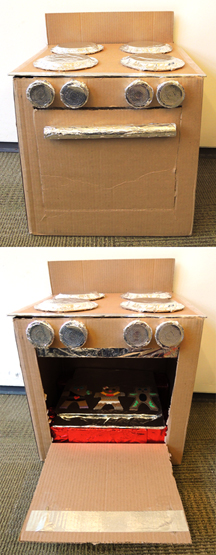 Our box was 18.5″ wide x 18.75″ high x 16″ deep. I cut an oven door in the front, and then Katie added a cardboard shelf inside of the oven, a flat range on top (with 4 paper plate burners), and a splash guard on the back. She tricked it out with red cellophane “heat,” tin foil highlights, and beverage lid knobs faced with large silver embossed foil seals. The over door handle was a paper towel tube wrapped in foil and attached to the door with brass fasteners.
The “magic” part of the oven was a small door, cut in the back. This is where I would sneak the cookies in, making them appear magically on the shelf.
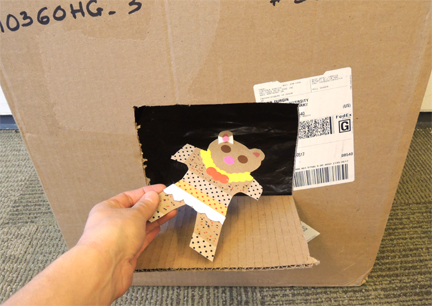 I borrowed a call bell from the library’s circulation desk to act as the oven’s “timer.” During the story time activity, kids wrote their names on the backs of their cookies, then piled the cookies in a big tub next to the oven. Then they sat in a semi-circle around the oven, wearing their mitts and holding their trays.
I would grab a cookie from the tub, silently read the name on the back, and sneak it into the oven. Then I would shout “Dan! Your cookie is ready!” and briskly ding the call bell. Dan would run forward, open the oven, hustle his cookie out, and run back to his place in the semi-circle. We kept going until all the cookies were claimed!

