
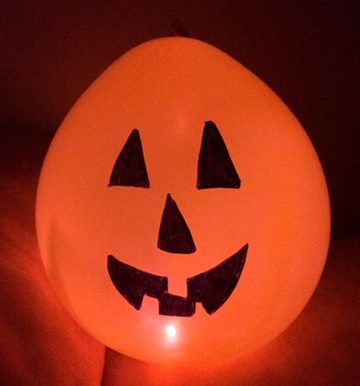
 A no mess, no carve, no flame, gorgeously glowing pumpkin? You got it! Bounce these LED pumpkin balloons around at your next story time, sneak a few on the shelves on the 31st, or take a spirited evening stroll.
You’ll need:
- 1 orange LED balloon
- A black Sharpie permanent marker
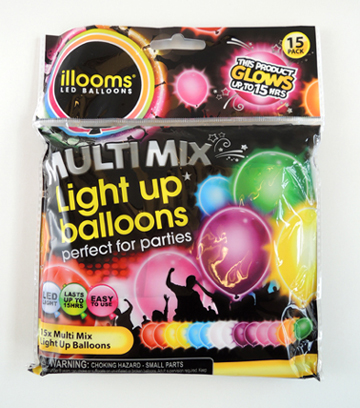
I first spotted these LED balloons at JaZams, our local toy store. They’re made by a company called illooms. A variety pack of 5 latex balloons cost $6 , and a pack of 15 balloons cost $13. I’ve also seen illooms sold online at Oriental Trading Company, Amazon, and Walmart for varying prices. Party City sells just the LED bulbs (12 for $10). So that’s an option as well – buy the bulbs and a package of orange balloons.
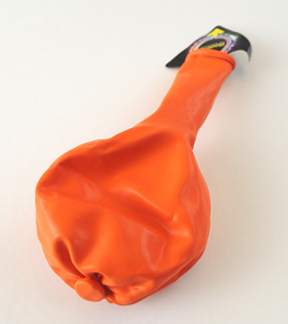
 The illooms LED balloon has a round, hard tip at the top, and a tab sticking out of its neck. Pinch the tip while simultaneously pulling the tap to activate the LED. Then inflate the balloon (the directions suggest a pump, but I went with my lungs).
 The round tip acts as a balloon weight that pulls the inflated balloon upside down, creating the the perfect pumpkin shape. Use a black Sharpie permanent marker to draw a pumpkin face on the balloon, and you’re good to glow!
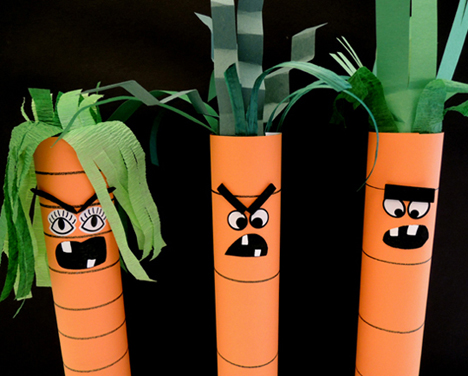
Looking for a few more simple Halloween projects? Try a toilet paper roll jack-o’-lantern, a hanging bat exhibit, a shoulder snake, or an herbal amulet to ward off those pesky goblins. And as long as were talking about spooky orange vegetables, take a look at this Creepy Carrots story time.
 Messed up on a test at school? Misplaced your toad? Stole your father’s flying car? Brace yourself – you might be getting a Howler in the mail.
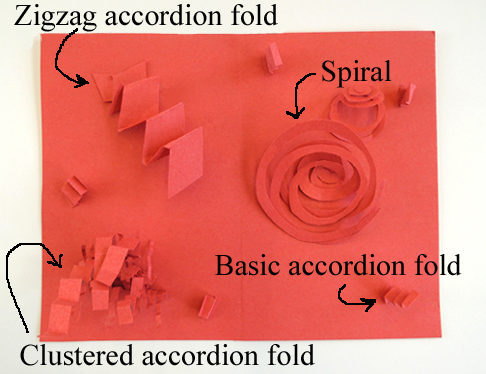 To make the basic accordion fold, take a strip of paper and fold it back and forth until it resembles a stair case. Attach one end to the card with tape. We cut a number of different size strips and let kids pick and fold the ones they wanted. We also had rectangular pieces available in case kids wanted to cut and fold a cluster of accordion folds.
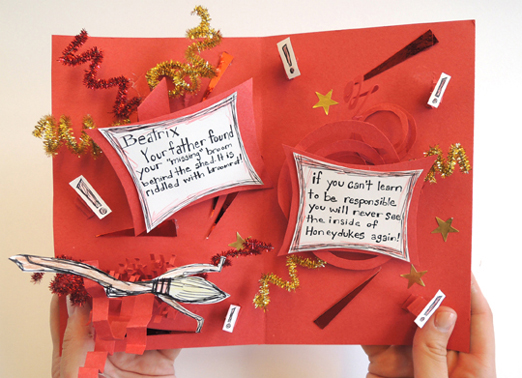
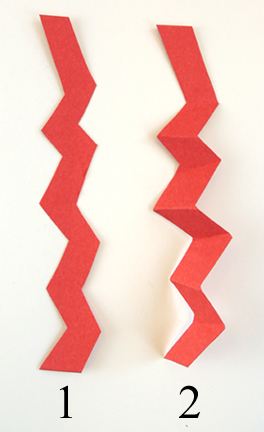 We had sparkle stems, foil star stickers, and little bits of red mirror board available to decorate the cards (the idea was to make it look as explosive as possible, so lots of red and gold)! Finally, write magical crimes and consequences on pieces of white card stock and attach them to the card or pop-up elements. Feel free to add illustrations as well (like Marissa’s fantastic broomstick in the image below? And did you notice the little exclamation marks popping up on accordion folds?).
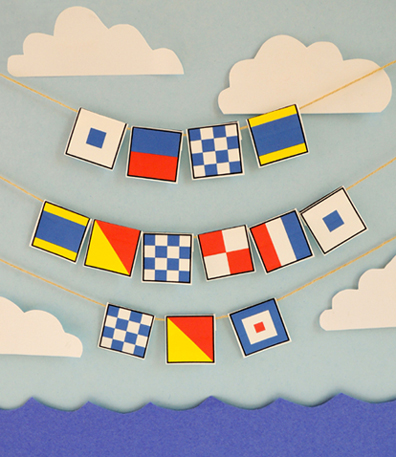 This project is a unique blend of literacy, non-fiction, and the high seas! I designed these personalized nautical flag necklaces for a Treasure Island event we hosted in 2010. In addition to being easy and fun to make, the inexpensive supply list won’t deplete your buried treasure stash.
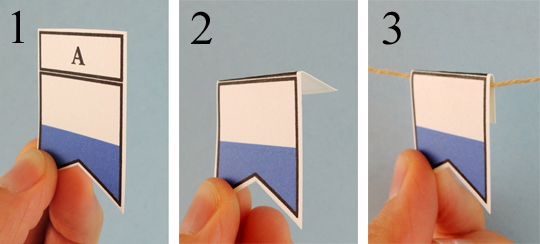 If you’re doing this project for a big event like we did, I suggest you make a letter tray to put the individual flags in. This can be as simple as paper cups, marked with post-its, hot glued to the inside of a copy paper lid.
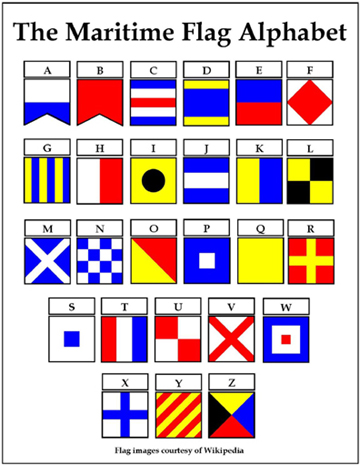 You could also use the alphabet to decode my flag message at the top of this post! Ha ha!