
 Travel through a cloud-covered dream tunnel which doubles as a magical oven for a pie full of sweet dreams. Dreams and pie…is there a book than can connect the two? Oh my yes.
We read Sweet Dream Pie, written by Audrey Wood, and illustrated by Mark Teague (Scholastic, 1998). Pa Brindle can’t sleep, so he begs Ma Brindle to dust off her magical, oversized pie-making equipment and bake a sweet dream pie. Despite repeatedly warning Pa that things could get out of control, Ma finally agrees to do it. The enormous pie is stuffed with sweets of all kinds, and the giant oven (which is set to “Special”), causes a heat wave on Willobee Street. Neighbors gather, ignore Ma’s warnings, and eat way too much pie. The result? Some of the wildest, out-of-control dreams imaginable (as only Mark Teague can illustrate!). Sighing, Ma Brindle takes her broom and sweeps the tempestuous dreams away. Ah well. She did warn them.
You’ll need:
- 1 sturdy paper plate (approximately 8.5″ in diameter)
- 1 rectangle of tin foil (approximately 12″ x 13″)
- 1 circle of tagboard or poster board (approximately 6.25″ in diameter)
- 1 circle of brown packing paper (approximately 11.25″ in diameter)
- 1 paper bowl
- Dream pie decorating supplies (more on that below)
- Scissors, tape, and glue for construction
- Markers for decorating
- 1 dream oven (more on that below)
- Hot glue
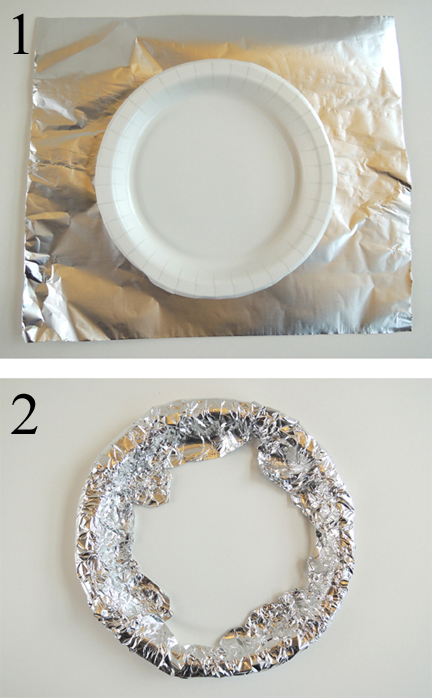
First, the pie! Place a paper plate on top of a rectangle of tin foil, then wrap the tin foil up and around the sides of the paper plate. The tin foil should just cover the edges of the plate, not the entire thing.
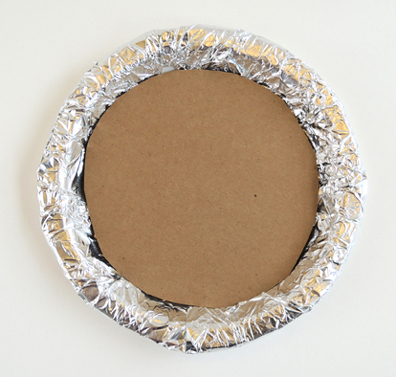
 Hot glue a tagboard or poster board circle to the center of the plate.
 Decorate the tagboard circle with your dream scene! First, we gave kids a quarter of a sheet of paper and asked them to draw a dream character or scene.
Once that was glued (or taped) in place, we offered supplies to fancy things up: iridescent cello, colored cotton balls, tissue paper circles, iridescent fabric shapes, self-adhesive foam, fabric flowers, foam beads, large gemstones, self-adhesive butterflies, pom-poms, small feathers, bits of embossed foil paper, mesh tubing, and metallic dot stickers.
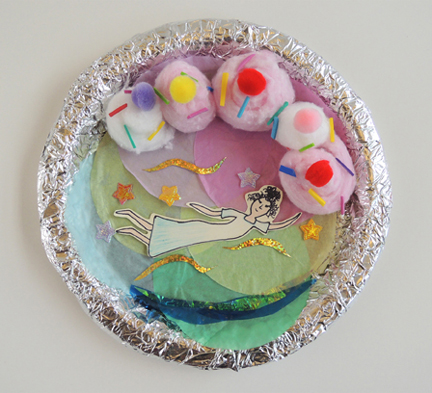
Here’s Marissa’s dream scene, which involves stars, dusk, flying, and and ice cream clouds. Be-a-u-ti-ful.
 And here are the dream pies the kids made! We asked the kids to describe the dreams for us, but I must admit, those who did offer their interpretations were still somewhat vague. Below, see if you can spot a ballerina, Valentine’s Day, flying, unicorn wonderland, ghost, mountains, butterflies, Spider-man, a birthday party, “purple,” “Antiga,” “shy,” and hippo.
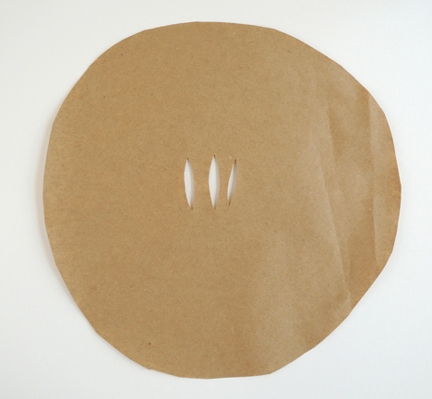
When the inside of the pie is done, set it aside for a moment. Use scissors or a box cutter to cut slits in the center of a 11.25″ circle of brown packing paper (or brown wrapping paper). These are the “ventilation slits” for your pie.
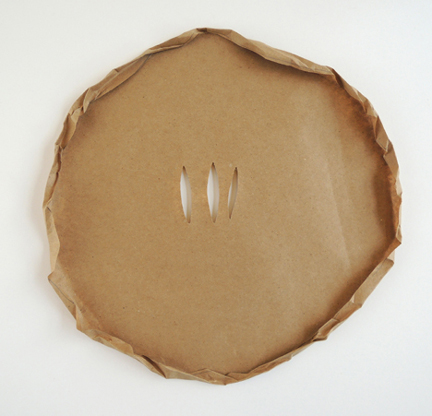
 Next, roll the edges of the circle upwards and inwards (about 0.25″ should do it). These are the edges of your “pie crust.”
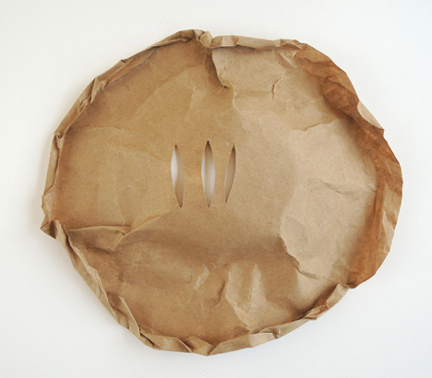
 Now to add the “dome” to the top of your crust. Flip a paper bowl upside down and press and smooth the crust over the top of the bowl. You’ll need some height here to cover that crazy dream scene you created.
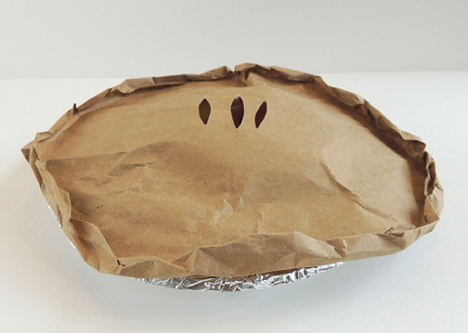
 Place the crust on top of the paper pie plate. It’s very cool to see the dream scene through the little ventilation holes of the pie crust!
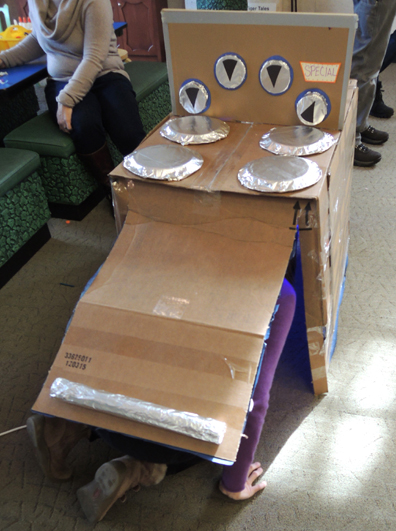
 You can stop the project there, or you can take it a step further and go through a dream oven! This doesn’t have to be fancy. You can drape a sheet over a table, or head into a darkened closet with some blue lights or glow sticks. But if you’d like to replicate our dream oven, here’s how we did it. Basically, it was a big box with door flaps cut out on both ends. On the outside, the box looked like an oven set to “Special.”
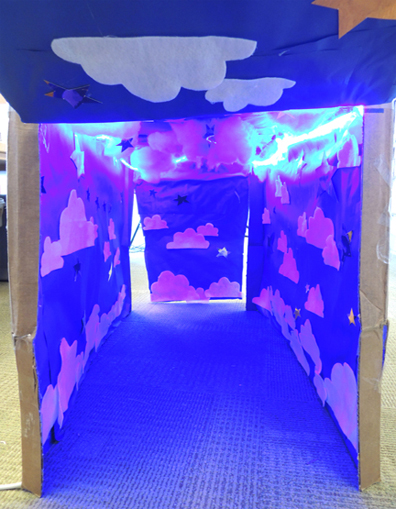
 But inside, it was a fantastic dreamscape! Marissa lined the box with blue paper, hot glued white felt clouds to the walls, rigged up dangling polyester fill clouds, and dotted the whole thing with mirror board stars. She used packing tape to attach a strand of blue LED rope lights to the ceiling. It was…so…awesome.
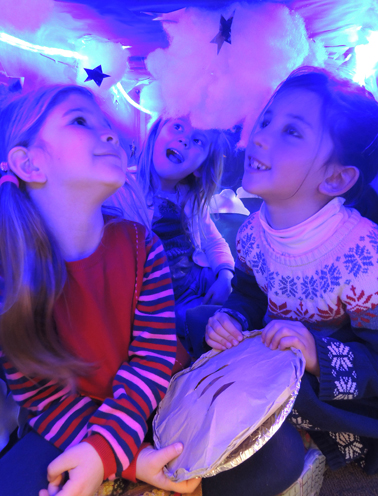
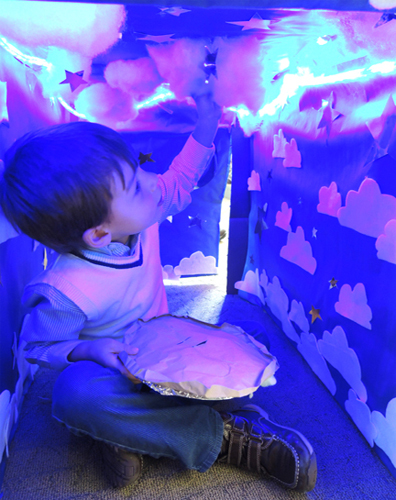
 Grasping their dream pies, the kids entered the oven and scooted through the tunnel, “cooking” their pies amidst clouds and stars. Some kids charged through the tunnel and lined right back up for another turn. Others meandered slowly through the tunnel, pausing to take in the dreamy atmosphere. Sweet dreams to one and all!
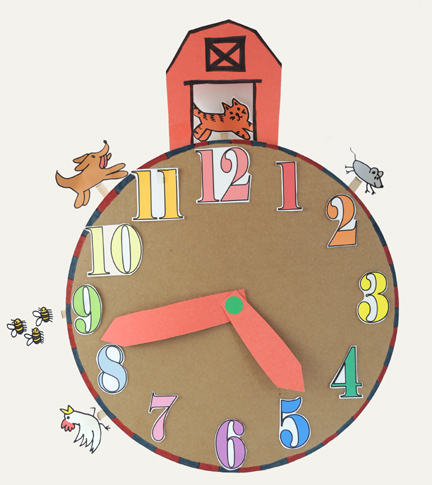
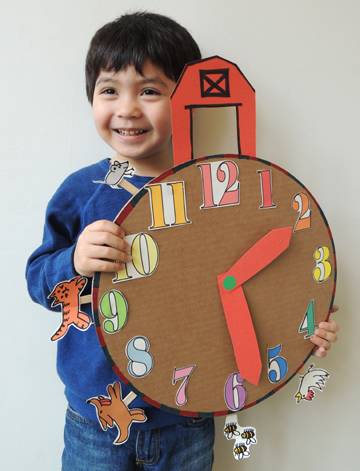 Go beyond Hickory Dickory Dock with this clever crank clock! Turn the handle on the back to send the characters dashing around the numbers and through the big red barn (scroll to the bottom of the post to see it in action)!
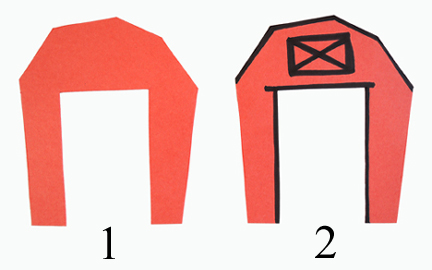 Attach the barn to the back of the clock face, right above the number 12. I highly recommend attaching the barn with hot glue. You really want the barn to stick because later, it can be used as a carrying handle for your clock! Here’s what the finished clock face looks like:
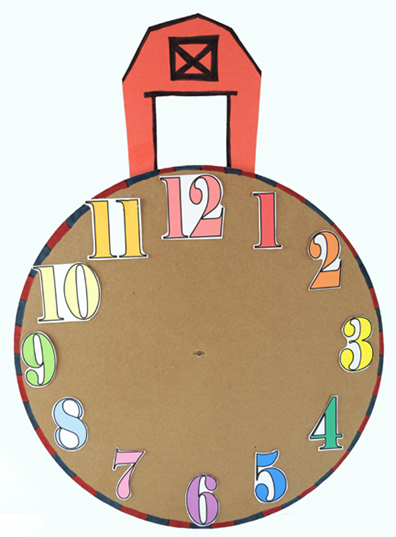 Set the finished clock face aside for a moment. Cut four, 1.5″ tabs in the end of a toilet paper tube. Then bend the tabs outward and hot glue the toilet paper tube to the back of the second cardboard circle:
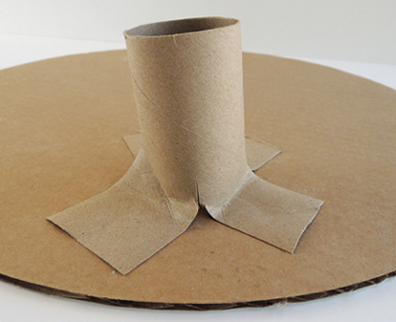 You’ll notice that the toilet paper handle gets glued on the perimeter of the cardboard circle. We experimented and found that was the best handle position for cranking the clock.
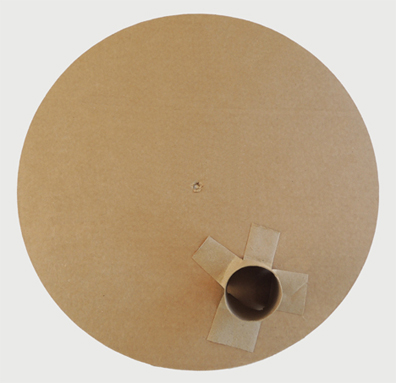 Cut and color the animals from the template, and tape (or glue) them onto the ends of the craft sticks. Make sure there’s plenty of room at the bottom of the craft sticks – you’ll need some space to attach the sticks to the clock.
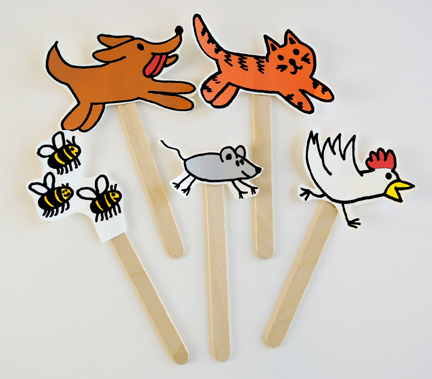 Tape the craft sticks to the cardboard circle. Note – the craft sticks need to be on the same side as the toilet paper tube handle. If the sticks are taped on the opposite side, they will rub and bump into your hand while you’re operating the clock. If you want to follow the order of the characters in the book, the mouse should go first, followed by the cat, dog, bees, and hen.
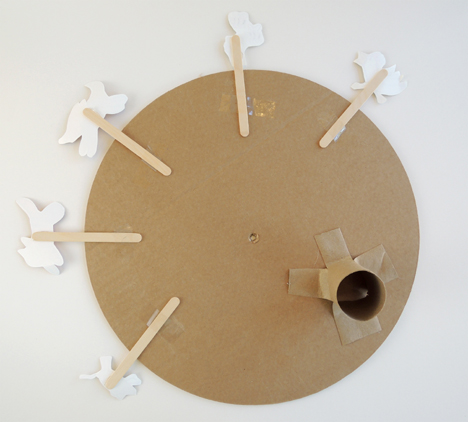 The back is done, time to put two clock circles together! Push a brass fastener through the clock face’s slit (you might need to enlarge the slit a little with a pair of scissors). Thread 2 foam beads on the fastener’s prongs:
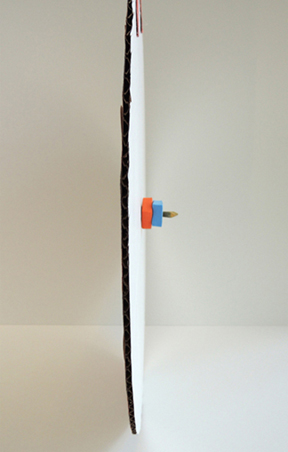 Push the prongs through the second circle’s slit, then unfold the prongs and secure in place with tape. Depending on your cardboard, foam beads, and brass fastener, you might have to do a little adjusting to get the circles to rotate smoothly.
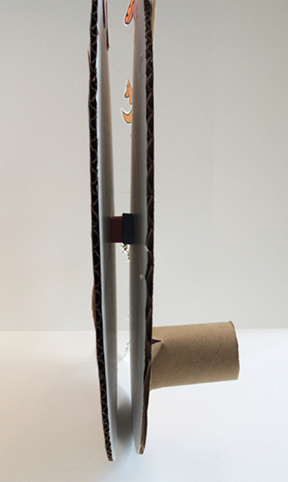
 To operate the clock, grip the clock face firmly at the bottom. Use your other hand to crank the toilet paper tube handle. You might have to adjust the animals a little, or bend the clock hands upward a bit, if they snag on the barn door or the numbers. But eventually, you’ll have a smooth race around the clock!
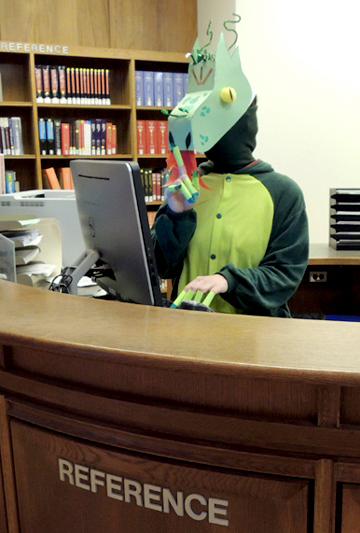 Wow I hear that new librarian is a total dragon. Like…literally.
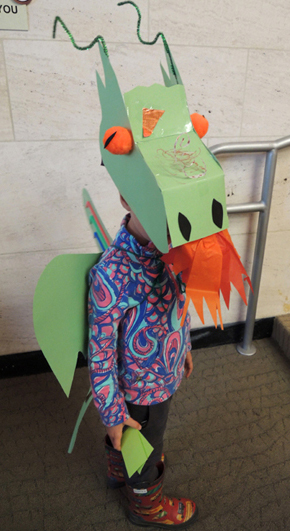 You’ll need:
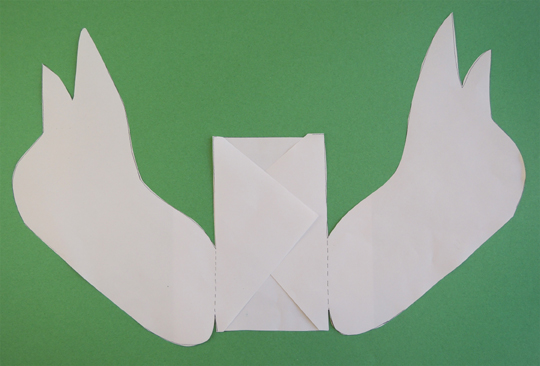 Next, lay the paper template on a piece of poster board (we ultimately decided to use light green). Trace the template on the poster board, then cut the entire thing out as one big piece. You’ll notice that there are 2 dotted lines on the paper template. Fold the poster board template downwards along the dotted lines. Then slide the poster board template on top of the box, and hot glue the sides of the template to the sides of the box.
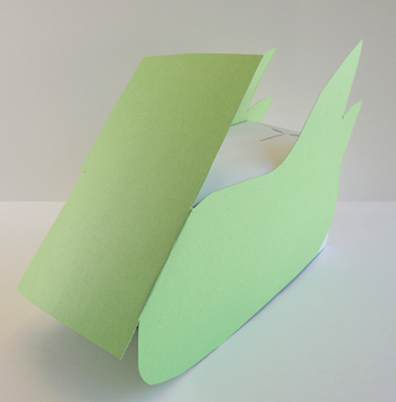 Next, hot glue the middle section of the template to the top of the box.
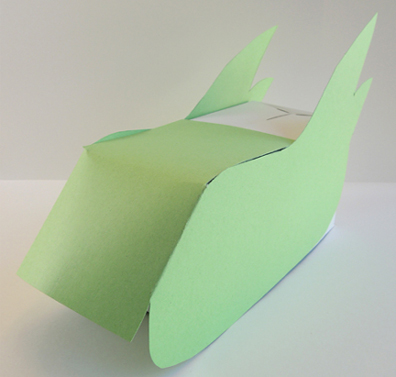 Trace the forehead template onto green poster board, and tape it to the front of the dragon’s head.
 Now decorate! We used markers to create spots, slivers of
 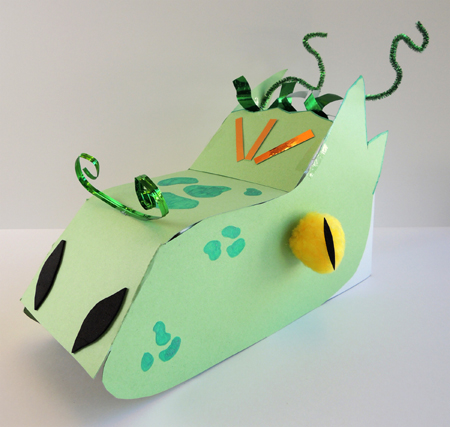 To create flames, cut 2-3 rectangles of tissue paper into flame shapes, then staple them together. Hot glue (or tape) the flames to the underside of the nose. Make sure to attach the flames to the end of the poster board nose, not the end of the box. Otherwise, the flames won’t flutter properly. Here’s a shot of the underside of the box, so you can see where the flames are attached.
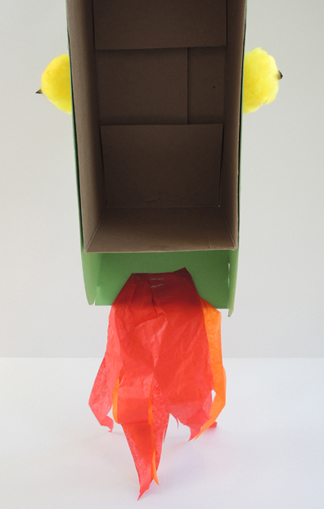 Try your head on. If it’s a little loose, stuff the back and front of the box with sheets of tissue paper. To breath fire, simply blow upwards and outwards on the tissue paper flames!
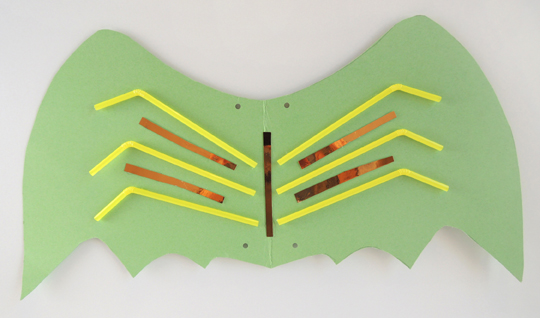 Here’s our dragon tail, which was roughly 6″ x 19″. We decorated ours with a couple pieces of mirror board (some kids went with drinking straws or just markers).
 You’ll notice that the tail in the above photo has a 2.25″ fold at the top. The folded end tucks into the back of your pants (or, if you’re wearing a dress, punch a hole in the tail and run a yarn belt through it).
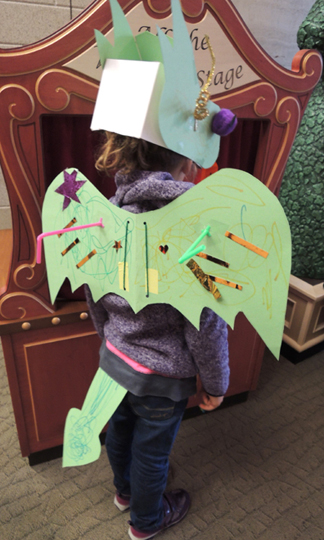 If you’d like dragon claws (and some kids really liked this part), wrap a 3.5″ x 4″ piece of green paper around your finger, then secure the tube with tape. Wrap one end of the tube with green masking tape and cut the masking tape into a point. Here’s Marissa modeling a fine set of claws and a truly awesome dragon onesie.
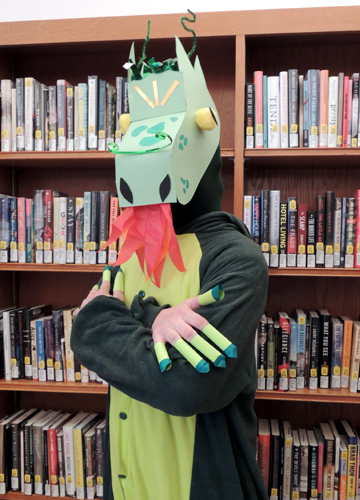 Now go forth dragon, and guard some books!